

Supabase
Supabase is a backend-as-a-service (BaaS) platform that provides a PostgreSQL database, authentication, storage and real-time APIs. It is an open-source alternative to Firebase, but with support for the powerful PostgreSQL database.
Supabase is a backend-as-a-service (BaaS) platform that provides a PostgreSQL database, authentication, storage and real-time APIs. It is an open-source alternative to Firebase, but with support for the powerful PostgreSQL database.
Supabase is ideal for developers who want to build modern applications quickly, without giving up flexibility and control over the backend.
NicoChat lets you integrate a PostgreSQL database in a simple way, so that you can manage data directly in the system. To connect Supabase to NicoChat, follow the steps below:
- Create an account on Supabase or log in.
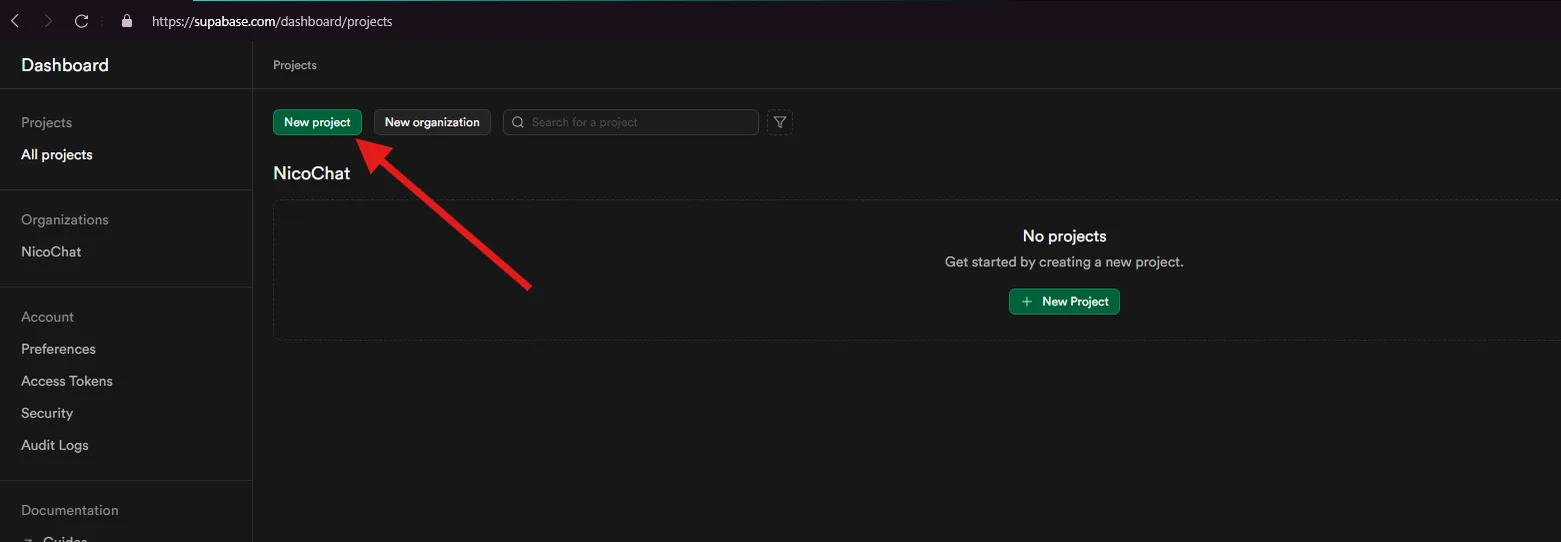
- Create a new project.
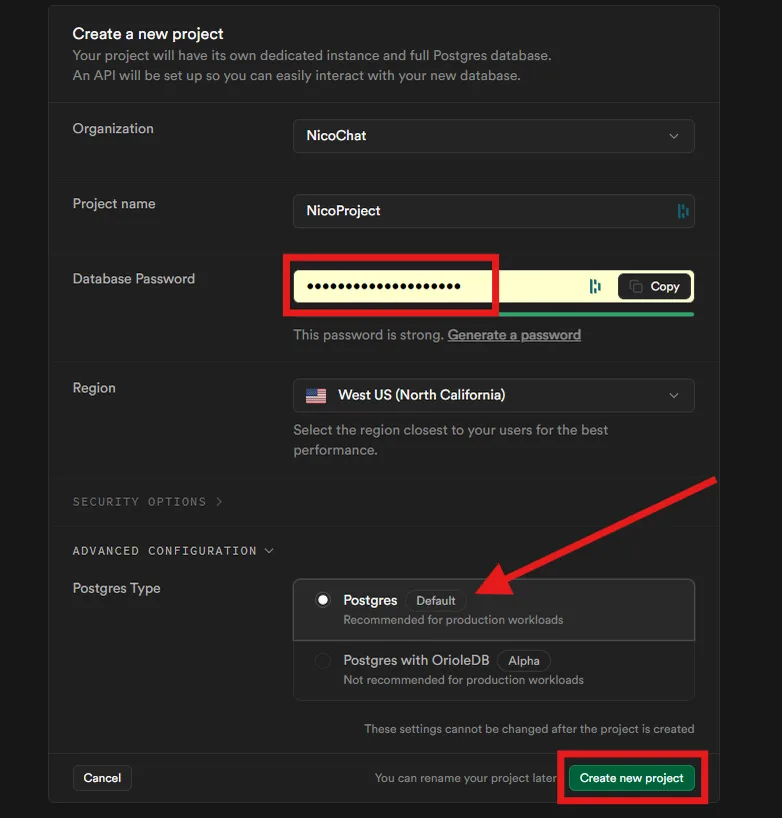
- Enter the organization, the project name and the project password. Save this password, as it will be needed later.
- After creating the project, click “Connect” on the top tab.
- Click “View parameters” and find the connection information:
host: Hostport: Port (usually5432for PostgreSQL)database: Database Nameuser: User (default:postgres)
- After copying the details, close the window and go to Settings > Database.
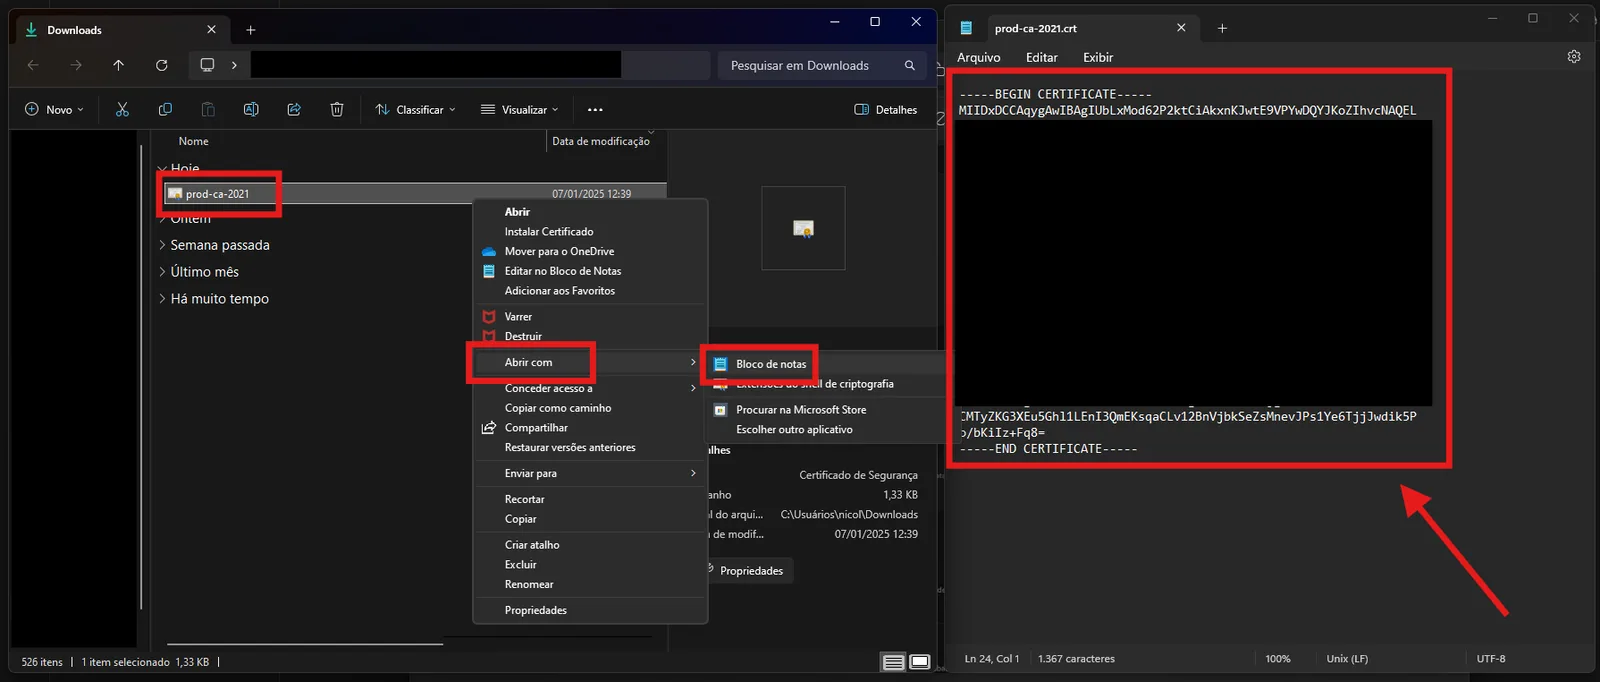
- Look for the SSL Certificate and click “Download certificate”.
- Open the downloaded file with a text editor, such as “Notepad”, and copy all of the content.
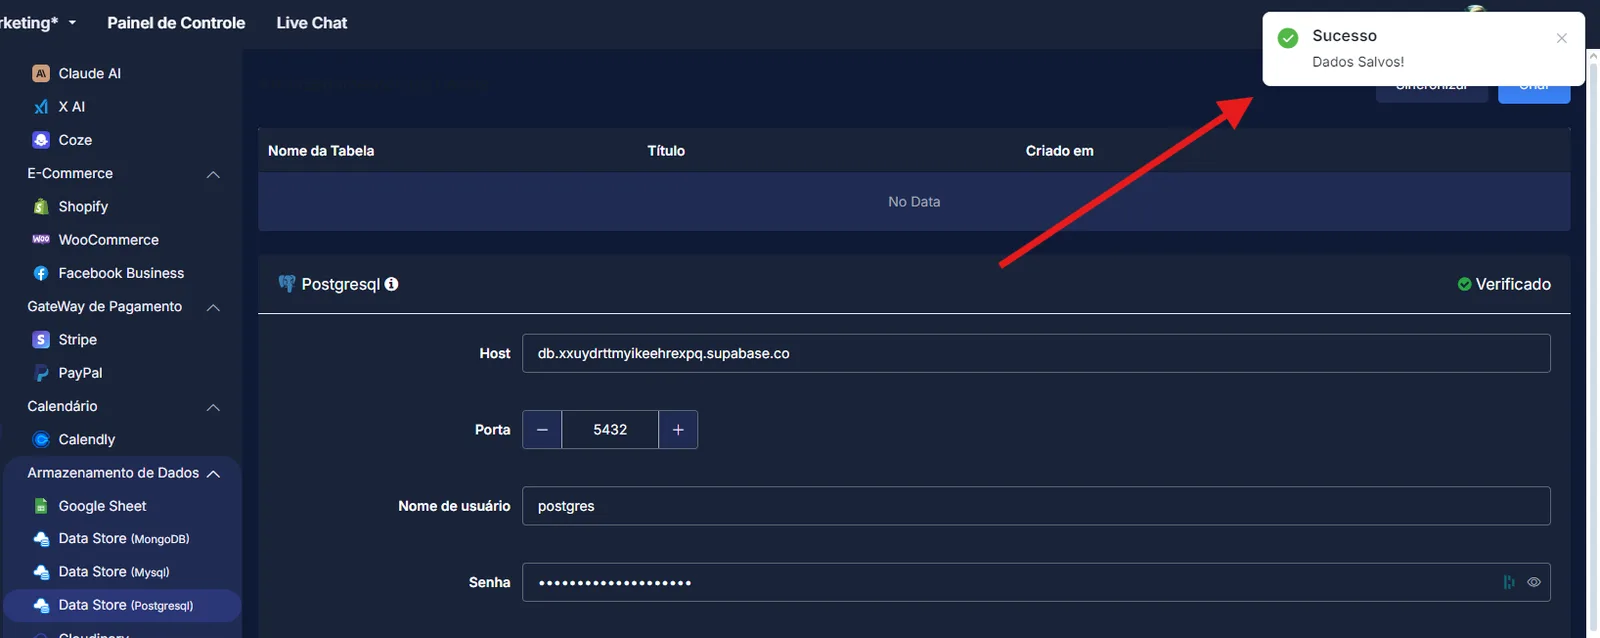
Host: Obtained in step 1.2
Example:
db.xxuydrttmyikeehrexpq.supabase.coPort: Obtained in step 1.2Example:
5432Username: Obtained in step 1.2Example:
postgresPassword: the password set in Supabase, obtained in step 1.1Database Name: Obtained in step 1.2Example:
postgresCA certificate: copy and paste the complete certificate, including the -----BEGIN CERTIFICATE----- and -----END CERTIFICATE----- tags. Obtained in step 1.3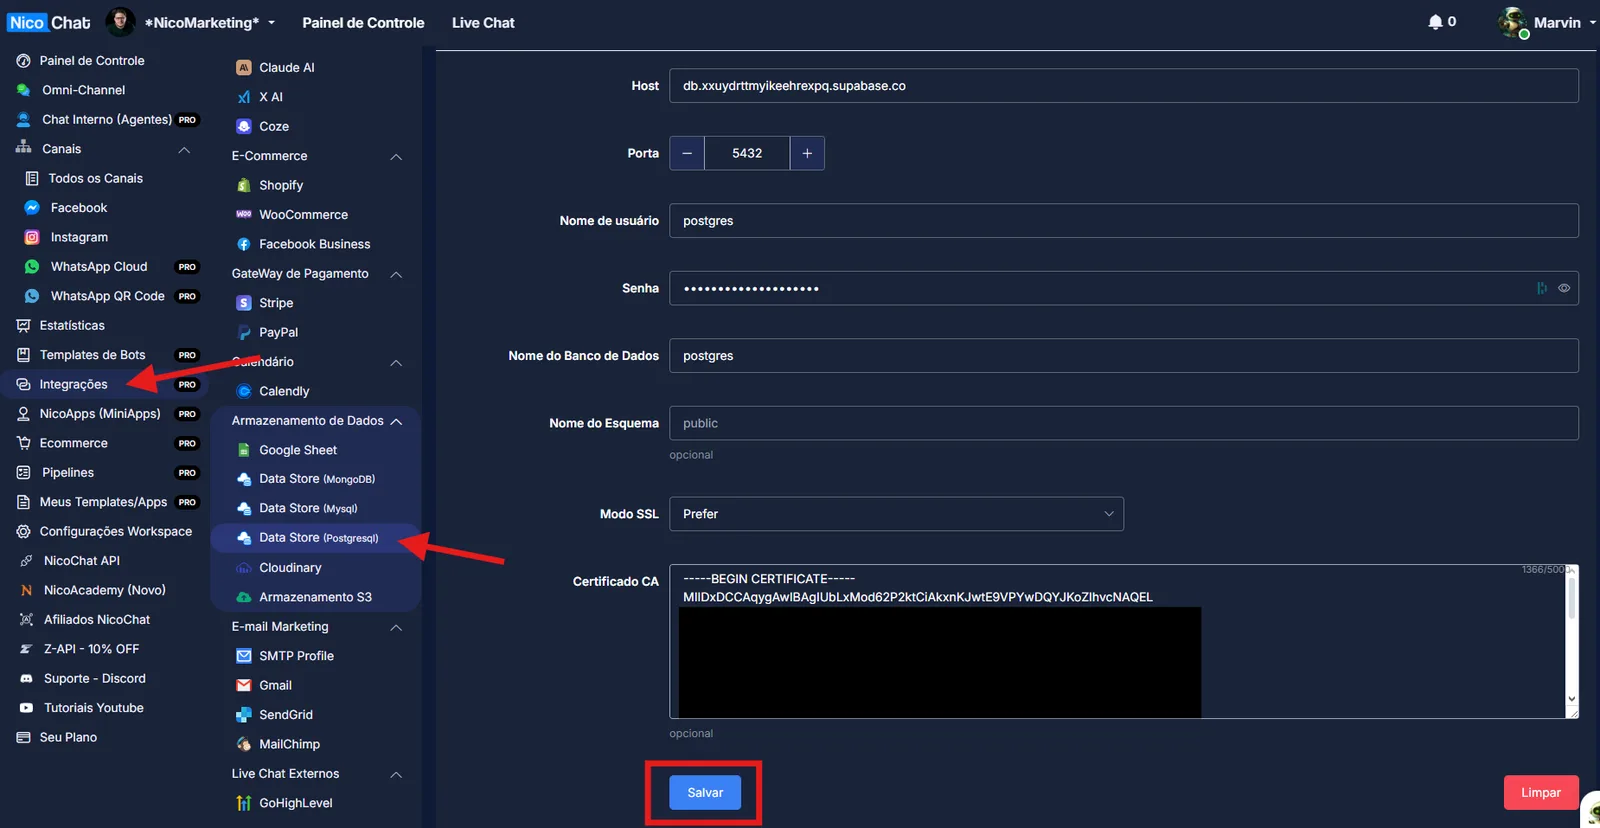
- Save the configuration: After filling in the fields, click Salvar to complete the integration.
To learn more about the integration and about accessing tables in NicoChat, go to nicochat.atlassian.net/wiki/spaces/NicoChat/embed/212959485.