

Stripe Checkout Url
Integrating Stripe as a payment gateway in NicoChat lets you securely process payments directly within your chatbot flows. This guide walks you through the steps needed to set up Stripe, create a frictionless payment flow, and define the essential elements to ensure a good user experience. Whether you are selling products, services, or subscriptions, these instructions will help you get started quickly and efficiently.
Setting up Stripe in NicoChat:
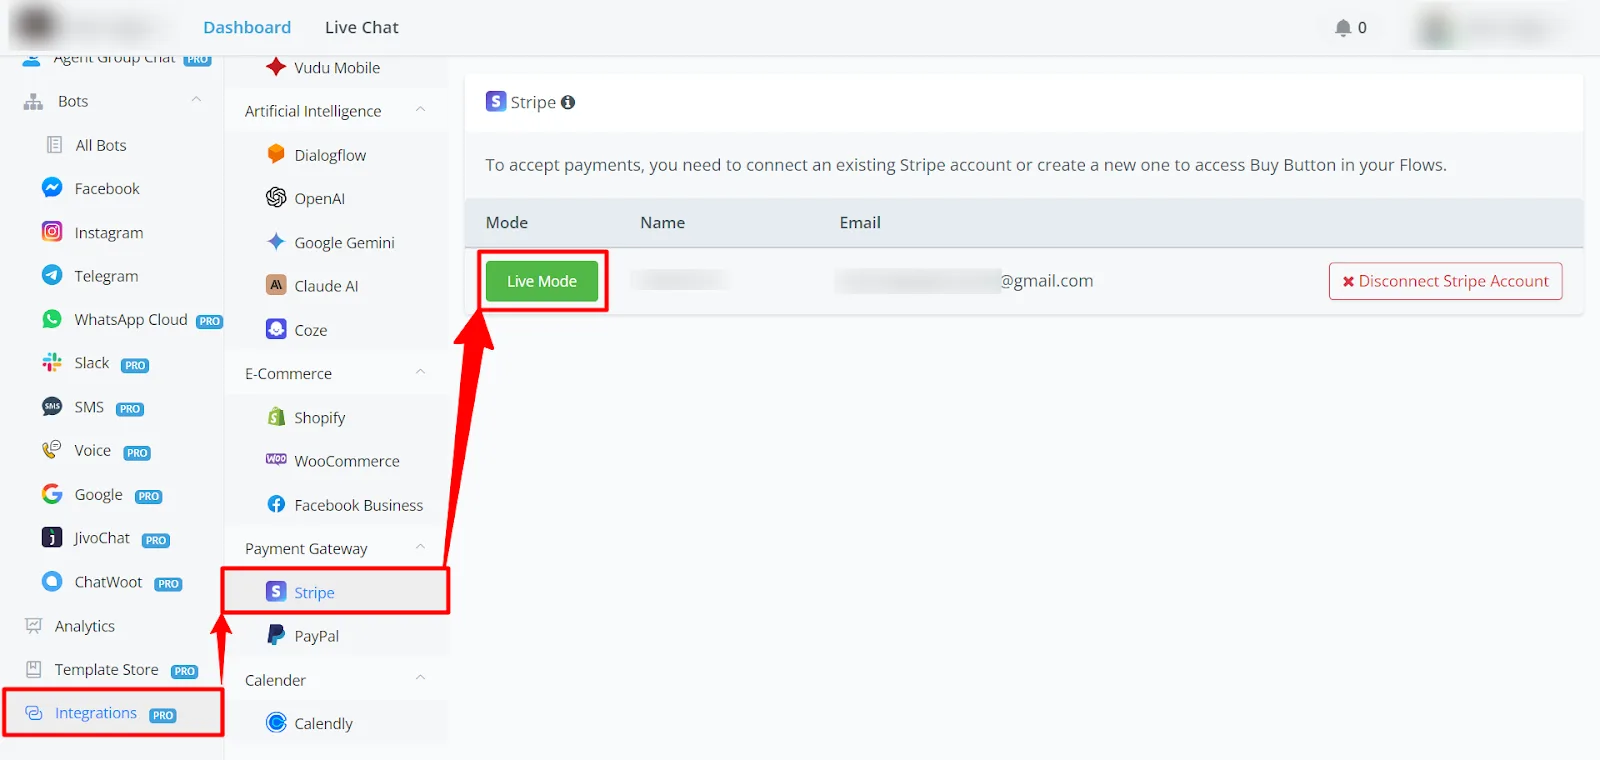
- In the sidebar menu, go to the "Integrations" section.
- Click "Payment Gateway" and select "Stripe".
- Make sure the mode is set to "Live Mode", so that you can accept real payments. If you have not connected a Stripe account yet, connect one at this stage.
Creating the payment flow:
- Go to the flow builder area and select an existing flow or create a new one, where the payment will be integrated.
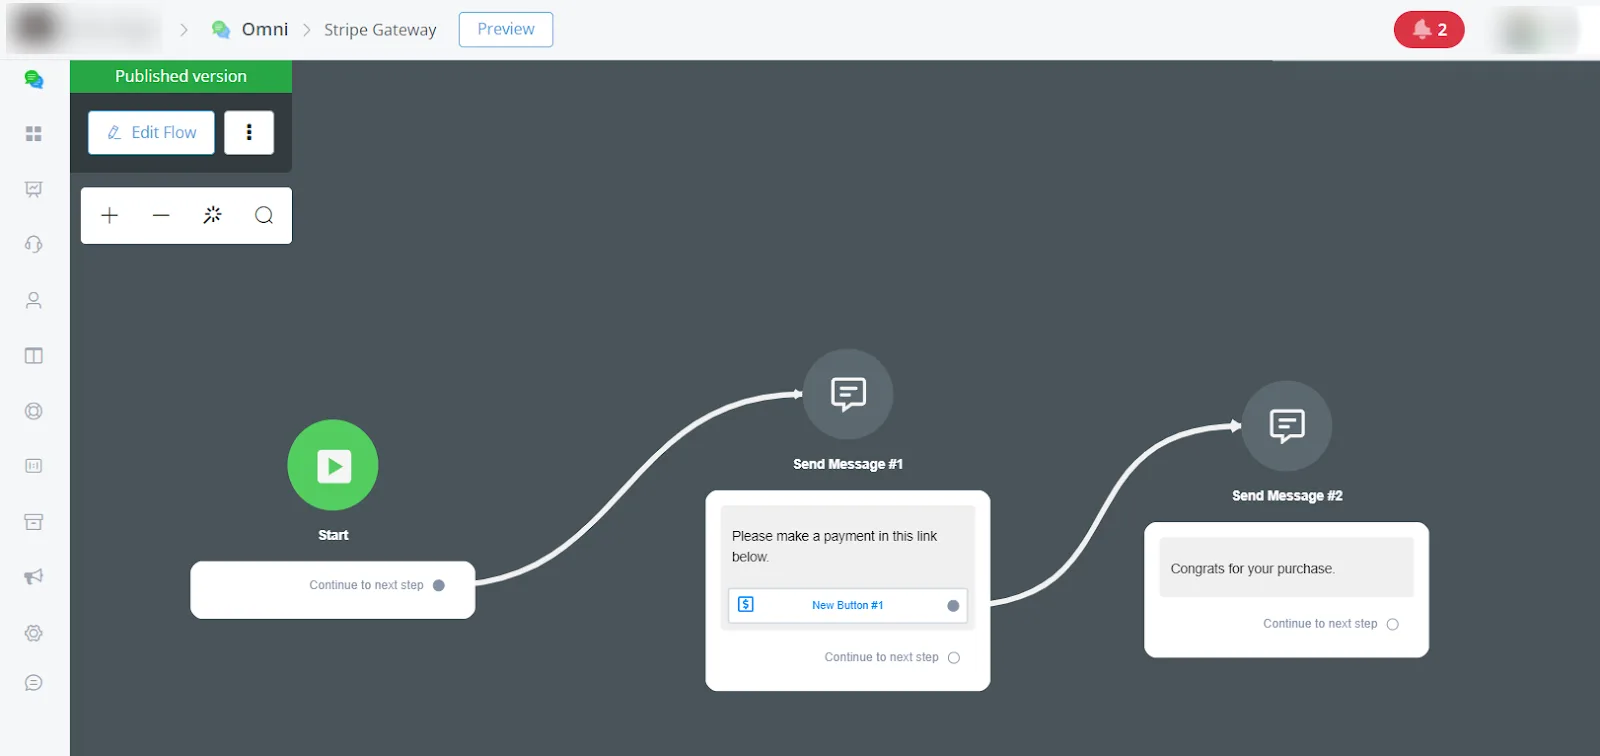
- In the flow editor, add a message block by clicking "Send Message" and set up the message that will be sent to the user — for example, "Please make the payment using the link below".
Setting up the payment button:
- In the message block, click "Add Button" to add a payment button.
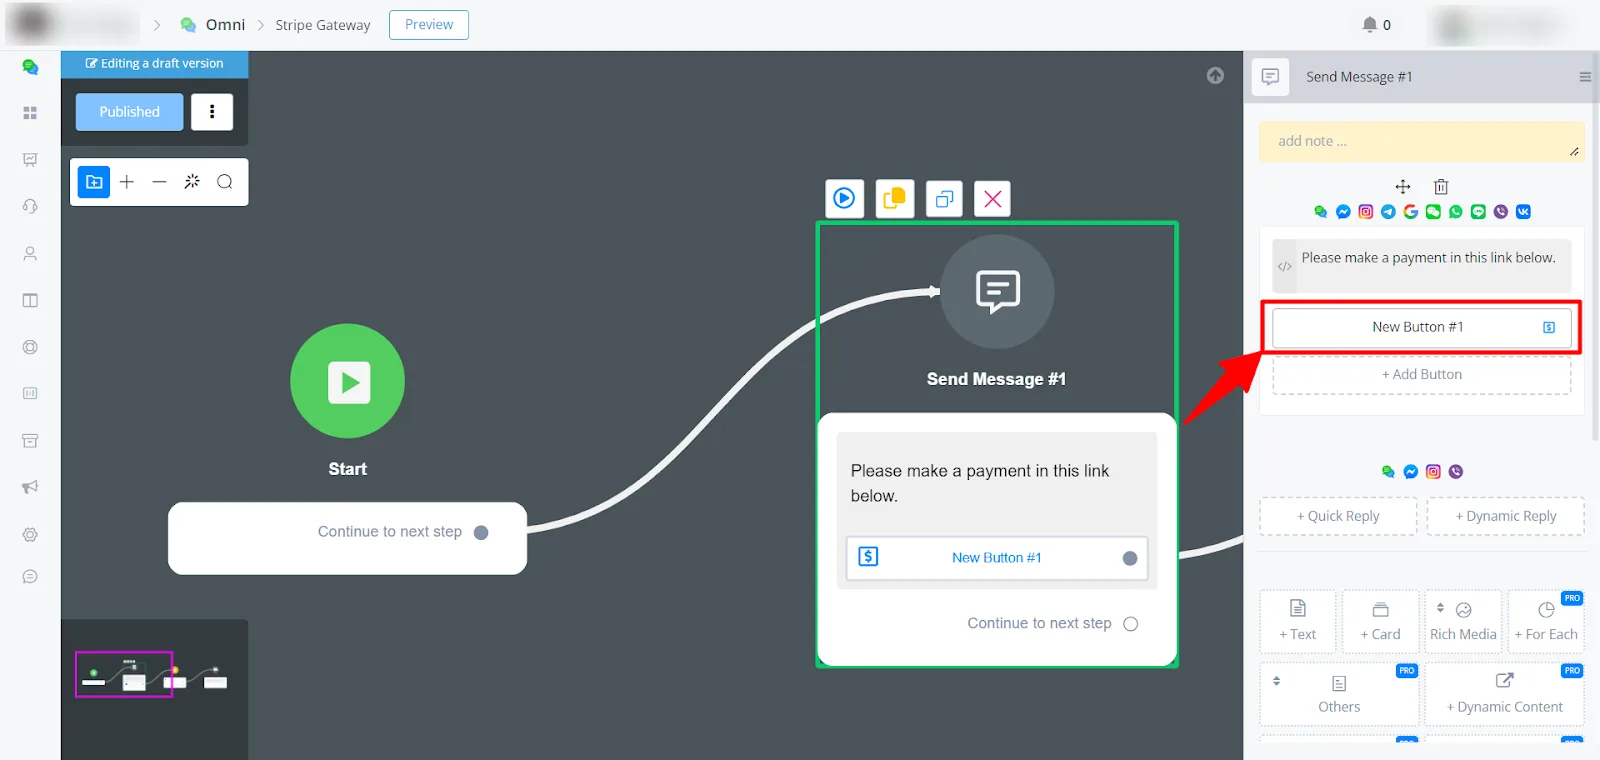
- Select the "Buy" action from the list of actions available for the button.
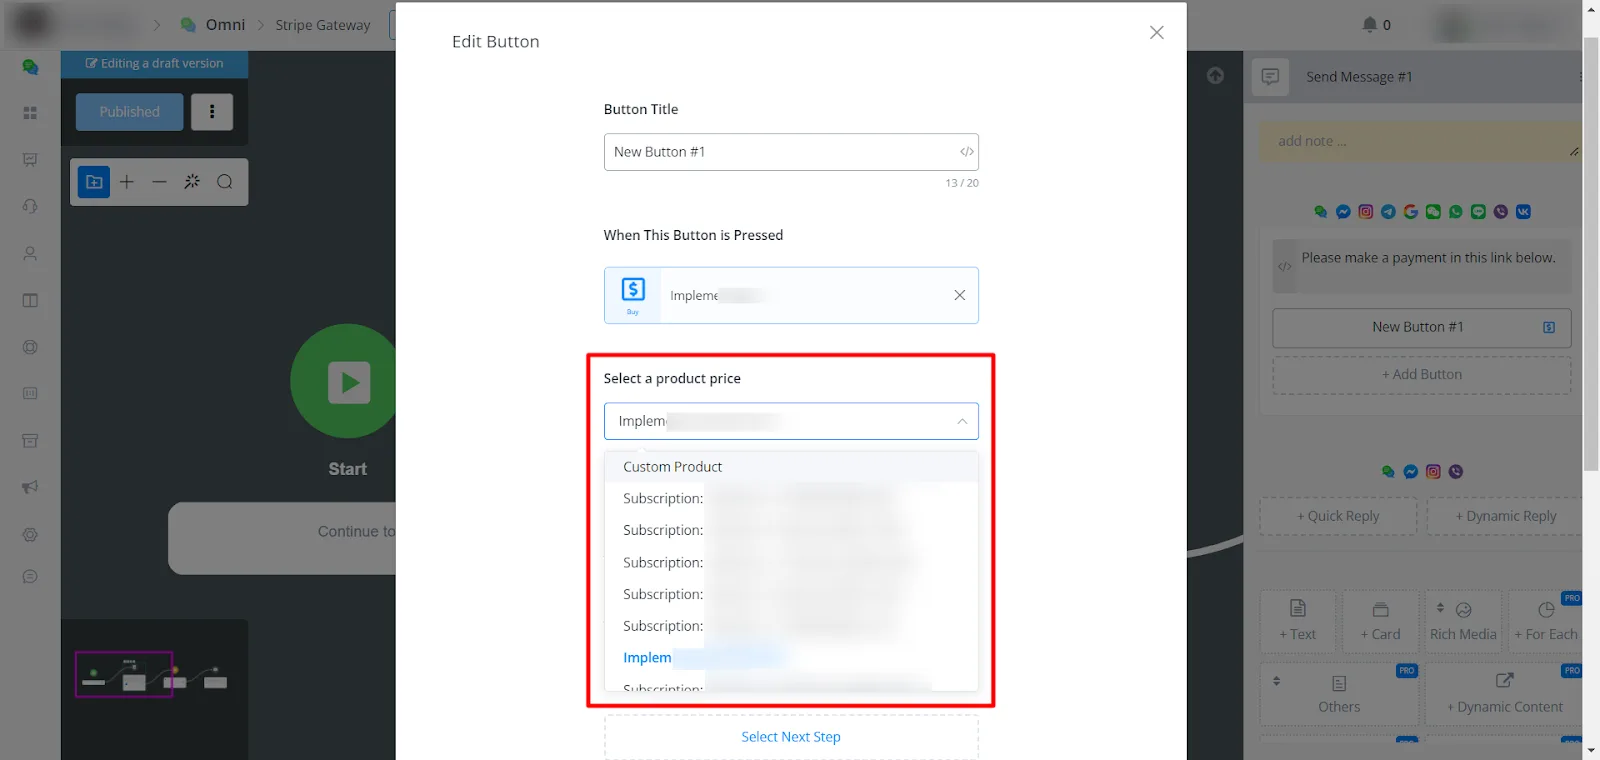
- In the button settings, give the button a title — "Pay Now", for example. Under "Select a pre-set price", choose the product or service the payment refers to. If you have not registered the products beforehand, select "Custom Product" and set the price manually.
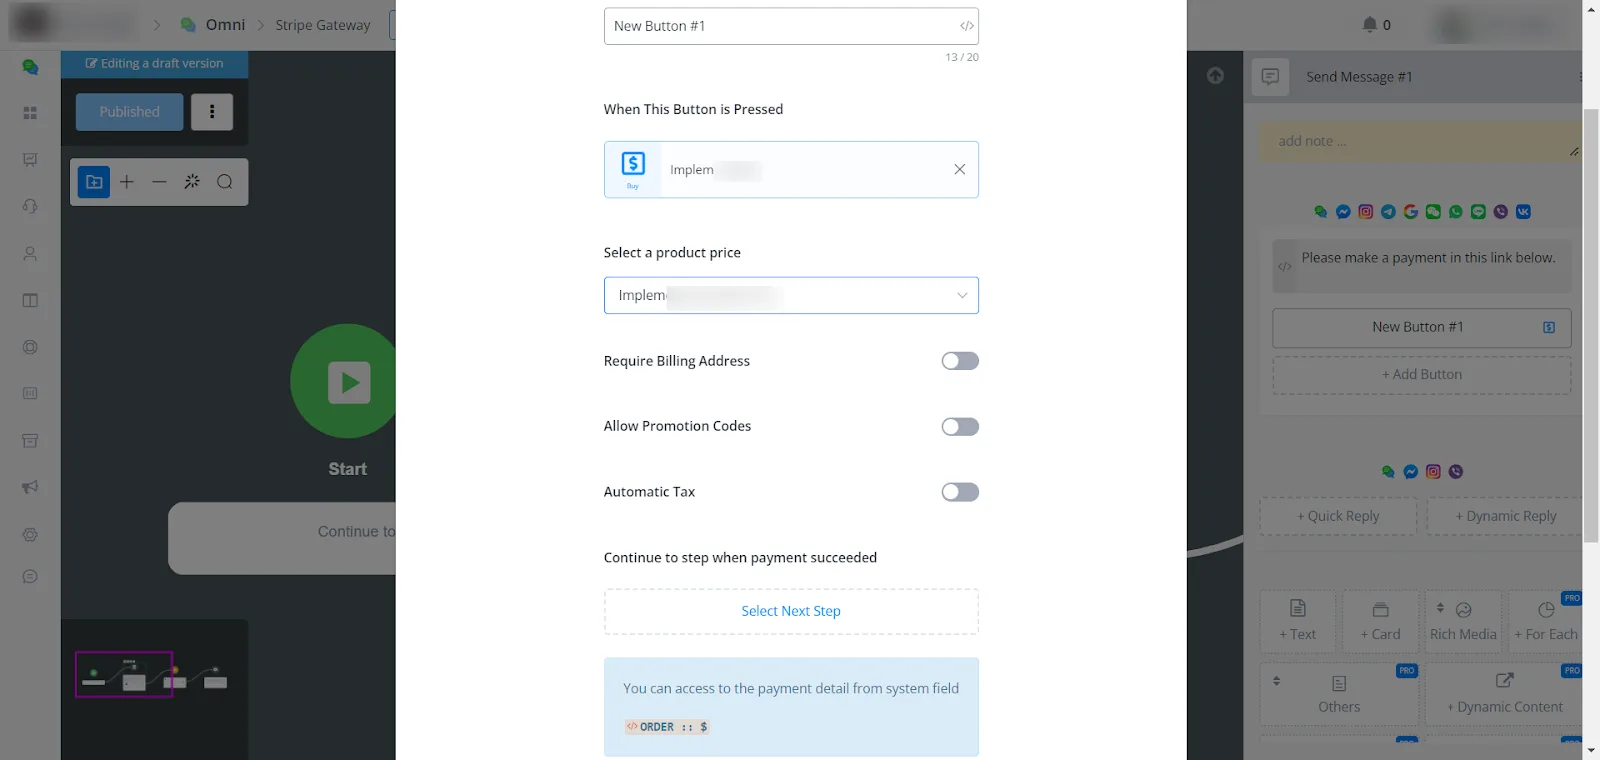
- If necessary, set up additional options, such as "Require Billing Address" or "Allow Promotion Codes".
Finalizing the flow:
- After setting up the payment button, define the action the flow should take after the payment is completed. It can be sending a confirmation message to the user or continuing to the next step in the flow.
- Publish the flow by clicking "Publish", so that it becomes active and ready for use.
If you need more help, open a ticket at discord.com/channels/1147227963792830534/1153402986240946358.