

Action Step
https://www.youtube.com/watch?v=YC_RsWjW6jo
Tags help you identify and separate the information in your chat so you can make an informed decision.
Let's say you ask users whether they are interested in a trip to Europe or to Asia. Then we will tag the users according to their answer.
We will cover the following actions in the Tags options.
- How to create a tag.
- Using tags in the flow.
- Tracking tags in Live Chat.
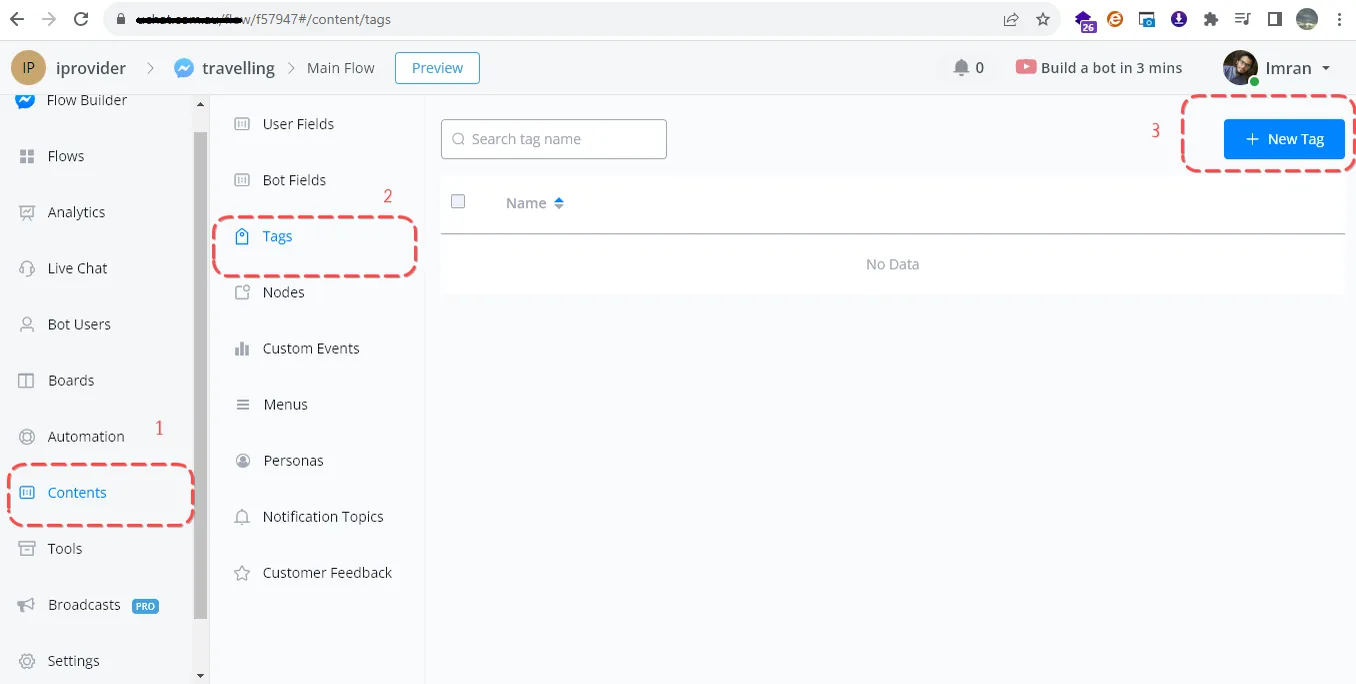
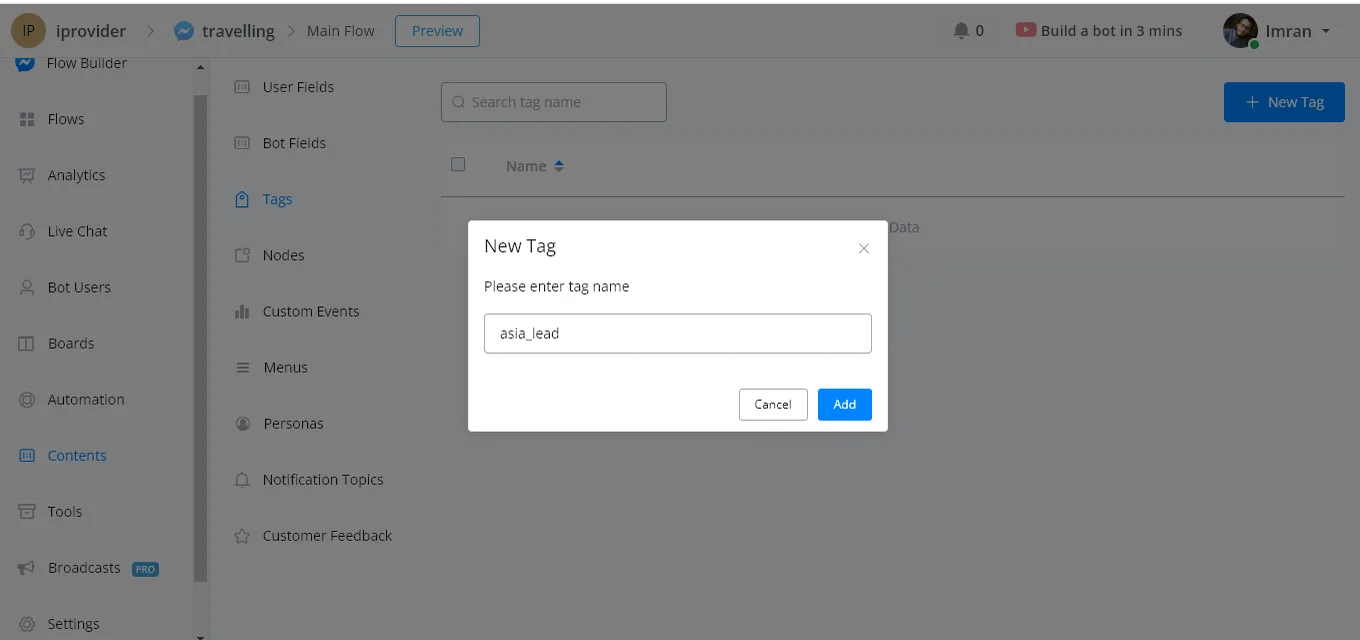
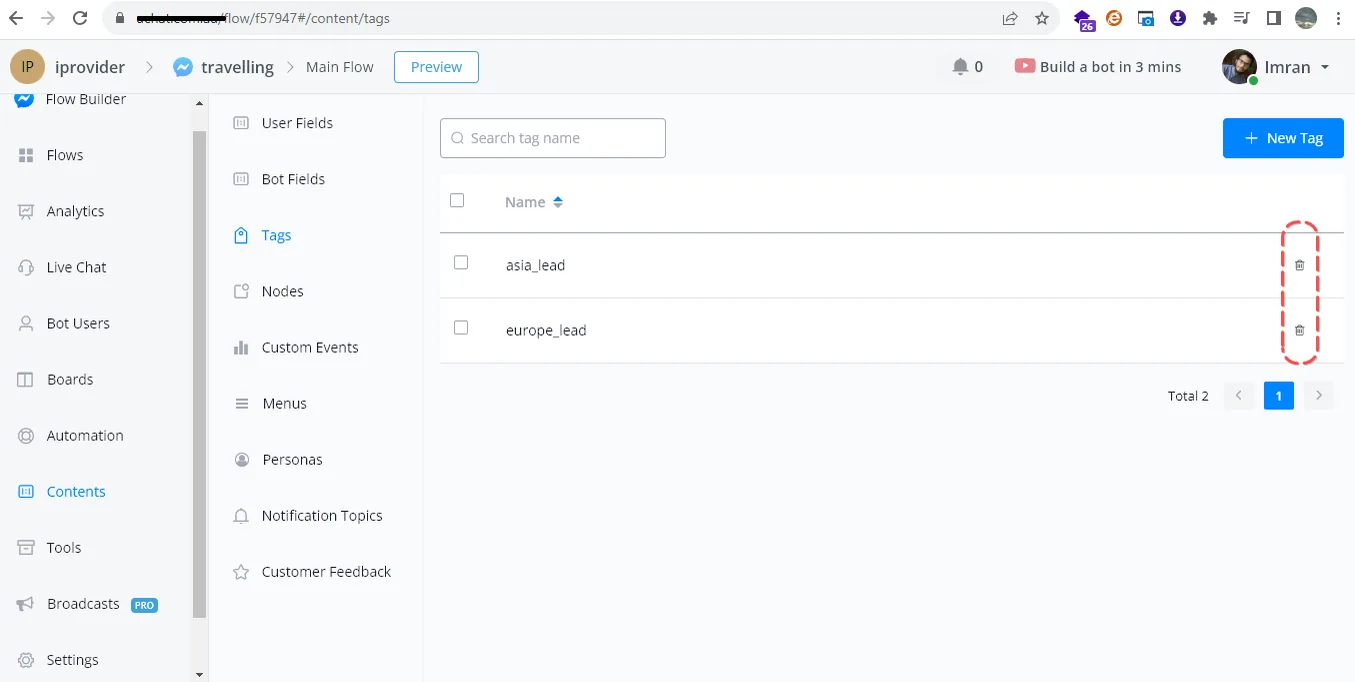
Click Content and select the Tags option. This is the window where you create or delete any tag. Now choose the New Tag button.
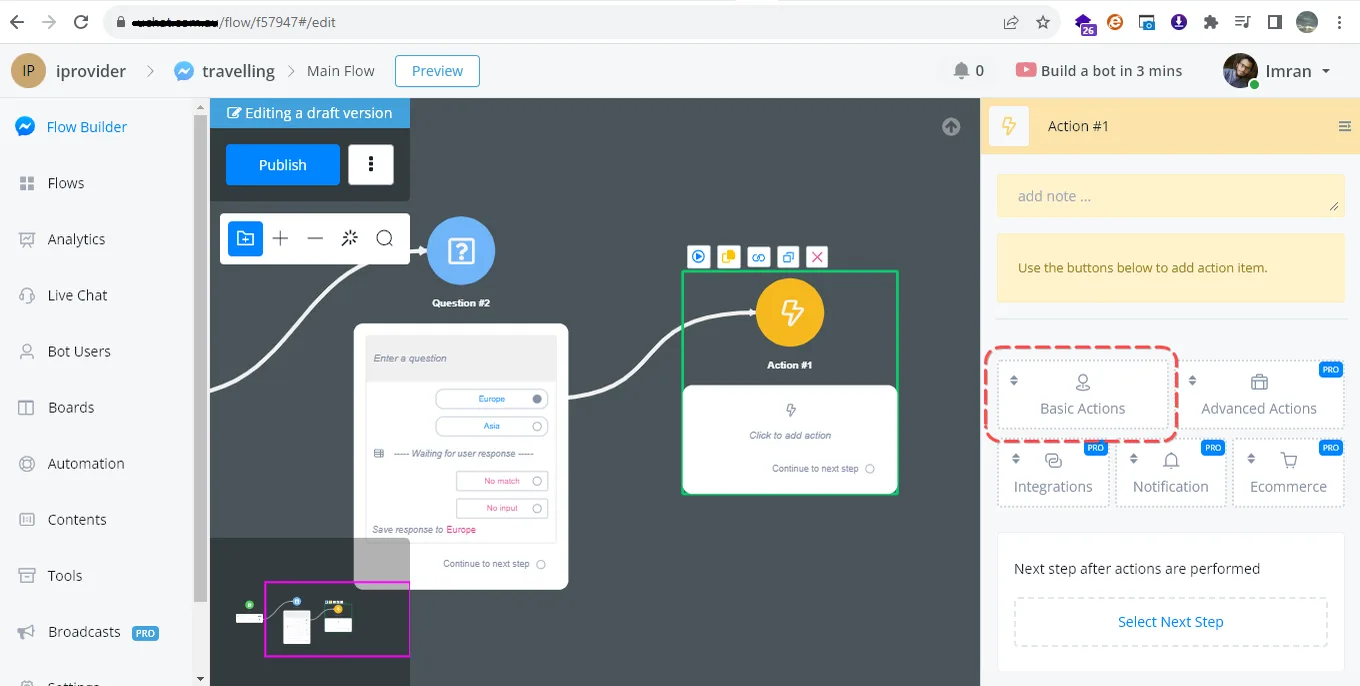
Go to the Flow, choose Basic Actions and select the Add Tag option.
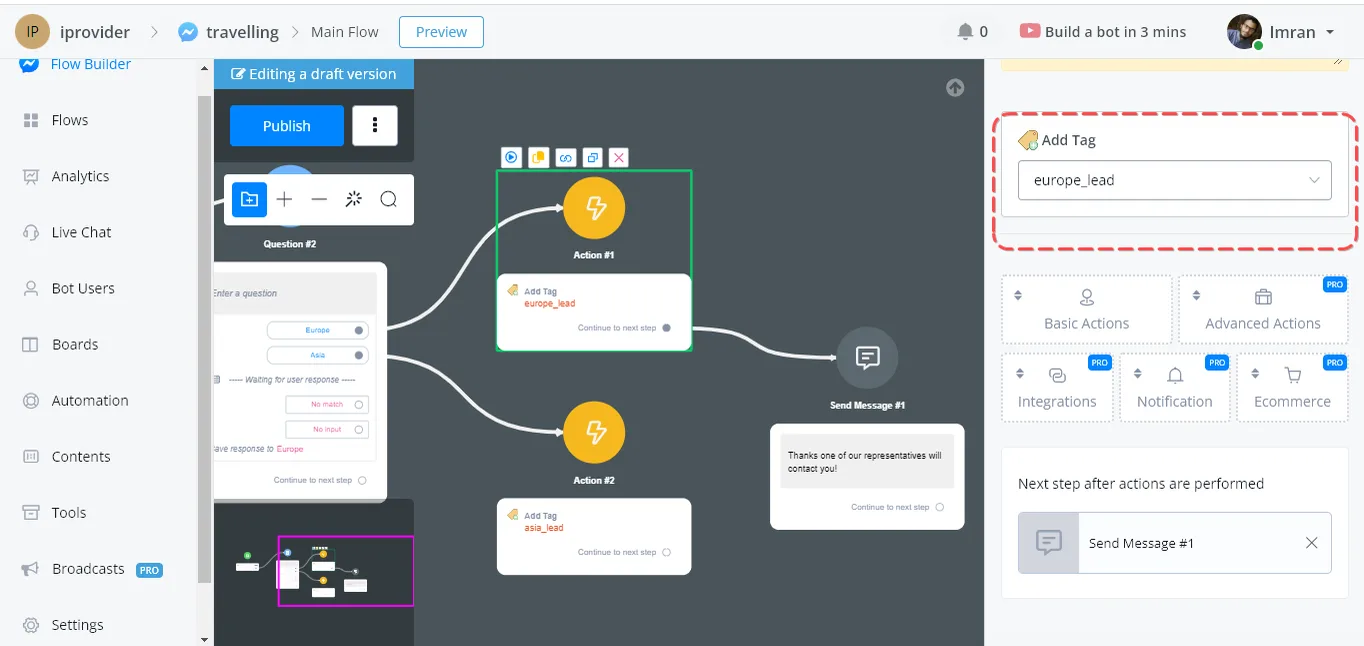
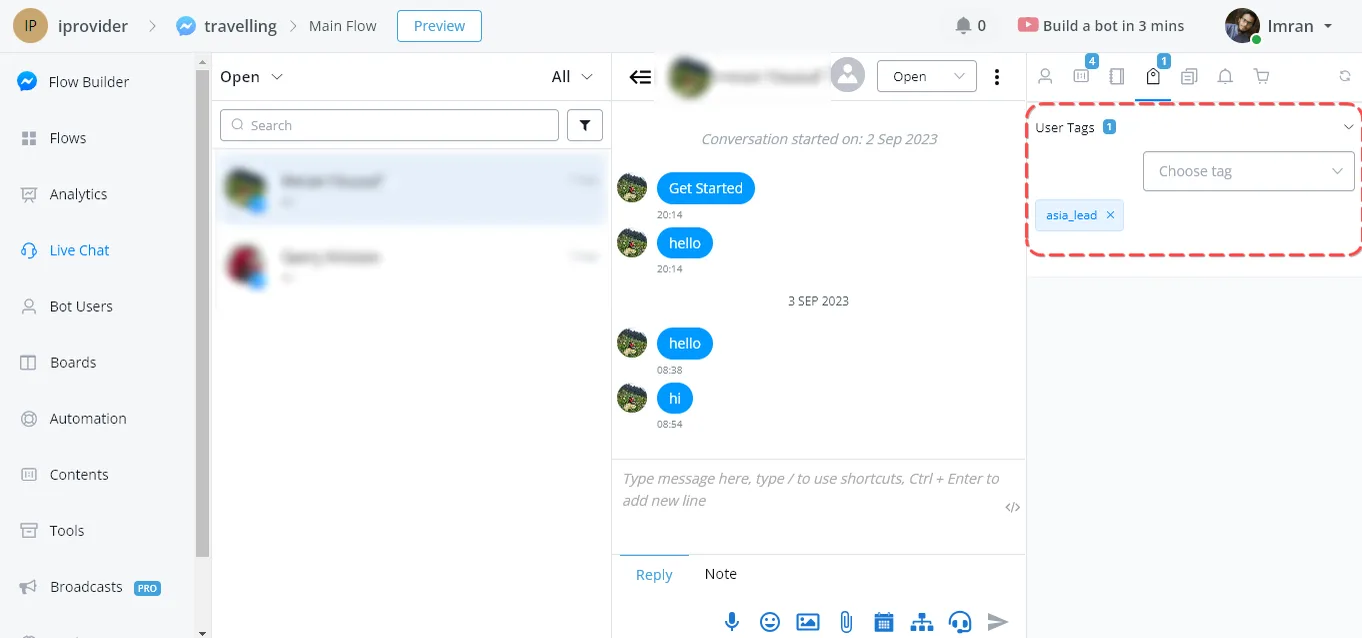
Now run this flow and see the result in the Live Chat section.
There the agent can see the user's Tags and can also add or delete tags manually, depending on the situation.
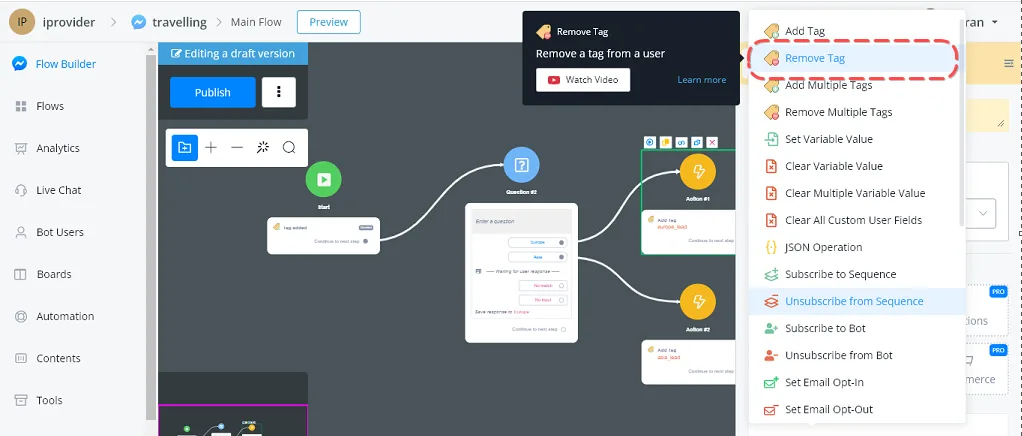
The Remove Tag action is available under Basic Actions. Let's imagine a scenario where the user is not interested in talking to a chat representative.
What we did was add a primary action: when a Button is selected, we trigger this action, which removes the tags we had previously selected in our chat.
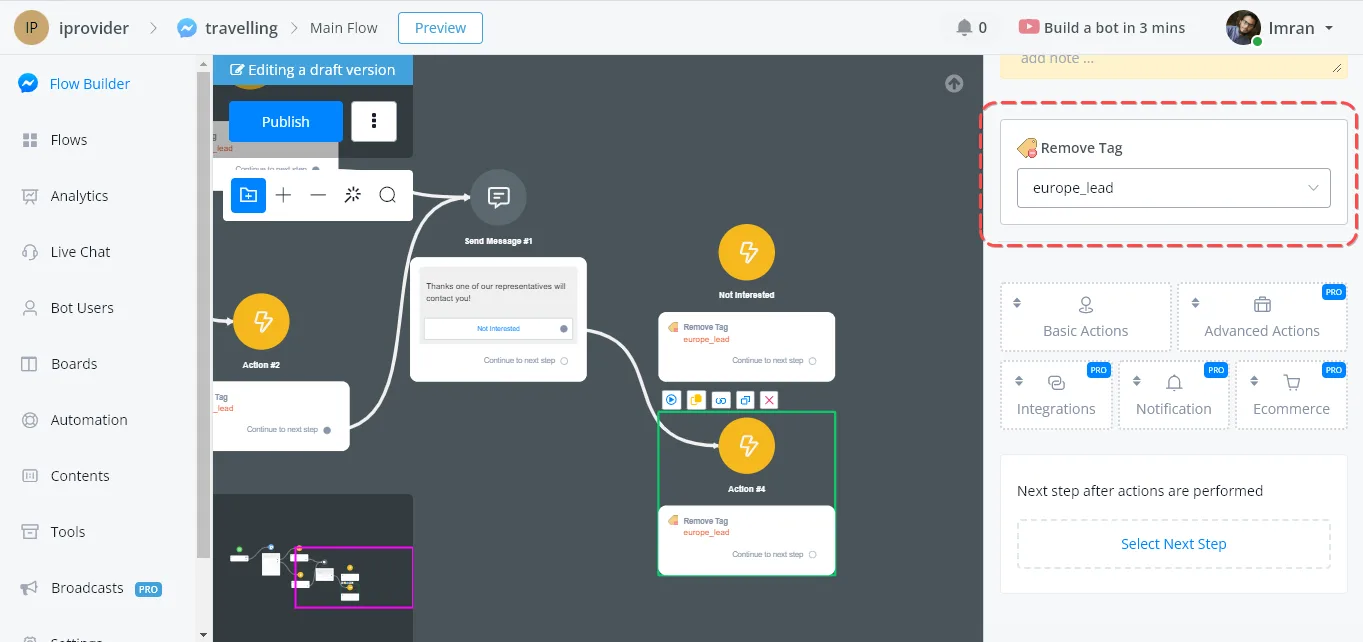
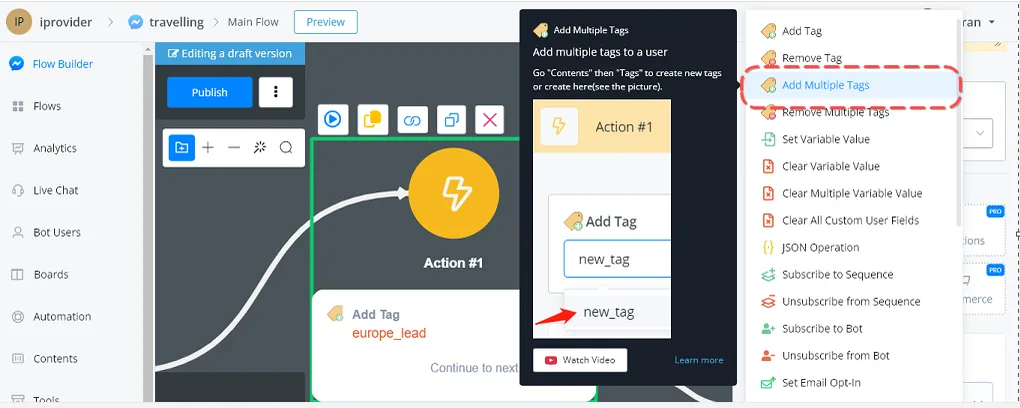
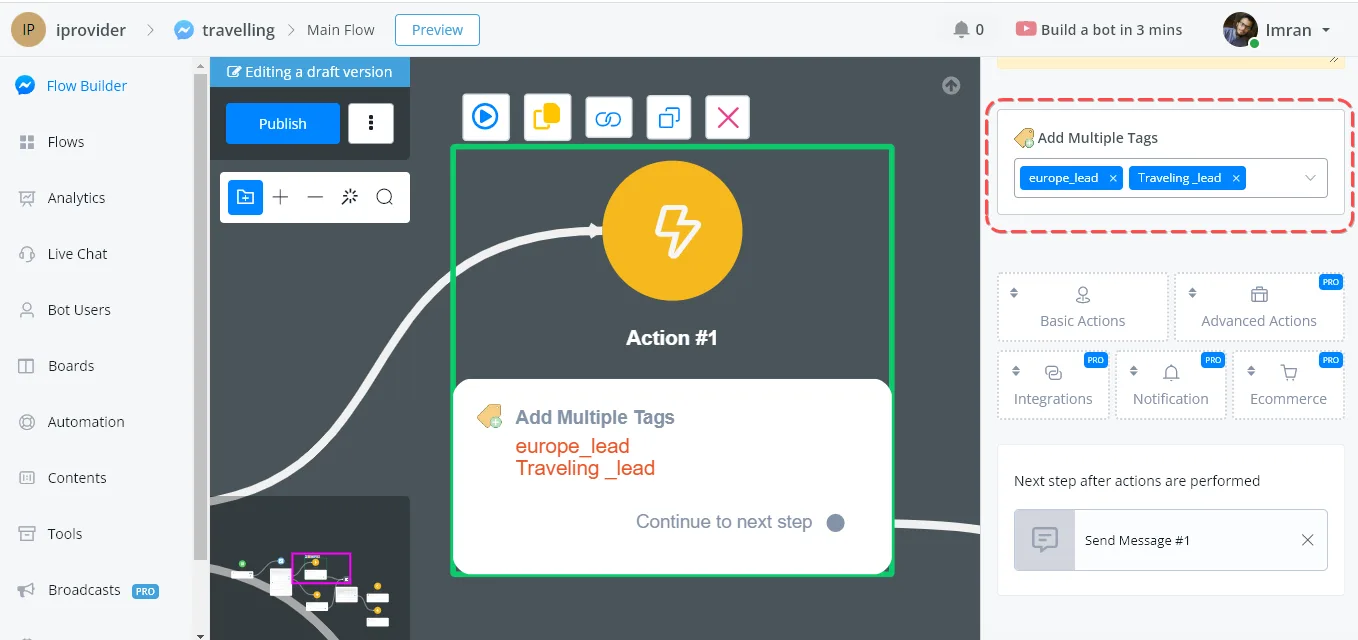
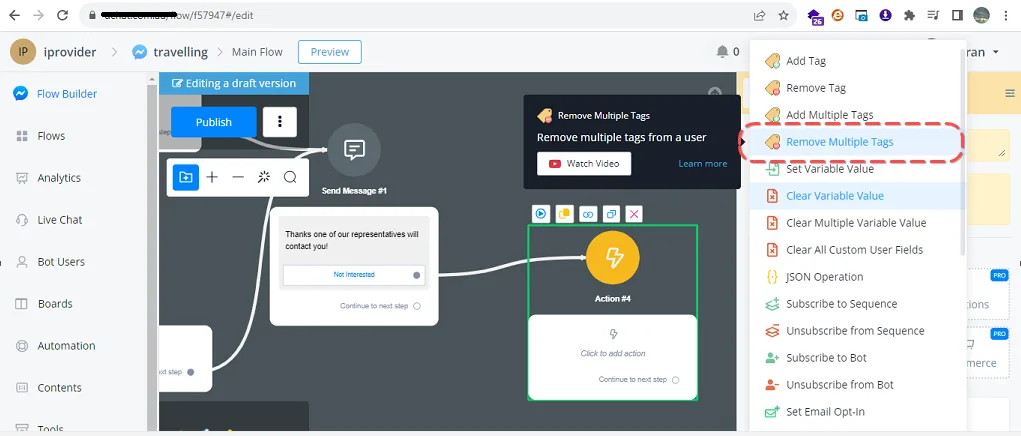
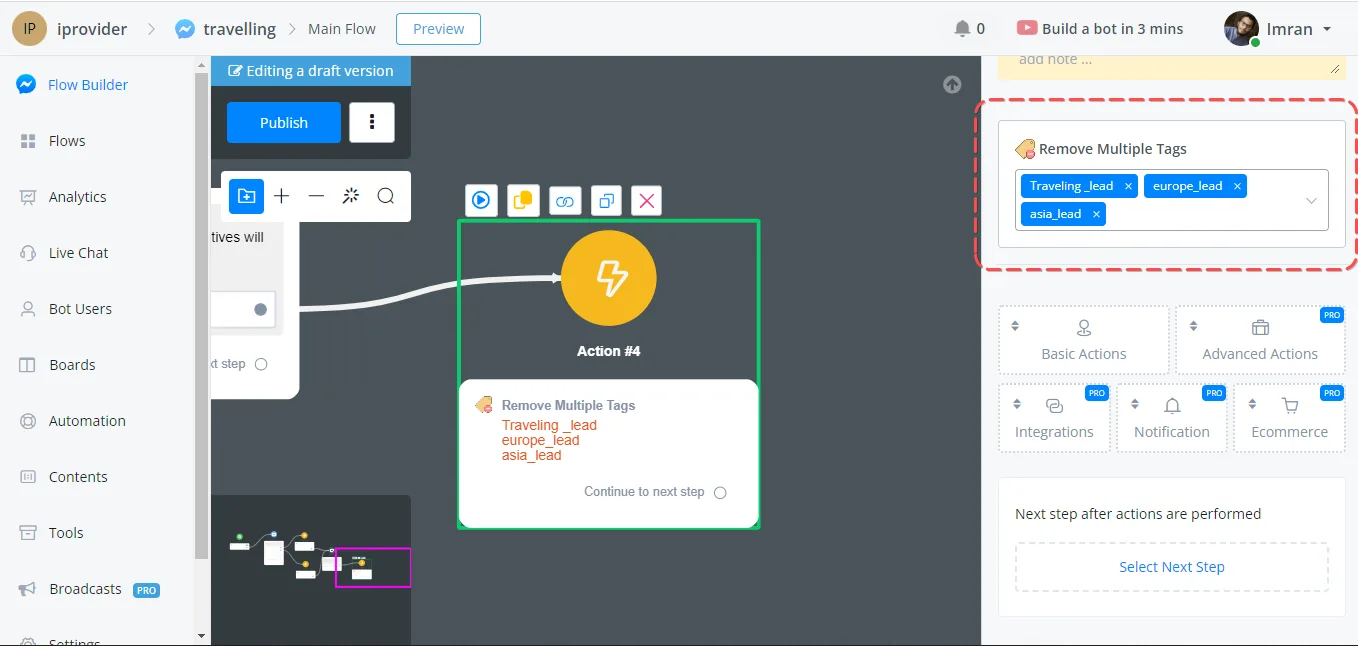
This option lets the chat builder remove several tags at once. So if the user has added a Europe/Asia destination but, at the end of the chat, presses the button saying they are not interested, we remove the tags through the Remove Multiple Tags option.
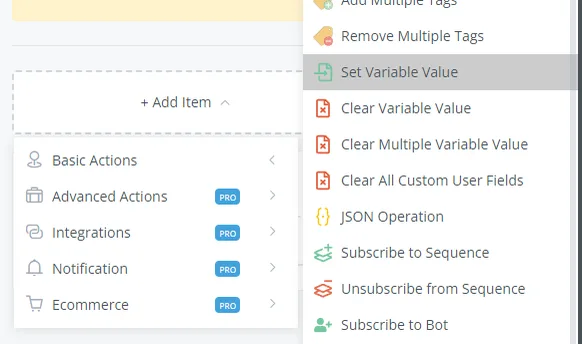
After clicking the Set Custom Field action, you can choose which custom field needs to have its value updated.
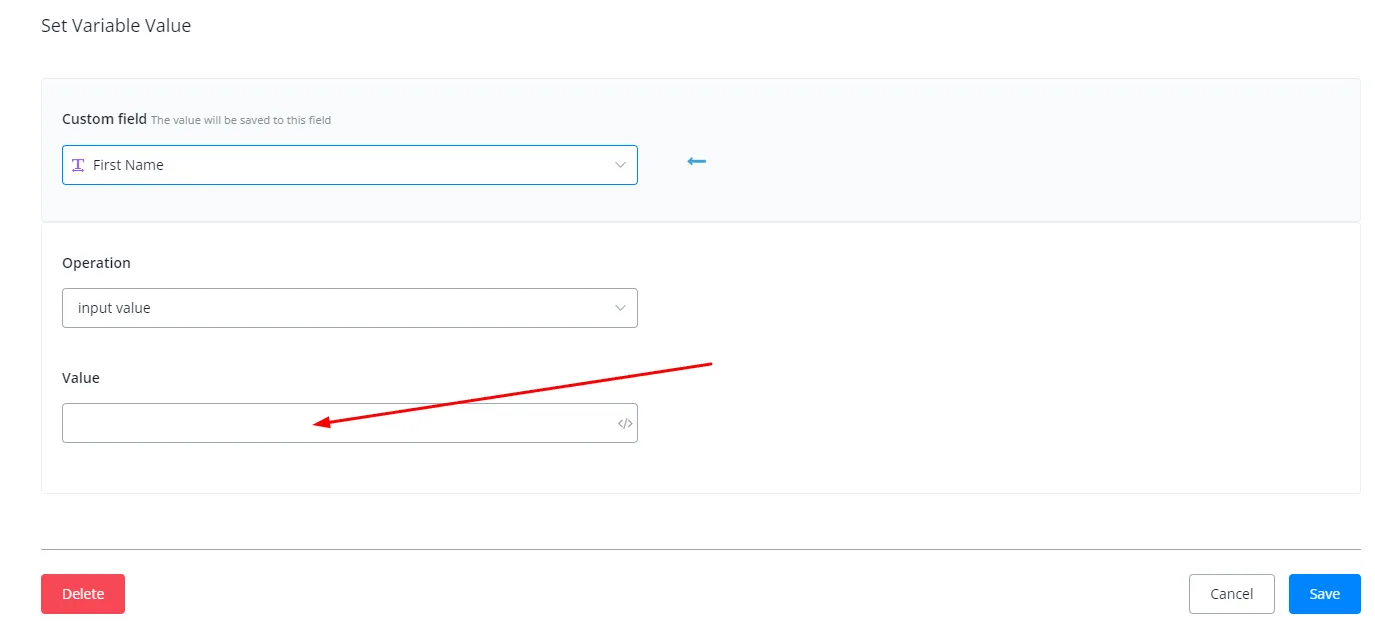
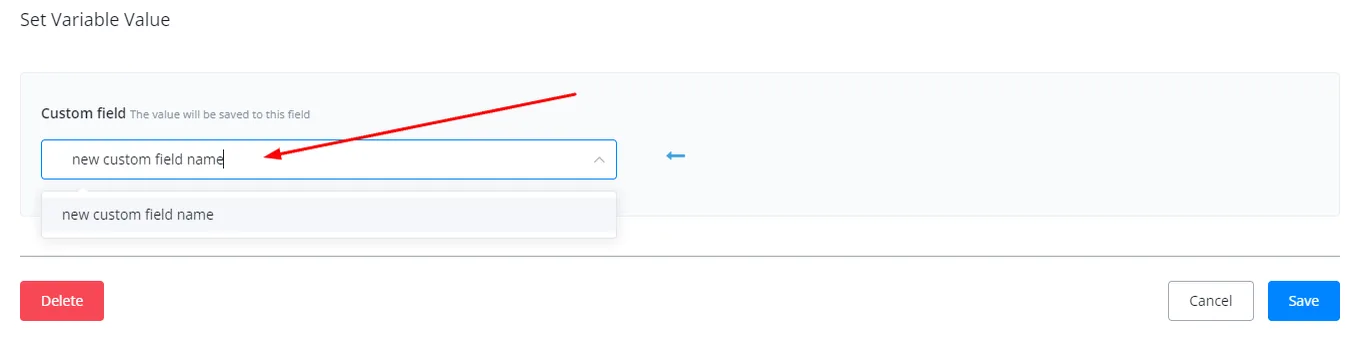
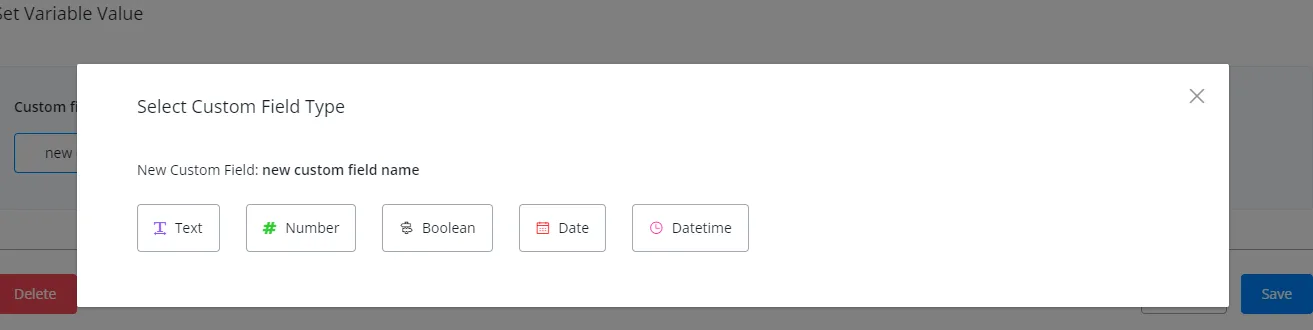
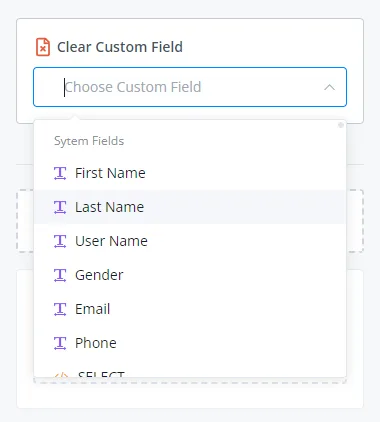
You just need to choose the specific custom field you want to clear.
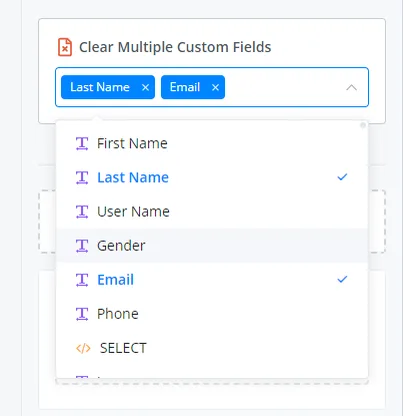
Make sure to choose all the custom fields whose values you want to clear.
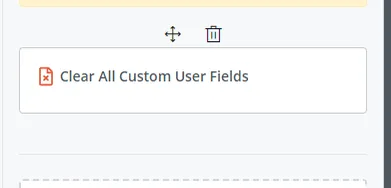
The Sequence automatically sends a list of messages to users. It is a good way to add more value through scheduled messages.
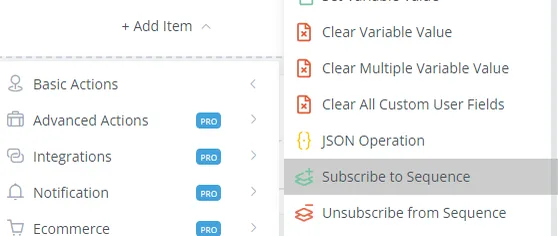
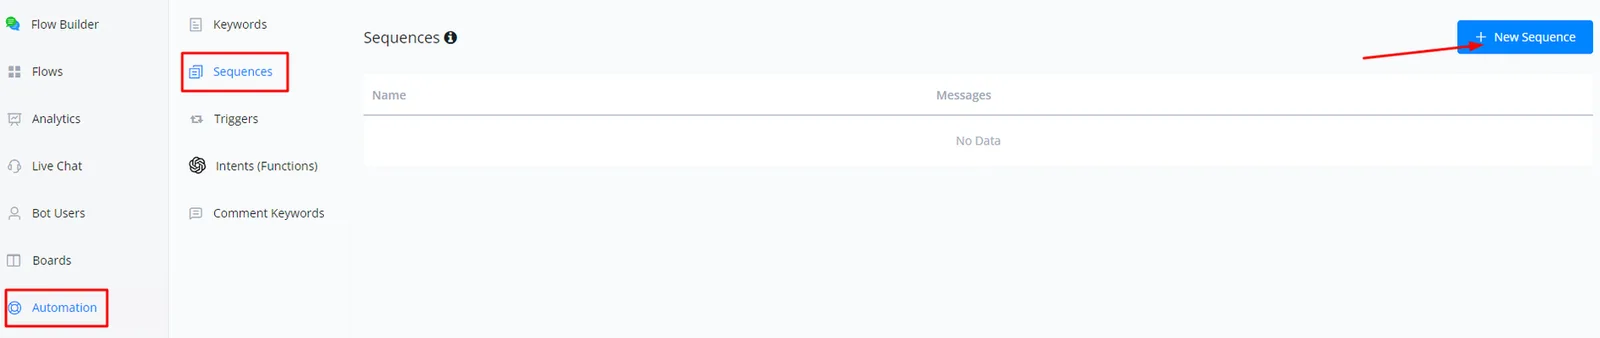
First you need to set up your sequence: go to Automation, click Sequence and then + New Sequence.
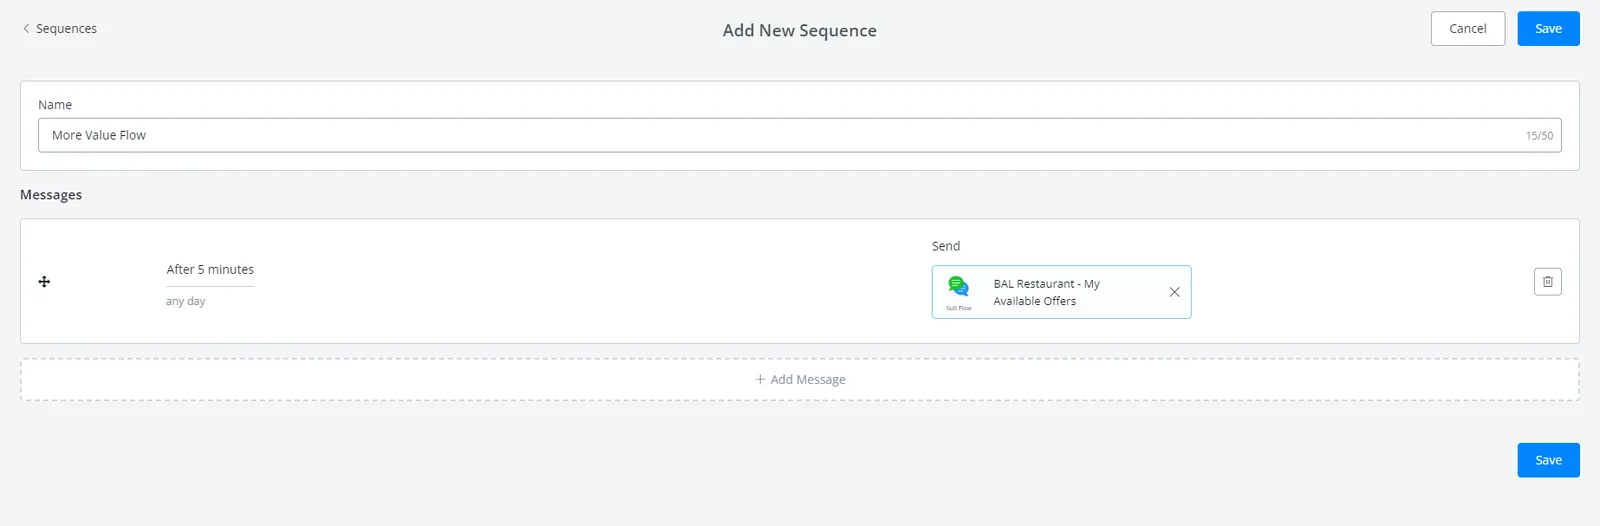
Give your sequence a name and choose a flow and a time interval for delivery. Don't forget to click SAVE.
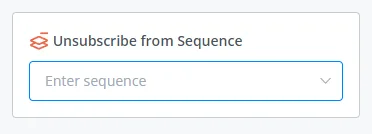
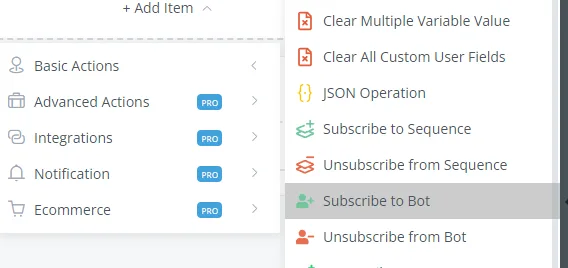
If you want to subscribe users to your bot or unsubscribe them, this function lets you do it inside your flows.
This feature lets you send emails to users. The action must be placed before an email node.
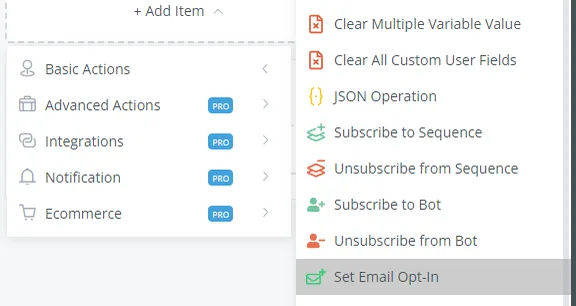
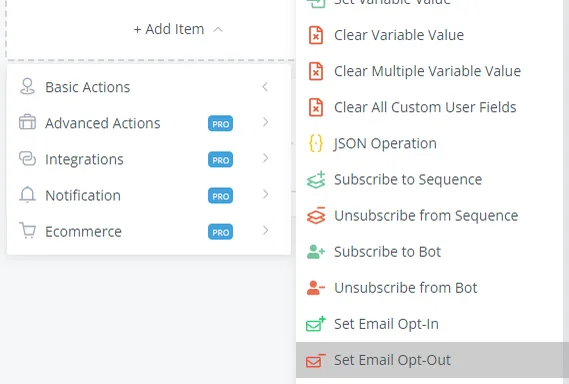
This feature is useful when you want to prevent a user from receiving an email. It is very useful when you send messages by email.
If you need to send an SMS to a user through the chatbot, set up this action before the Send SMS node.
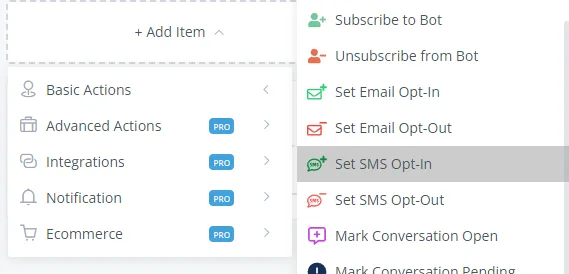
Define SMS Opt-Out
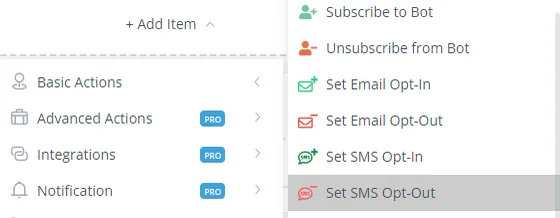
To make sure a user does not receive any SMS from the channel, use this action.
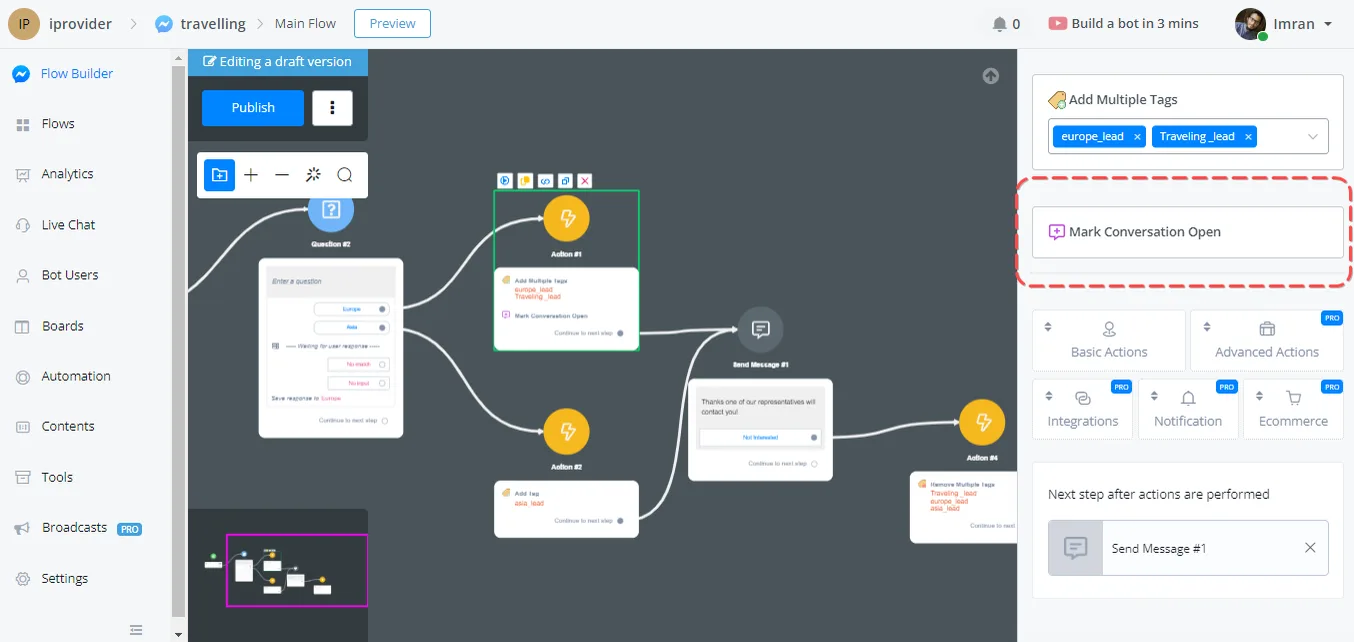
This option can be used when you want to open the conversation in any situation. Note that, by default, all conversations stay open unless we configure some function inside them.
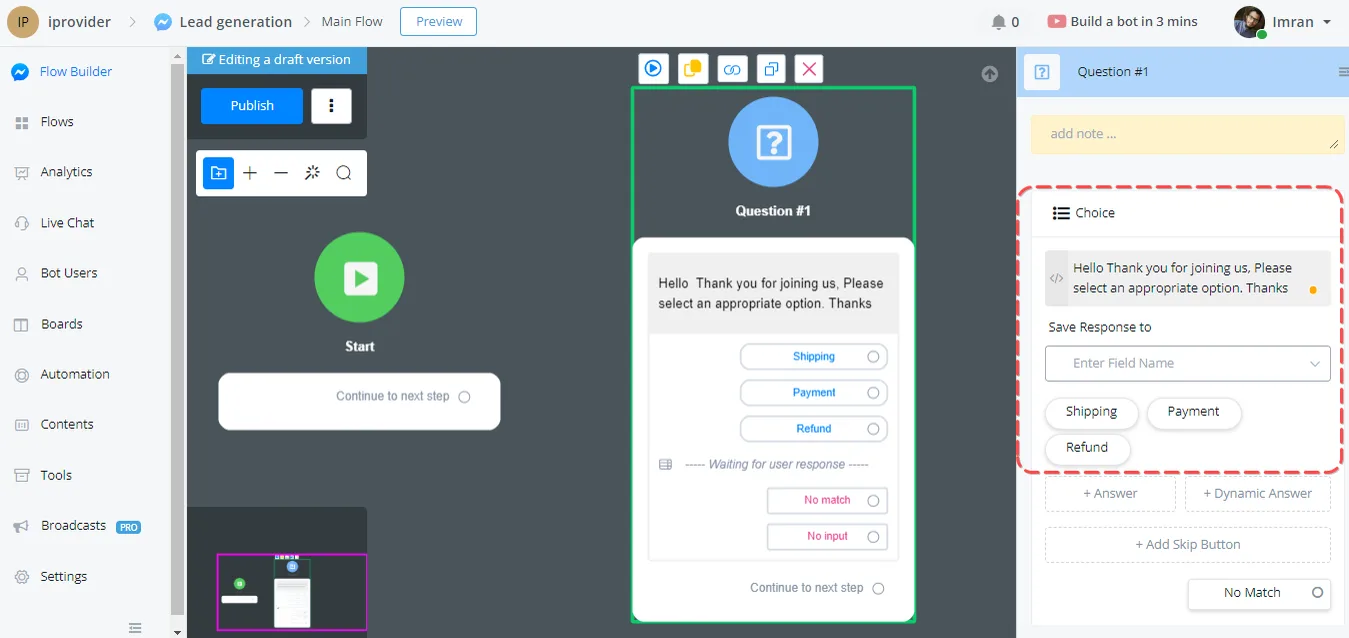
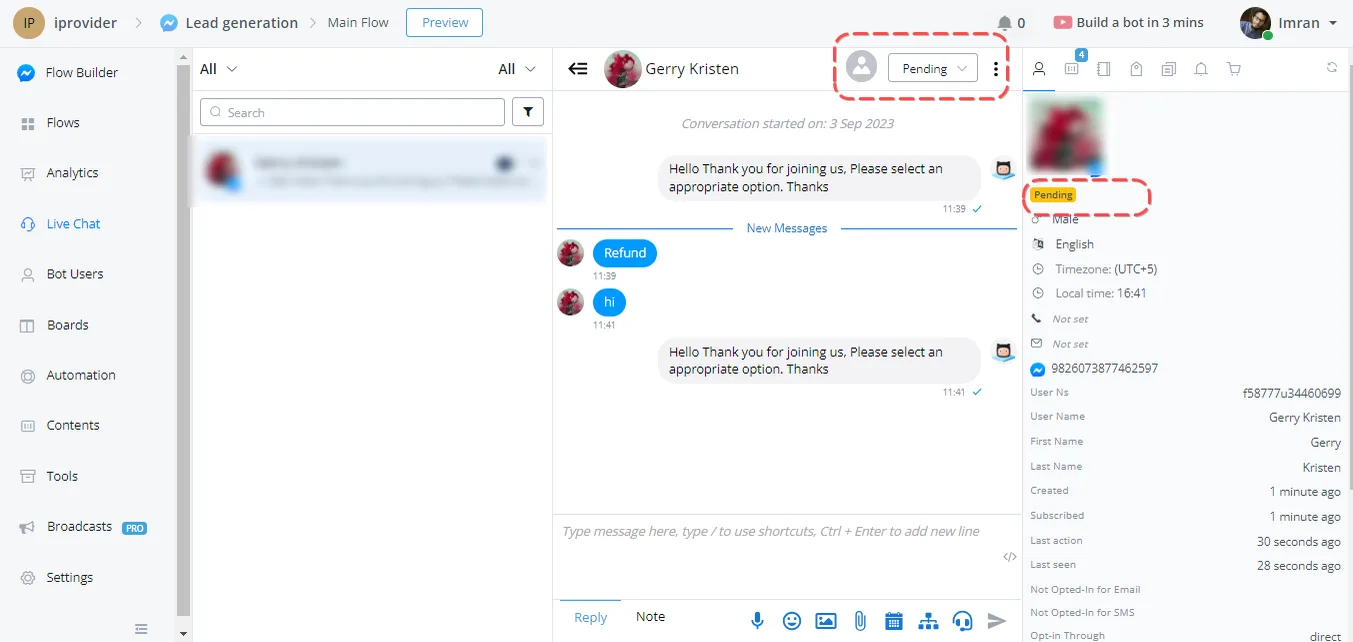
This option automatically sets the chat status to Pending. A use case would be a Store with three categories.
- Shipping
- Payment
- Refund
So if the user selects Refund, the flow will mark the chat status as Pending to highlight this chat information for the chat agent.
The chat can be marked as spam. We need to make sure the chatbot provides accurate and reliable information. When building the channel, we can mark users' chats as Spam to avoid distractions.
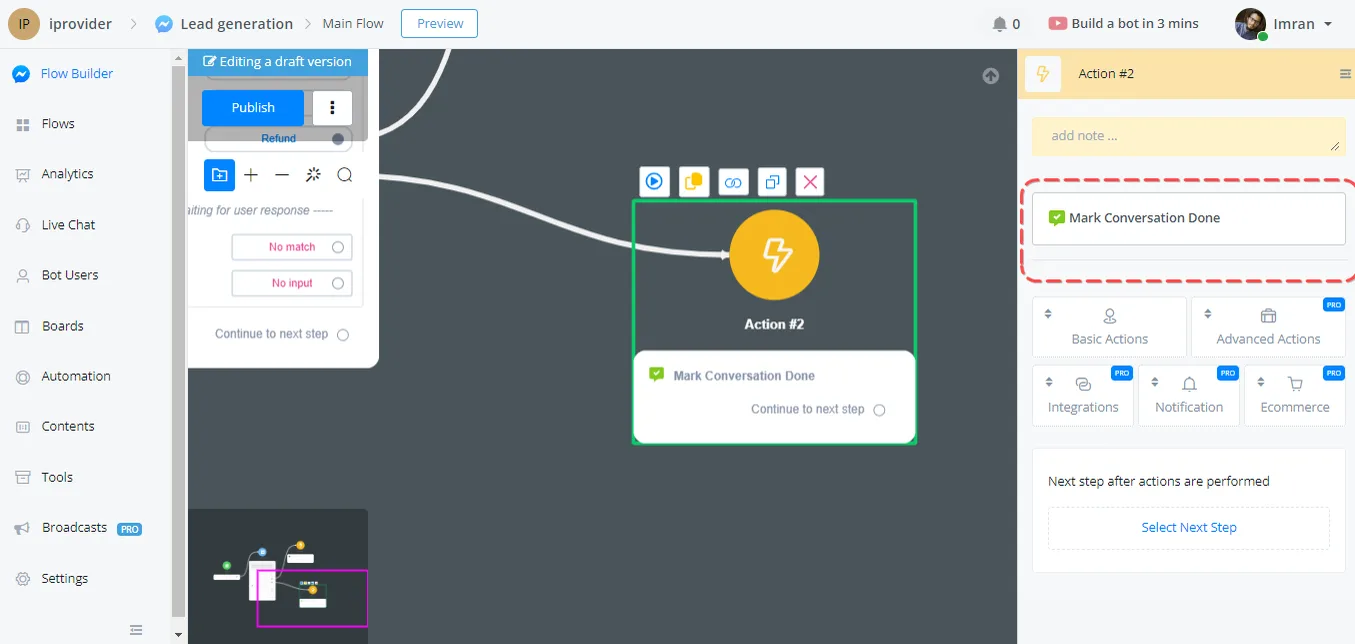
The chat can be marked as done in certain cases. What if your flow works out and the user gets what they wanted? You can set this in a specific set of actions, Done. That way, your Chat Agent will not pick up chats with the Done status.
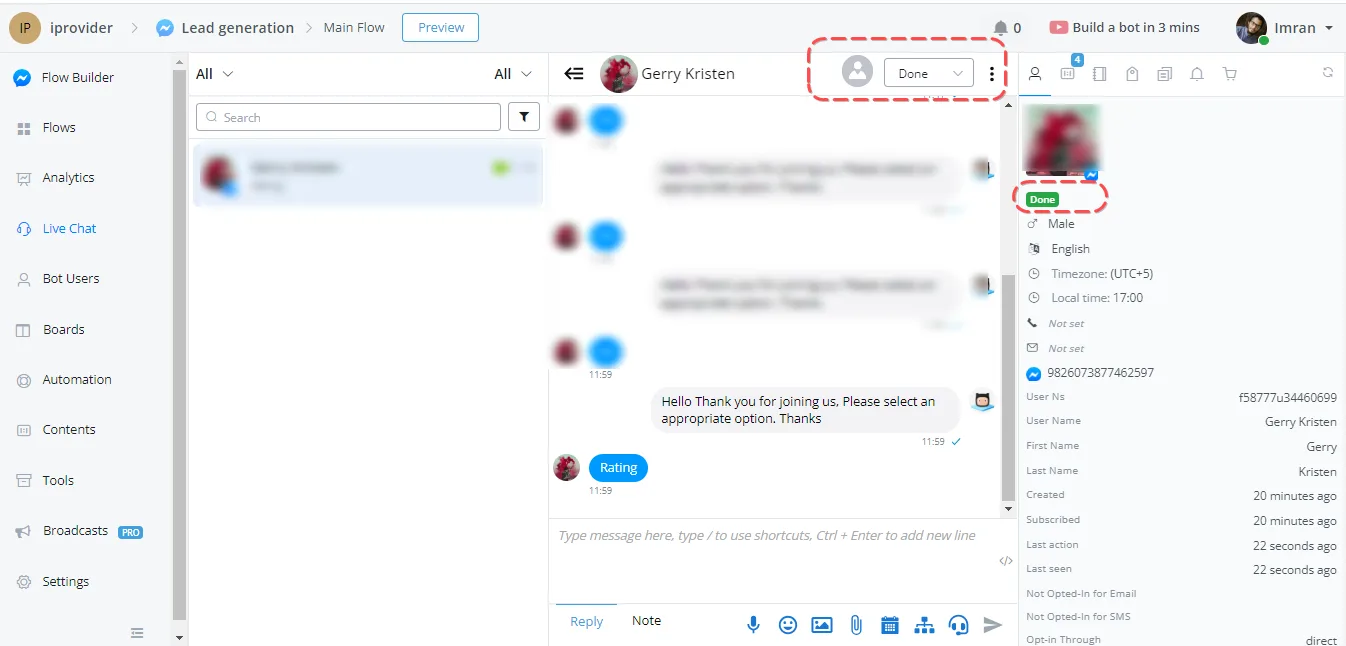
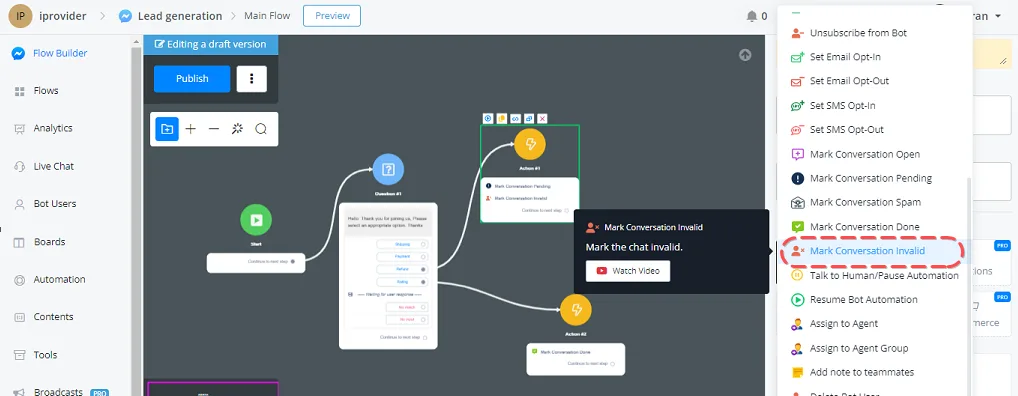
A conversation can be marked as invalid based on certain criteria; a lead that does not fit an agent/channel's business case can be marked as invalid.
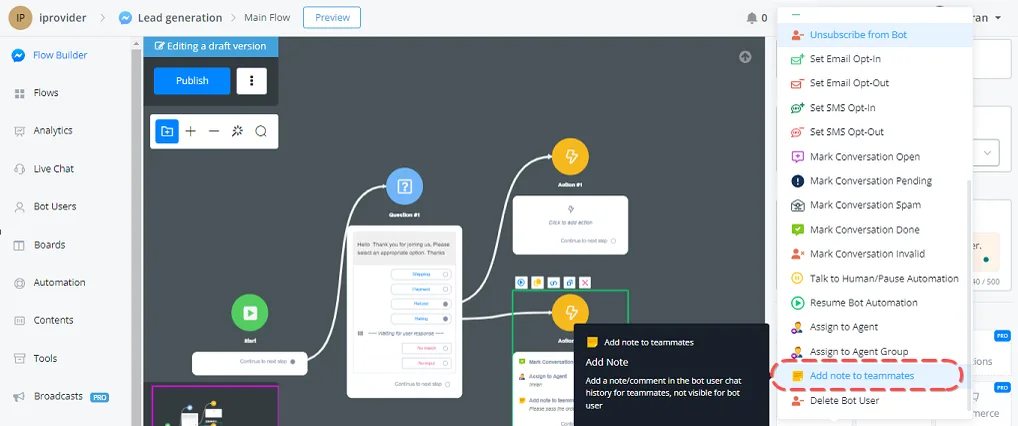
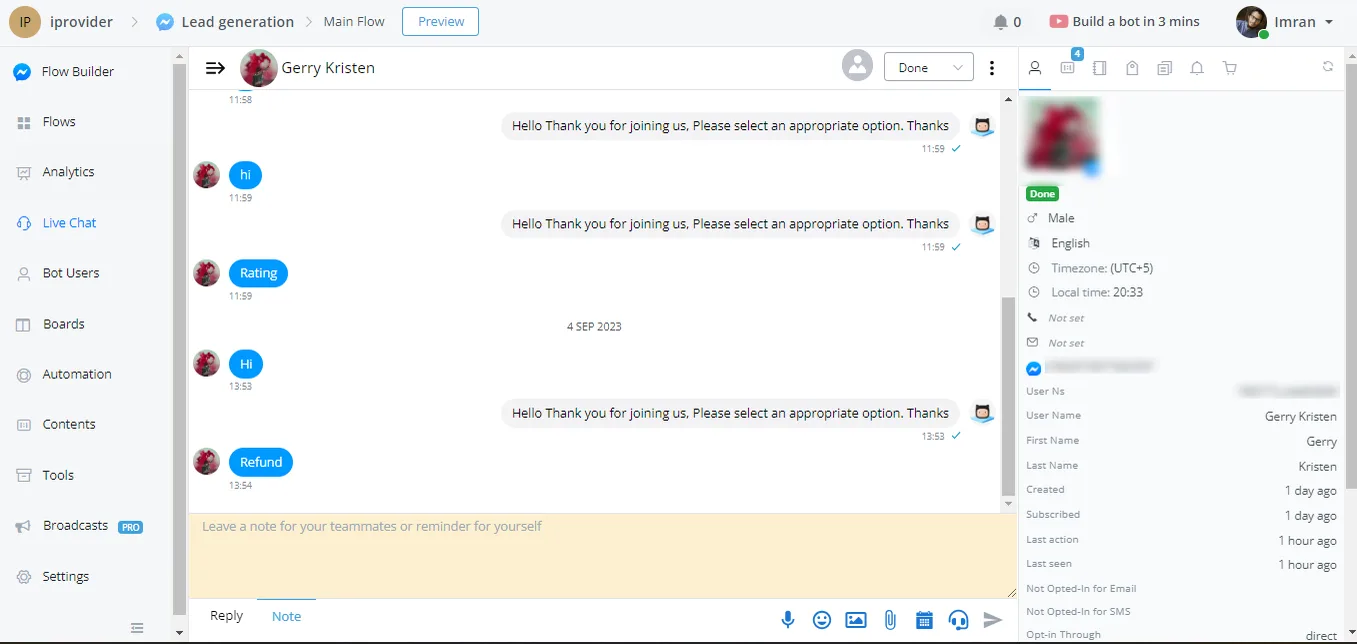
Live Chat screen:
A new feature that lets you set a user limit for your chatbot and automatically delete excess users. This update streamlines the process of managing and maintaining your chatbot's user base.
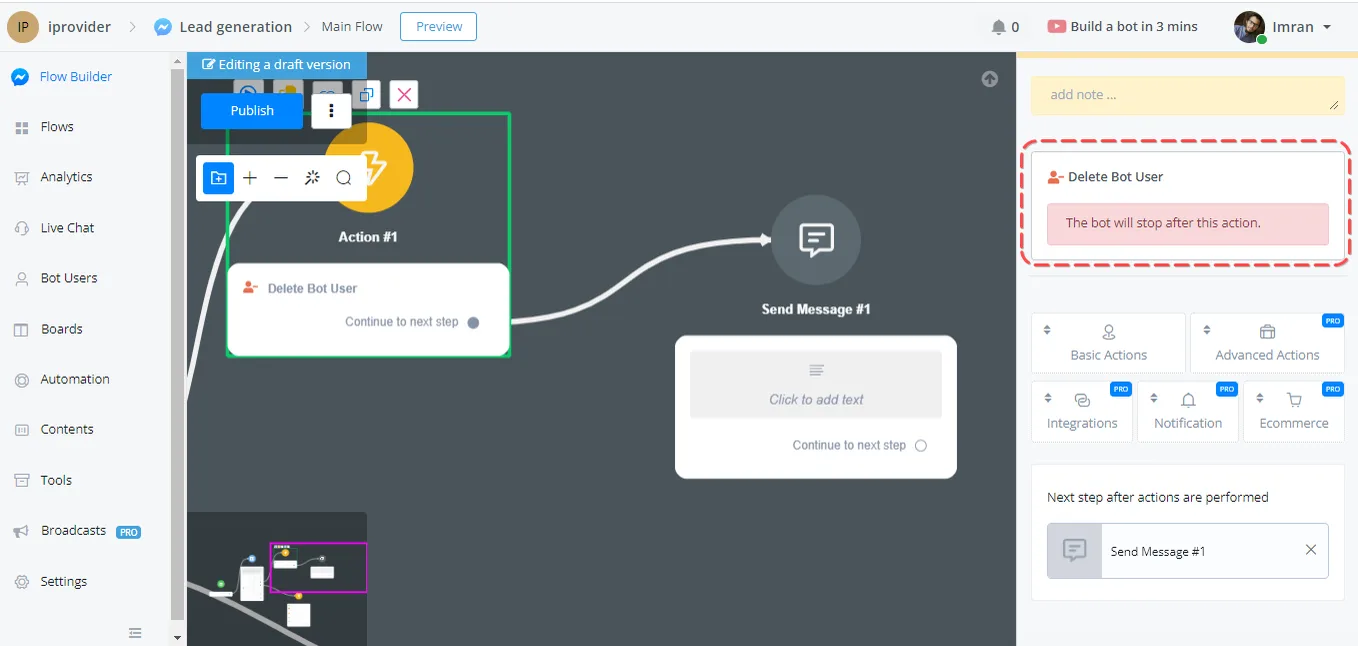
The first method uses an action step inside the chatbot flow. Just find the "Delete Contact" action step in the Basic Actions category. When the flow reaches this step, it will automatically delete the user, making sure the following messages or conditions are not processed.
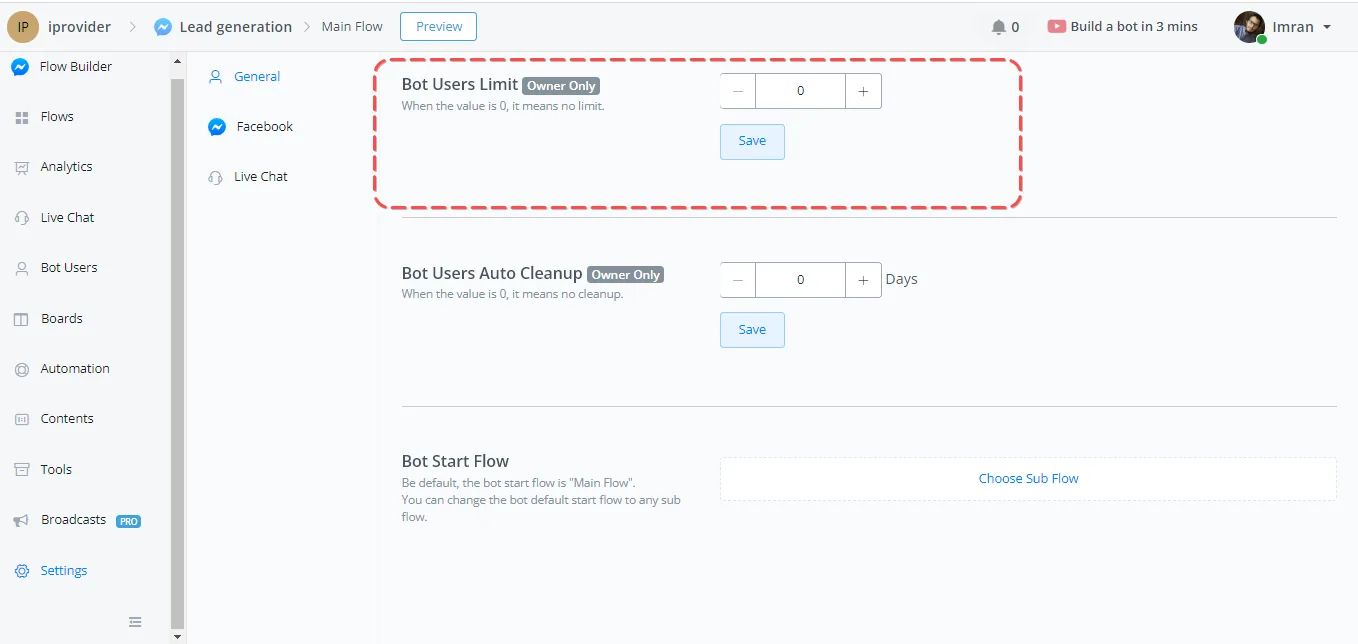
Another way to delete users automatically is to set contact limits in the NicoChat Settings. In the General section, you will find the “Contact limit” option. By specifying a value greater than zero, the system will periodically check the total number of users and delete the oldest ones if the limit is exceeded.
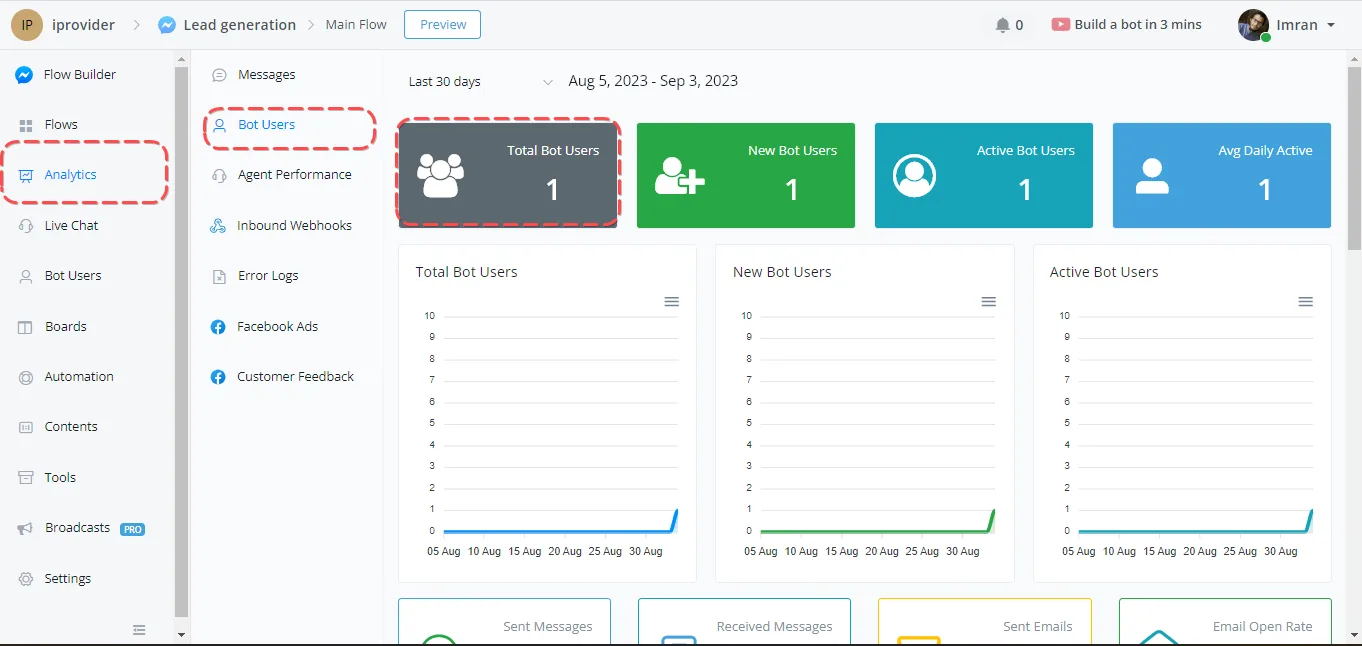
To track the number of users, go to the Statistics section. There you will find information about the total number of contacts. This data will help you determine the right user limit for your chatbot.
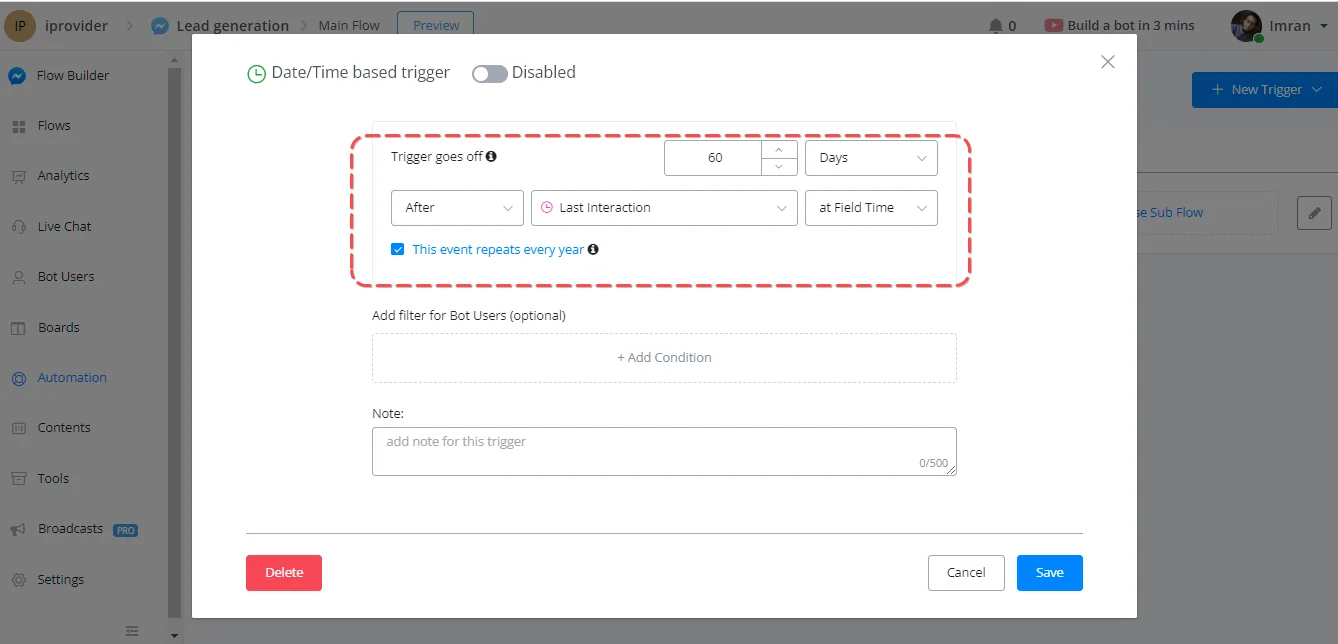
If you prefer a more customized approach, you can create triggers based on specific conditions. For example, you can set a trigger to delete a user if there is no interaction for a given period. With time-based triggers, you have more control over the deletion process.
In this tutorial, we will learn how to generate ICS files so that users can add meetings directly to their calendars, on the computer, on the phone, on iOS or on Android.
A powerful use case for the calendar integration is letting Live Chat agents generate appointments inside conversations. With the Calendar File Generator, agents easily create a meeting event that users can add to their calendars. Here is how it works:
In the Live Chat conversation, find the “Calendar File Generator” option at the bottom.
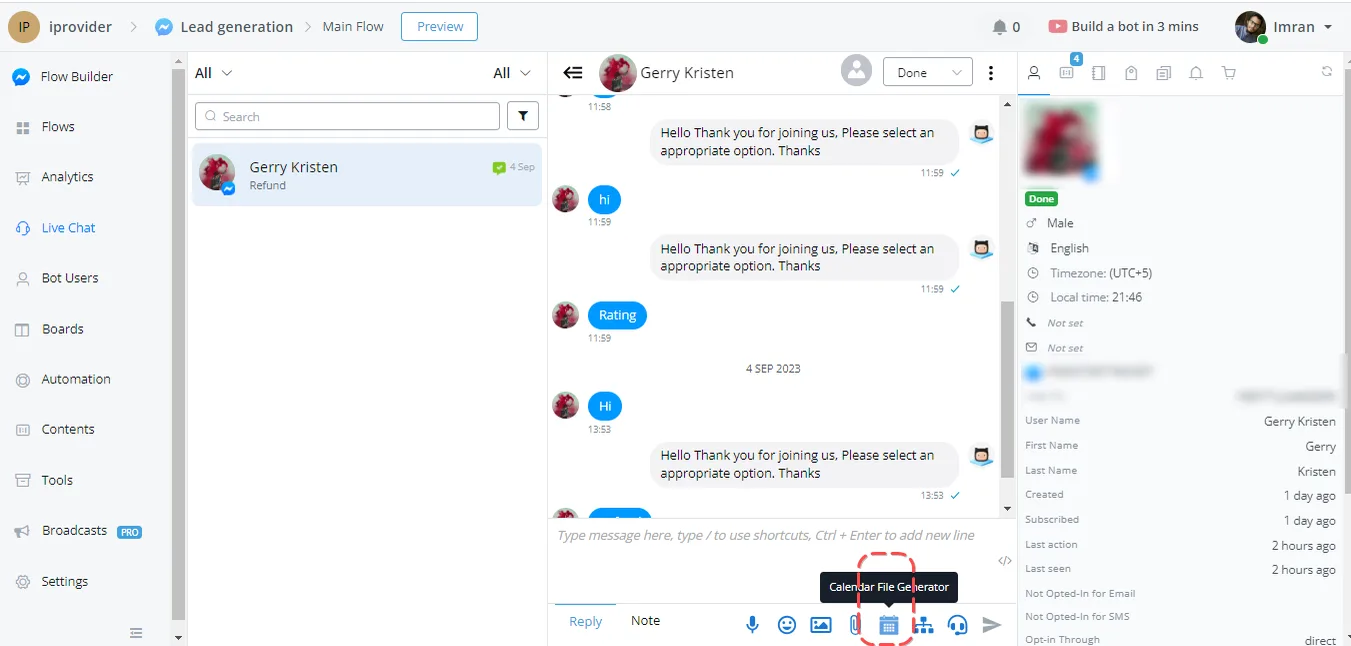
Click it to open a new window, where you customize the meeting details.
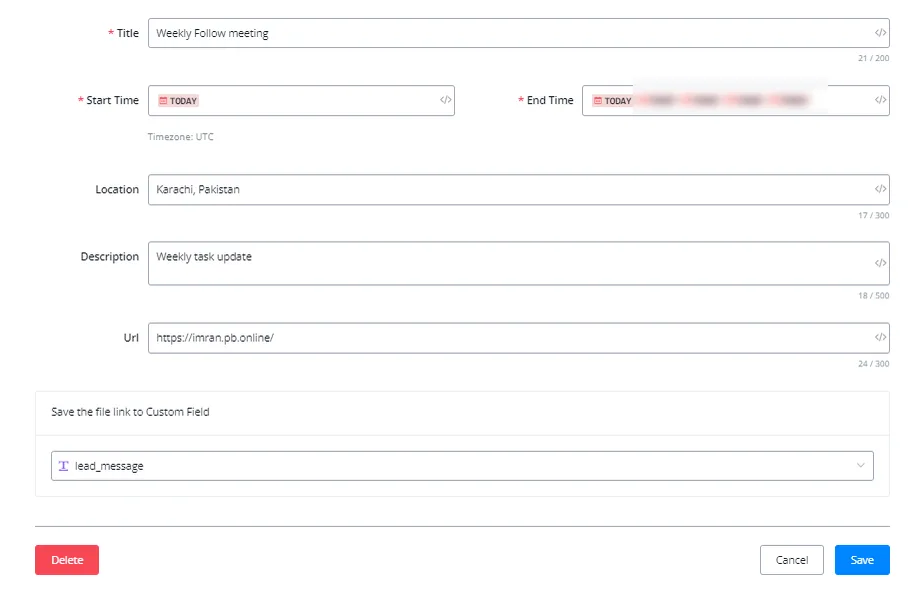
- Give the meeting a name, such as "Follow-up meeting".
- Set the start and end dates and times of the meeting.
- Specify the location, whether a physical address or a virtual meeting platform, such as Zoom.
- Add a description, such as “Weekly follow-up meeting”.
- Optionally, include a URL related to the meeting, such as your website.
- Save the generated ICS file, which will appear in the bottom left corner of the Live Chat conversation.
When it is ready, send the file to the user, who can download it and add it to their calendar.
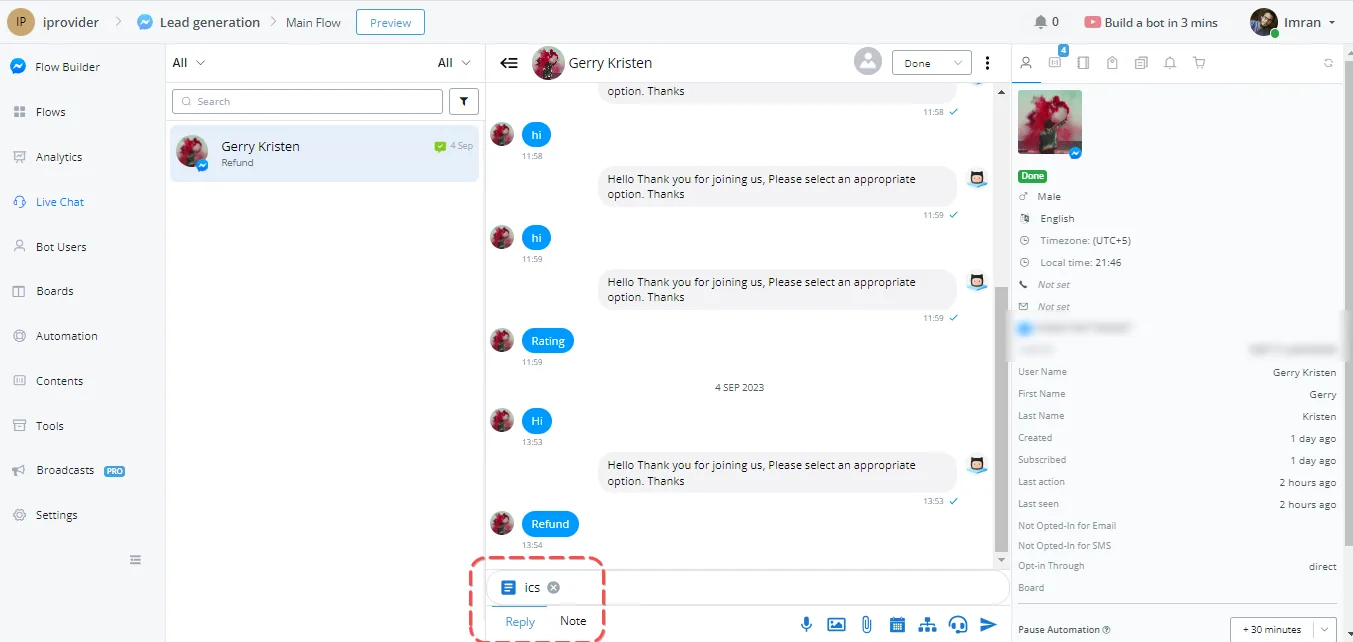
As soon as they receive the ICS file, the user can easily add the meeting to their calendar. Here is the step by step:
When the user opens the file, a browser tab will open with an overview of the meeting details.
- They will see the meeting information, including name, date, time and description.
- To add it to the calendar, just click the “Add to calendar” option.
- They will be asked to choose a calendar application or service (for example, Google Calendar).
- After the choice, the event is added to their calendar, where they can access all the details and even set reminders.
The calendar integration is not limited to Live Chat conversations. You can also embed it in flows to automate more. Here is how to use it in a flow:
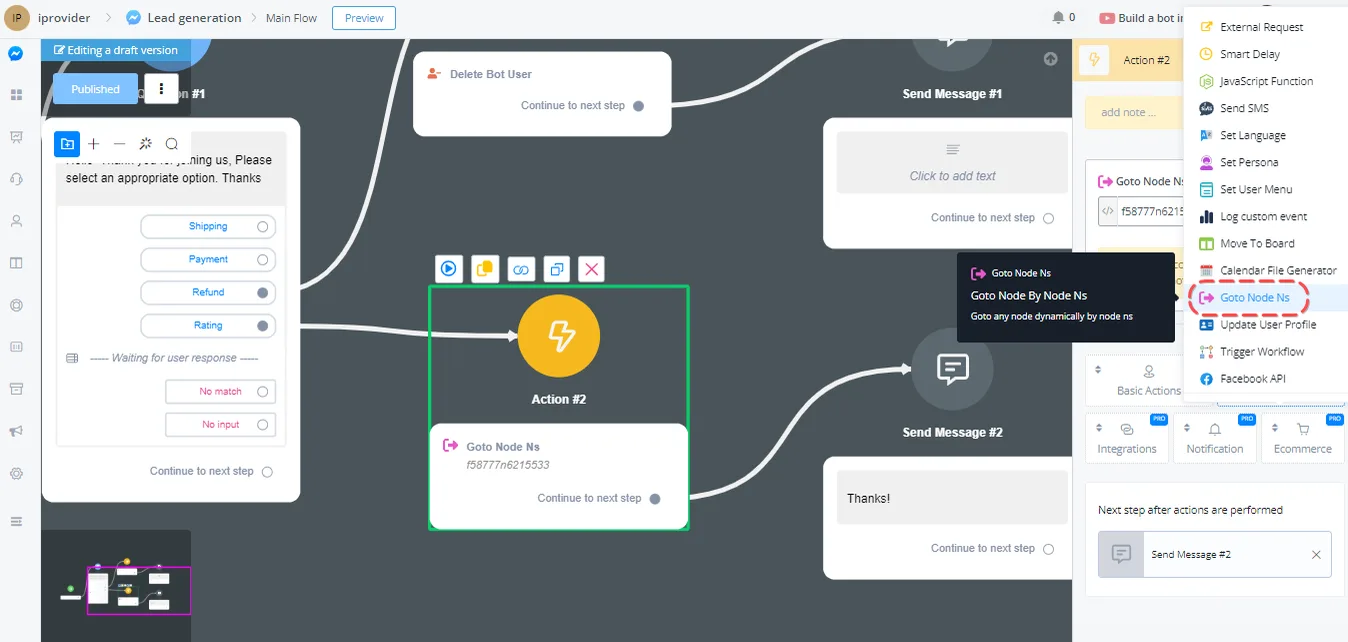
- In the flow, add an action block and select “Advanced Actions”.
- Choose the "Calendar File Generator" option and edit the action.
- Customize the meeting details as needed, including dynamic variables for start and end times.
- Save the meeting link in a custom field for future use.
- Show the meeting link in a text block or use a button to make access easier.
Send the link to users via SMS, email or any communication channel you prefer.
When users click the link, they can add the meeting to their calendars, just like in the Live Chat scenario.
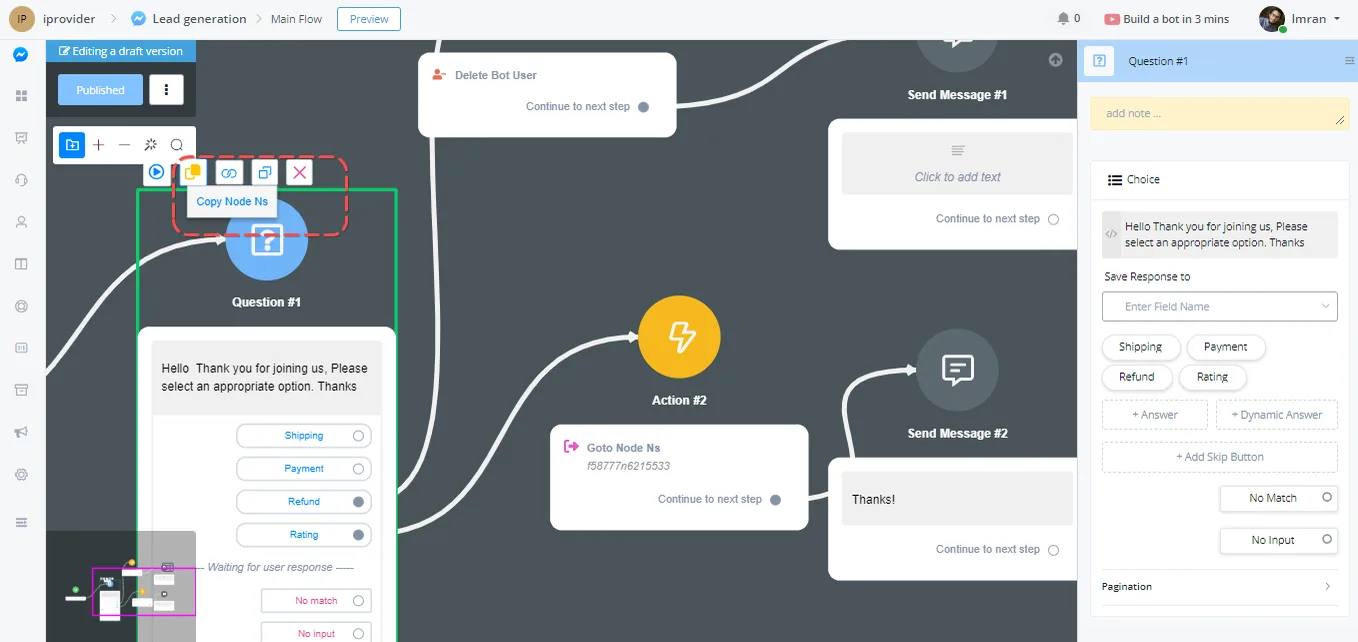
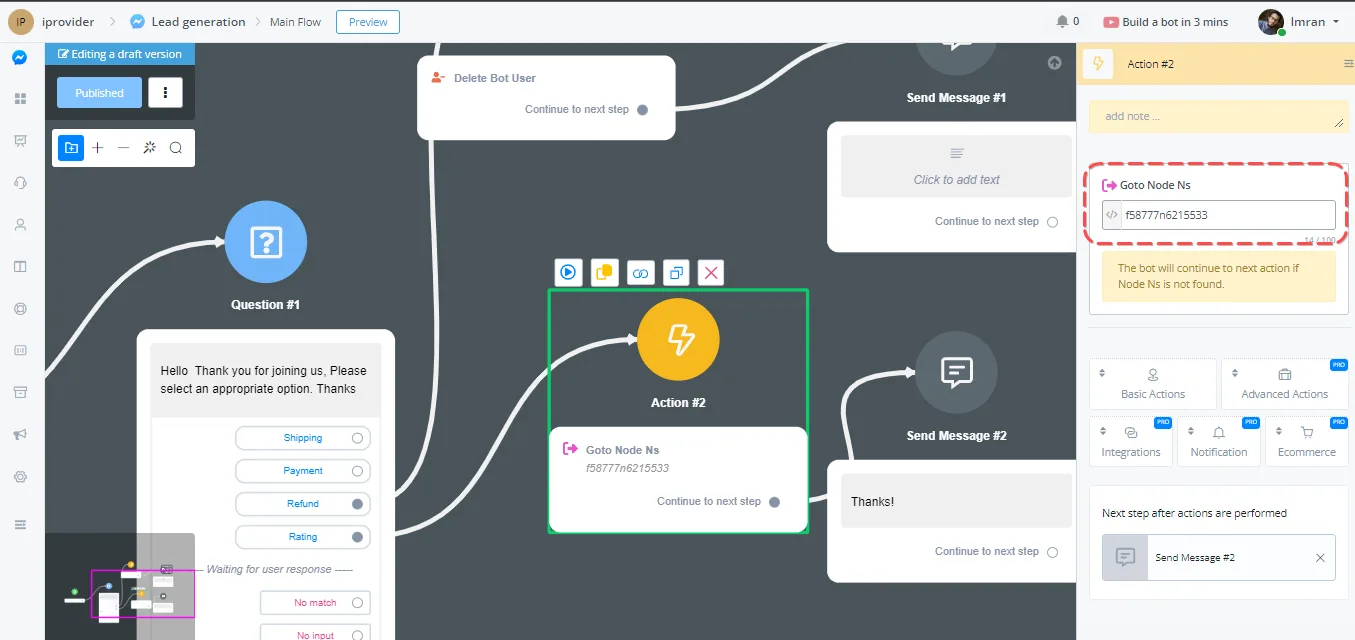
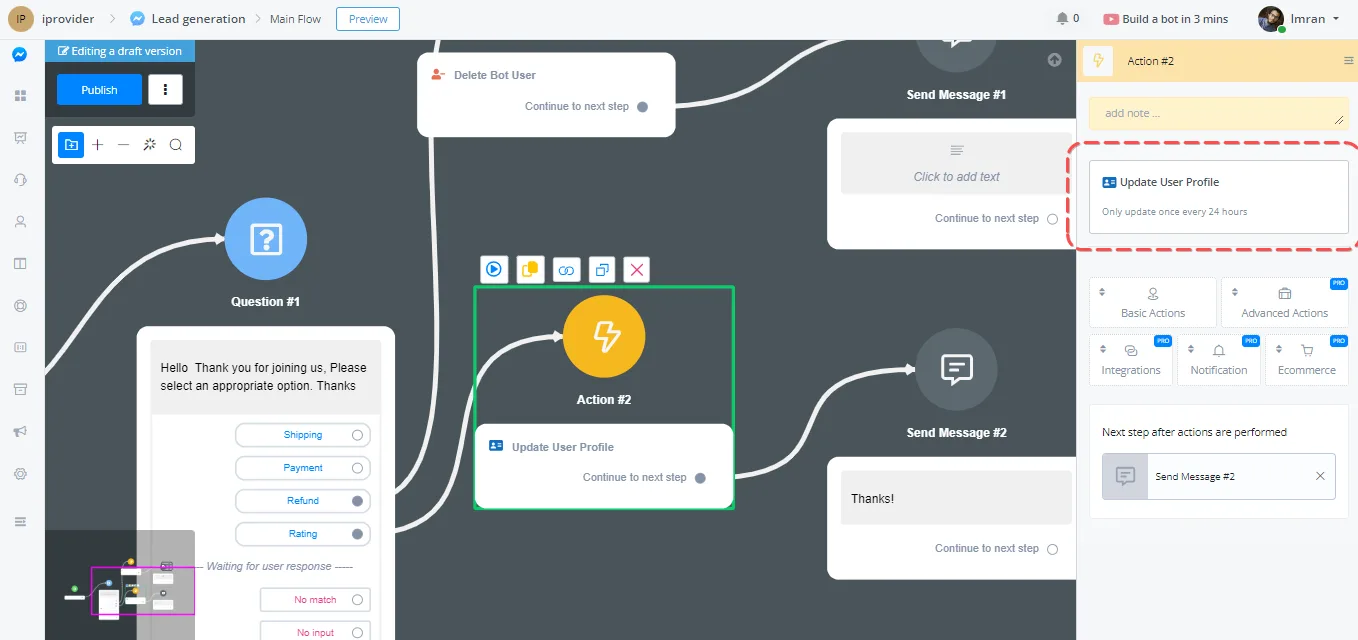
This option is used to update the user's data coming from the source organization, in the many cases where we need to update a user profile, along with other information that can be updated within the 24-hour period.
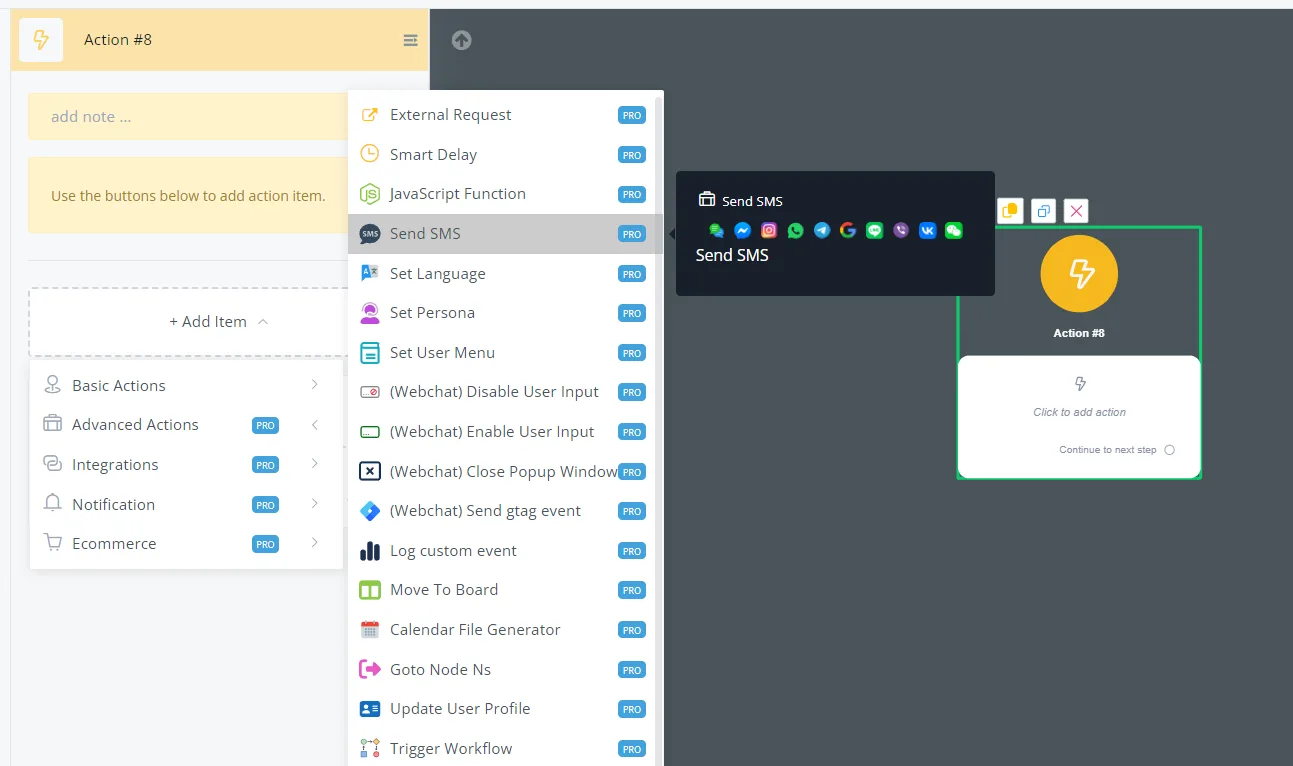
This option lets you send an SMS to any user who has provided a contact number. With the SMS feature, you can talk to users whose last interaction was more than 24 hours ago.
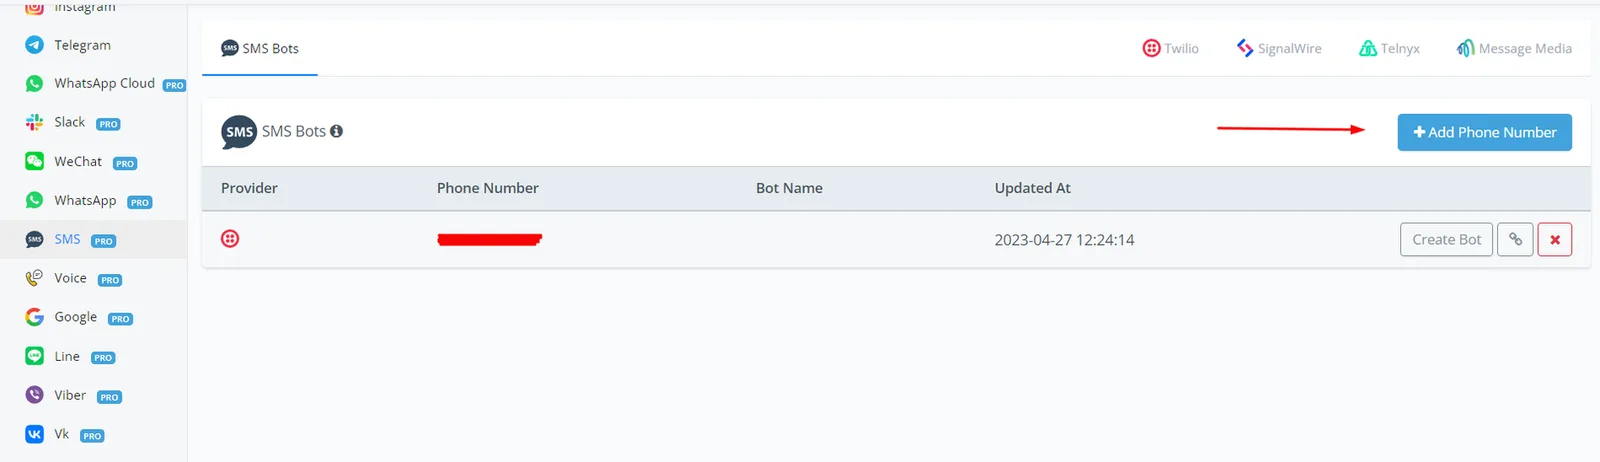
Make sure you have added your number in the section below, activating it with one of the four SMS number providers (Twilio, SignalWire, Telnyx, Message Media).
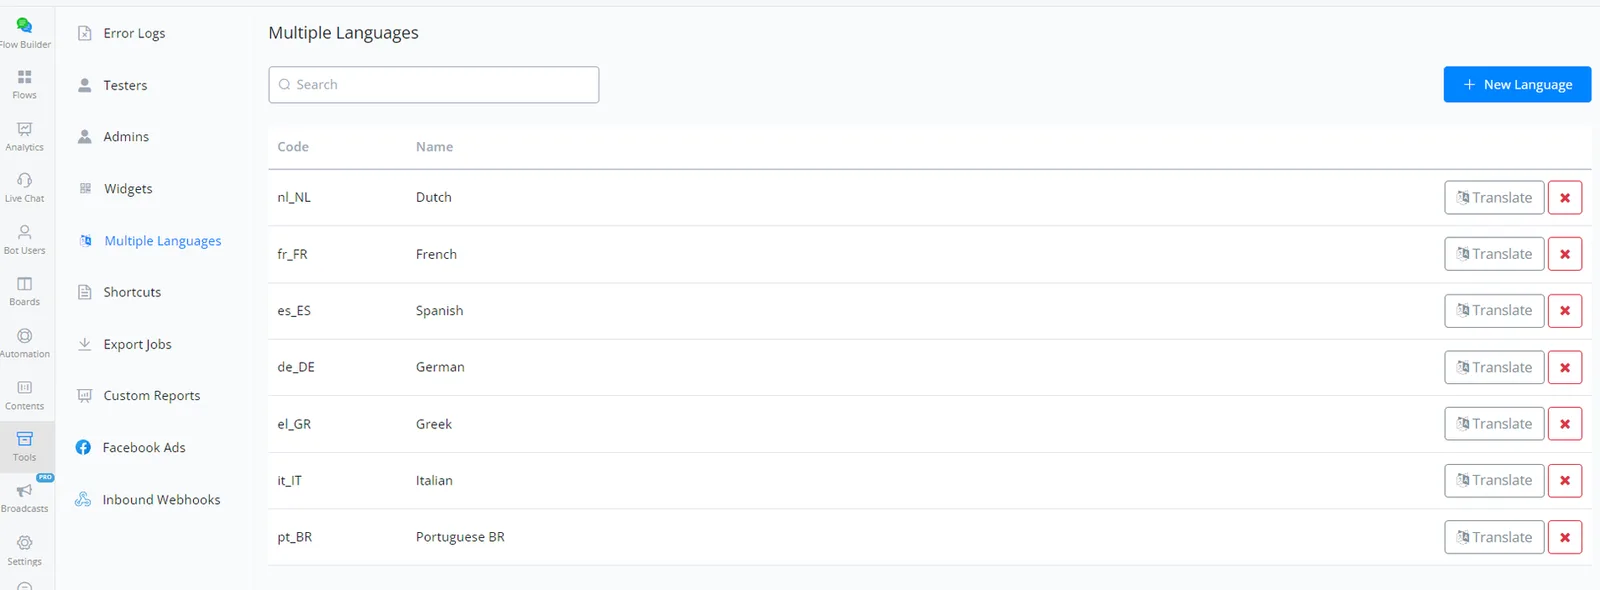
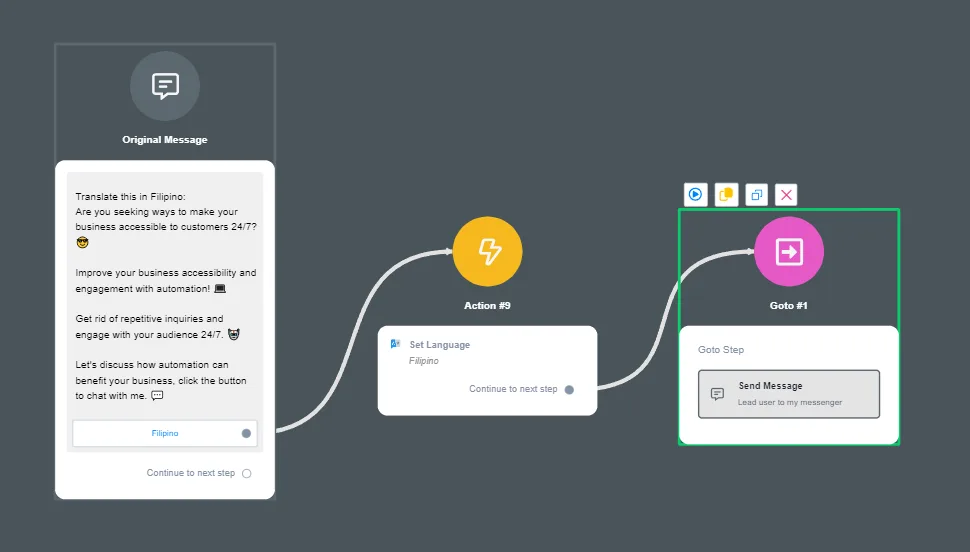
This action lets you change the language of our flows according to the desired language.
Go to TOOLS > Multiple Languages > New Language
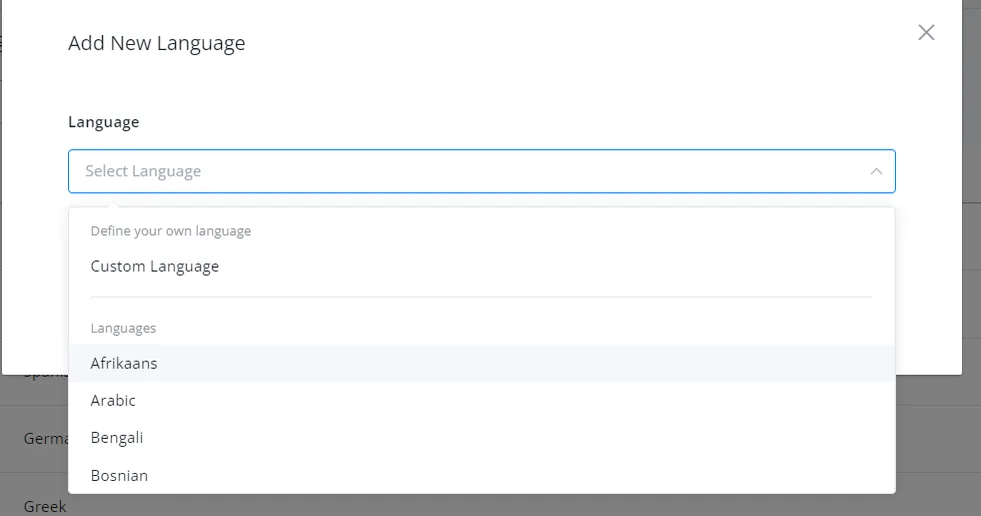
You can choose the desired language or add a custom language, if you do not find one in the available list.
Make some translations.
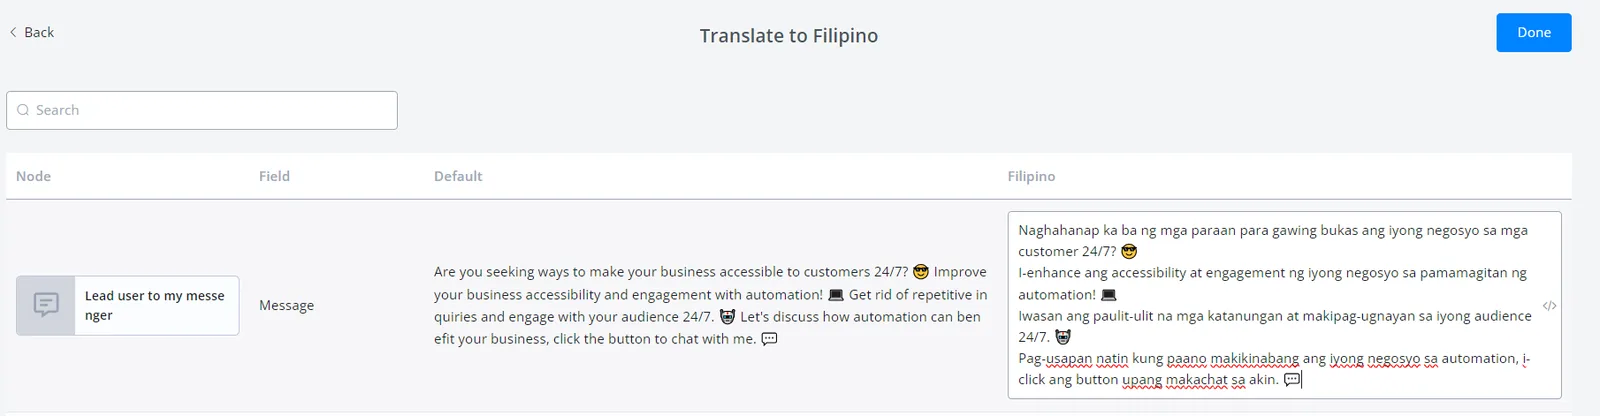
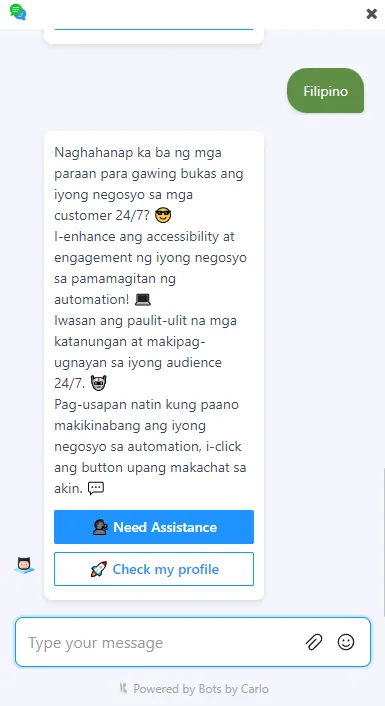
Here is a configuration example.
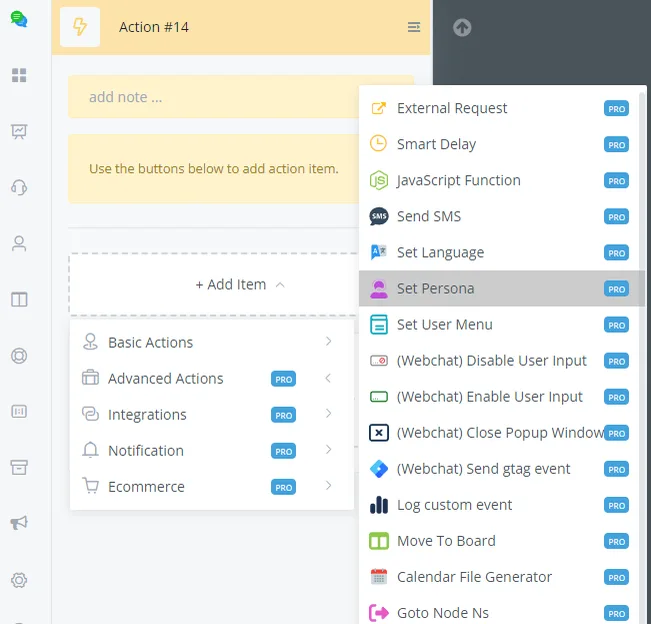
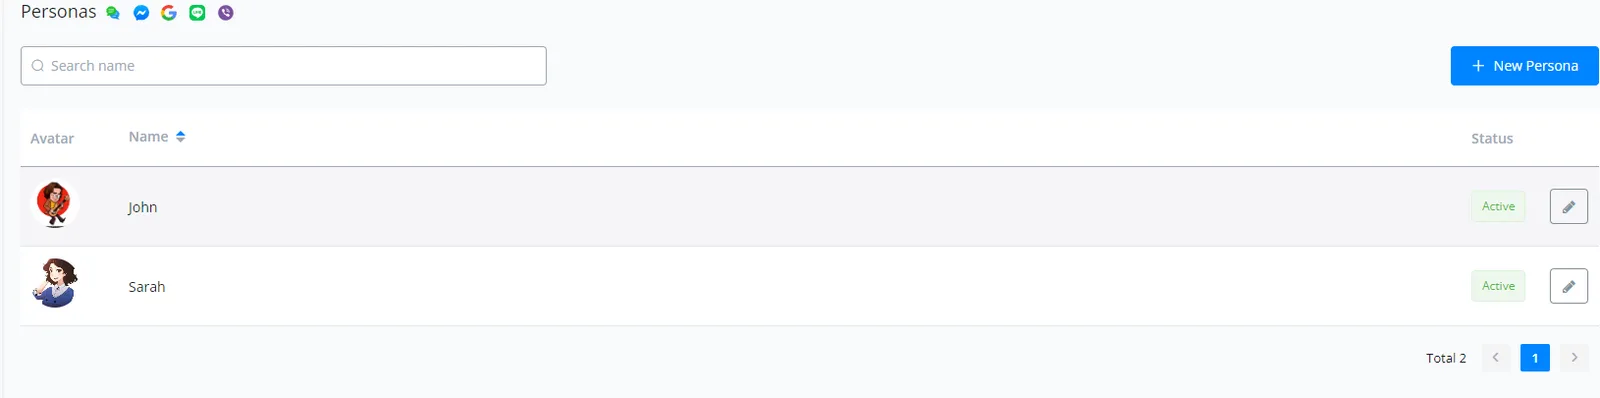
Setting a persona is basically letting your chatbot have different characters. Imagine talking to one person in the billing flow, another in sales and another in support. This allows much more personalization in your chatbot.
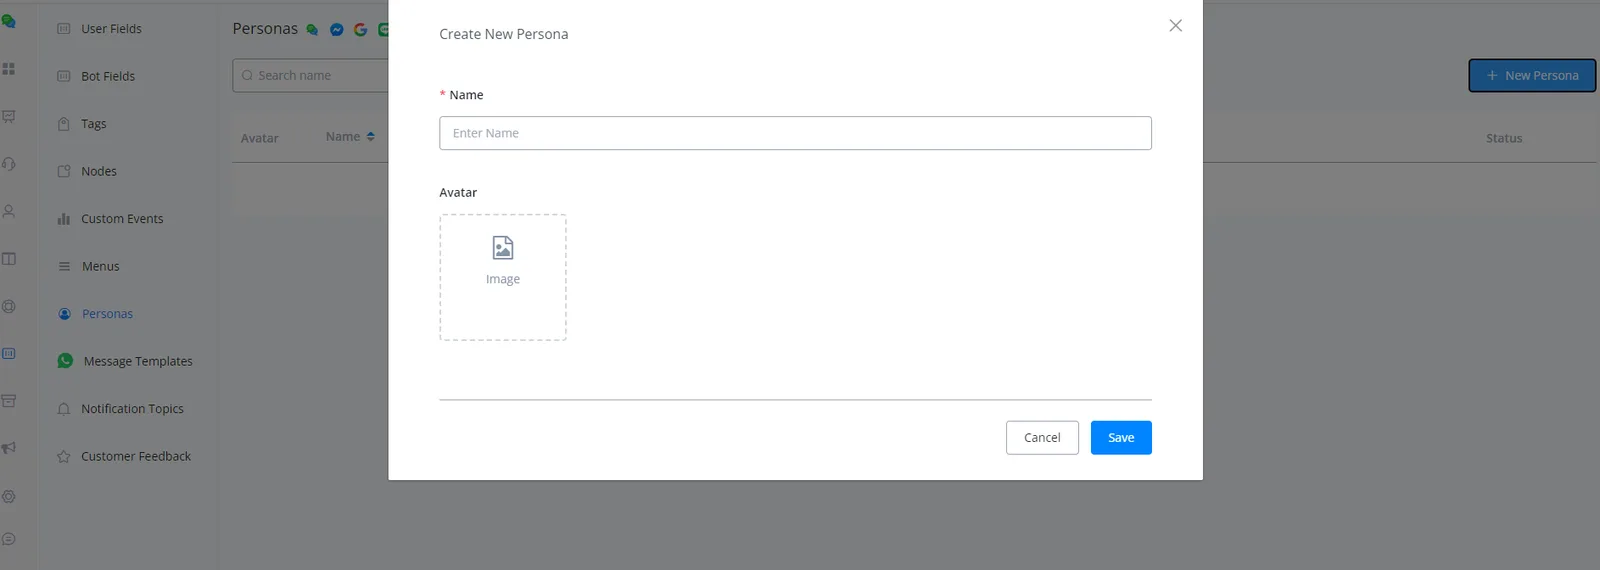
Go to Content > Personas > click “+New Persona” and enter a name and an avatar (optional).
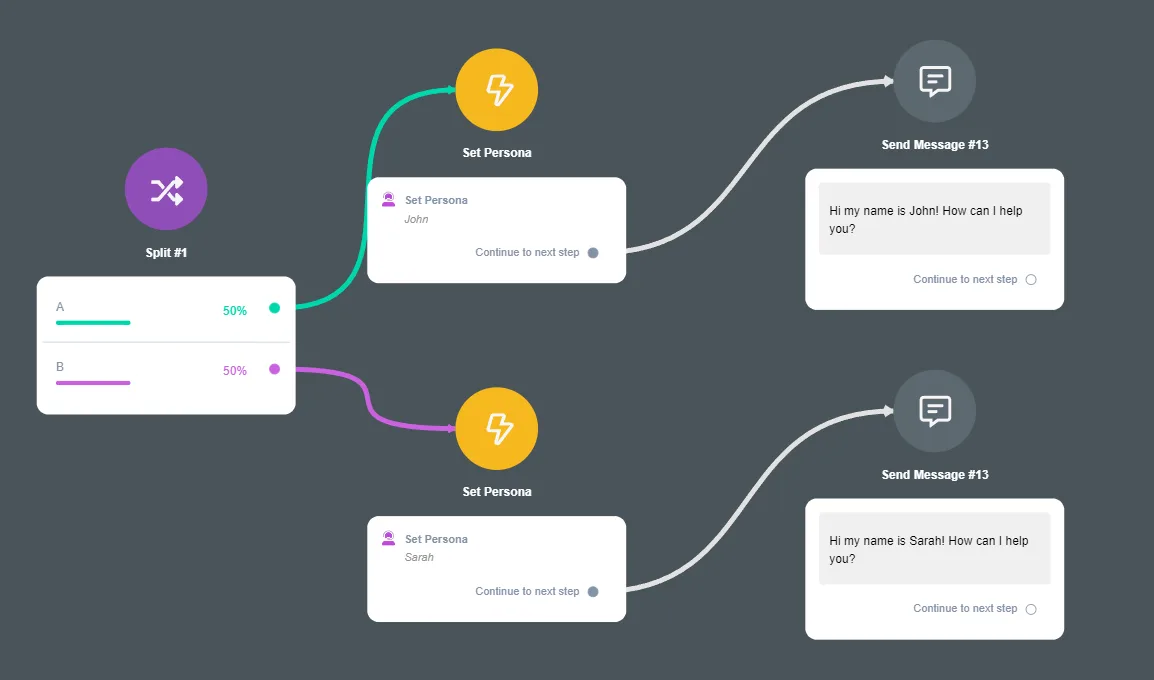
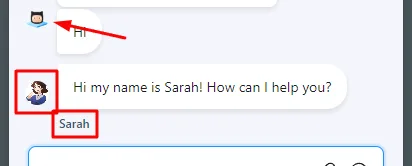
As you may have noticed, the avatar changed and the conversation is now led by the persona “Sarah”.
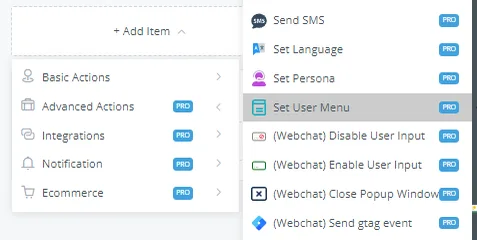
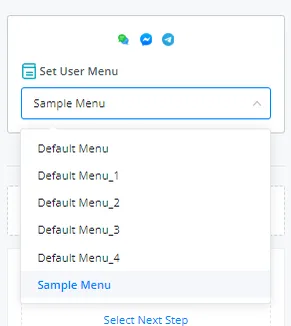
Setting the user menu is a good way to offer shortcuts in your chatbot. So instead of making the user go through every flow, we can use this function to send them straight to the flow they want.
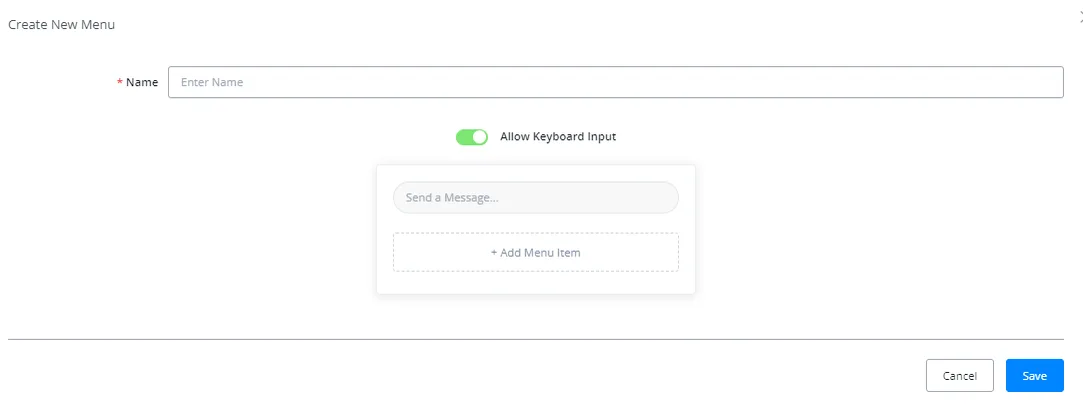
Go to Content >> Menus >> + New Menu

Create the name of your menu and click “+Add menu item”
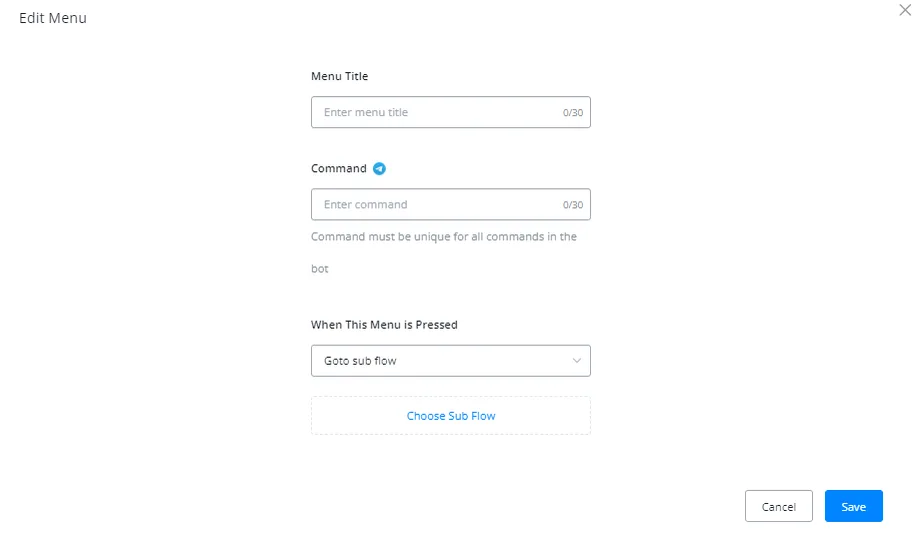
Add the Menu Title, choose a subflow and click Save. That is where your user will be sent when the menu is triggered.
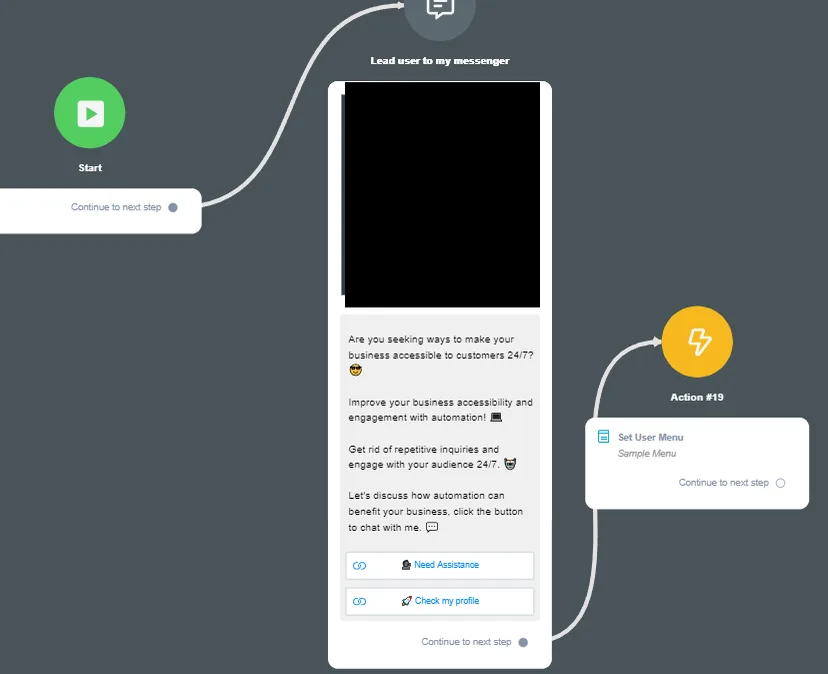
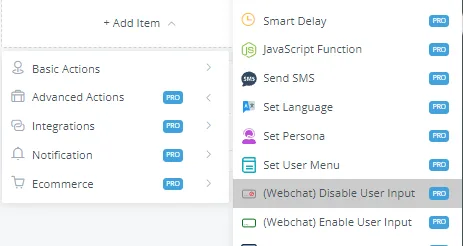
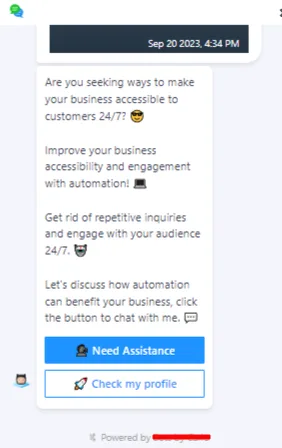
This is how the user input looks when disabled. The user will not be able to send any written message.
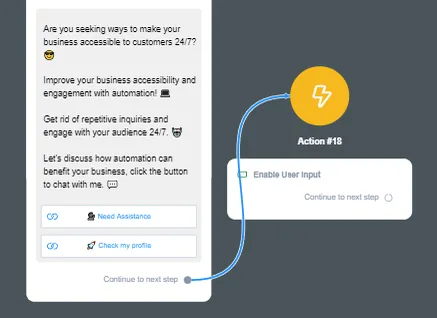
If you want to enable the user input again, just add the Enable User Input action.
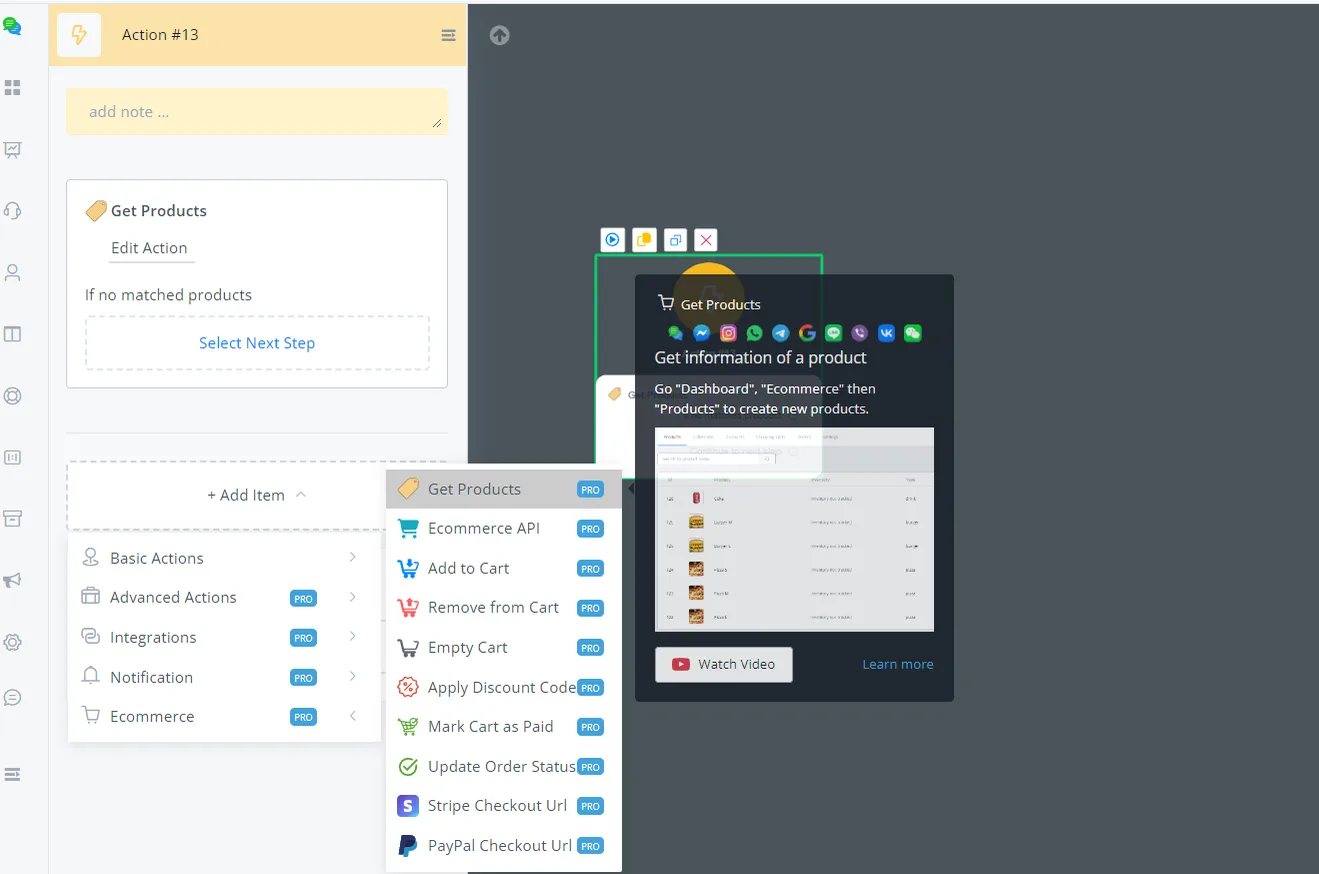
This action lets you get all the products and store them in JSON fields. It gives builders more flexibility to show products to their users than the “Product” option in the message step.
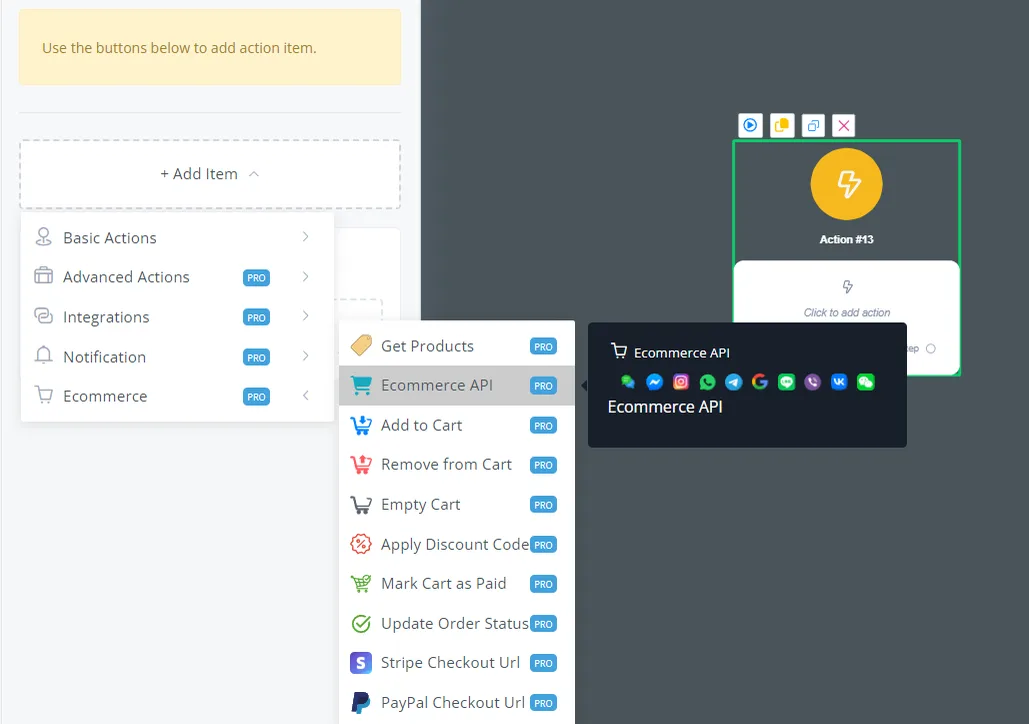
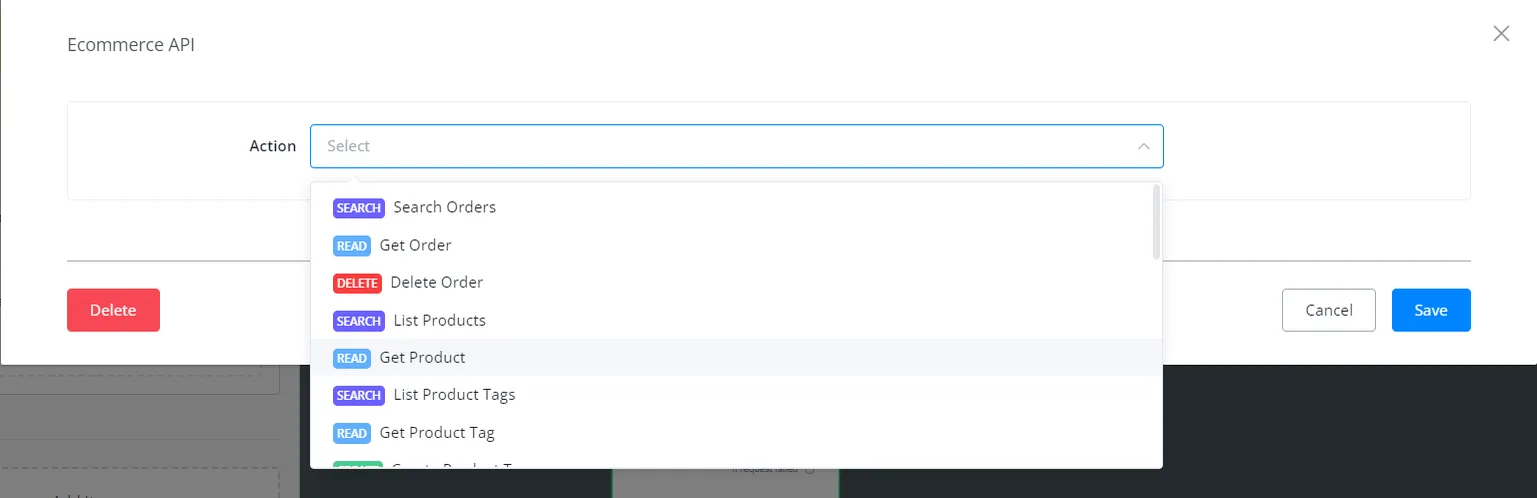
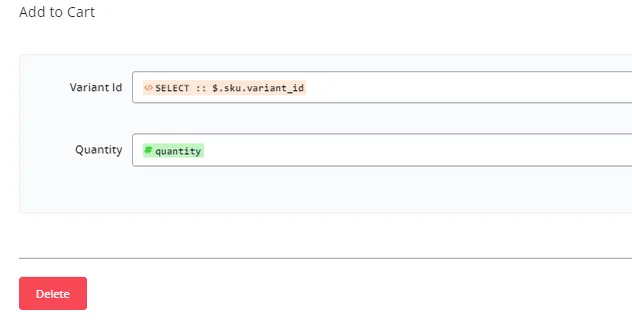
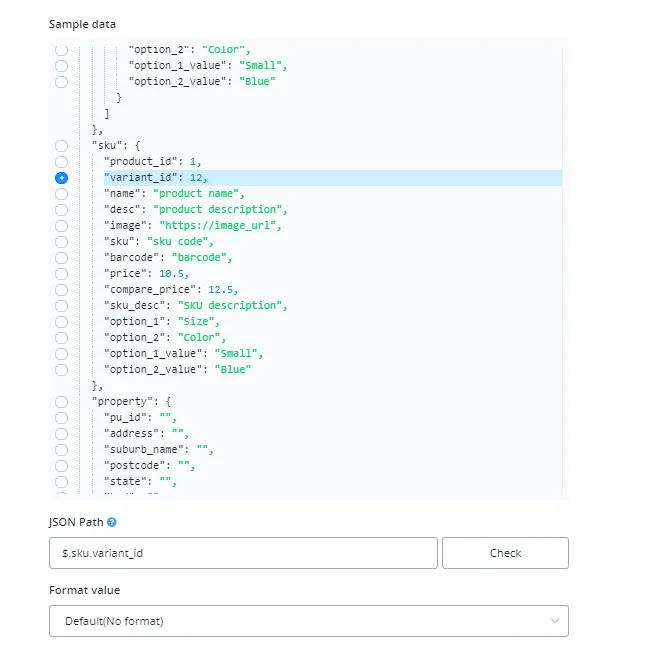
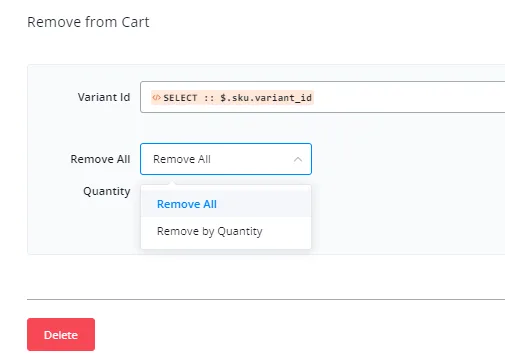
This action empties your cart immediately.
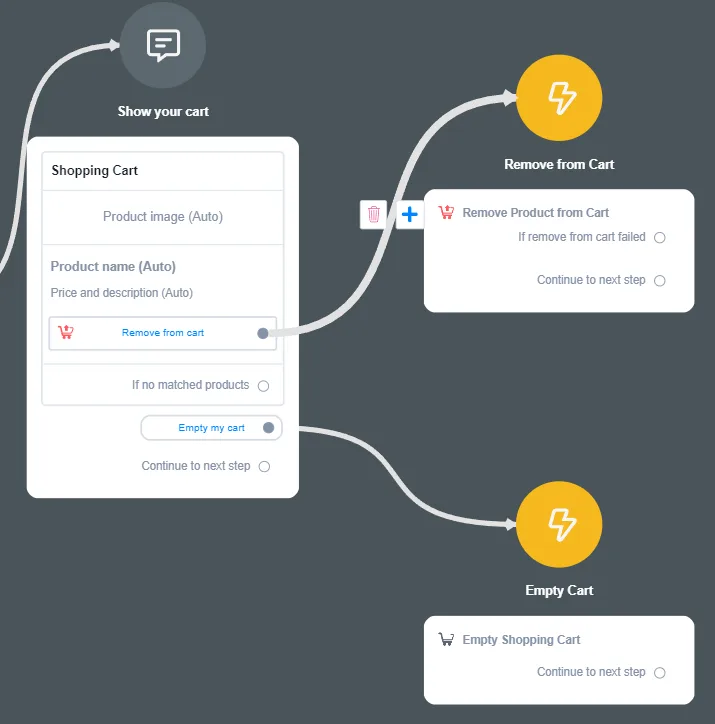
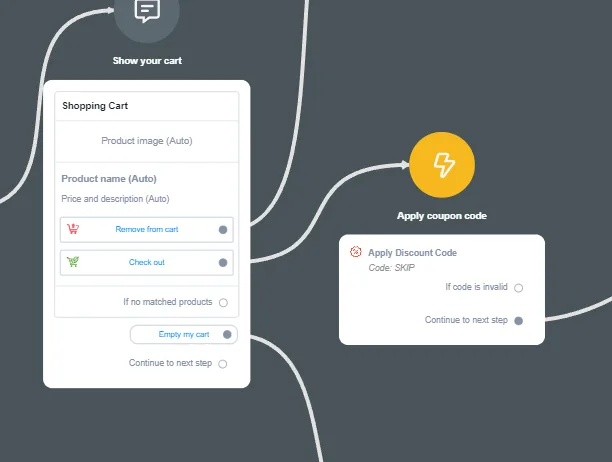
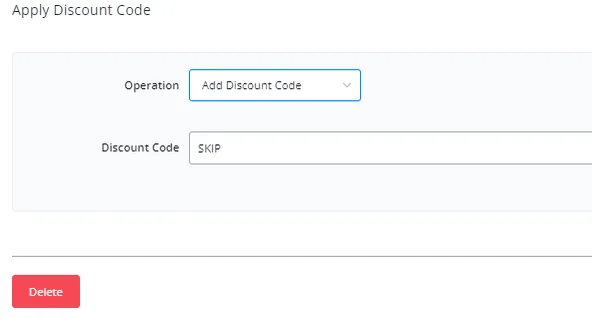
This action lets you apply a discount code to your cart.
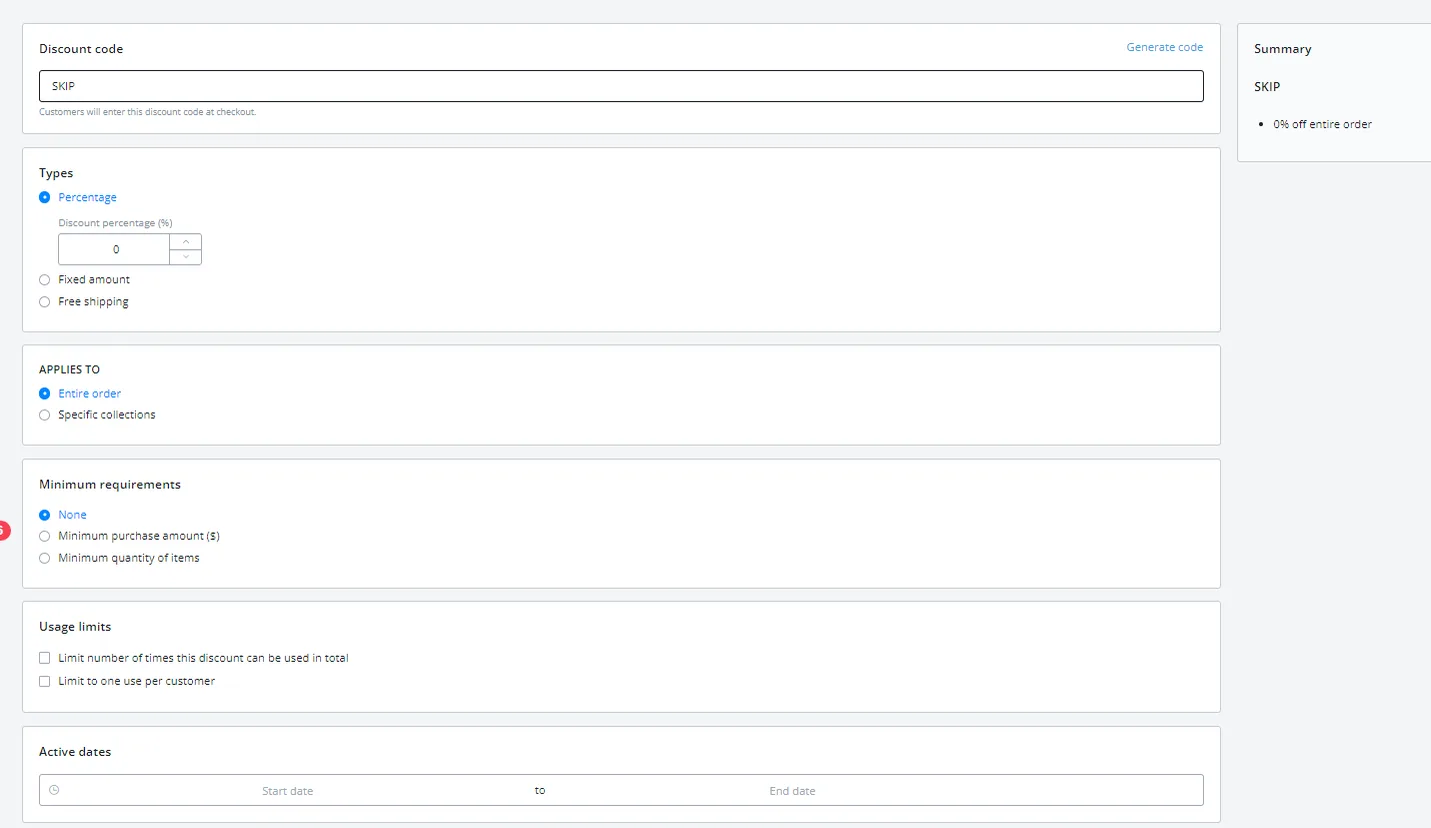
Go to the Ecommerce section and choose Discounts. Click Create Discount to create one.

This section lets you configure the coupon usage according to your preferences. You can choose between percentage, fixed amount and free shipping coupons. You can also limit the number of times the coupon is used or allow only one coupon per customer. Don't forget to save afterwards.
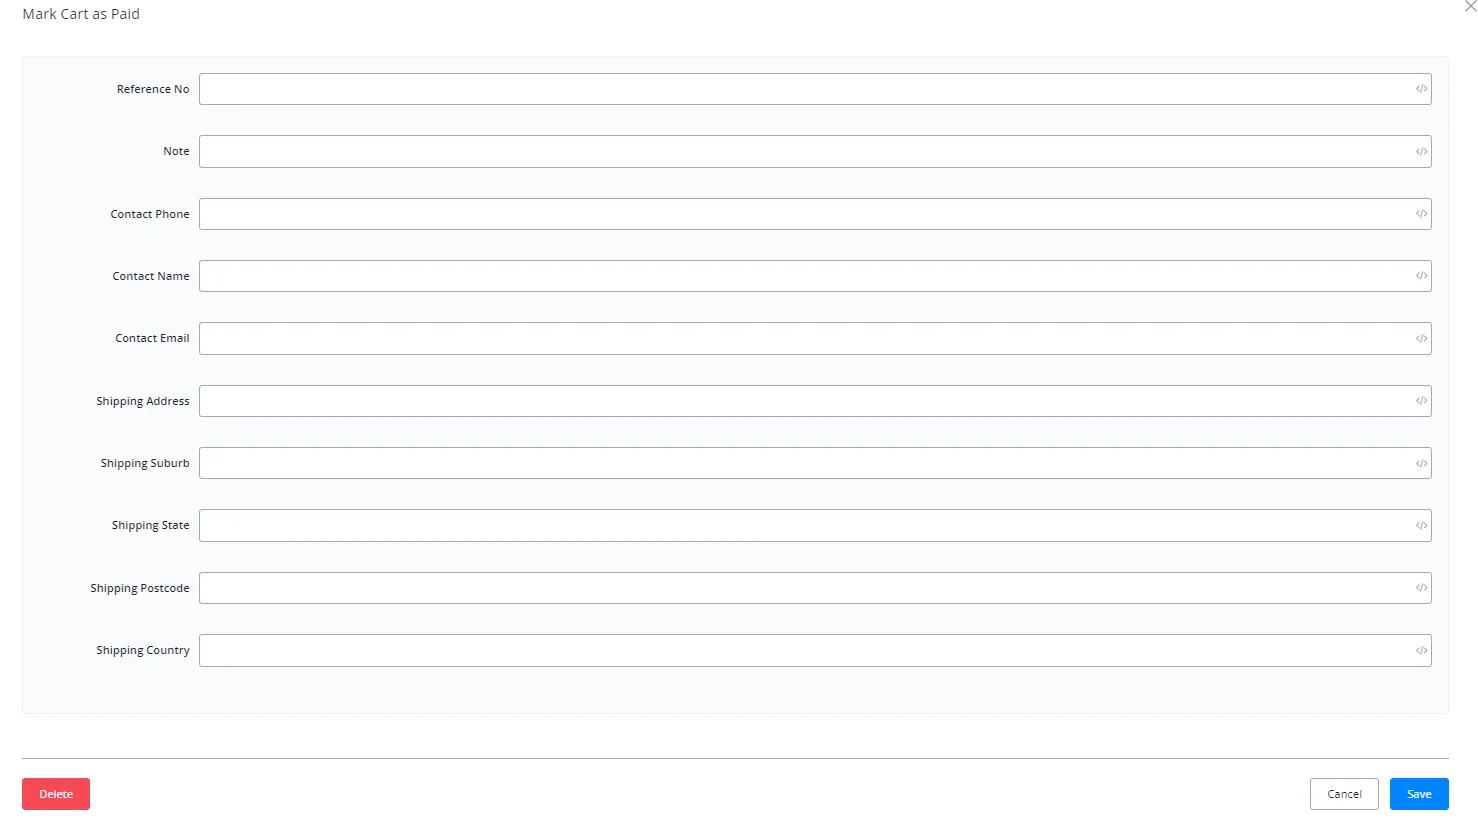
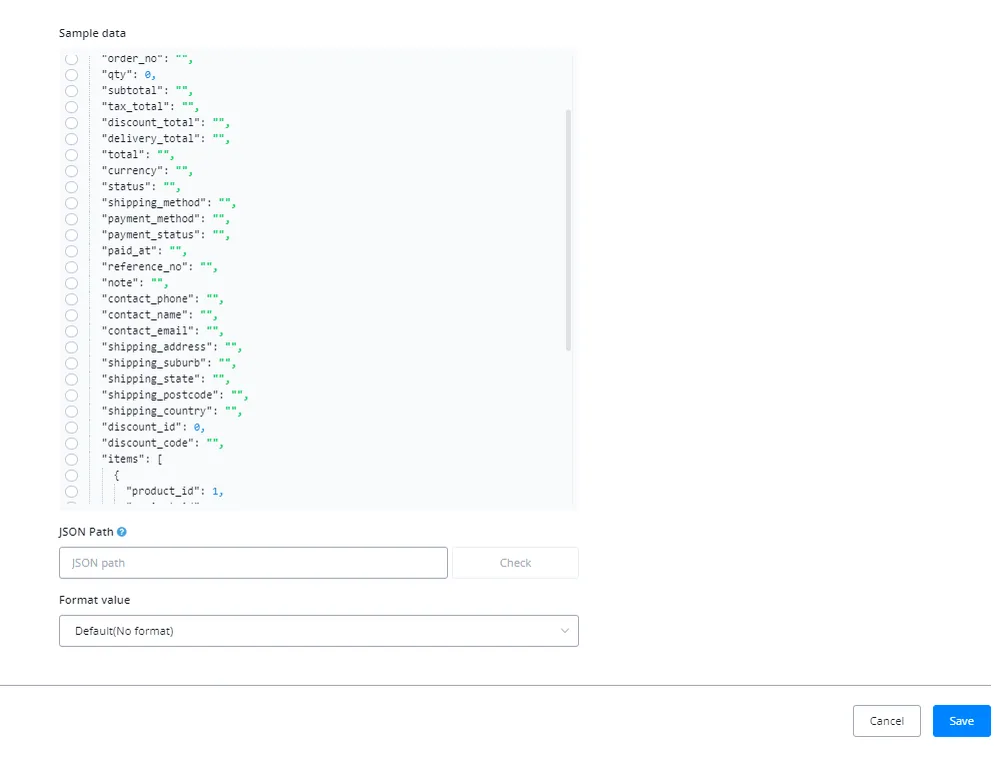
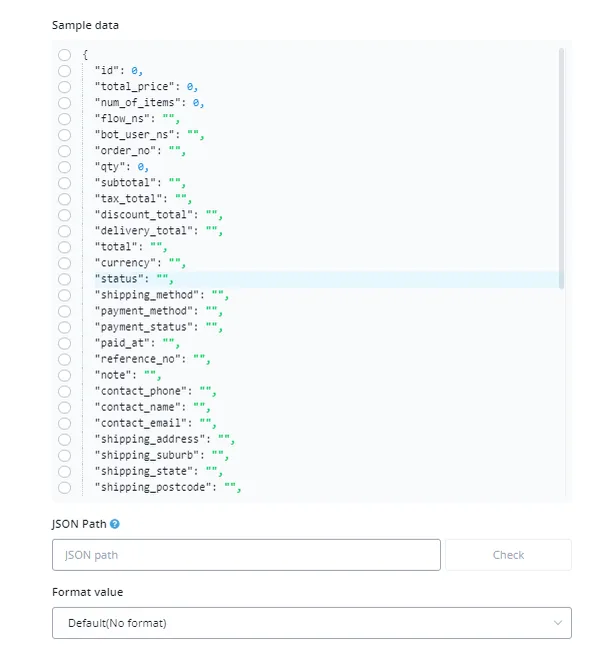
To find the information you need, you have to use the “Order” system field. Save the information in a custom field and map it into the fields of the “Mark Cart as Paid” action.
This action lets you update the status of an order. Here are the different updates you can make.
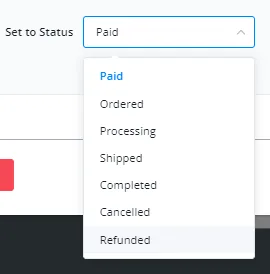
To do this, you will need to add the Order Id and set the Order Status.
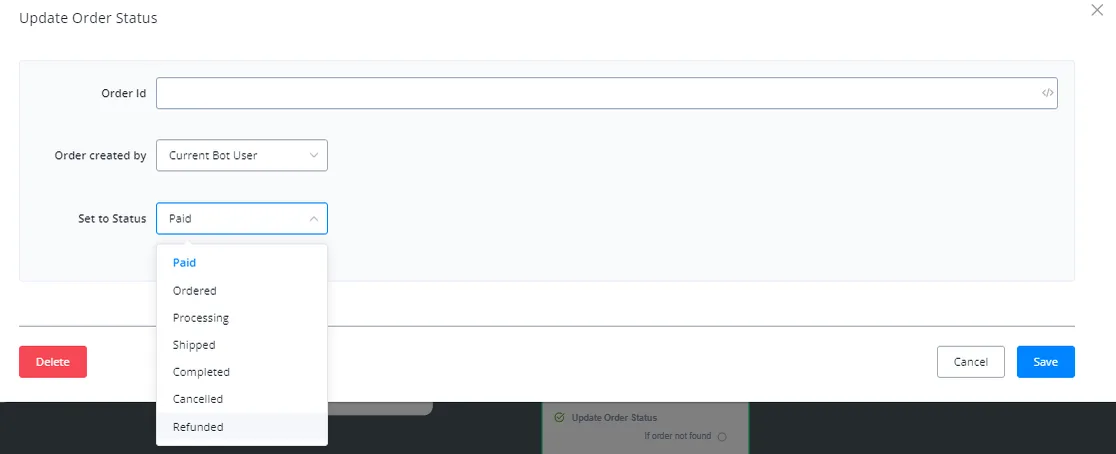
You can get the Order Id by typing in the “Order” system field. Save the Order Id in a custom field and map it to this action.
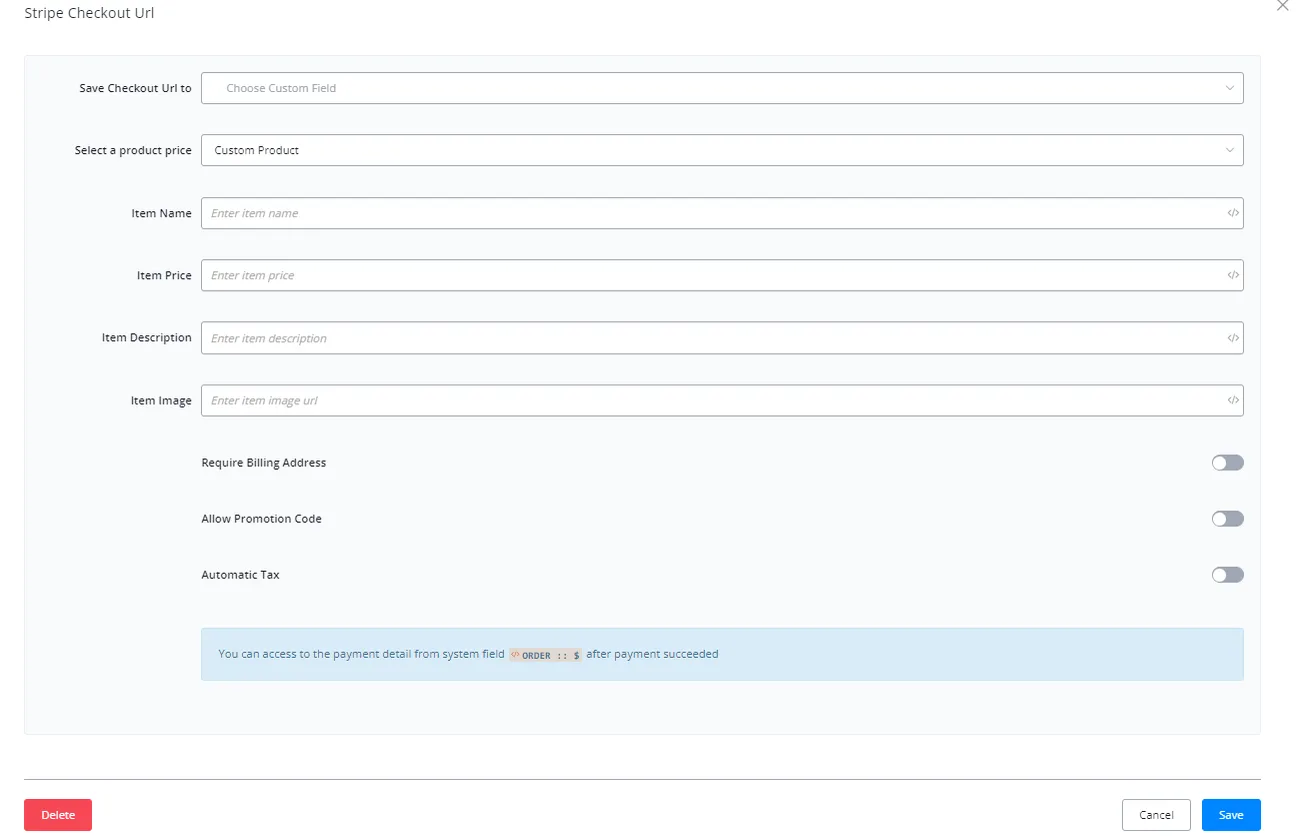
If you plan to use Stripe as your payment gateway, this action is the most suitable. It gives the user a checkout link that contains the payment invoice.
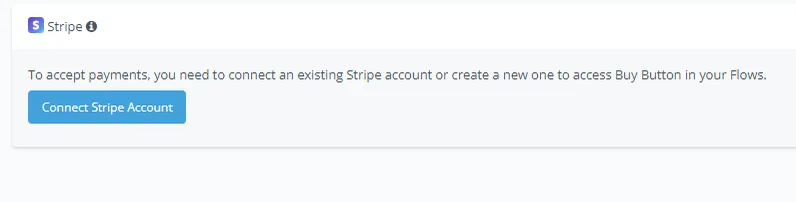
You will need to provide some information to get this checkout URL. You find it in the “Order” system field. Once you have it, set a custom field that will store the URL.
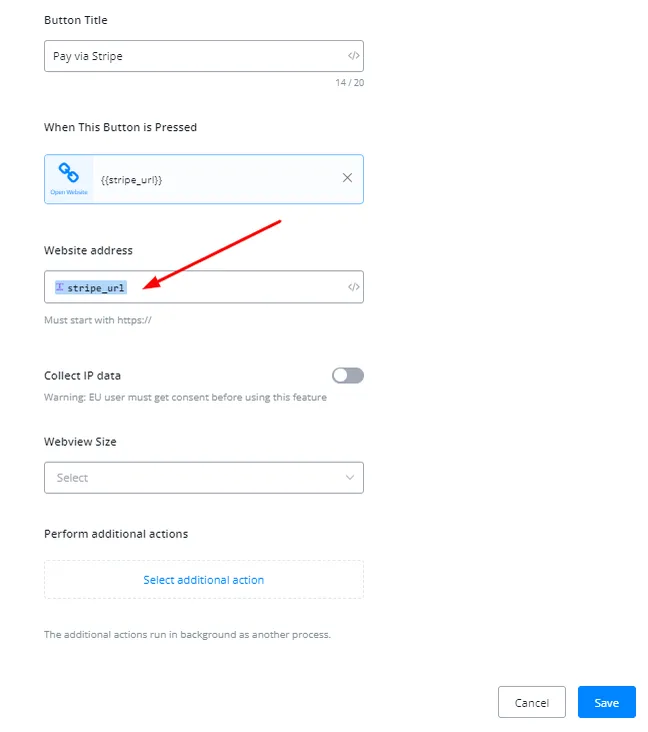
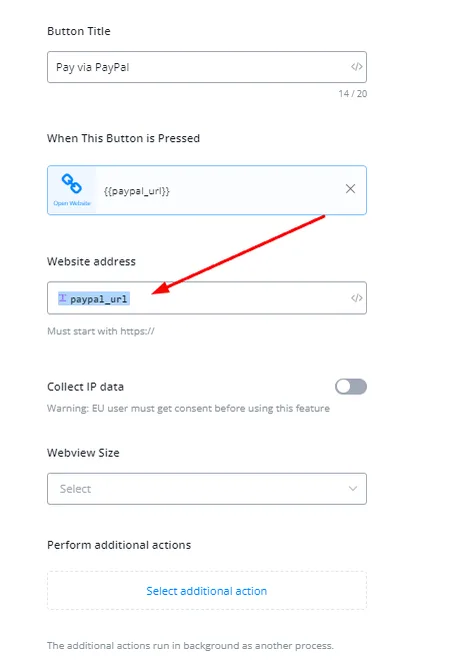
After that, attach the URL custom field to a button, so the link opens when the button is pressed.
If you plan to use PayPal as your payment gateway, this action is the most suitable. It gives the user a checkout link that contains the payment invoice. All you need is some information.
First, make sure you have correctly connected PayPal to your workspace.
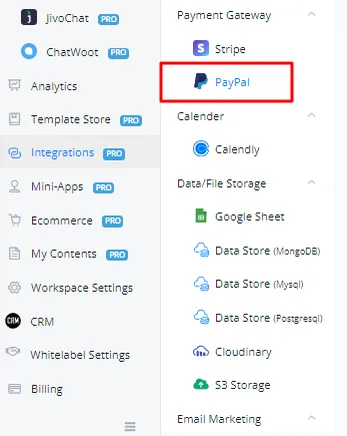
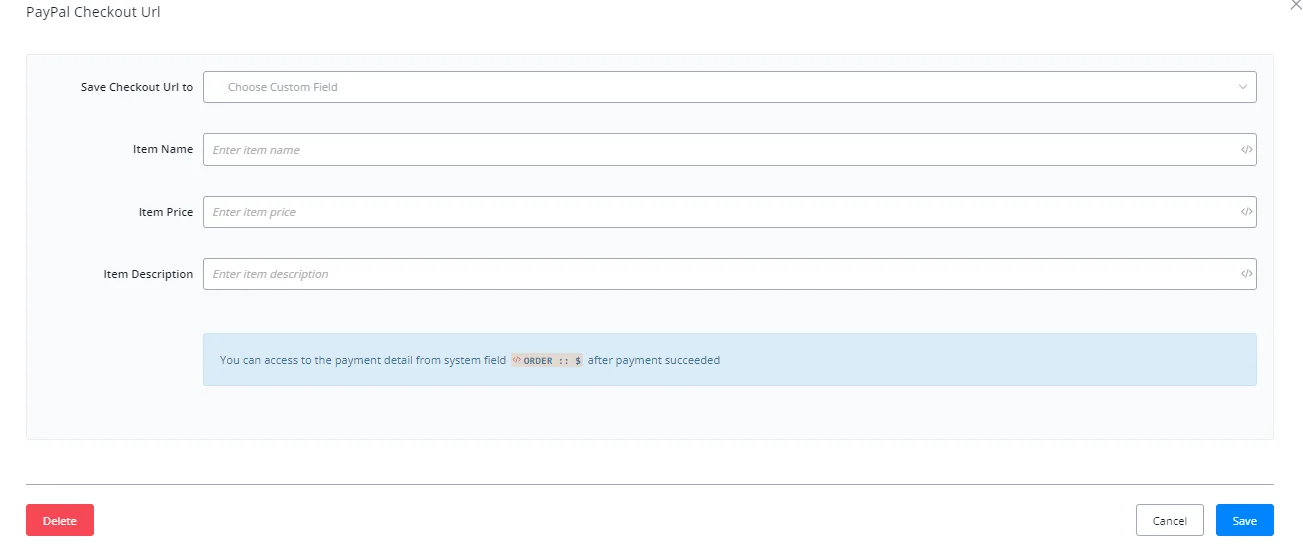
After connecting successfully, you can go back to the flow and add the “PayPal Checkout Url” action. At that point you will need to fill in some information.
In addition to the basic and advanced actions above, the NicoChat flow builder has a group of actions dedicated to Artificial Intelligence, which lets you delegate parts of the conversation (or the entire conversation) to an AI agent configured in the workspace.
Inserts into the conversation an AI Agent already configured in "AI Agents". From the point where this action runs, the AI Agent takes over the conversation — answering the user, querying the linked knowledge base and, if configured, running AI Tasks and Functions — until the conversation is closed, transferred to a human, or the agent itself hands control back to the flow.
Runs a specific AI Task (created in "AI Tasks"), without necessarily handing the whole conversation over to an agent. It is useful for one-off, objective actions inside the flow, such as summarizing a message, classifying a text, extracting a structured piece of data or generating a single answer based on a defined prompt — keeping the rest of the flow under the control of the traditional steps.
Uses AI to interpret the intent of the user's message and route the flow to the corresponding path, instead of relying only on fixed keywords. Each mapped intent can lead to a different node/subflow, and an "unrecognized" intent can fall into a fallback path (for example, transferring to a human agent or asking the question in a different way).
These three actions consume the AI provider configured in the workspace (see AI Hub Settings) and count toward the usage limits shown in AI Usage Analytics.