

External Request - API
With external requests, you can call APIs from third parties or from your own server to request data, submit data and so on.
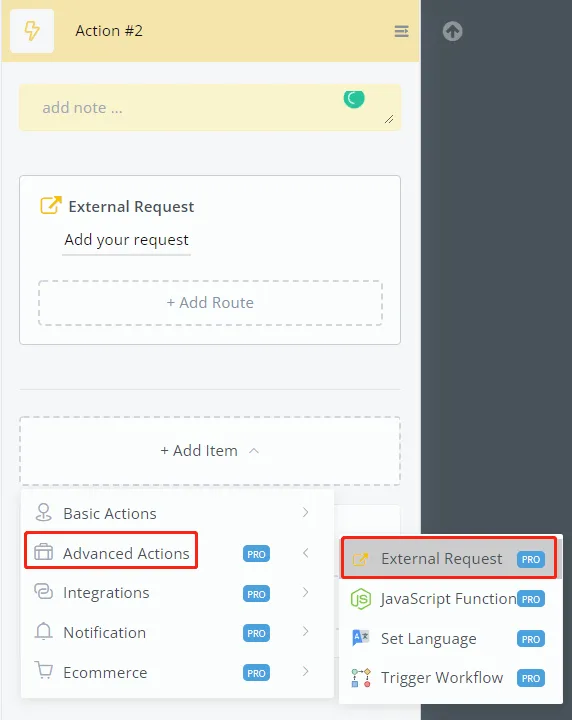
In an Action step, find "External Request" under "Advanced Actions" and click "Edit External Request" to start editing it:
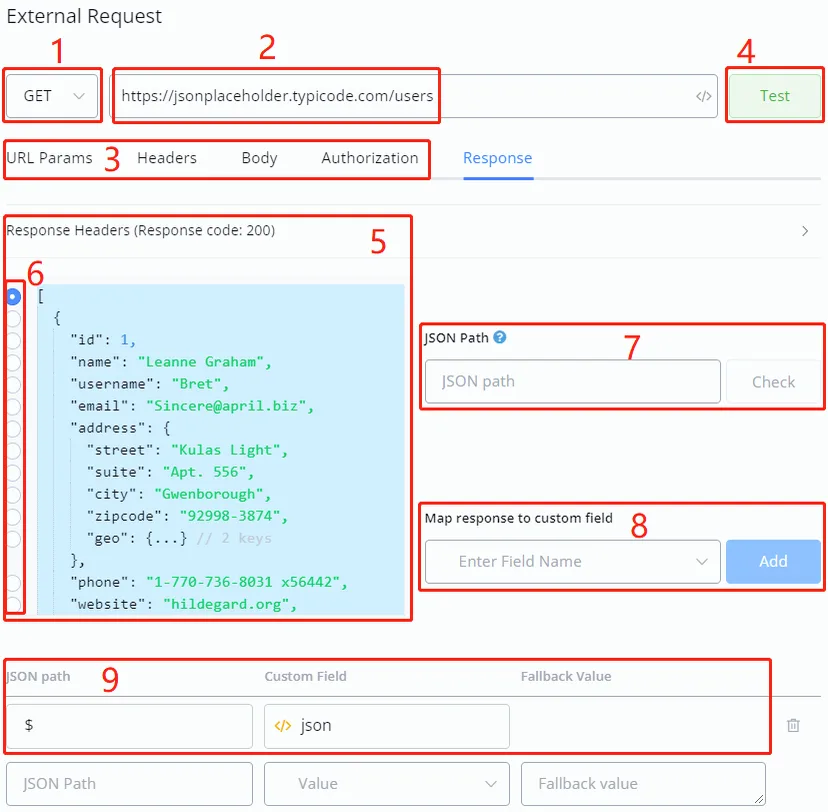
- choose a request type such as GET, POST, etc.
- paste the URL/endpoint of your request
- adjust the "URL Params", "Headers", "Body" or "Authorization" section if needed — for example, to set up an API key
- click "Test" and area 5 will show in the "Response" section with a response code
- click "Response Headers" to expand the header and see more details; the received data appears in blue
- choose which part of the data you need by clicking the corresponding circle on the left-hand side
- after clicking area 6, the JSON path for the selected data is automatically shown here. $ means the whole JSON.
- choose which custom field to store the data in. You can create a new field here: type a field name and click it in the drop-down. Click the "Add" button to add it to the mapping list
- finally, the mapping is shown in area 9. Add as many mappings as needed and click "Save".
If the API you are going to call already has a ready-made cURL command — in the service documentation, in Postman or copied from the browser —, you can fill in the whole request at once instead of typing the method, URL, headers and body field by field.
curl. It can span several lines, with the line breaks and backslashes exactly as you copied them.Bearer and the Basic Auth for you.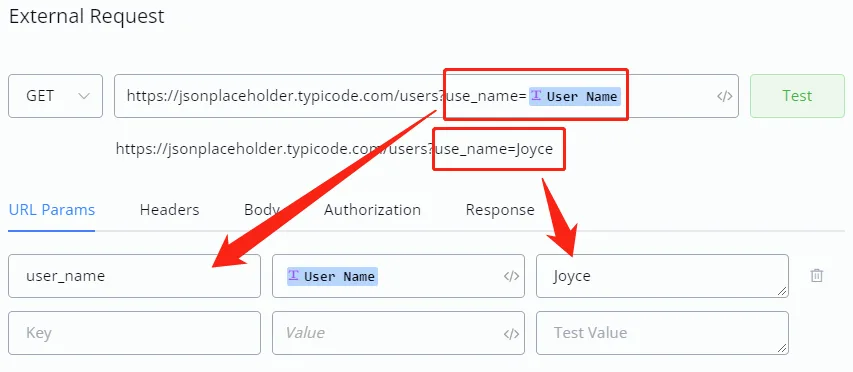
In the screenshot above, we can see that there is a URL parameter in the endpoint called “user_name”. Remember to copy the endpoint down and provide a test value.
Alternatively, you can use the URL Params sections for the same result.
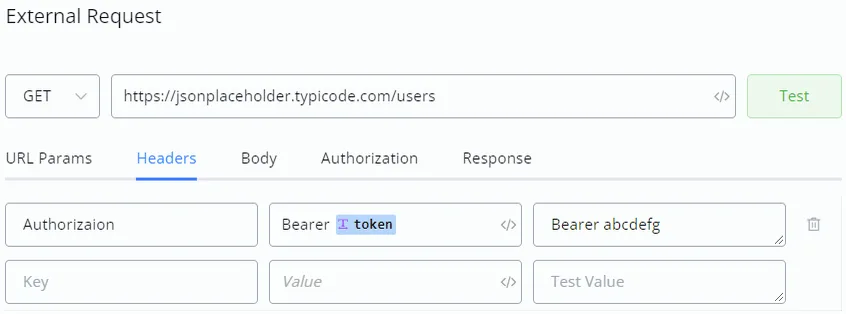
Just like in URL Params, put the key name first, then insert the variable and provide a test value.
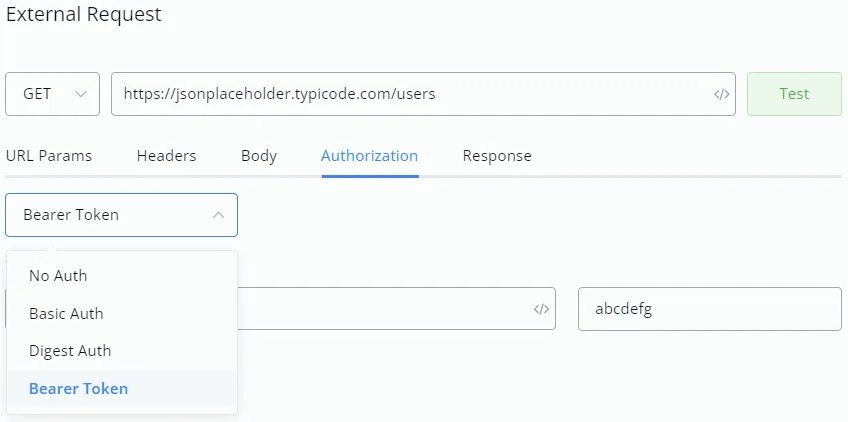
Alternatively, put the token in the Authorization section. It is less error-prone (sometimes people simply forget the “Bearer ” in front of the token).
Moreover, for Basic Auth, simply put your username and password value and the system will do the base64 encoding for you.
To include a file in the parameters, use multipart/form-data:
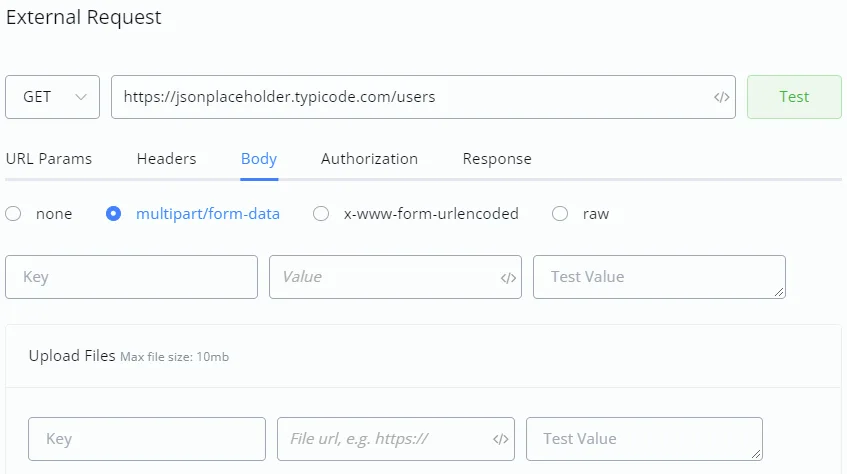
x-www-for-urlencoded works exactly like the URL Params or Headers section.
Instead of listing all the payloads in x-www-form-urlencoded, you can also paste the example payload in raw JSON:
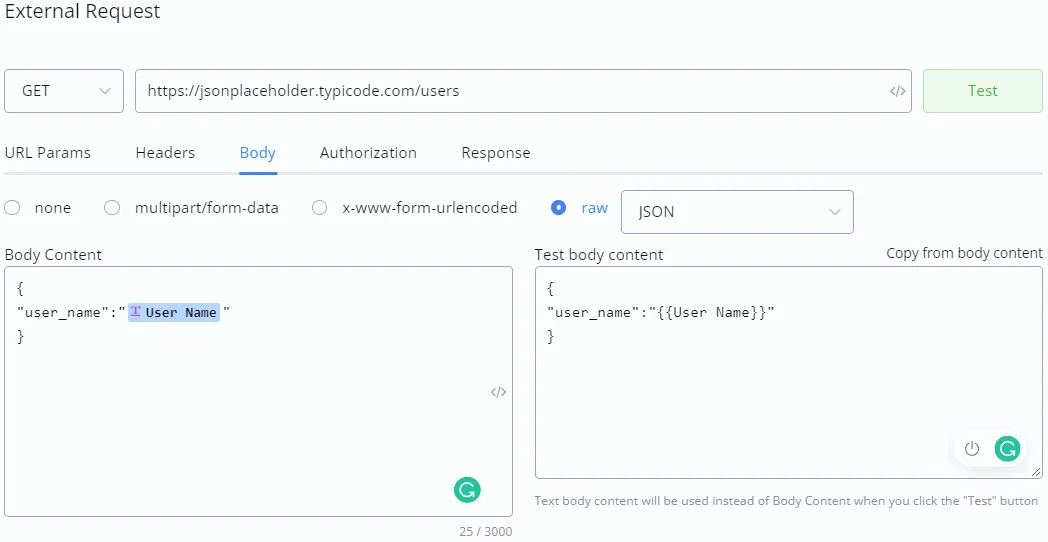
On the left-hand side, under Body Content, paste or write your JSON first; when you insert a variable, the test body content appears immediately on the right-hand side. It is used to specify a test JSON value.
Click Copy from body content to copy the whole JSON structure. All the variables will be replaced by {{ variable_name}}. Remove the placeholder and put your test values.
Once you are ready, click the Test button next to the URL endpoint or in the Response section.
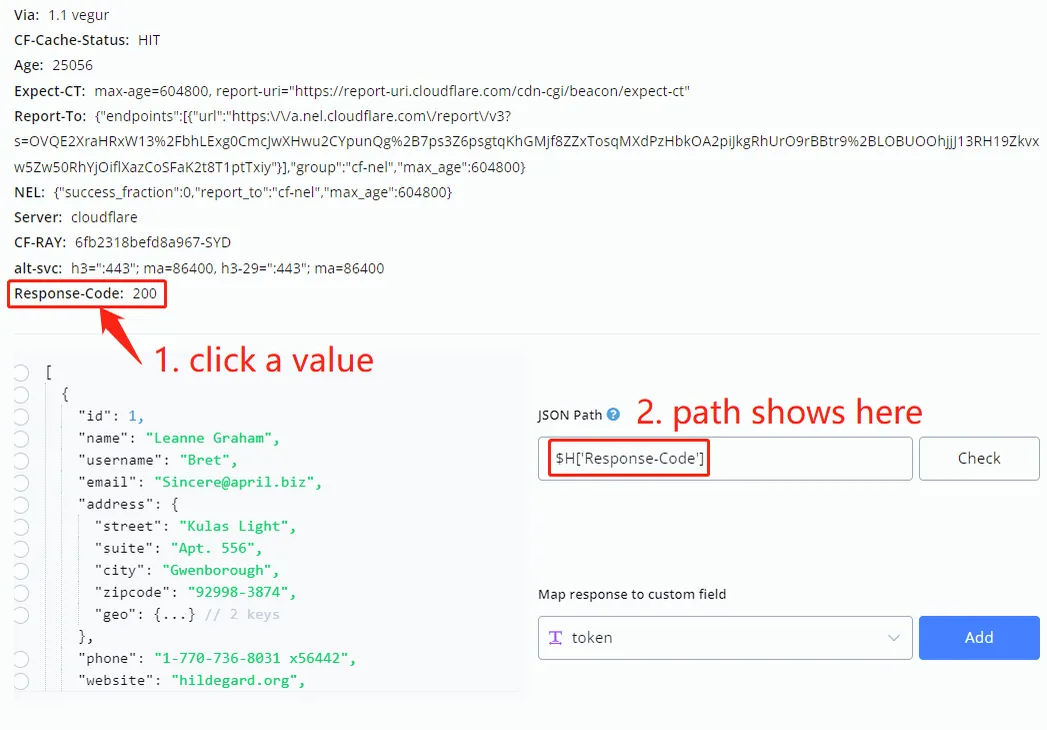
Besides the tips about how to map data above, you can also save the response header values for later use. Simply expand the header and click a value: the corresponding JSON path appears there automatically.
Not every API answers in the format you need. When the JSON path is not enough — the list has to be filtered, the values added up, the date reformatted, the text split into pieces —, pre-processing solves it: a snippet of JavaScript that runs on the server after the response arrives and before the mapping writes the variables. The mapping then sees what your code returned, not what the API sent.
Turn pre-processing on in the Response section and write the code in the box that appears. Three rules make all the difference:
- The response arrives in the
payloadvariable, ready to use — noJSON.parseneeded. - Write only the body of the code: no
functionaround it, and do not declarepayloadagain. - The
returnis what counts. Whatever you return becomes the root of the mapping: return{ total: 3 }and the path is$.total.
// a API devolve { data: [ {nome, status, valor}, ... ] }
const ativos = payload.data.filter(function (i) { return i.status === 'ativo'; });

return {
  quantidade: ativos.length,
  total: ativos.reduce(function (s, i) { return s + i.valor; }, 0),
  primeiro: ativos.length ? ativos[0].nome : ''
};
With that return, the mapping writes $.quantidade, $.total and $.primeiro into the custom fields — three ready-made variables instead of a raw list the flow would have to deal with later.
It is the same engine in two places, and the difference is in what goes in and what comes out:
payload variable