

Chat assigned to an agent (Trigger)
Introduction: we will demonstrate how to trigger automation when a live chat agent is assigned to a Contact. This can be done within a flow or in the live chat interface
Introduction:
we will demonstrate how to trigger automation when a live chat agent is assigned to a Contact. This can be done within a flow or in the live chat interface.
Use case to explain the scenario:
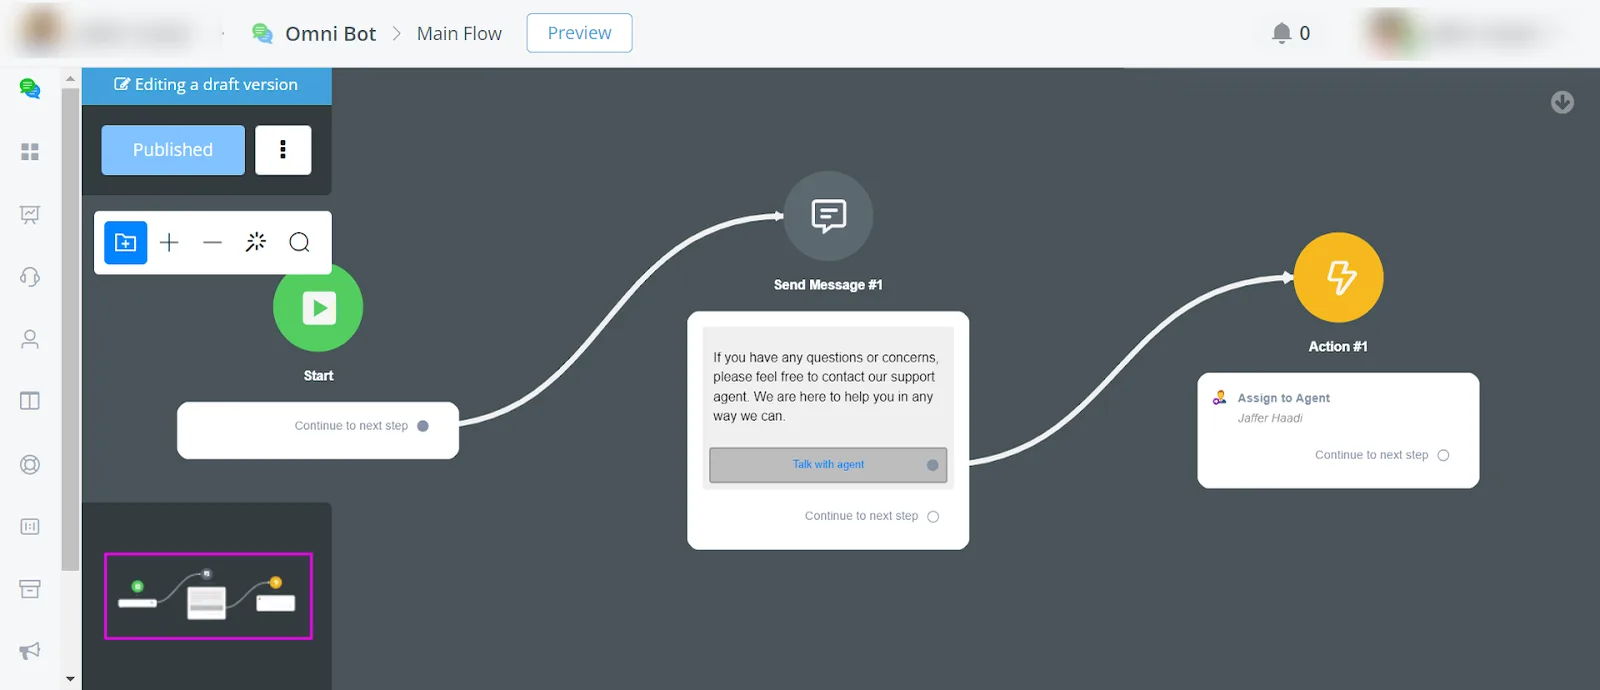
Automations > Triggers. Create a new trigger by selecting Chat assigned to an agent. Enable the trigger and save. The new trigger appears at the bottom of the list.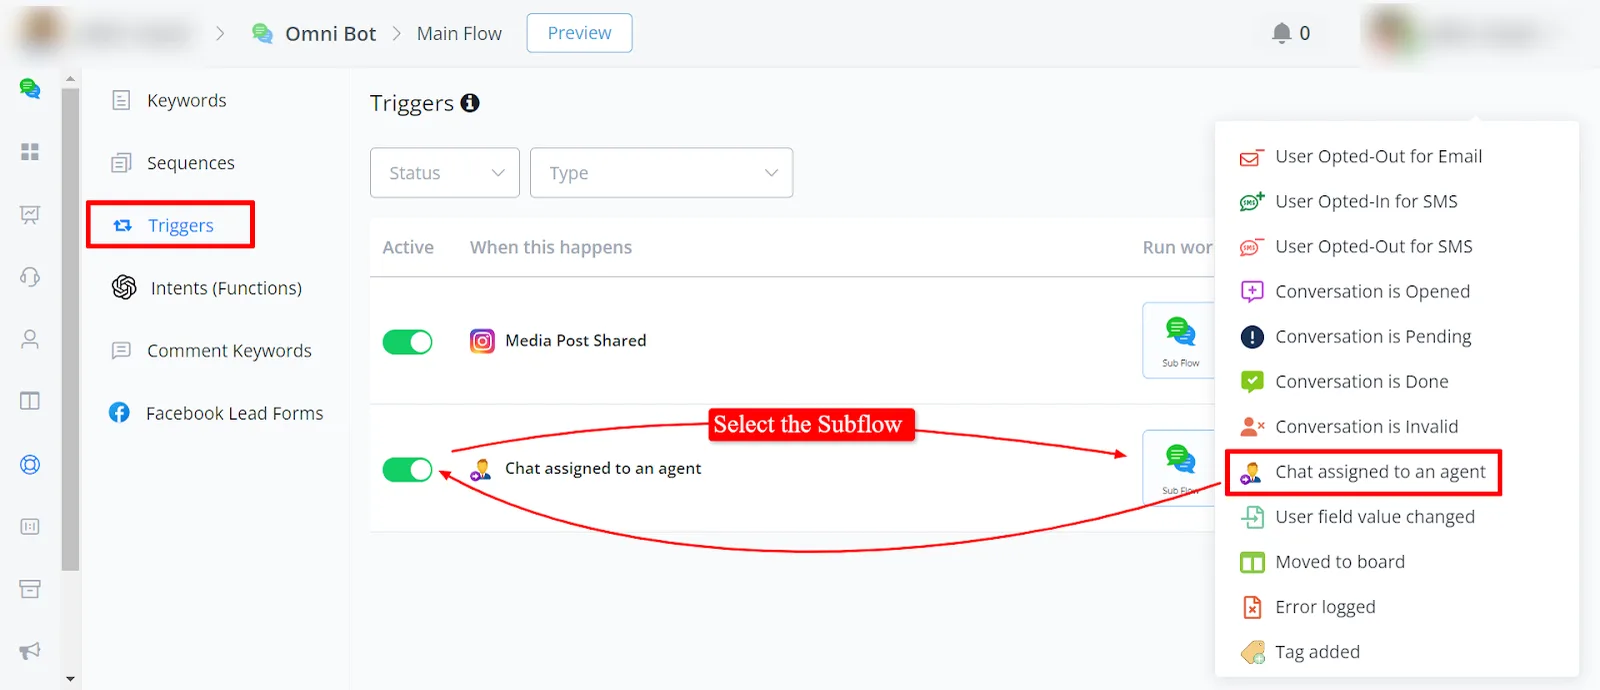
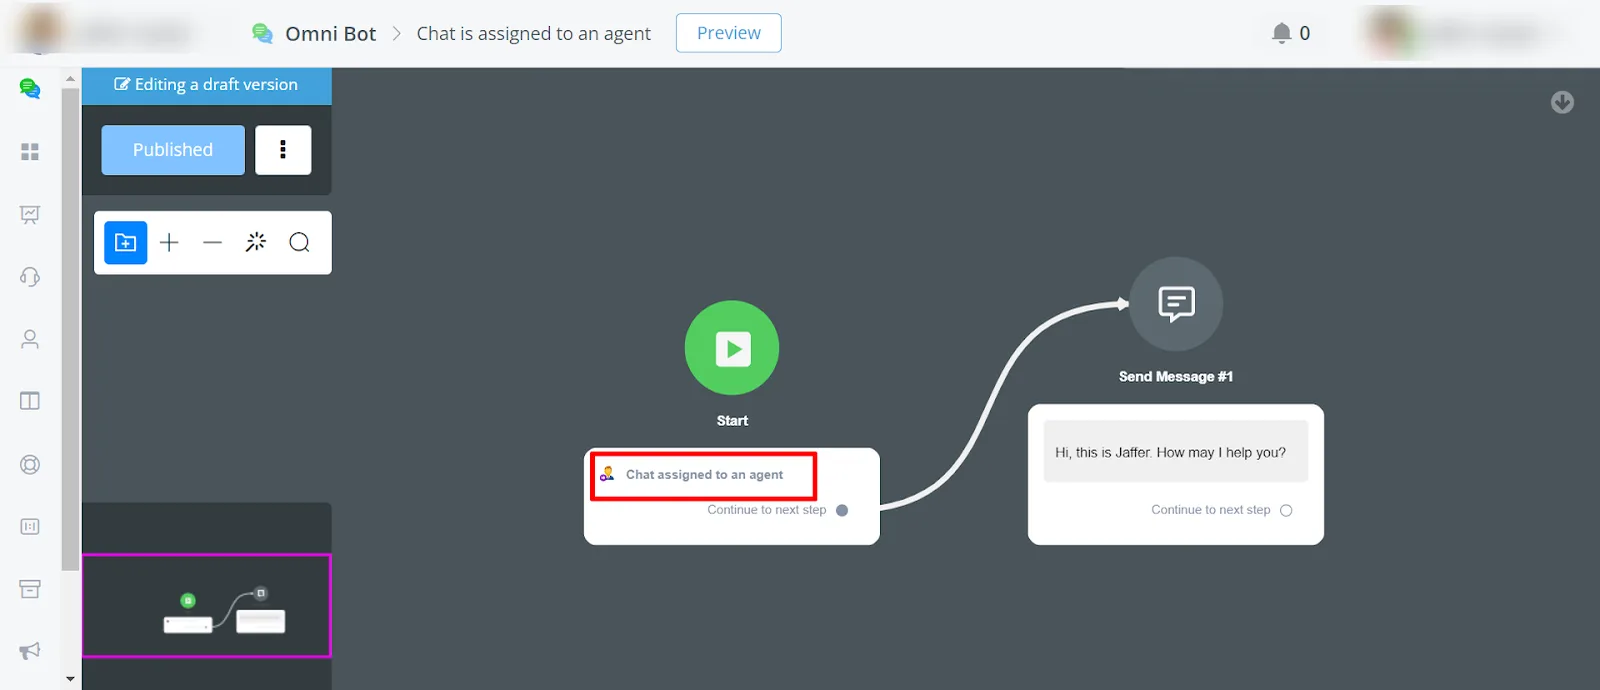
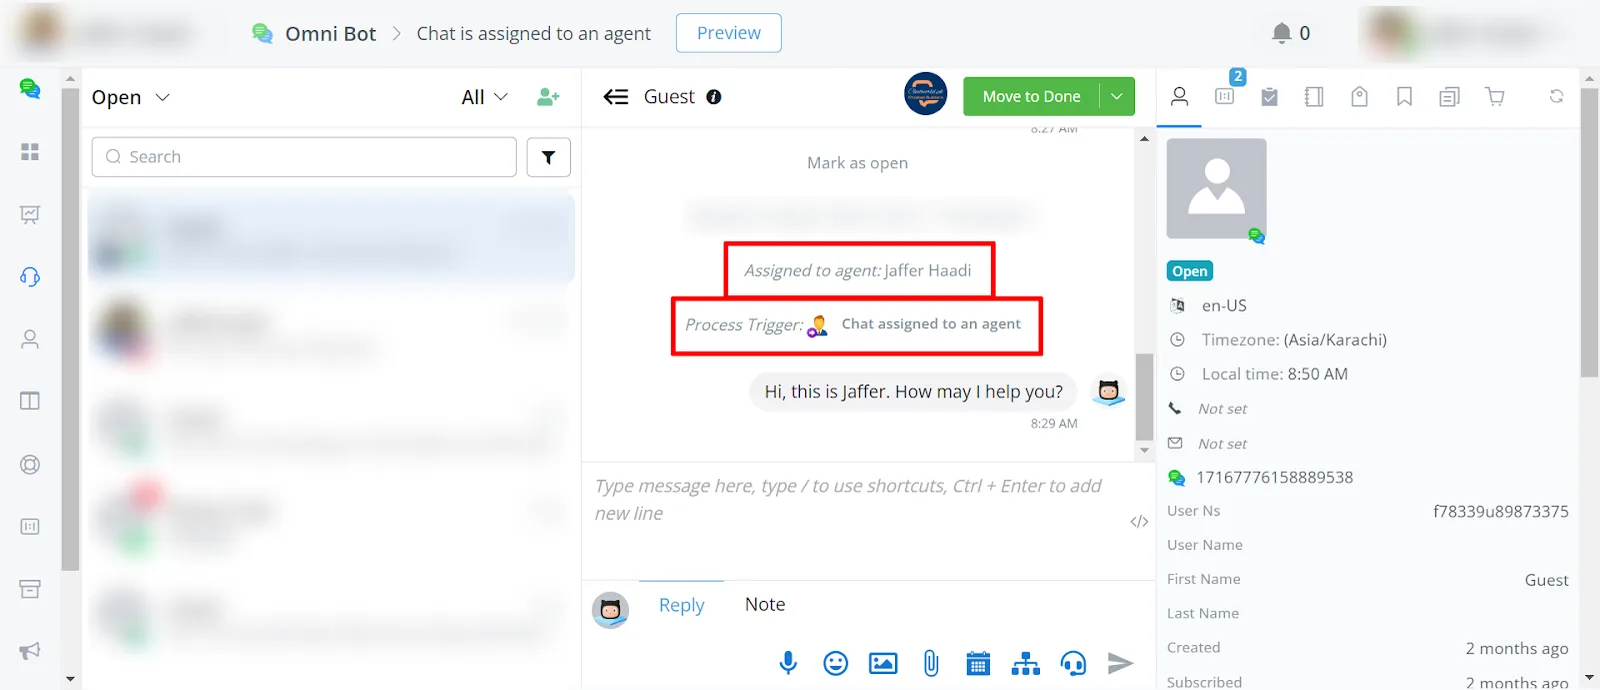
This section explains how to assign a live chat agent to a Contact through the Live Chat Interface or through Bulk Action, in the Bot Users section. These steps give you more control over agent assignment.
- Navigate to Live Chat in the main menu.
- Select the conversation with the Contact you want to assign.
- In the conversation panel on the right, locate the Assign to Agent option.
- Choose an agent from the dropdown menu to complete the assignment.
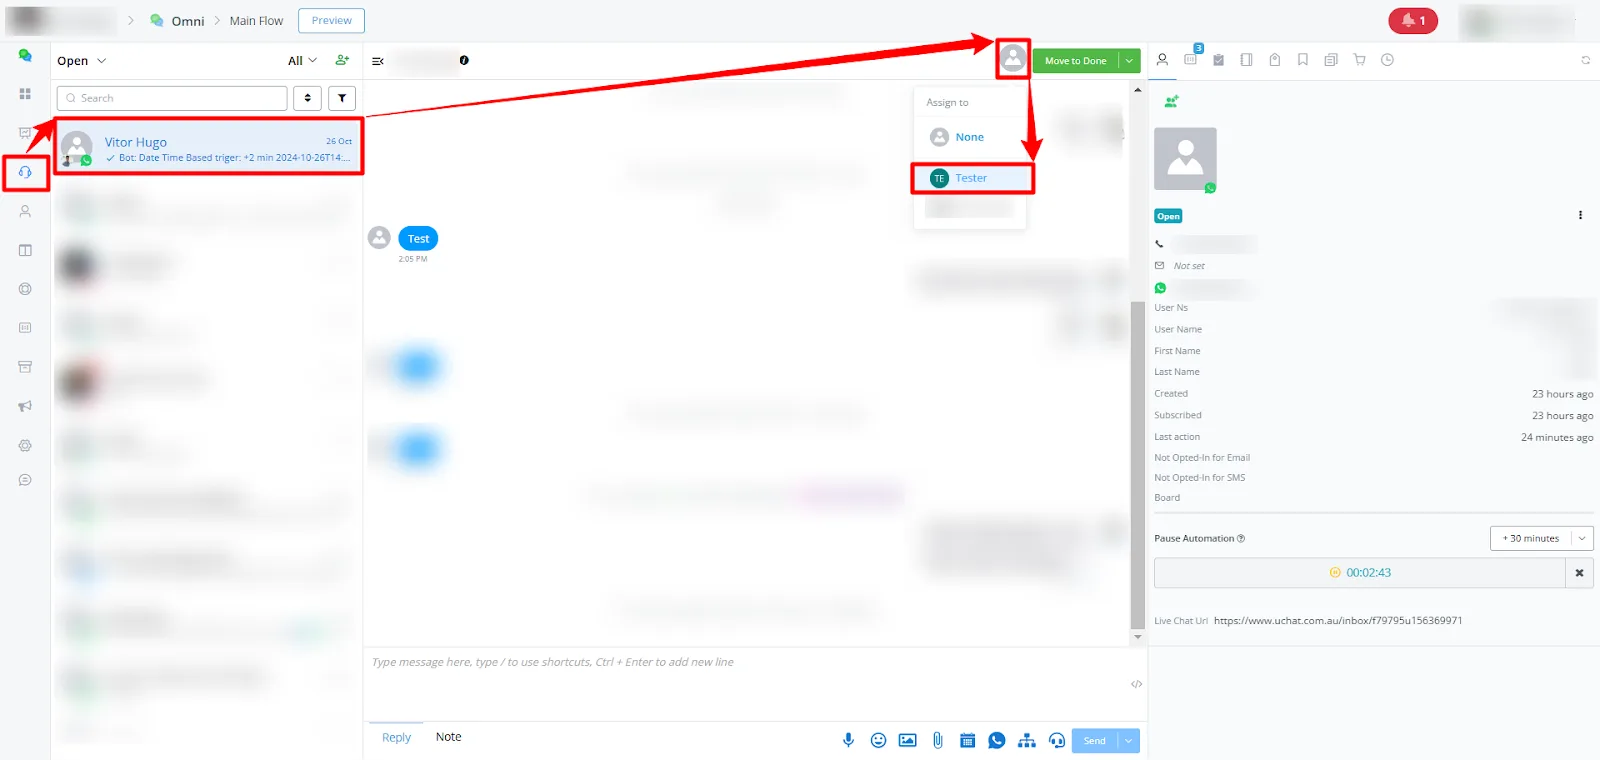
This method allows quick, real-time agent assignment directly in the live chat conversation view.
- Go to Bot -> Bot Users.
- Select multiple users by checking the boxes next to their names.
- Click Bulk Action in the top-right corner.
- Select Assign to Agent from the dropdown menu.
- In the pop-up window, select the agent you want to assign to these users and confirm.
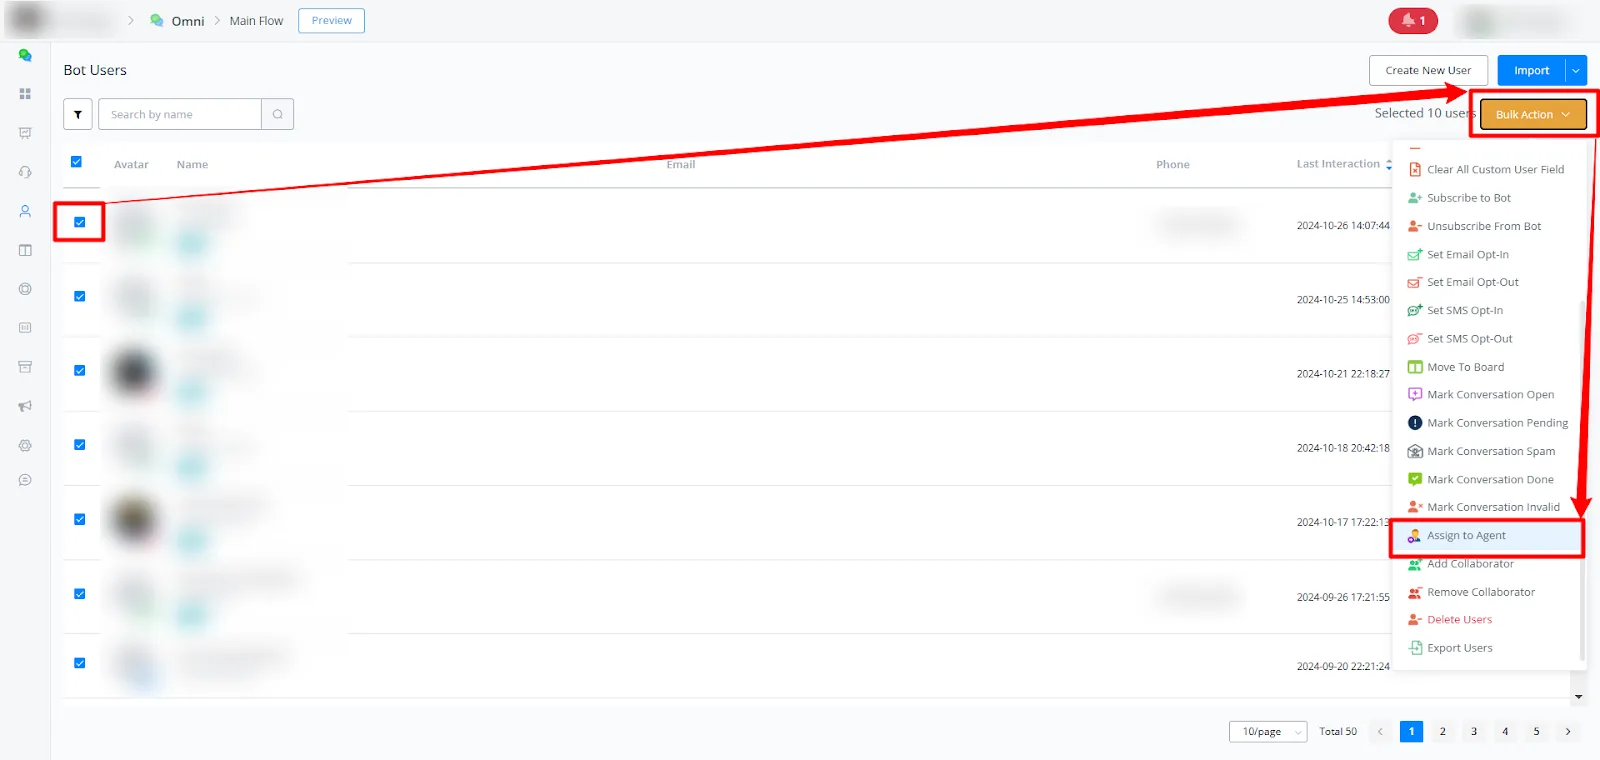
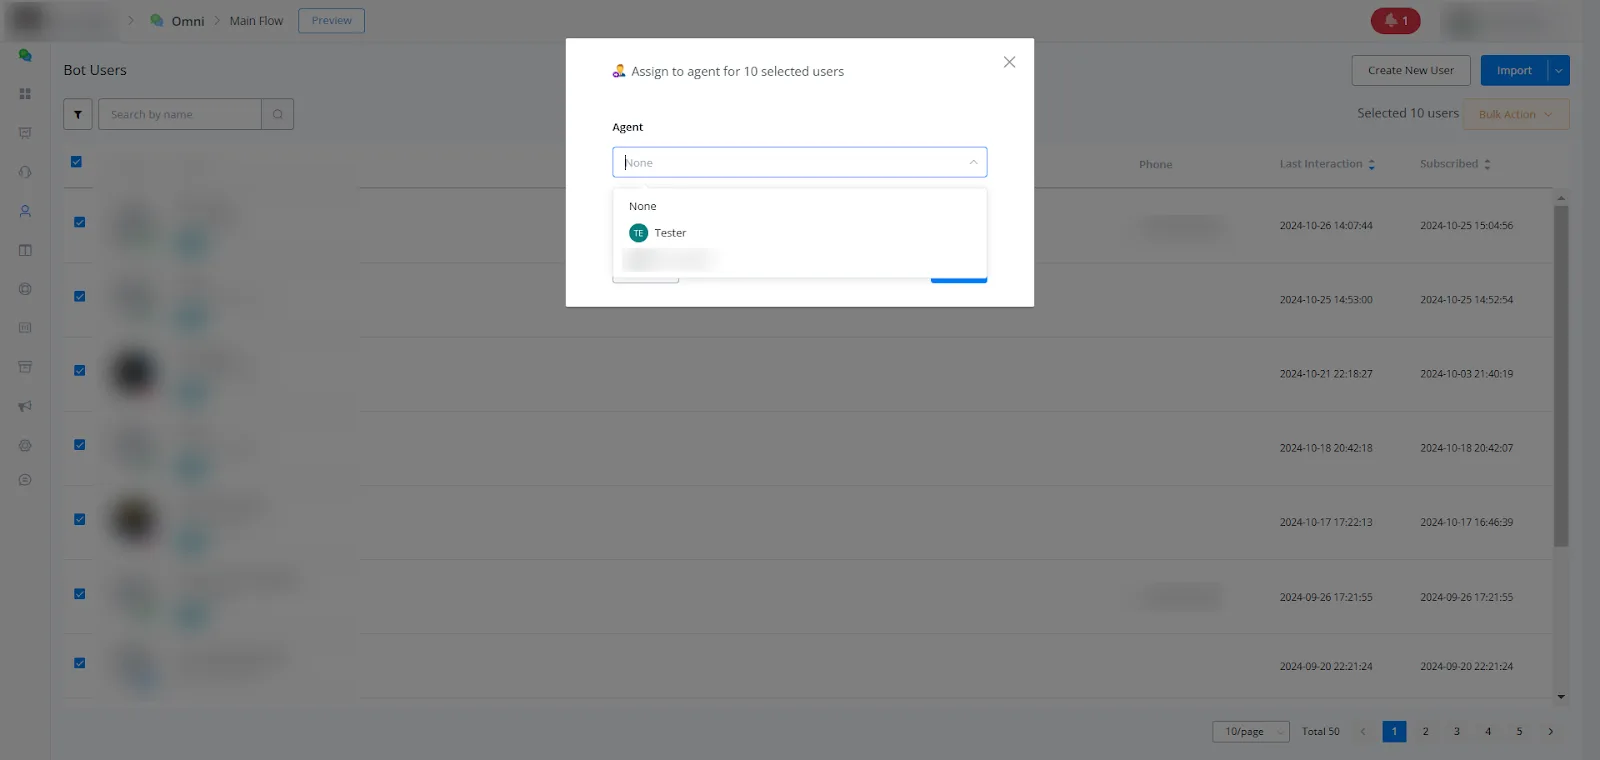
This bulk assignment option is ideal for managing a large number of users at once, streamlining the process of assigning agents to multiple users at the same time.