Triggers
YouTube video (not available for embedding)
Triggers help you automate certain processes in the chatbot. For example, when a contact opts in to receive emails, you may want to sync that data with a CRM or with Google Sheets.
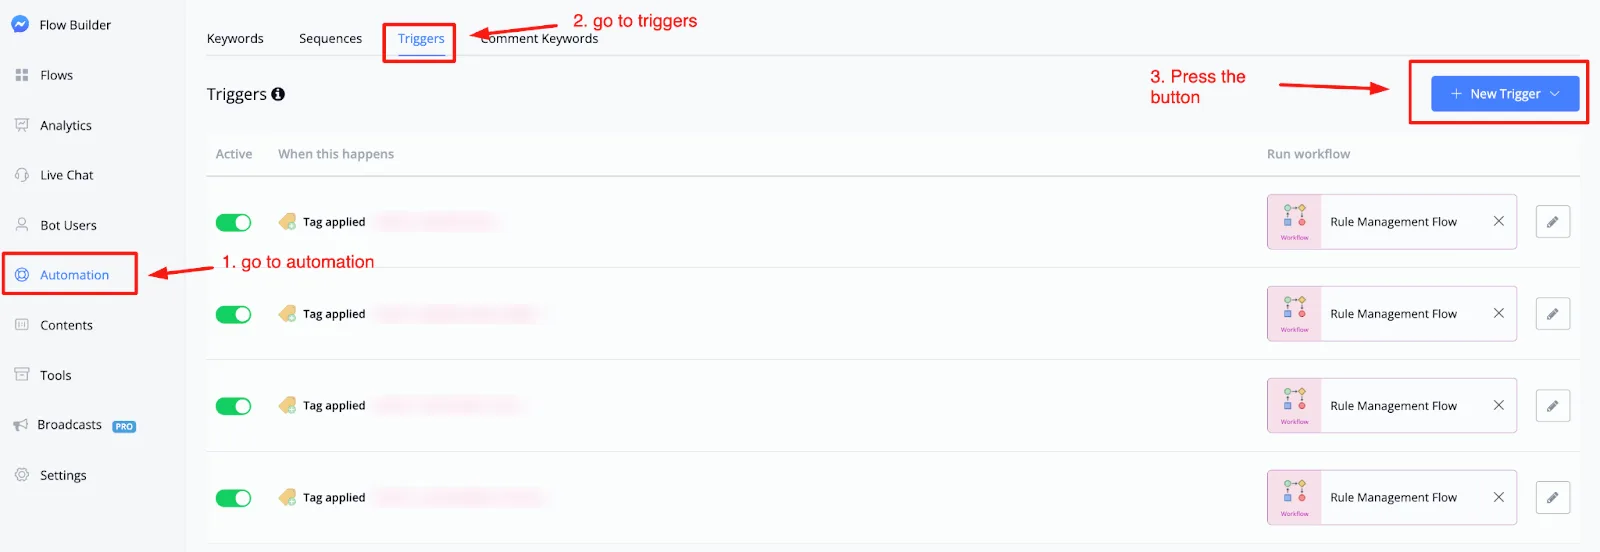
To reach the triggers section, go to the left-hand menu, select Automation and then choose Triggers. From there, you can create a new trigger by pressing the blue button in the top right corner, named + New Trigger.
Once pressed, you will see the available triggers you can choose from.
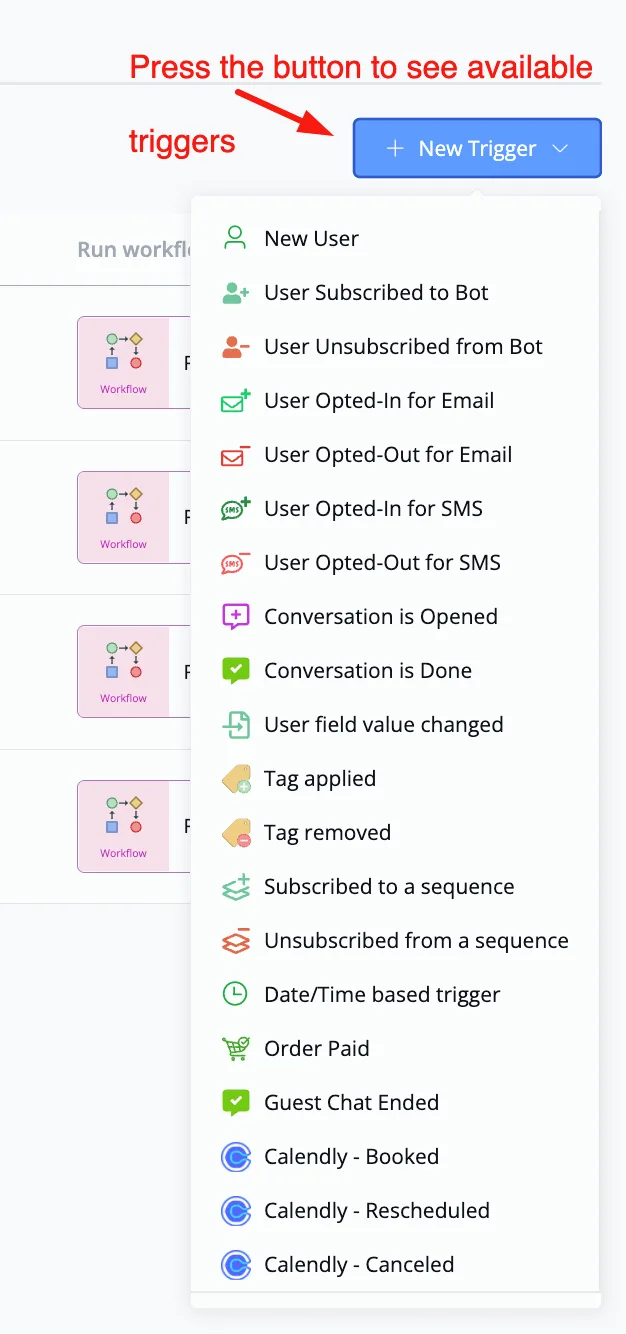
Let's take the example of a trigger for when someone pays for an order inside your chatbot. Press the blue + New Trigger button and select the trigger named Order Paid
From there, a pop-up window will open where you can set up the details of your trigger.
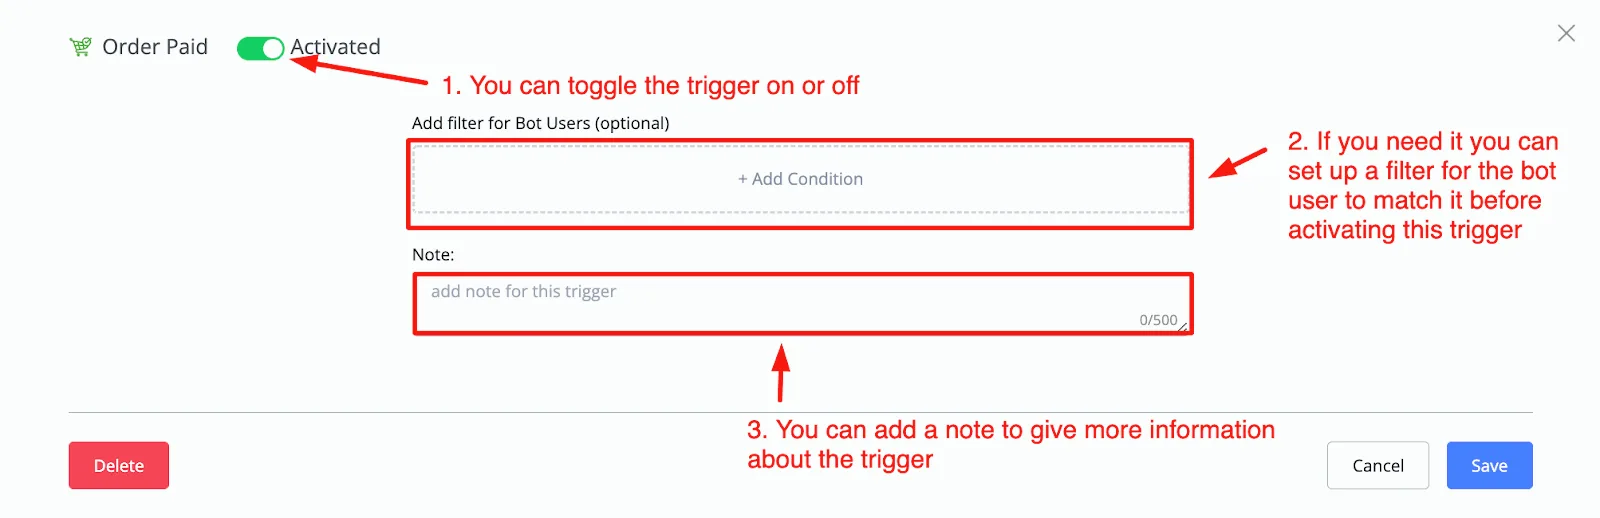
You will be able to enable or disable the trigger, set up a condition in case you need the contact to match a certain filter before the trigger is activated, and add a note that better explains this trigger.
Great if you are working with a team or creating a template and need to clarify things.
Once that is done, press the Save button in the bottom right corner, and half of your trigger setup will be ready.
Now that the trigger has been created, we need to add an action to it. To do this, press the Choose Sub Flow area to the right of that trigger.
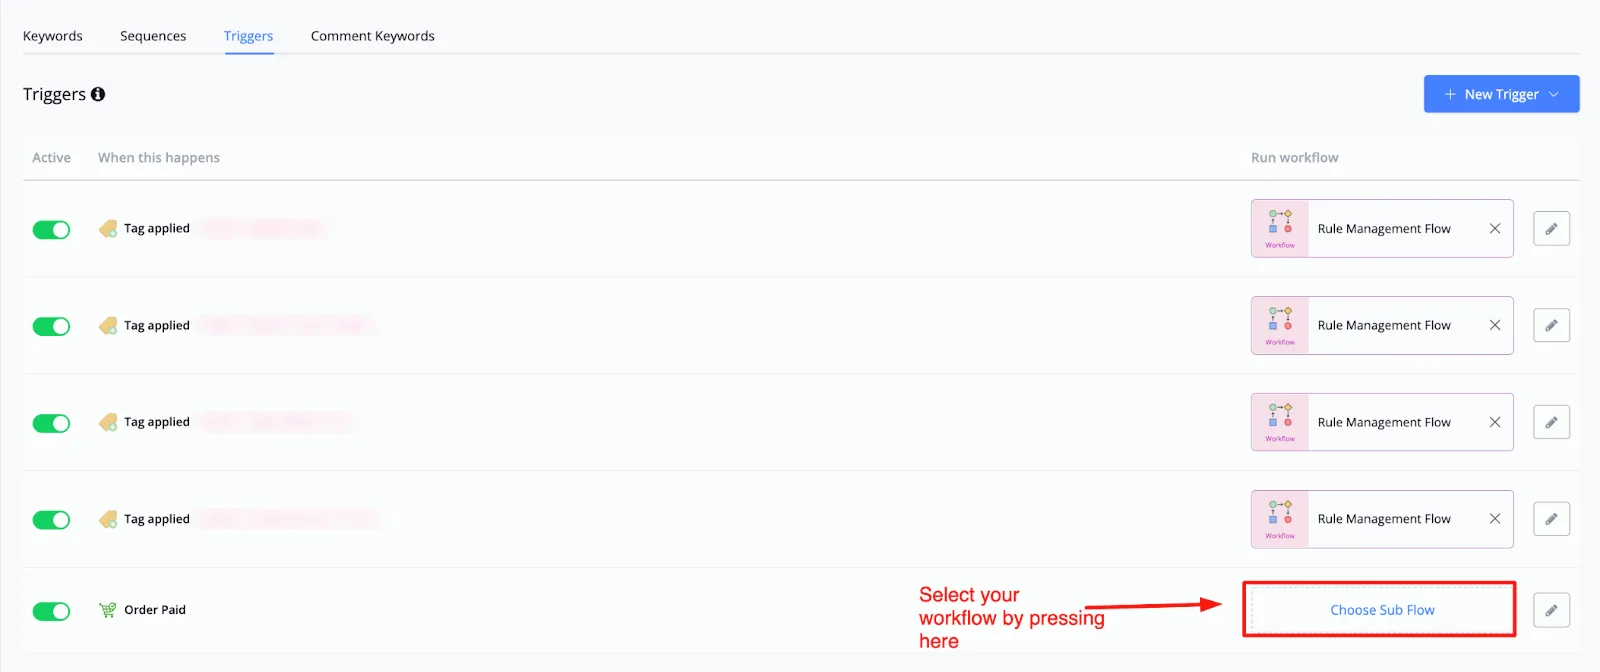
Once that is done, a pop-up window will open where you can select the flow that will be connected as soon as this trigger is activated.
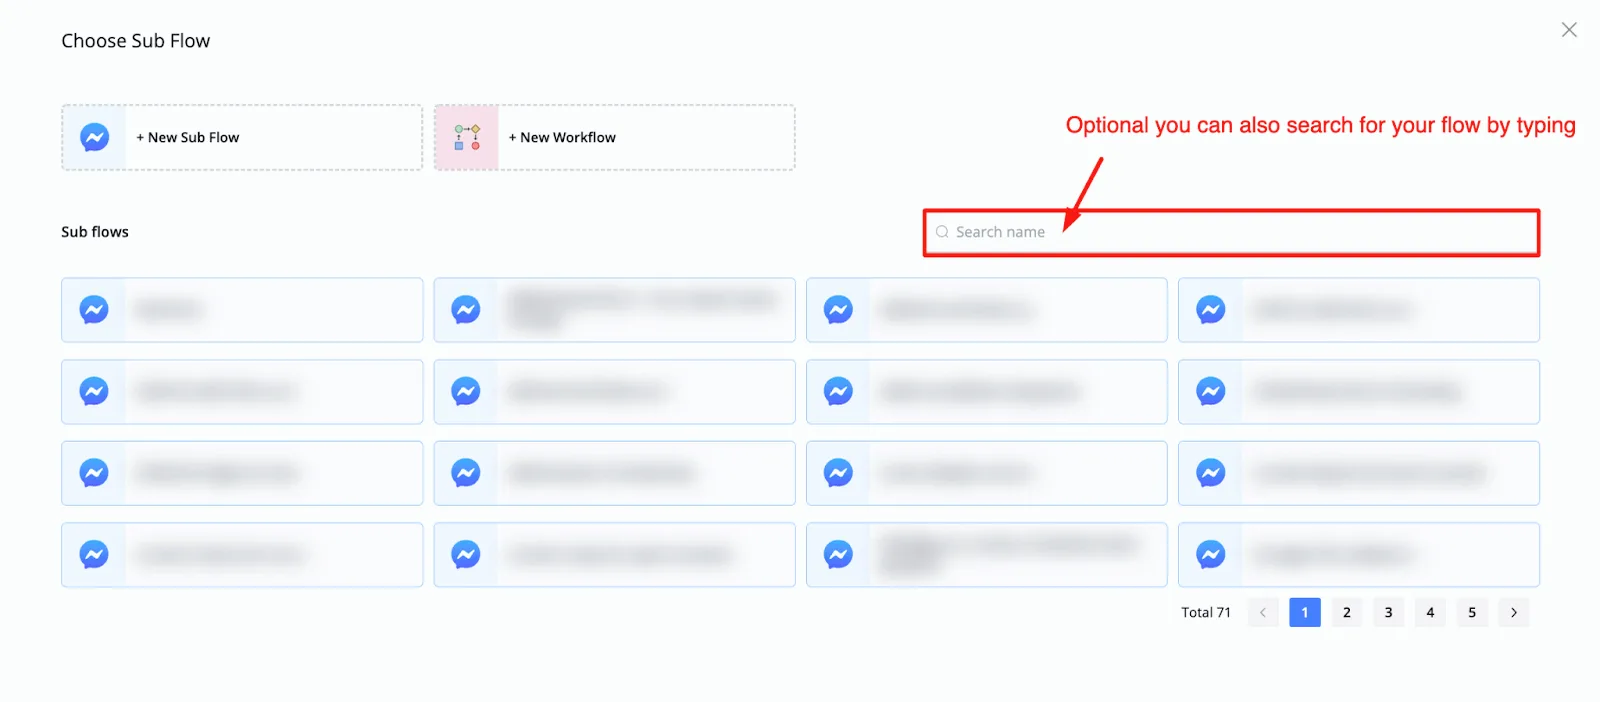
If you prefer, you can also type to find your flow more easily. Once you find it, just select it and you will return to the trigger overview.
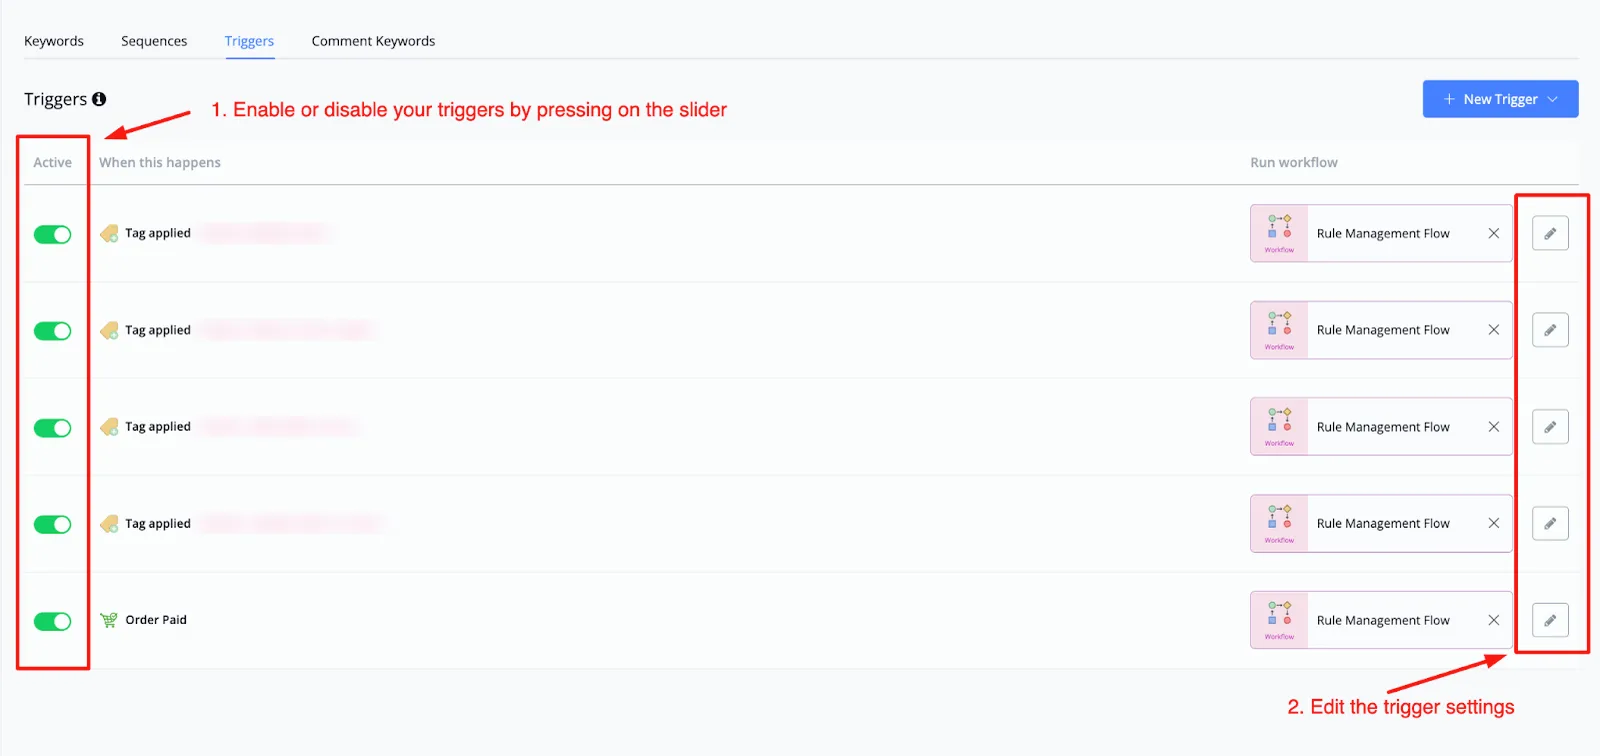
From there, you have a few options for managing the triggers.
You have two options if you want to manage your triggers:
- You can enable or disable them by pressing the slider to the left of the trigger itself
- You can edit the trigger settings. Inside, you also have the option to delete the trigger entirely