API - Documentation
Check the API details in the Swagger documentation.
The NicoChat API is used to retrieve data from the flow you build. Here are some examples of what you can do with it.
- Extract from NicoChat the flow you built.
- Create, delete, or get data, including flow tags and fields.
- Handle subscriber data: get the subscriber information, edit their tags or fields, and send subflows to them.
- Set up all the data used in e-commerce, such as carts or products.
If you need to work with the data below, the next sections show the steps to use the NicoChat API.
Because data protection is important, the API uses a few attributes to authorize your identity. So the first step is to enter the authorization data. Click the Authorize button, as shown in the figure below.
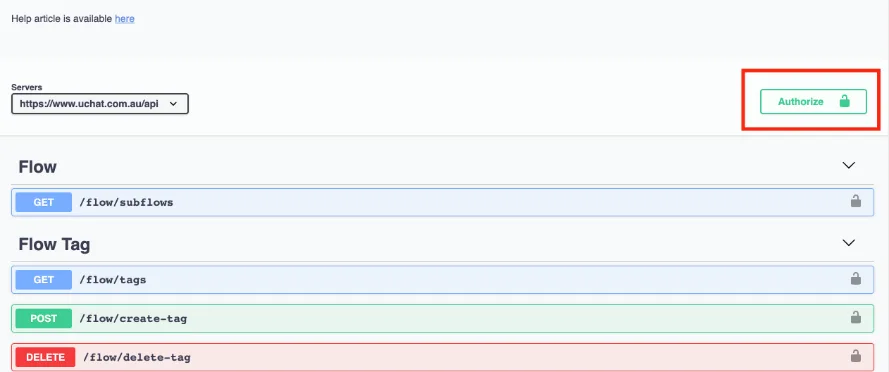
There are three attributes you need to fill in the text box.
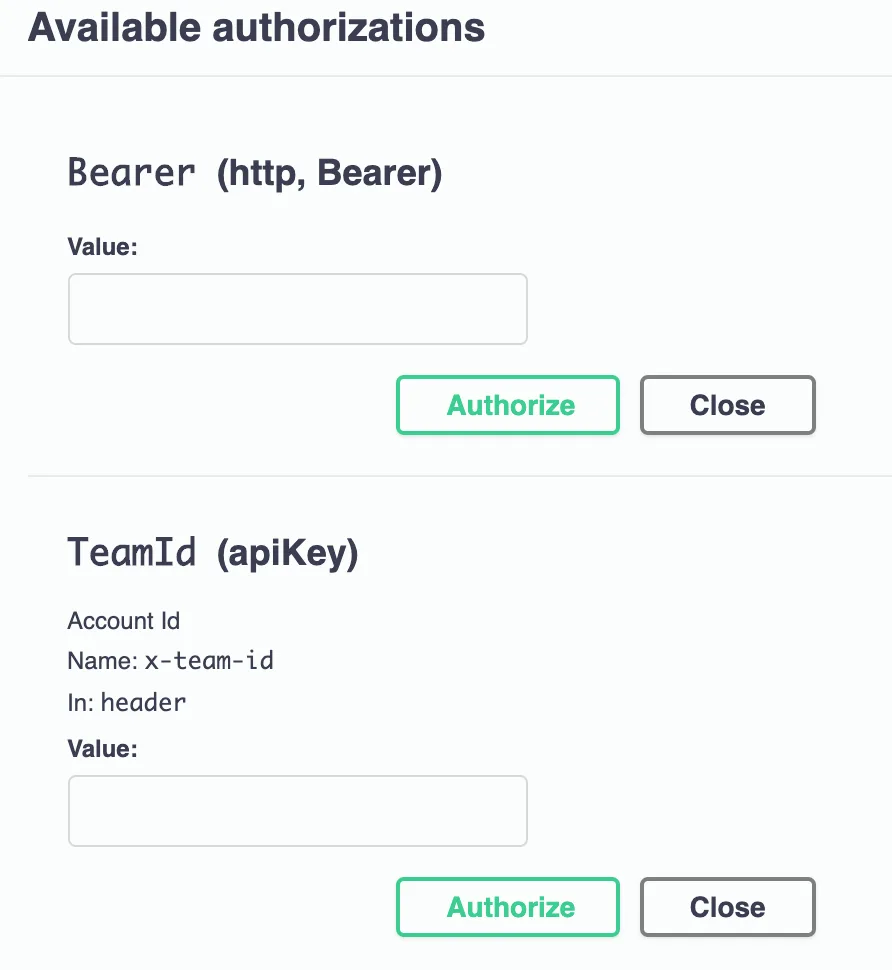
The following section shows how to find these attributes.
Step 1. After logging in to your NicoChat account, the account name and the avatar appear in the top right corner. Click them and choose Account Settings from the dropdown.
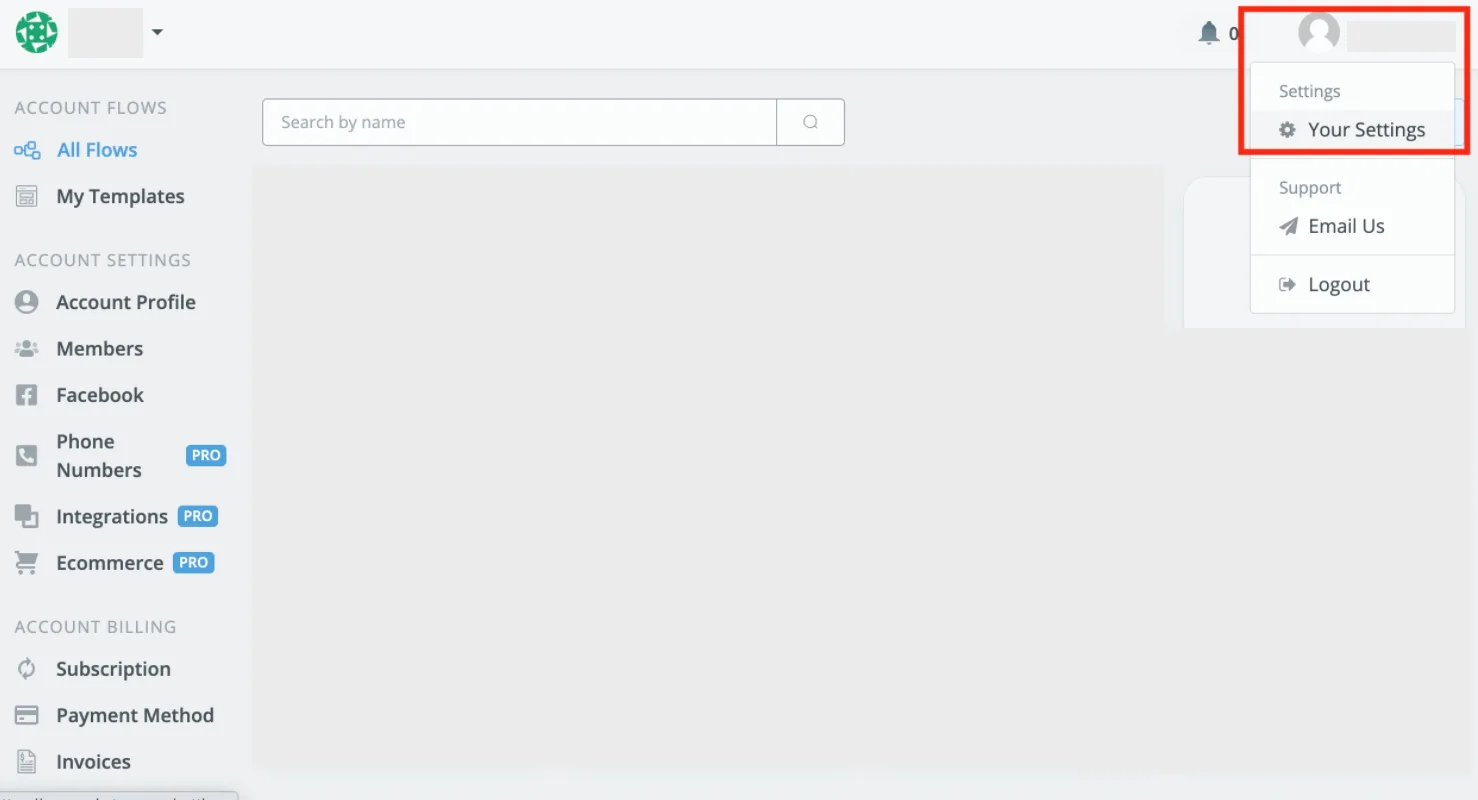
Step 2. Go to the API Keys section by clicking the button in the user settings. Enter the name of the key you want to create and click the Create button.

Step 3. The key then appears in a pop-up window.
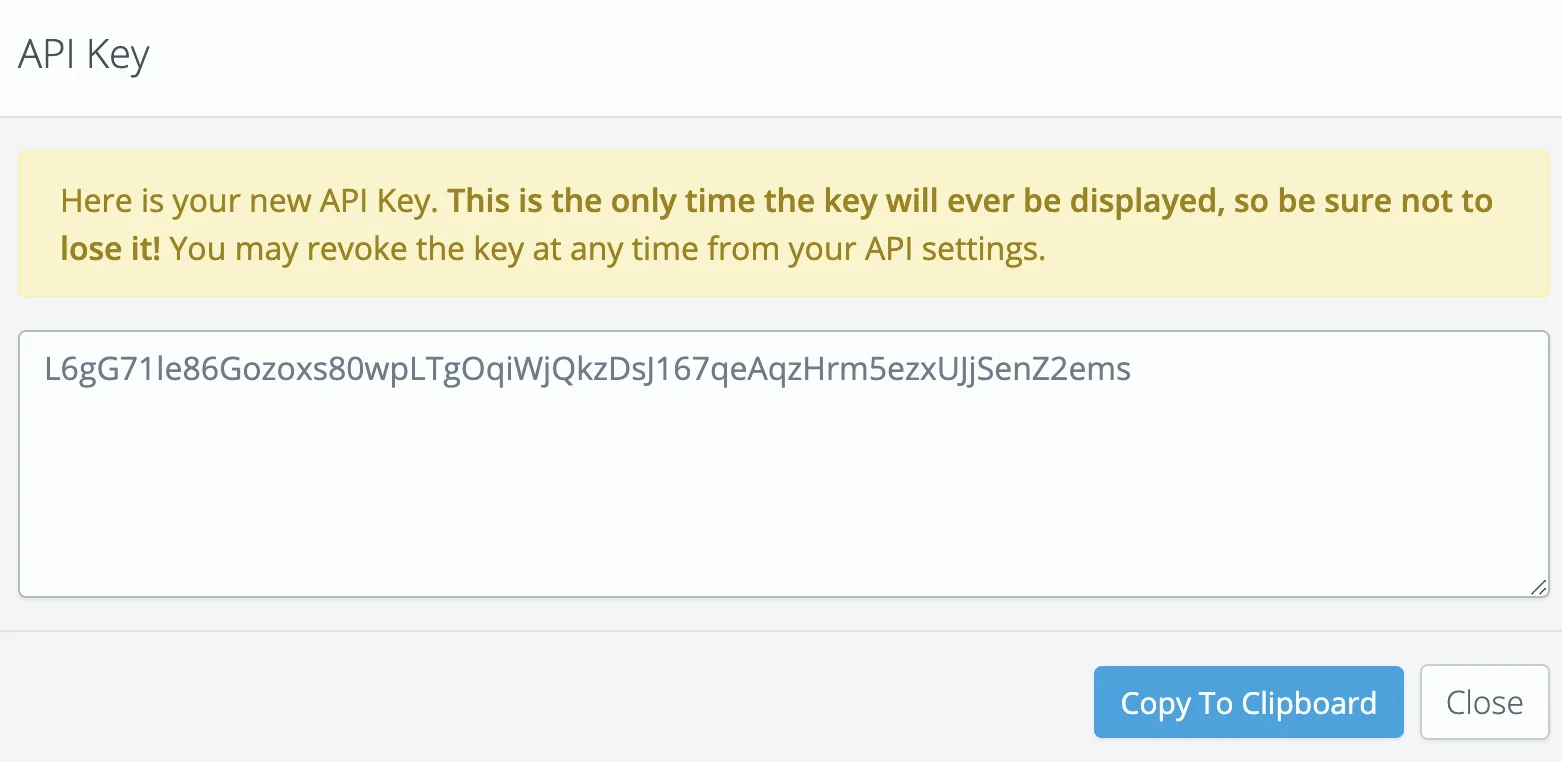
When you close the window, you will see the basic information about the key, except the key value.
Curl is used in API requests. In the NicoChat API documentation, you need to perform a few operations before getting the curl.
Here we use Get Flow Tag as an example.
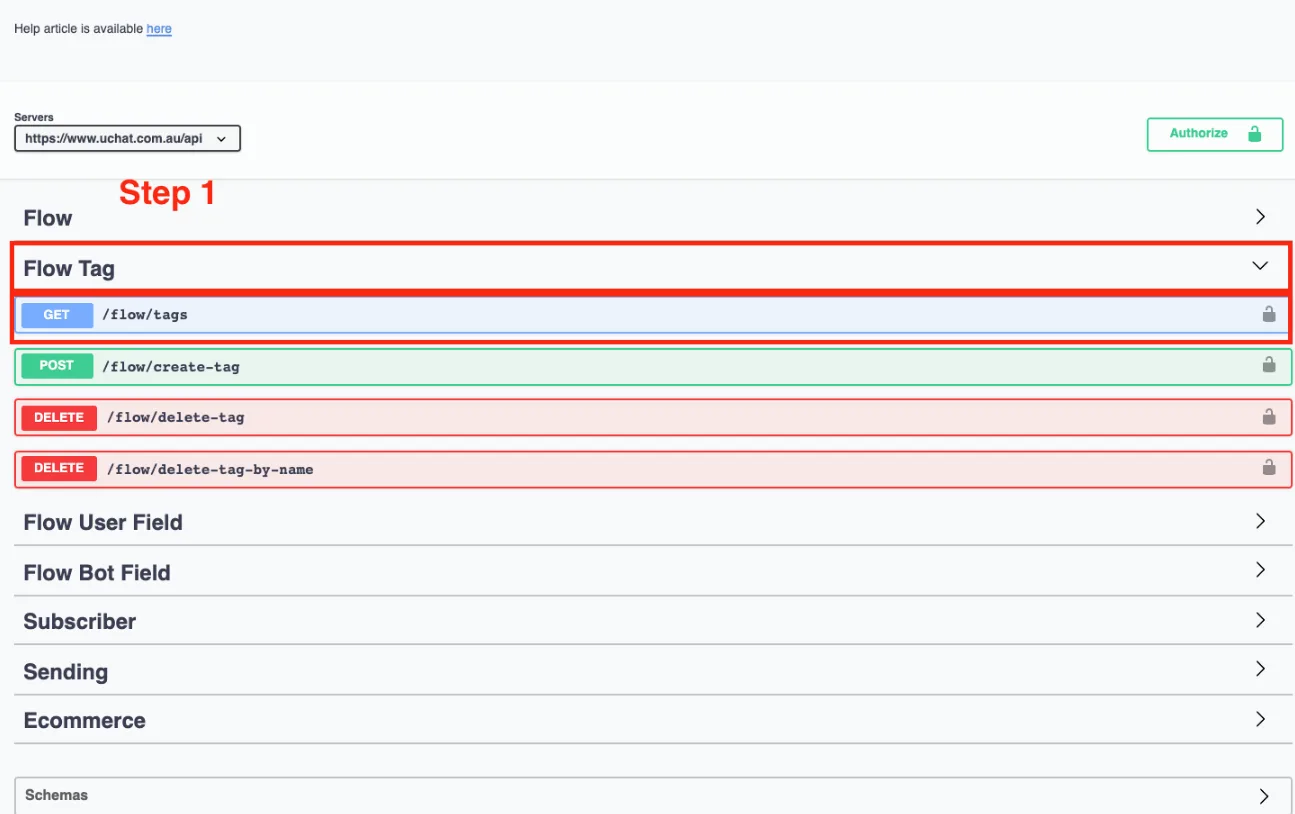
Step 1. Click to expand the category, in this case Flow Tag. Then find the action and the resource Get /flow/tags. Click the row and a dropdown area will be displayed, as shown in the image below.
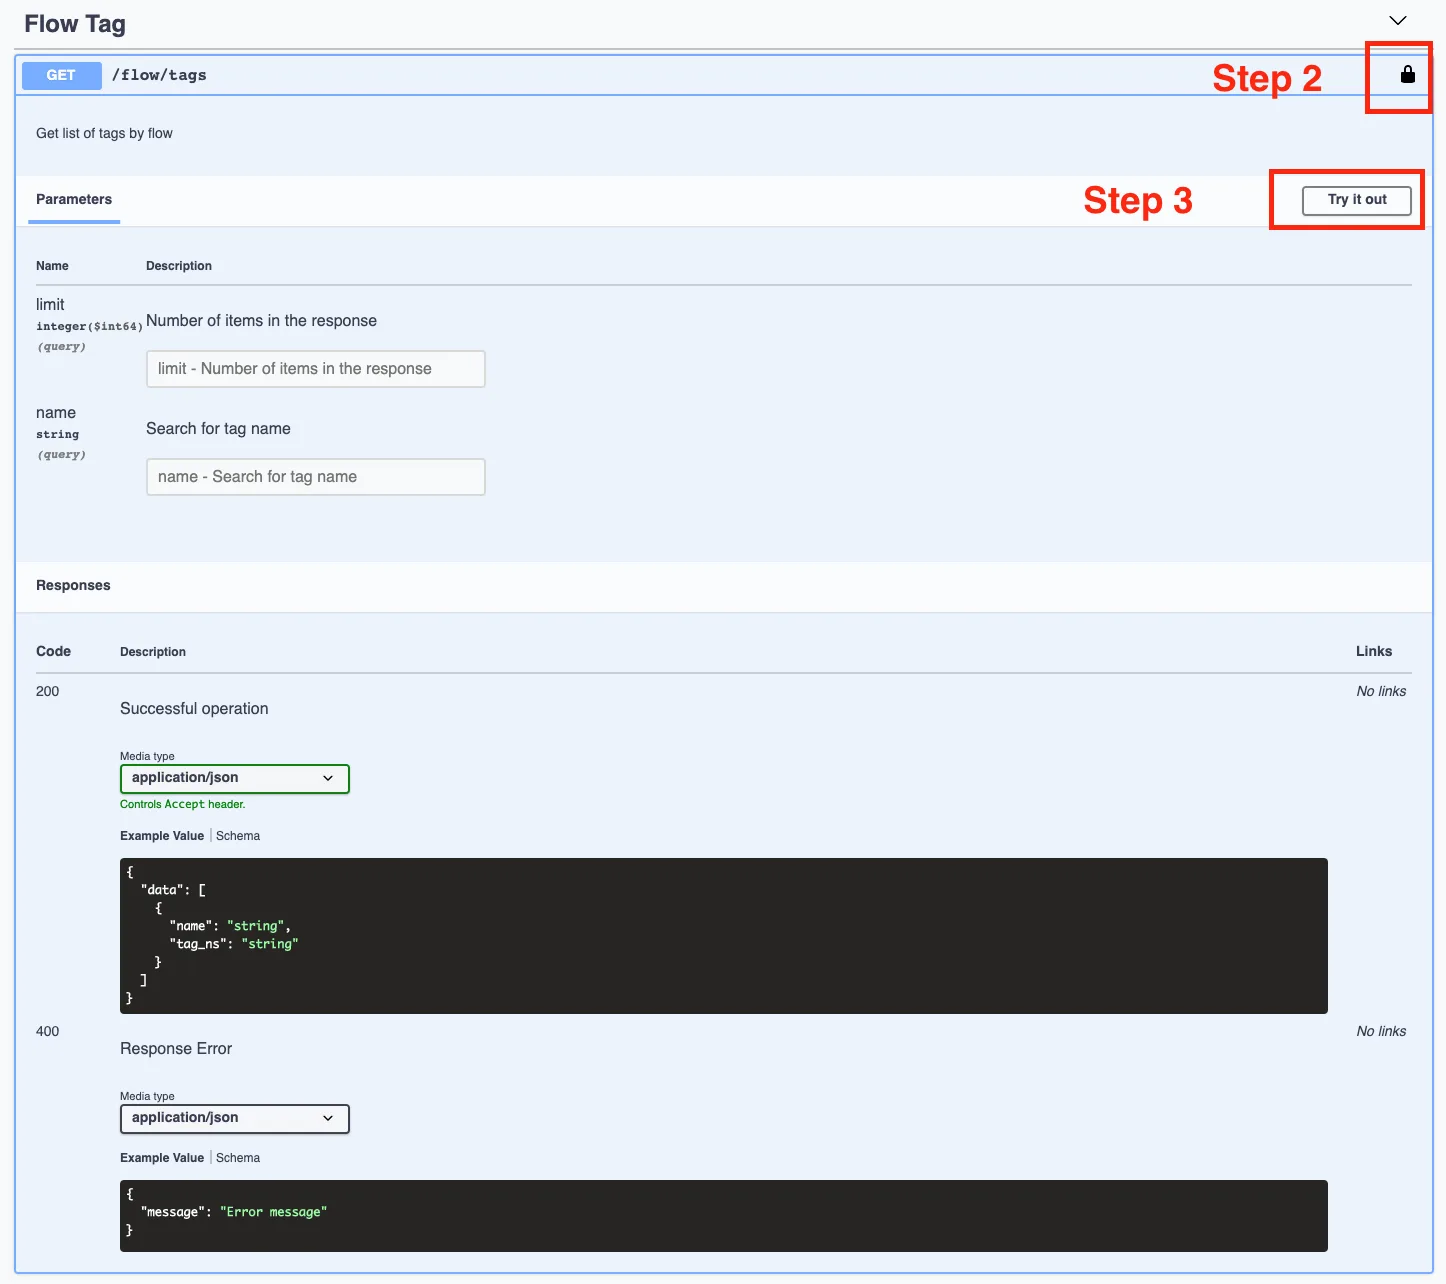
Step 2. This icon means authorize. If you have already done this before, this step is not necessary. Otherwise, repeat what was described in the Authorize section.
Step 3. Click Try it out. You will see that you can fill in the Parameters or the Request body and that the Execute button appears at the bottom of this area.
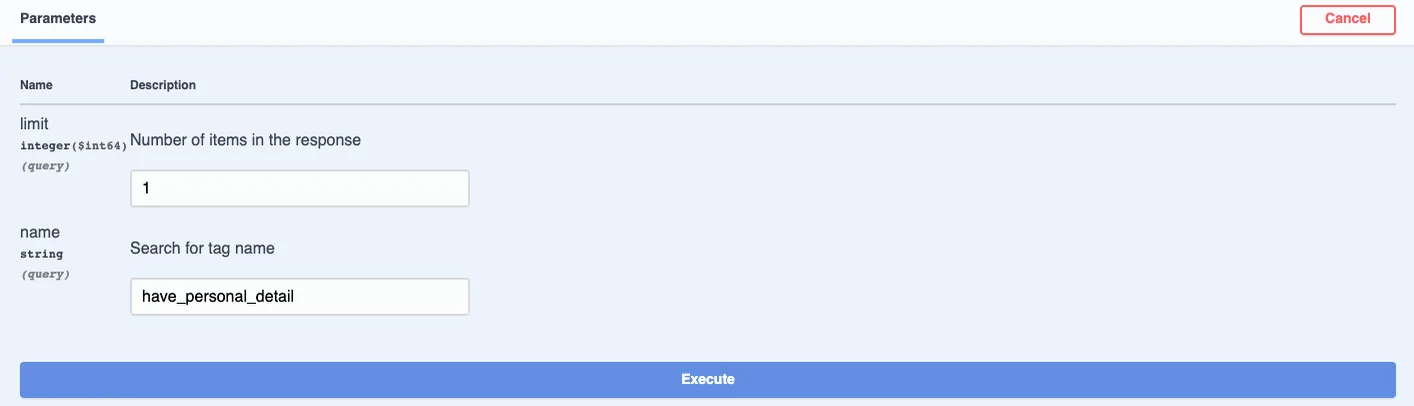
Step 4. Fill in the required parameters or request body and click the Execute button. Finally, you will get the Curl and the Request URL.

This part displays the JSON result you will get from the NicoChat API. In general, code 200 means you got the response successfully. Code 400 means there is an error in your response.
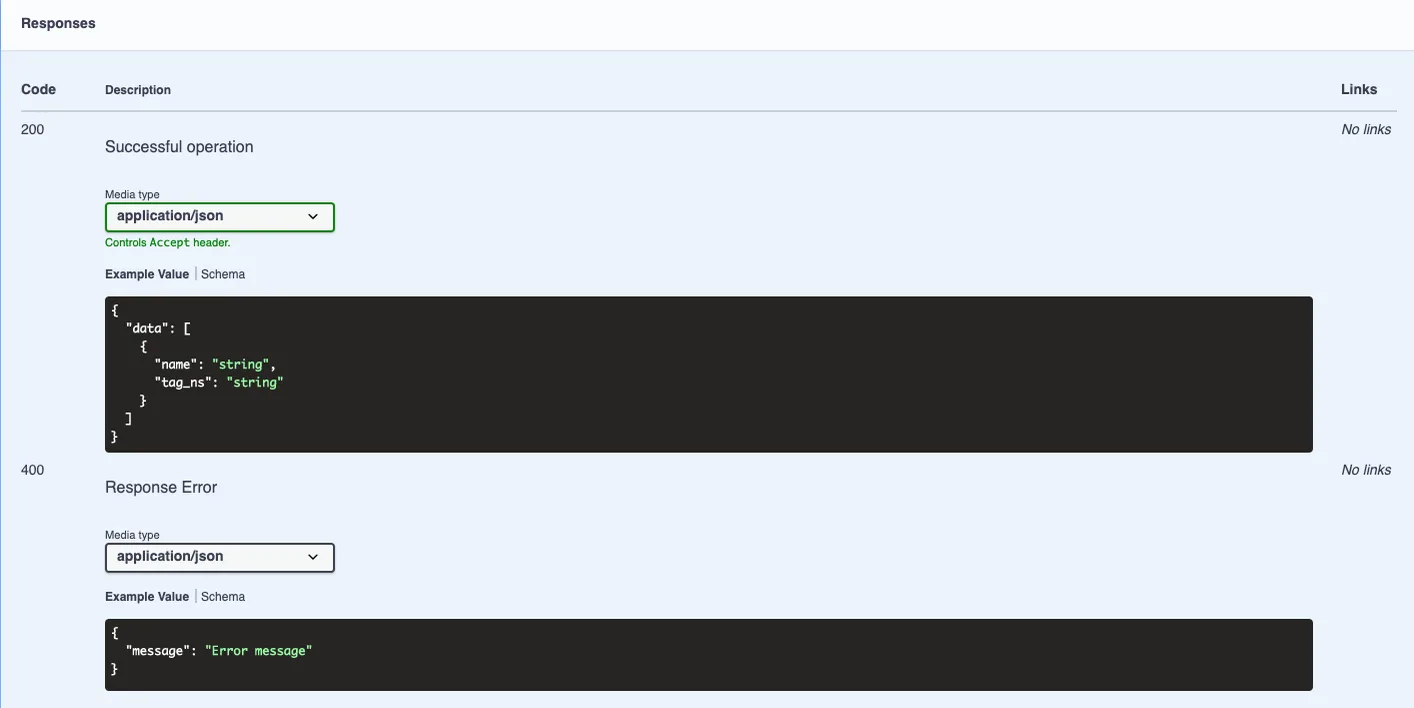
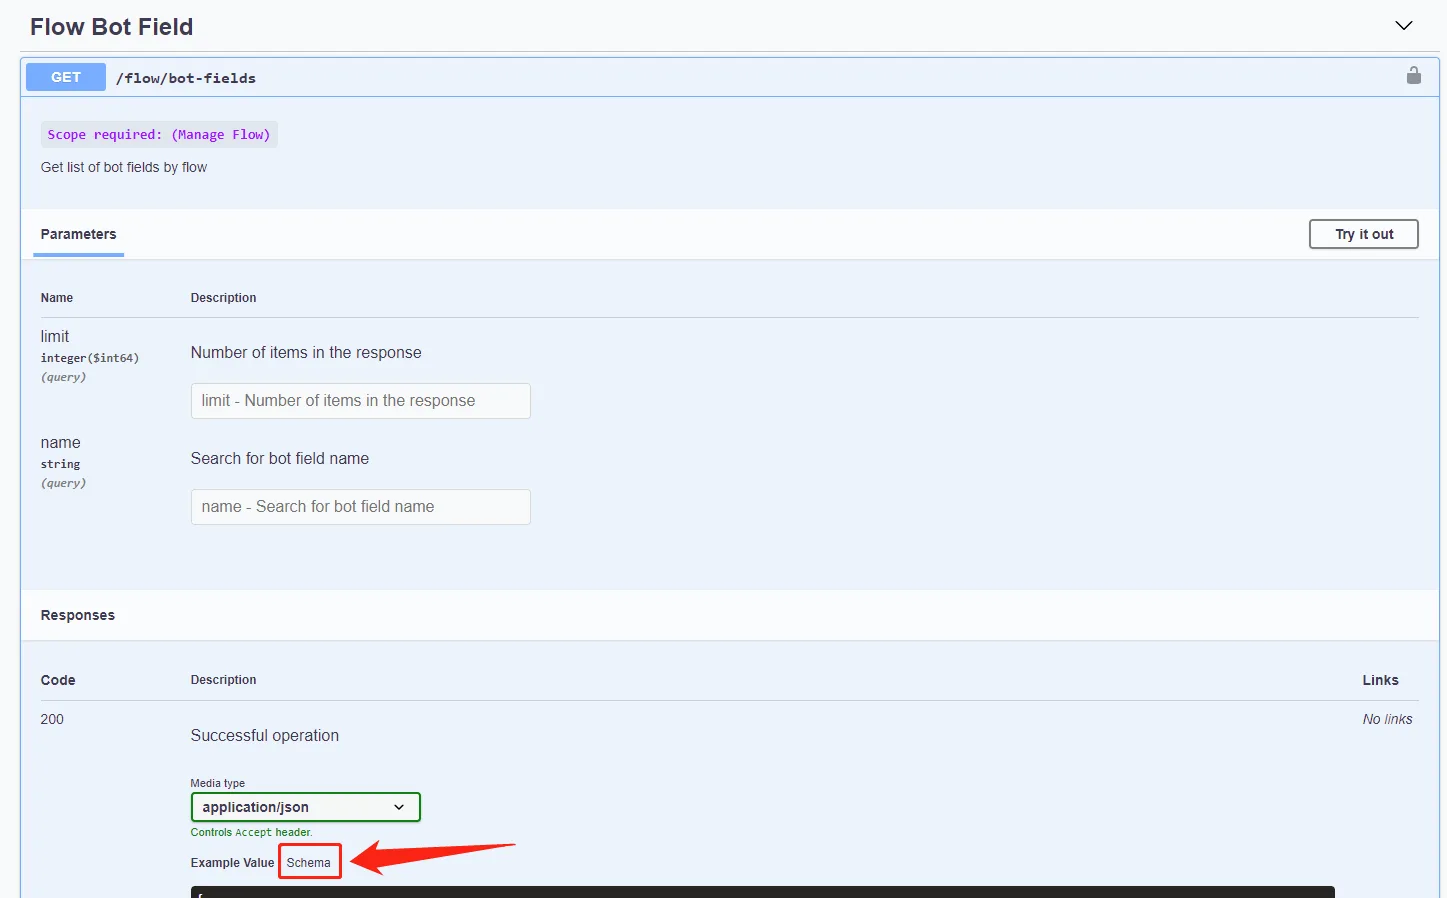
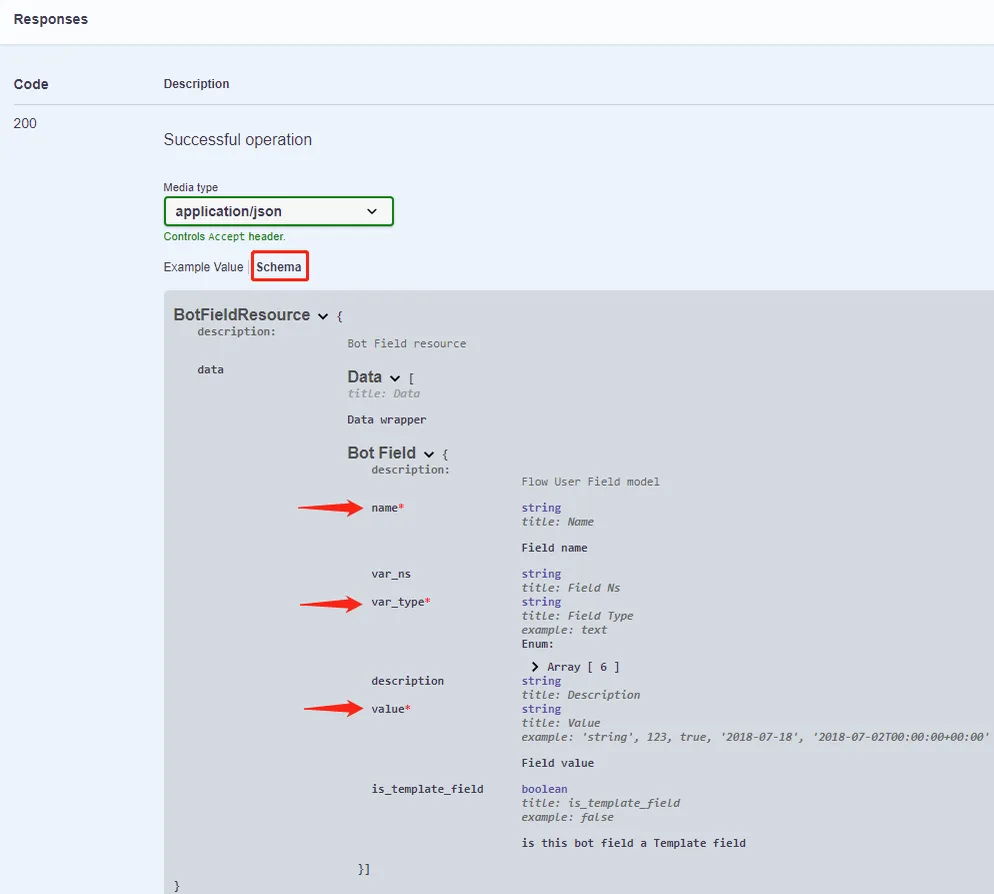
In addition to the example value, you can click “Schema” to see more details, such as which values are required.