

Registering the Line Business Account
Connecting the Line Business account to NicoChat is a somewhat difficult task. This guide provides the step-by-step process for registering and accessing the Messaging API information.
Before you begin, one important point is worth clarifying: to connect your Line account to NicoChat, you do not need any NicoChat webhook information.
Visit https://account.line.biz/signup to start your registration process.
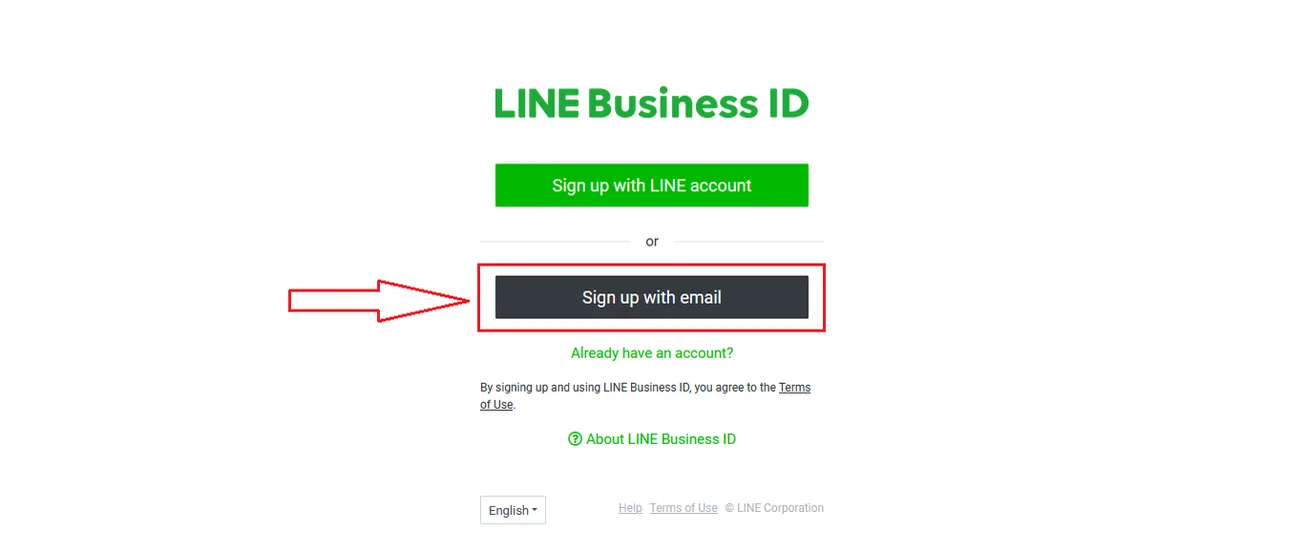
There are two options for creating the Line Business account.
1- Use an existing Line account
2- Use an email address
If you already have a Line account, you can sign up through it. In this guide, we will sign up with an email address.
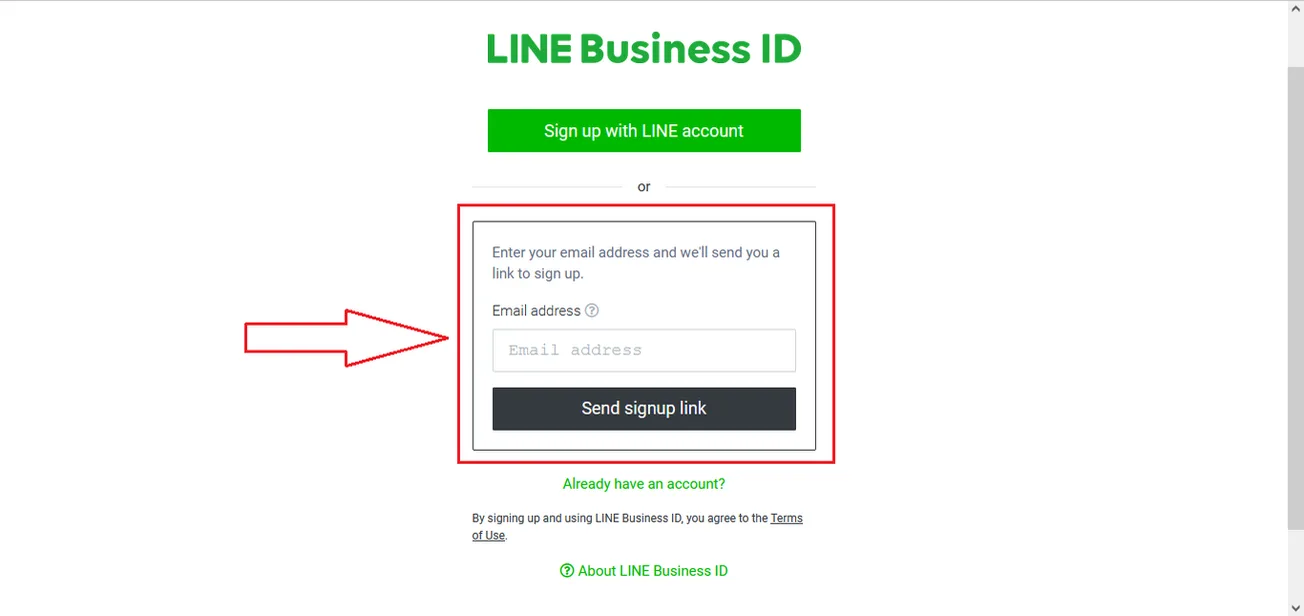
Enter a valid, active email address, because Line will send you a signup link so you can complete the registration.
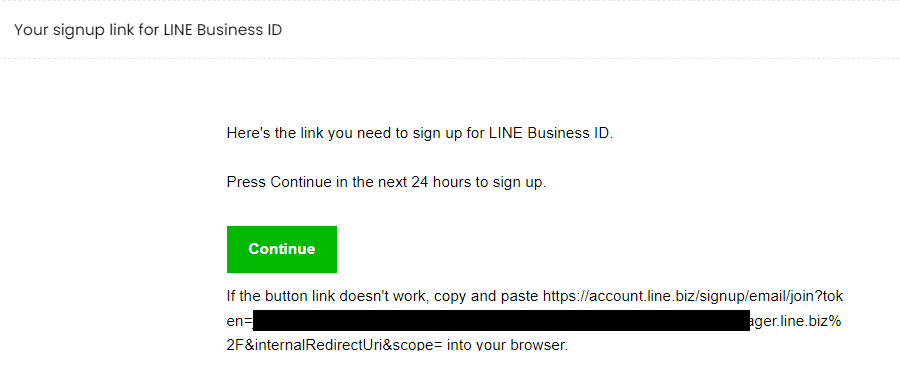
This is what the Line email looks like. Click “Continue” to proceed with the registration.
The next screen will ask for:
1- Name
2- Password (6 to 12 half-width letters, numbers, and symbols)
3- reCAPTCHA verification
After entering the required information, click “Sign Up”.
.webp)
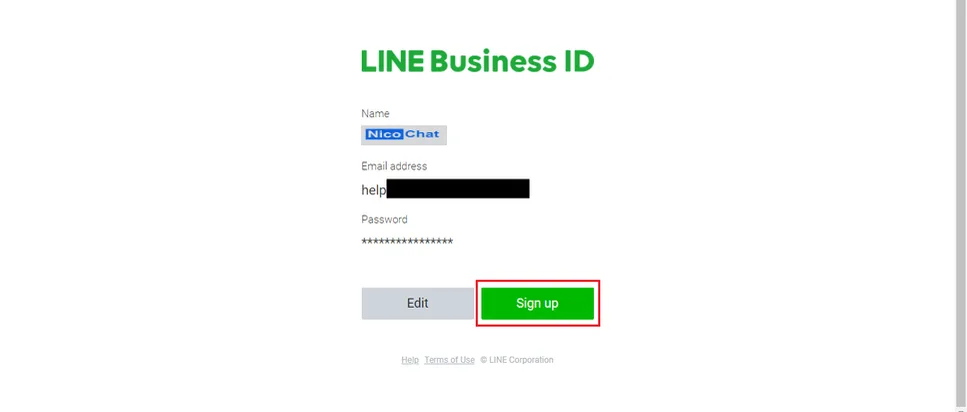
The next screen displays the signup information before the account is created. Review the data and change whatever is needed; if everything is correct, click “Sign up”, as shown in the image.
Congratulations, your Line Business account has been created. Click “Continue” to access the account.
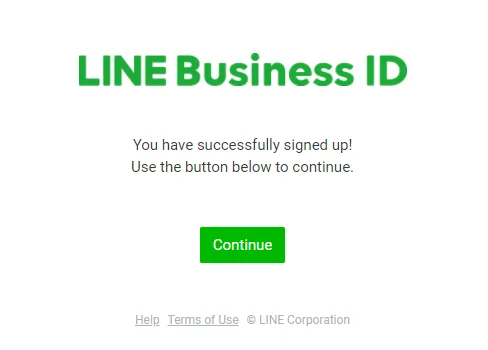
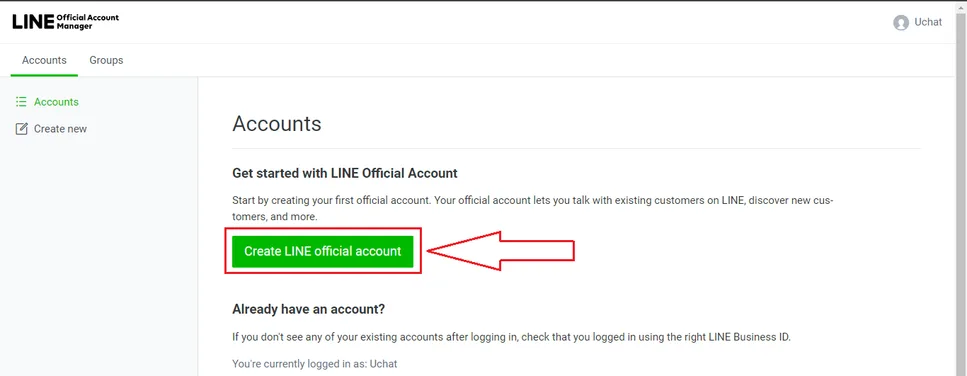
In the Line Official Account Manager dashboard, you need to create a Line Official account. Click as shown in the image below (highlighted in red).
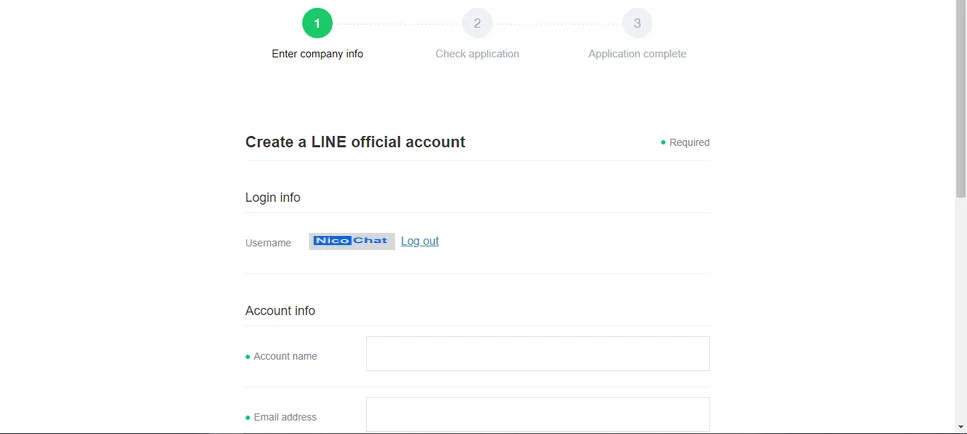
On the next page, fill in the registration for your Line Official account. The following information will be requested:
1- Account name
2- Email (your email should already be registered)
3- Business name
4- Industry
4.1- Main industry
4.2- Sub-industry
After filling in the data and submitting the form (page one), the next page shows the information for confirmation. Once you have reviewed it, click Submit at the bottom of the page, as shown in the image below.
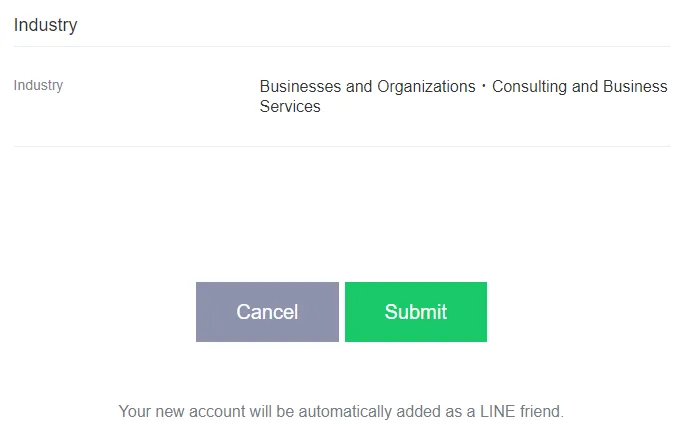
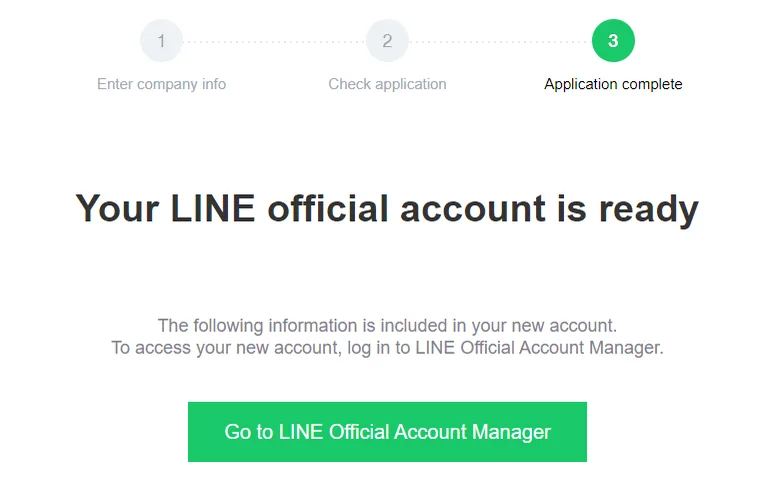
Your Line Official account has been created.
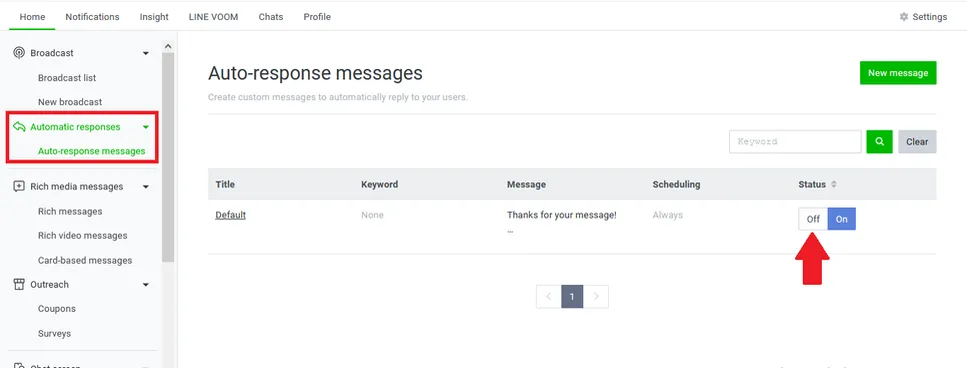
On the home screen, click Auto-replies, because auto-replies are enabled by default.
The image could not be loaded
Click “Disable” to turn off the auto-replies.
A confirmation pop-up will appear; click “Disable”.
The image could not be loaded
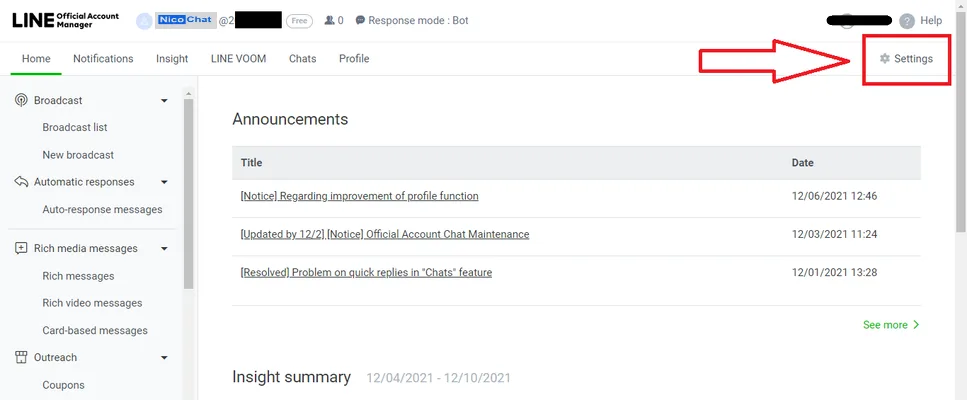
In your Line Official account dashboard, click “Settings”, in the top right corner, to access the Messaging API information.
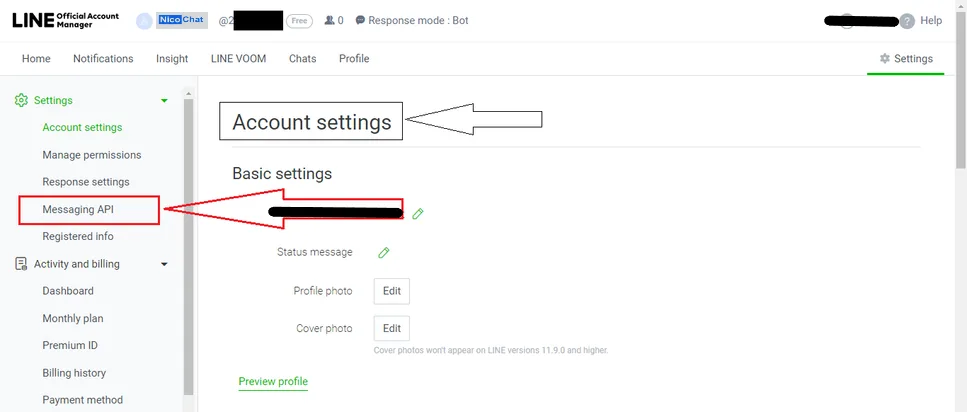
On the “Settings” page, open the “Response settings” option on the left side of the screen. Make sure the “Response mode” is set to “Bot”.
The image could not be loaded
On the Account settings page, the Messaging API information is on the left side of the screen, as shown in the image below:
In every new registration, the Messaging API is disabled by default and needs to be enabled. To enable it, click the green “Enable Messaging API” button.
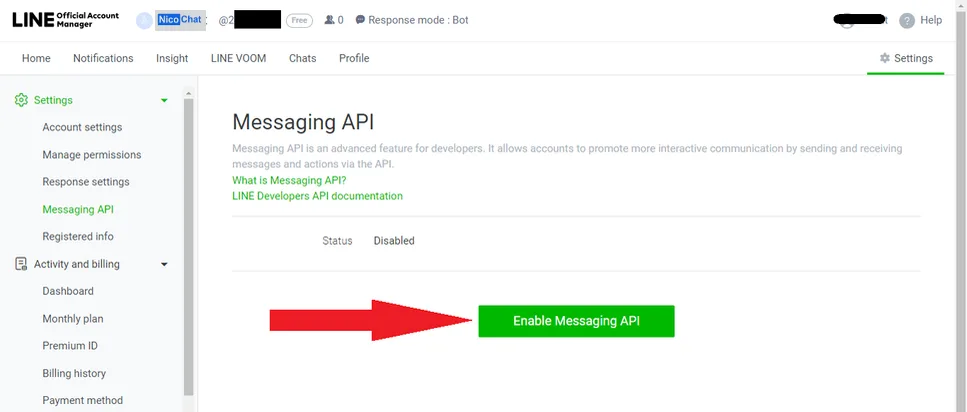
The “Register developer information” window will appear. Enter the developer information and, when you are done, click the “Agree” button at the bottom of the window.
The “Register developer information” window will appear. Enter the developer information and, when you are done, click the “Agree” button at the bottom of the window.
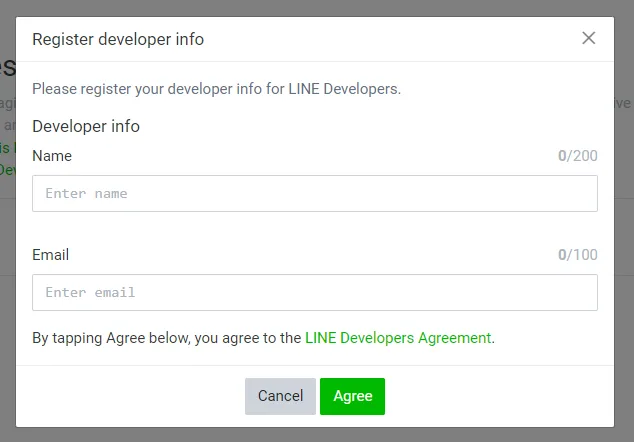
After clicking “Agree”, the next screen displays the information you entered for confirmation. Click “Ok” to proceed with enabling the Messaging API.
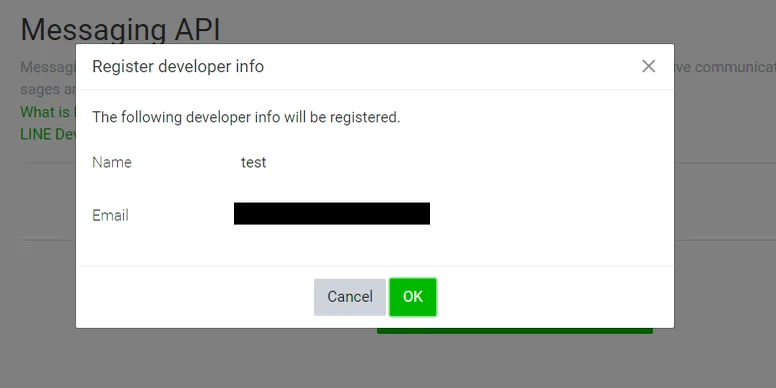
You will now be asked for the name of the company or person who will manage this account. Enter “NicoChat” as the new developer, as shown in the image below, and click “OK” to continue.
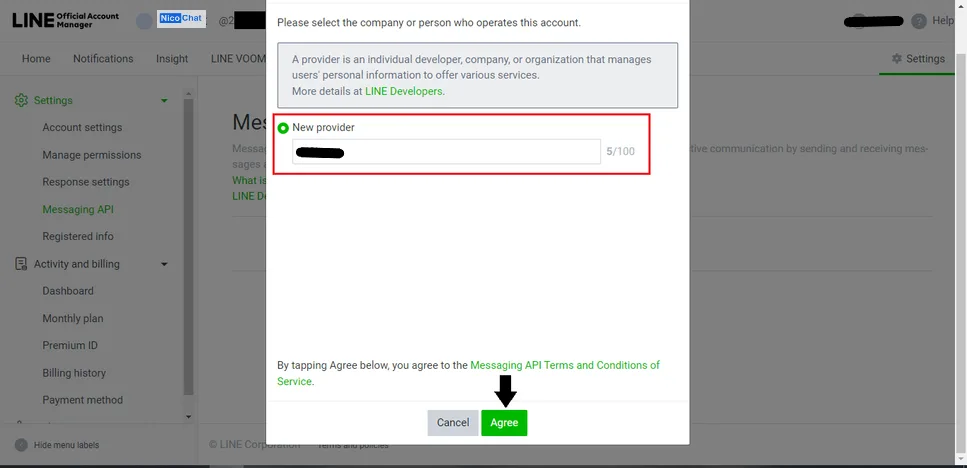
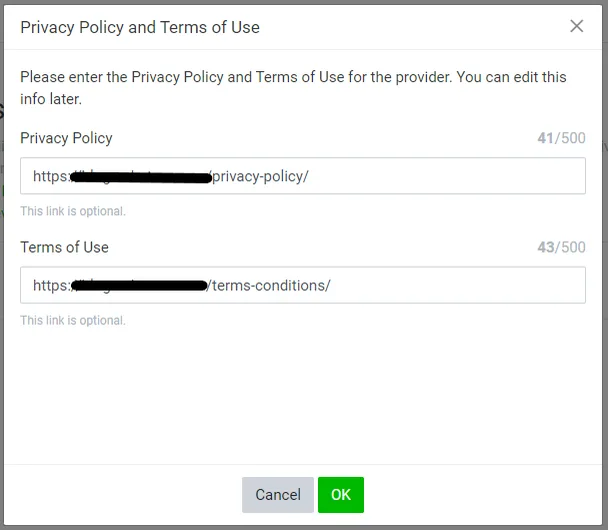
On the next screen, you will be asked for:
1- Privacy Policy
2- Terms of Use
If you have your own links, you can enter them; you can also use the NicoChat links, which are in the footer of the website. They are also listed below:
After entering the required information, click “OK”, at the bottom of the window.
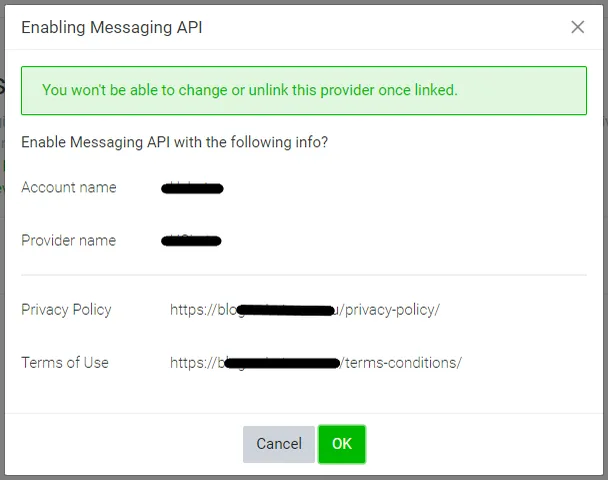
The next screen displays the information for confirmation. If it is correct, click “OK”, at the bottom of the window.
Many users get confused when they reach the Messaging API screen after completing the activation. This happens because the Line setup in NicoChat requires the following information to connect the Line account to the Line Chatbot:
1- Channel Id
2- Channel Secret
3- Channel Access Token
The Messaging API screen displays the “Channel ID” and the “Channel secret”, and has an empty Webhook field.
Once we have completed the registration and connected the Line partner account to the NicoChat Line Bot, the NicoChat webhook link will appear here automatically.
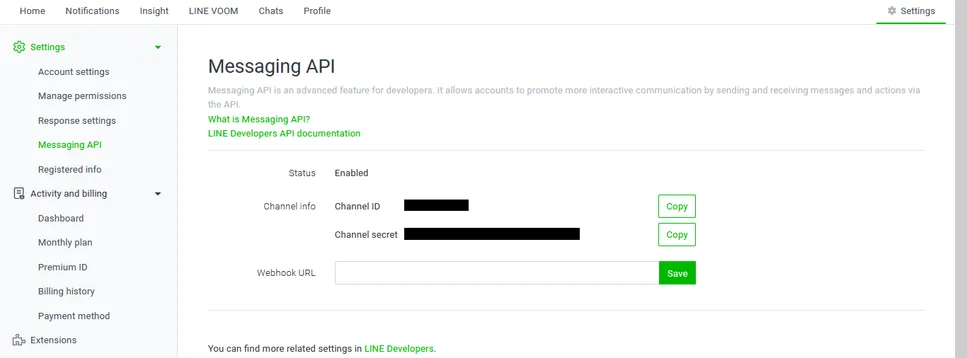
In this step, we continue with the registration to obtain the Channel Secret, which completes the NicoChat requirements.
Click “What is the Messaging API”, as shown in the image above (highlighted in red). A new tab will open. You will notice that the domain has changed from “manager.line.biz” to “developers.line.biz”.
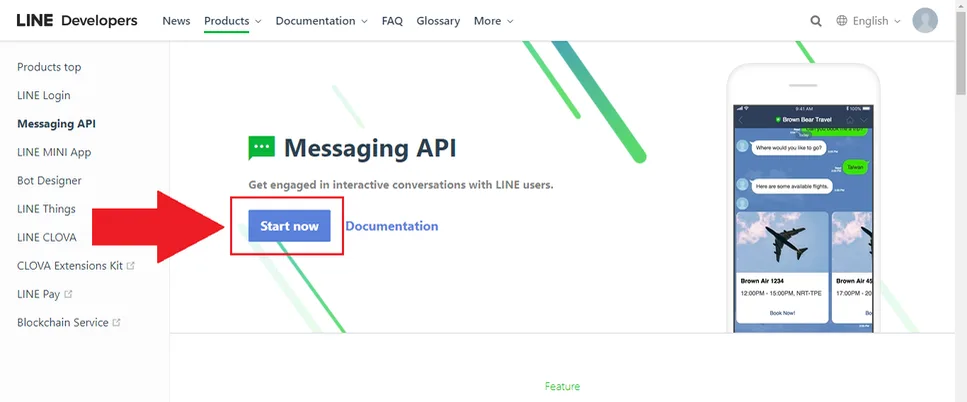
In the new tab, click the “Start now” button, as shown in the image below (highlighted in red).
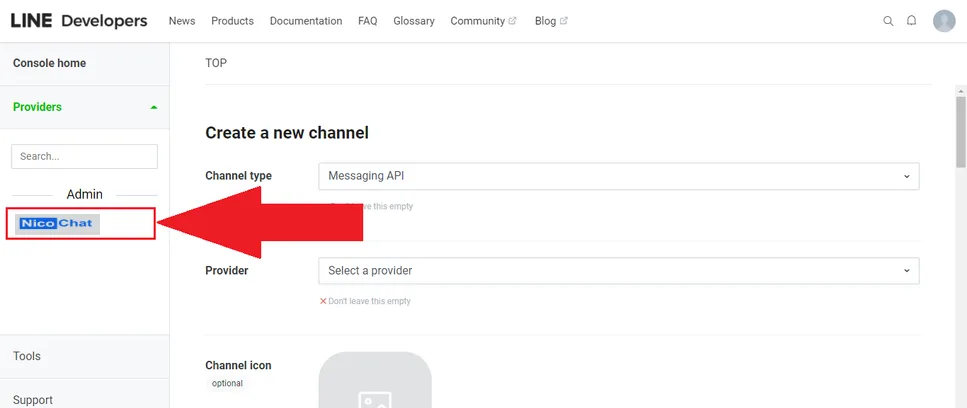
A new page will open asking for some more information. Do not worry: just ignore that form and click the admin account you created in Line. This information is on the left side of the screen, as in the image below (highlighted in red).
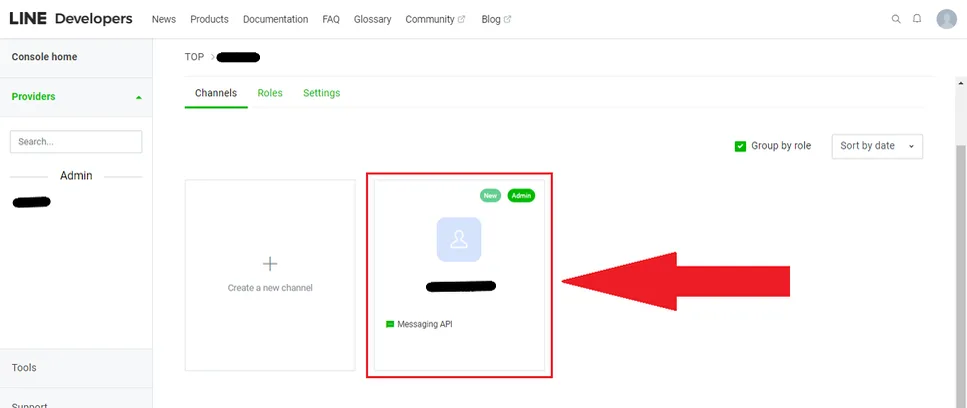
The next page displays the developer profile we created while enabling the Messaging API. Click the developer profile.
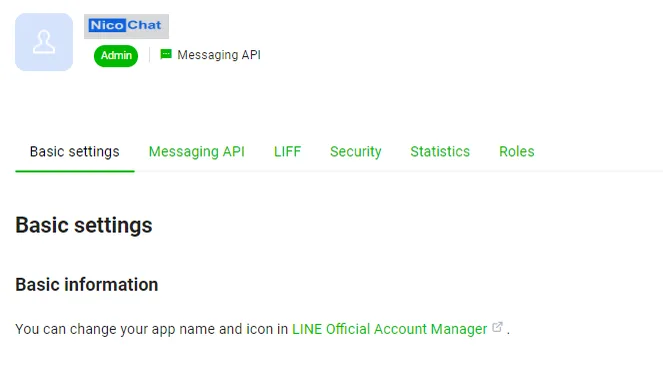
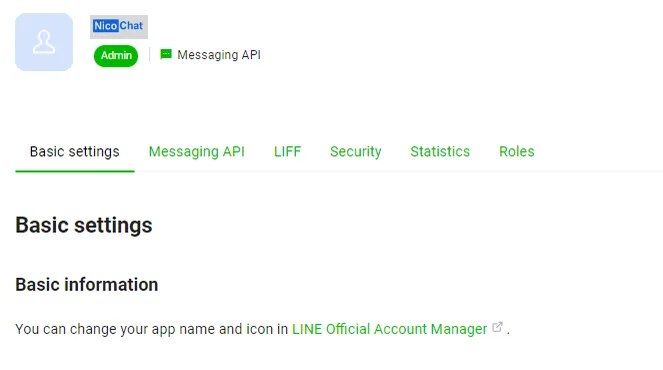
The developer profile has several tabs for managing the Line account. That is where we will find our information.
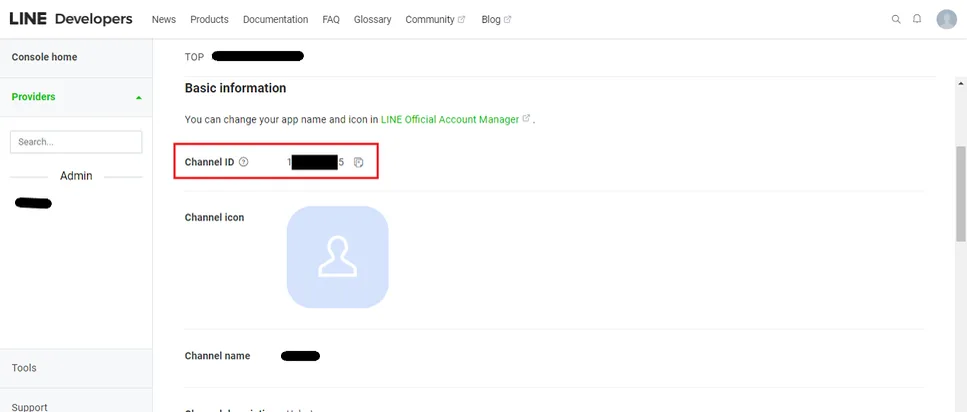
On the “Basic settings” tab, the first section holds the Basic information, where our “Channel ID” is located.
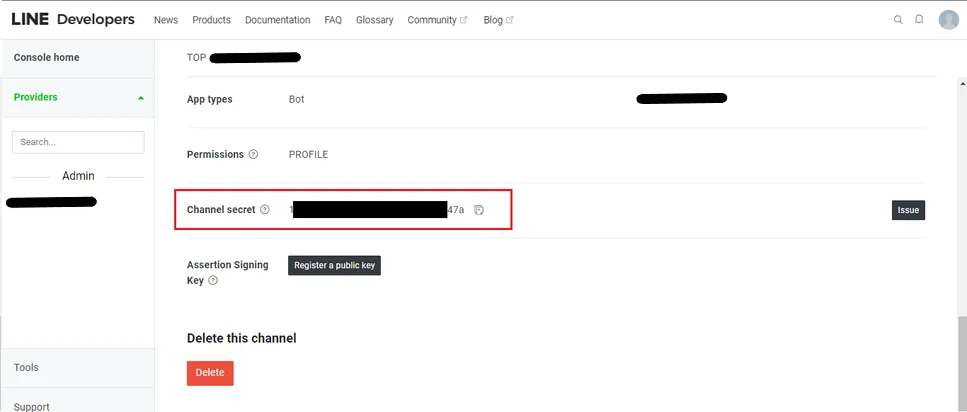
On the “Basic settings” tab, right at the bottom, the second-to-last option is the “Channel secret” key.
To get the “Channel access token”, we go to the Messaging API tab at the top. It is the second tab, after Basic settings.
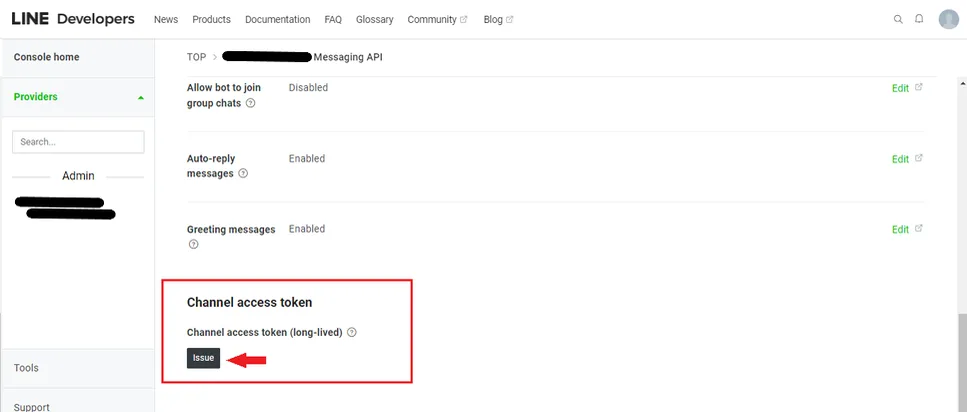
The channel access token is at the bottom of the Messaging API tab. To access the key, click Issue, as shown in the image below (highlighted in red).
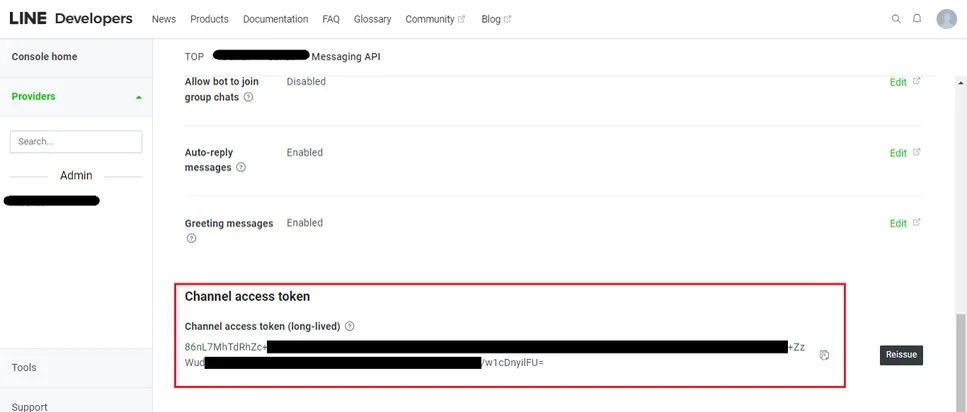
After clicking “Issue” to generate the channel access token, the screen will look like this.
Copy the three keys from the developer profile, following the steps above, and enter this information in NicoChat when creating a Line Chatbot. The information should look like this.
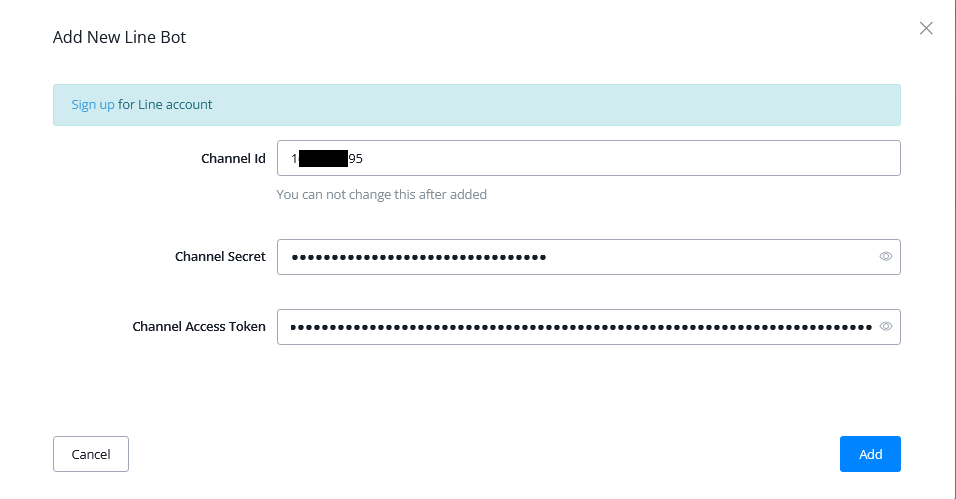
Click “Add”, in the bottom right corner, to link your Line Business account to your NicoChat account.
.webp)
Now that we have connected the NicoChat Line Chatbot to the Line Partner account, let us open the Line Partner account once more and check the NicoChat webhook, to make sure the Line Chatbot works perfectly.
If we skip this step, the Chatbot will not work.
The NicoChat webhook information can be checked in the Line Developer Portal that we created to access the Channel Access Token. (see the image below)
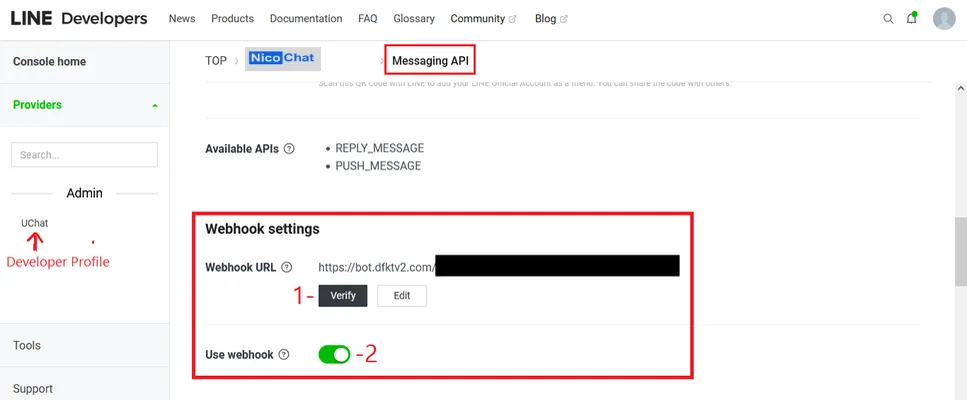
- #1 Click to verify the connection
- #2 Enable the “Use webhook” option to allow communication between Line and the NicoChat Chatbot.
You can now create the Line Chatbot and interact with your customers.
If you need more help, talk to the NicoChat community or contact NicoChat.