Using Ecommerce in the Flow
You can check this "Ecommerce Template" for inspiration after setting up your ecommerce system.
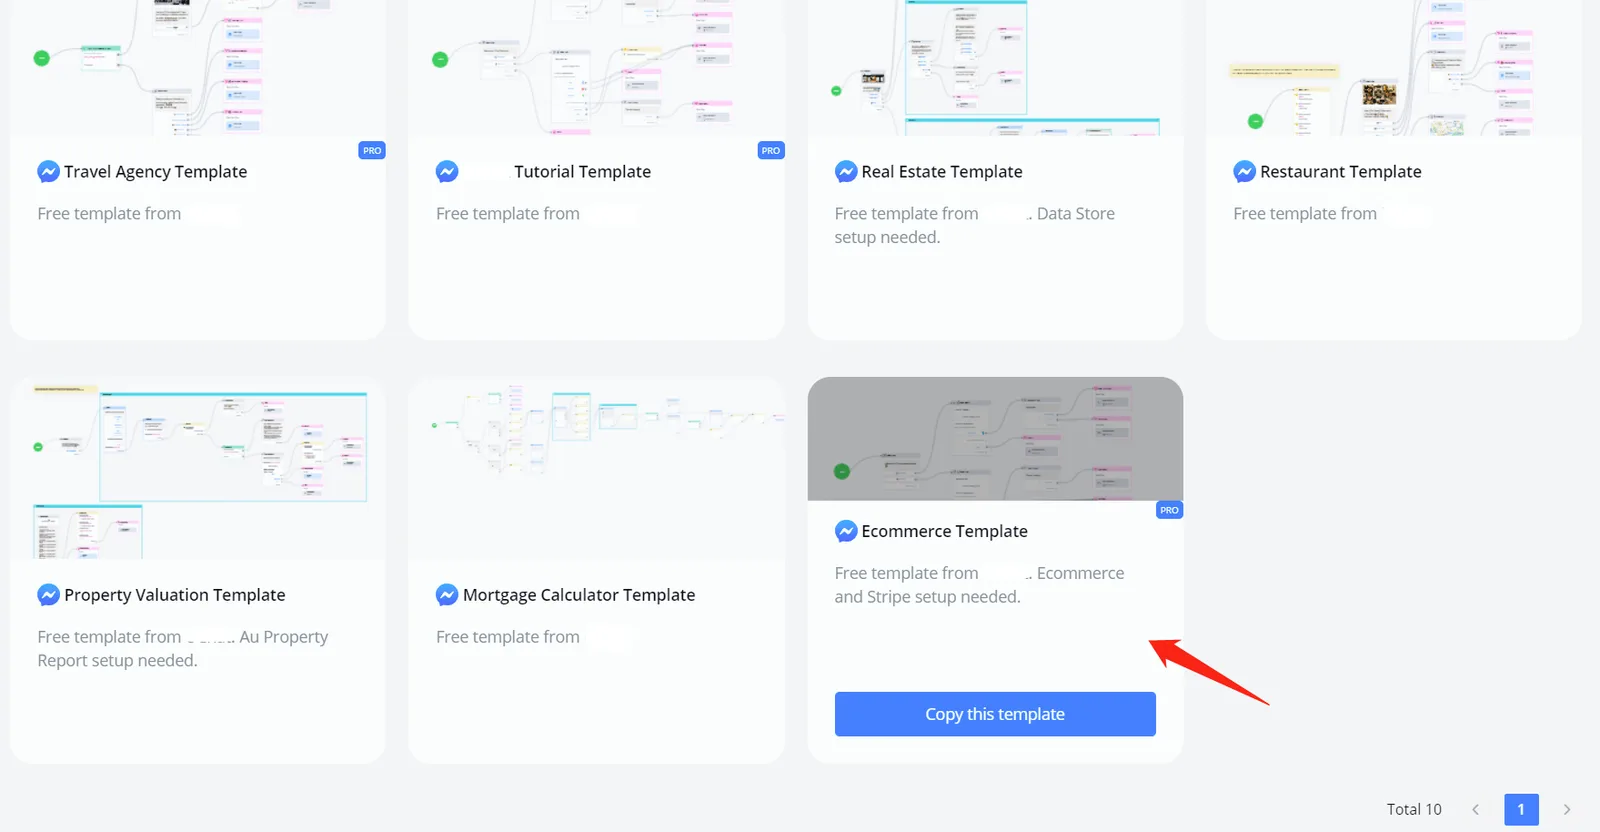
You can check this "Ecommerce Template" for inspiration after setting up your ecommerce system.

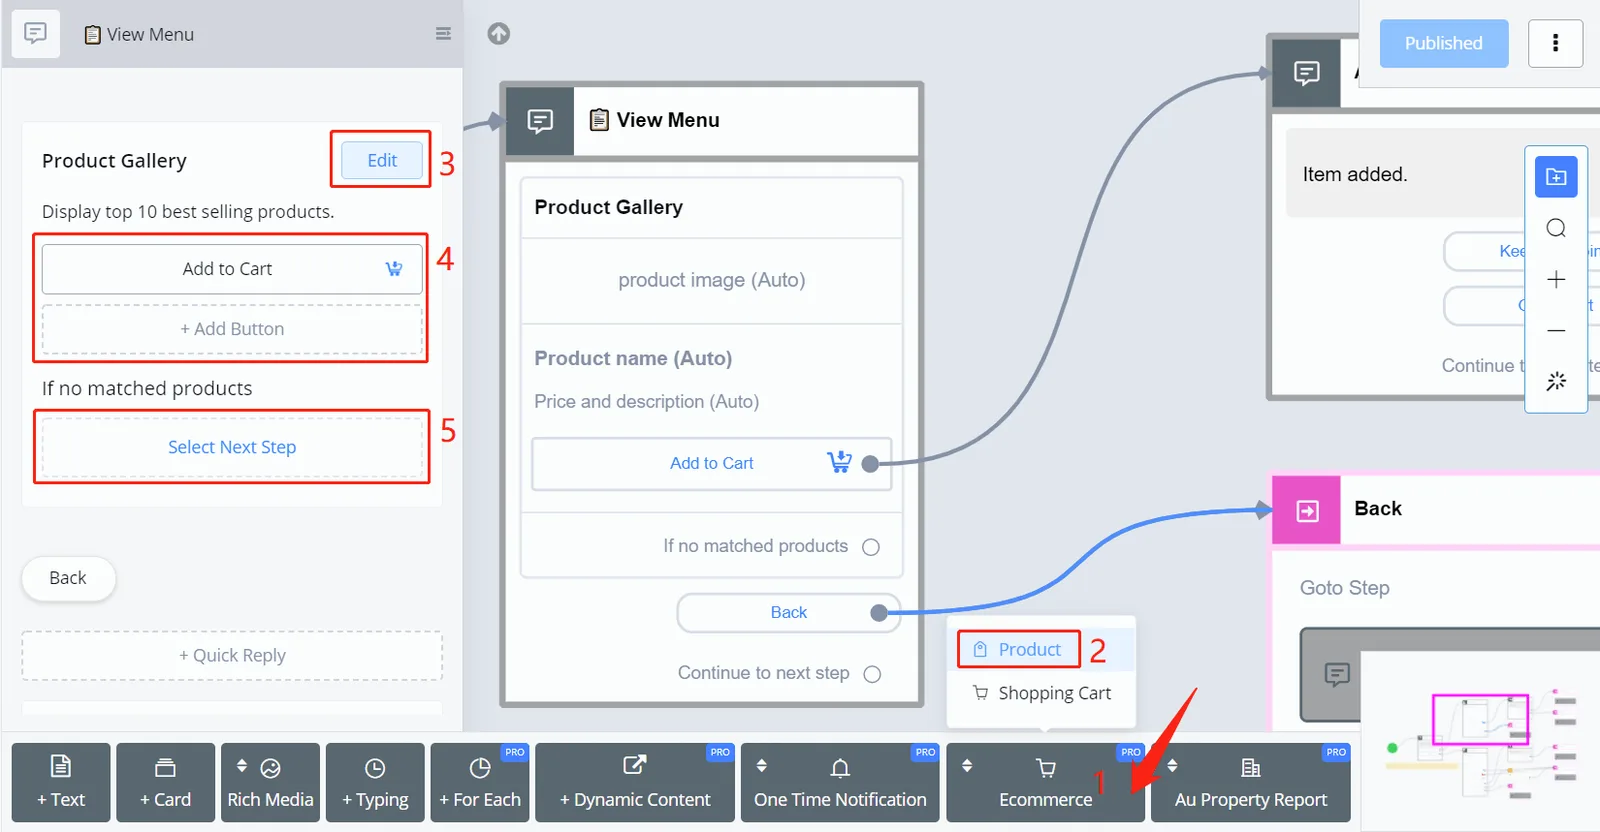
In the Send Message step, find "Ecommerce"(1), "Product"(2) and click "Edit"(3). The buttons added in area 4 appear below each product. And don't forget to put the Prompt in area 5, in case no product matches.
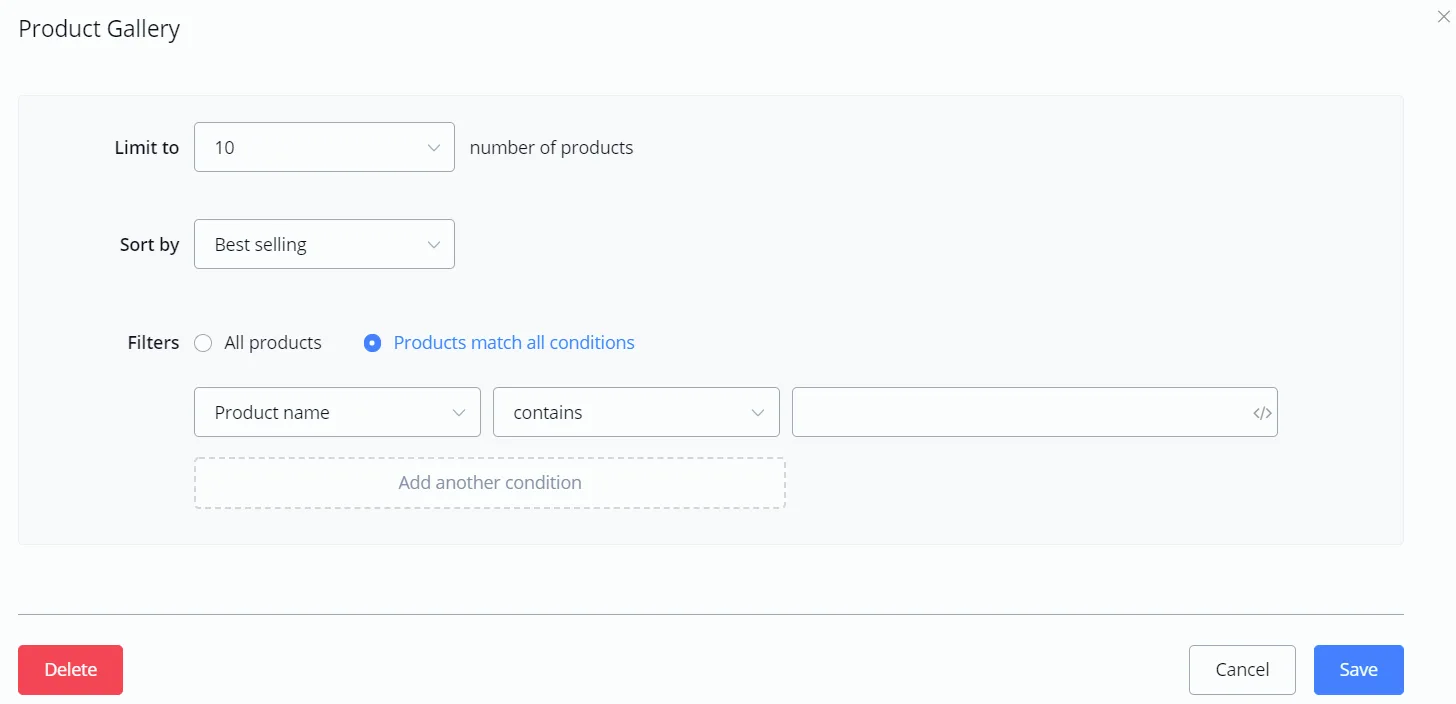
- choose how many products to show, from 1 to 10
- select a sorting condition according to the user's choice
- set a filter with as many conditions as needed.

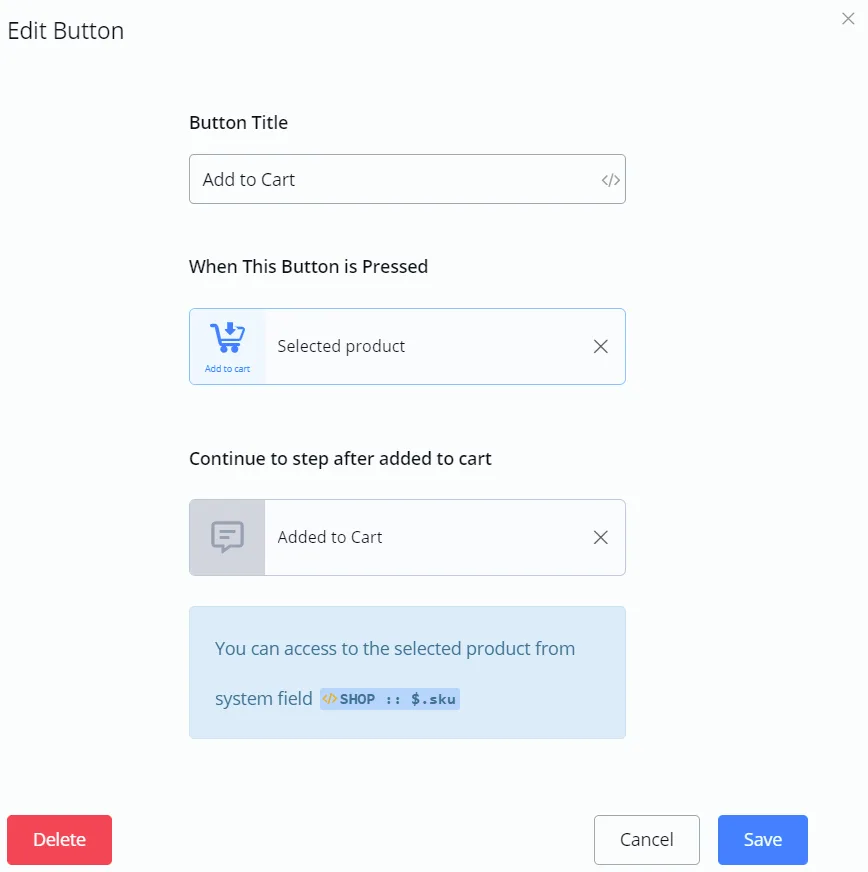
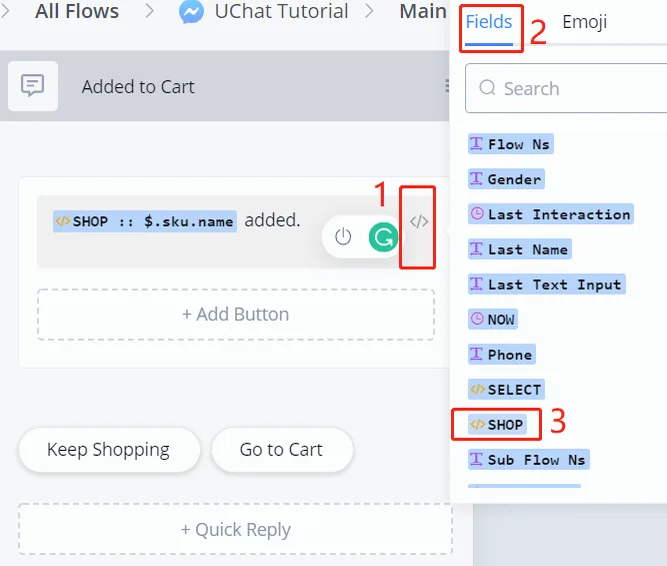
Select "Add to Cart" when the button is pressed. It is also good to inform what was added. Get the information of the added product from the "SHOP" JSON variable.
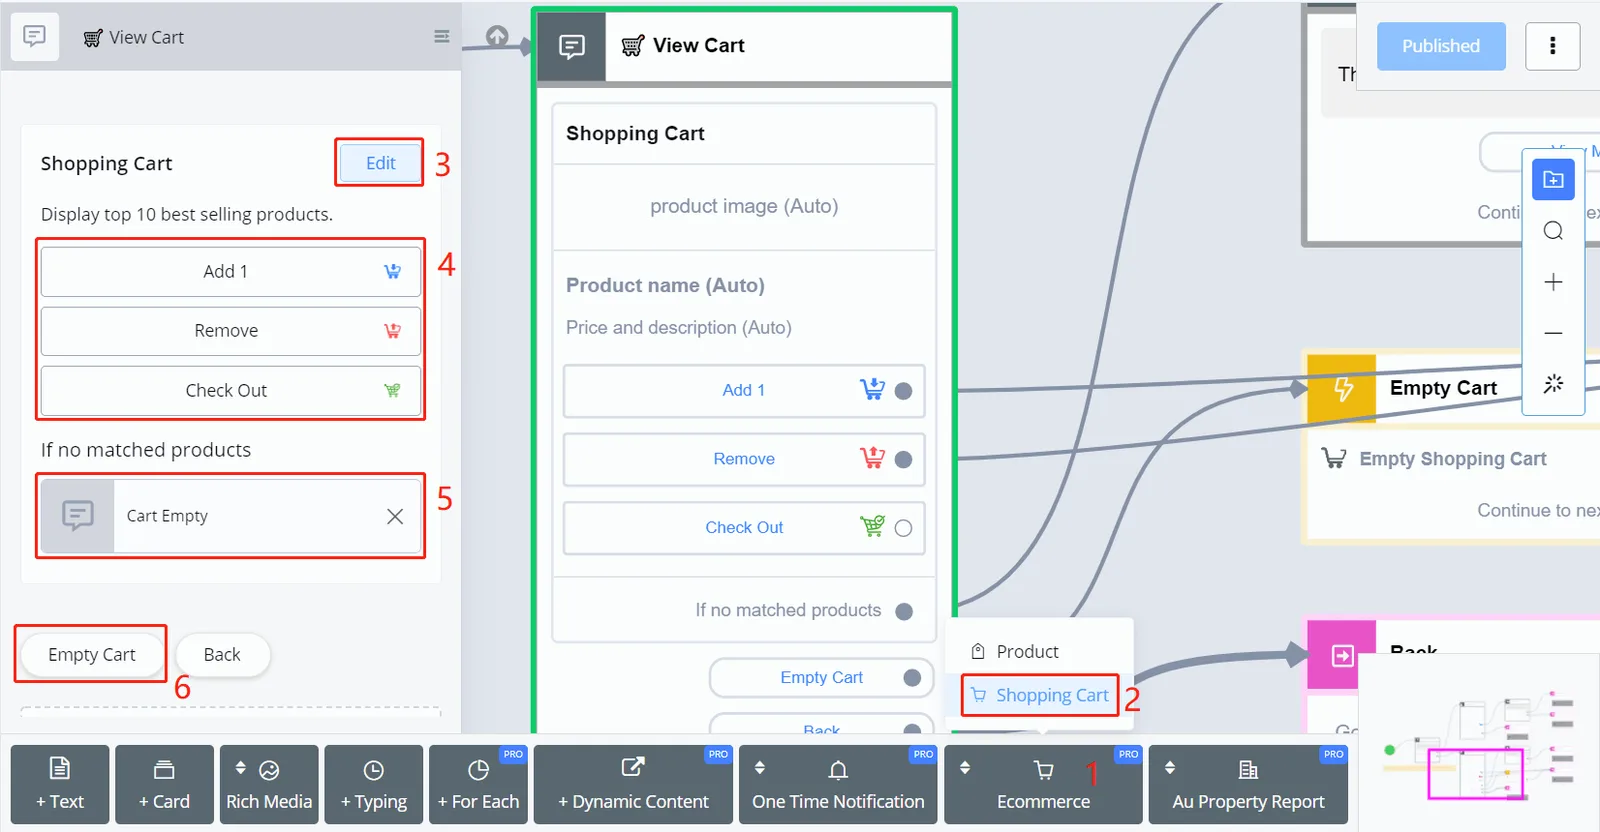
Find "Shopping Cart" under "Ecommerce" and click "Edit". Again, any button placed in area 4 will be displayed with every product.
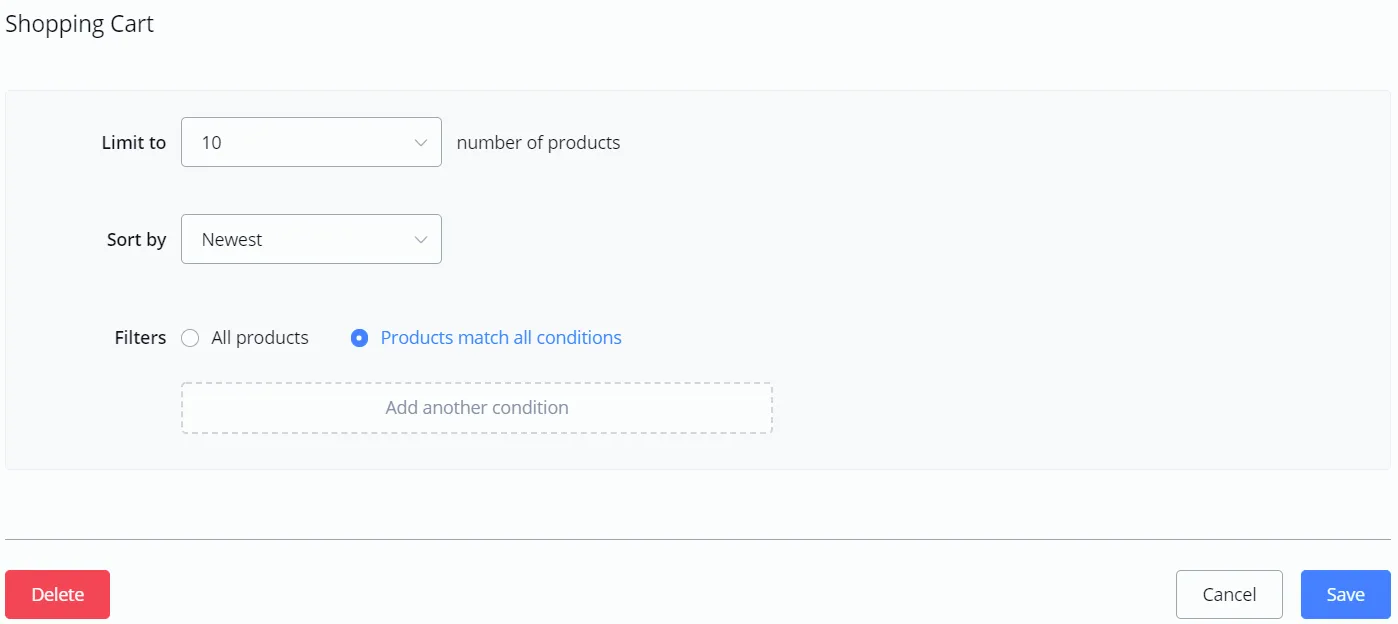
The edit page of "show cart" is similar to the "show product" one, but it is a bit more complicated, because the cart has to display every product for review before checkout.

Select "Remove from Cart" when the button is pressed. You may want to use a Goto step that leads to the cart again, to refresh it, since there are quantities displayed along with the products, unlike a static menu.
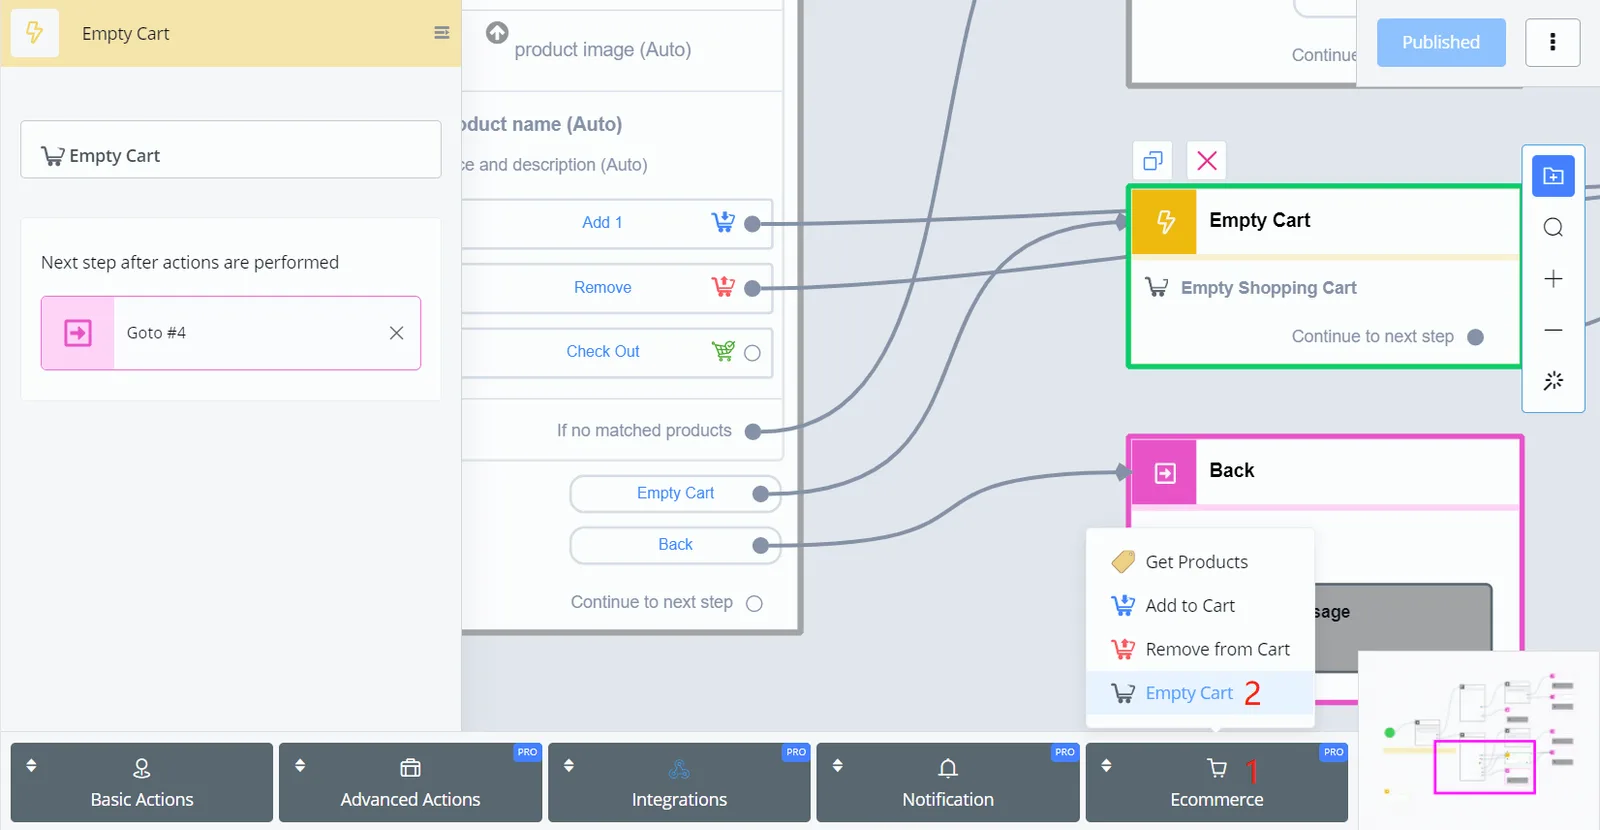
Select "Empty Cart" when the Quick Reply is pressed. Why not a button? Because it can be redundant to have more than one “Empty Cart” following every product. Besides, “Empty Cart” is in the Action step, not in a button action. That is why you need to select an Action step as the next step of the Quick Reply.

We have just said that it is redundant to have an “Empty Cart” button on every product, but why put several “Checkout”? Because the actions of the Action step are processed in the backend, while “Checkout” requires the frontend to open a website, the checkout page. That is why you can only call "Checkout" on a button.
If you do not want to put “Checkout” on each product, try adding one more text-type information after showing the cart:
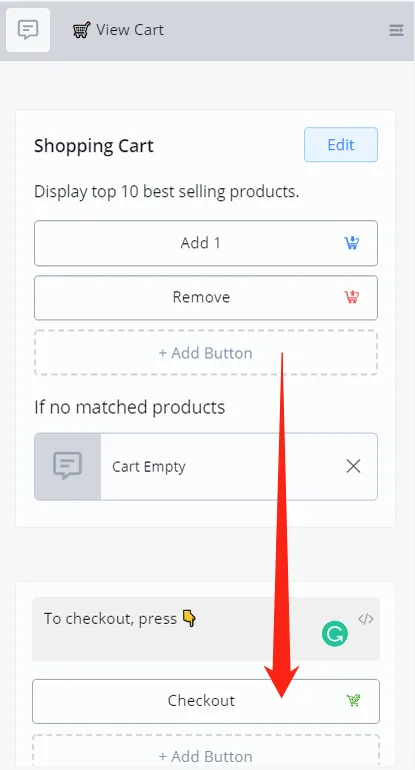
When completing the purchase, first the list of products appears with quantity and price and then an area for the user to leave their contact details:
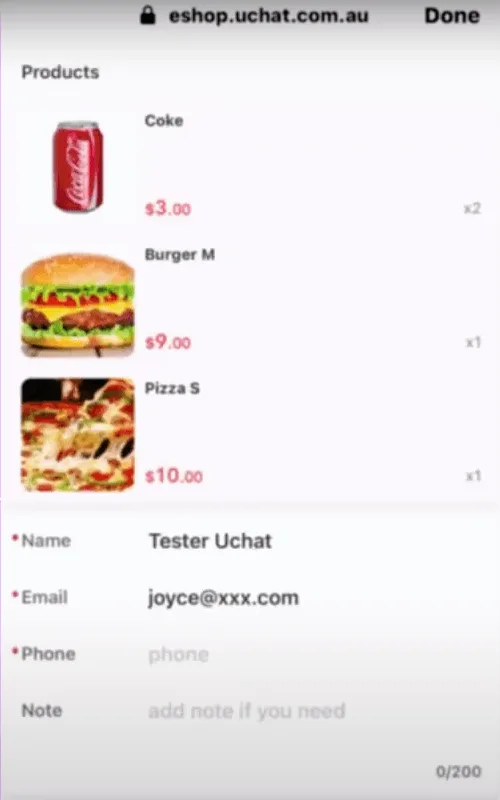
Keep scrolling the page and you will see the delivery options, the coupon code and a summary of the order.
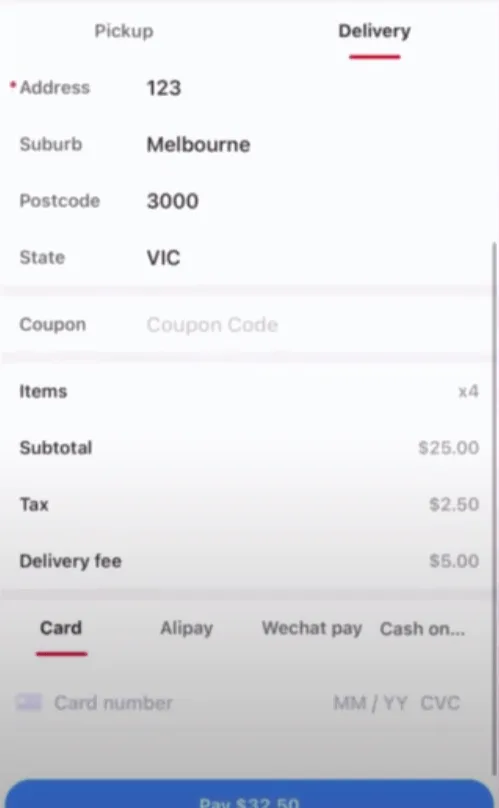
Finally, when selecting a payment option and clicking “Pay $xx.xx”, the page will be directed to Stripe.com. If you are in text mode, you will see this:
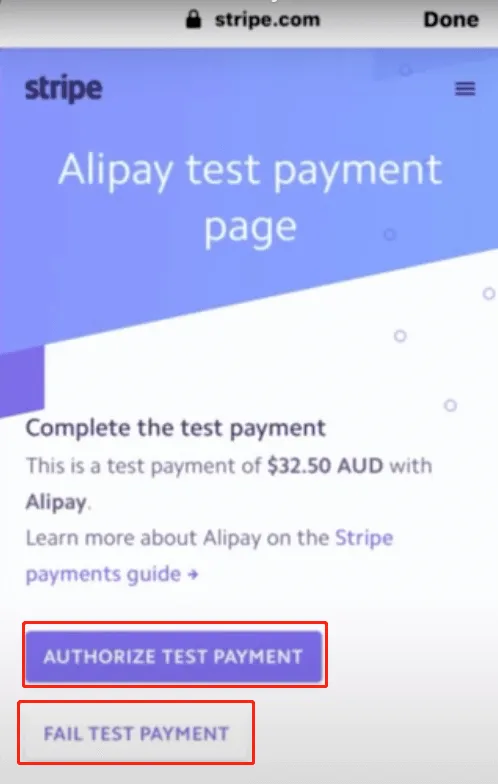
Click "AUTHORIZE TEST PAYMENT" or "FAIL TEST PAYMENT" to test what it looks like when the payment is approved or fails.
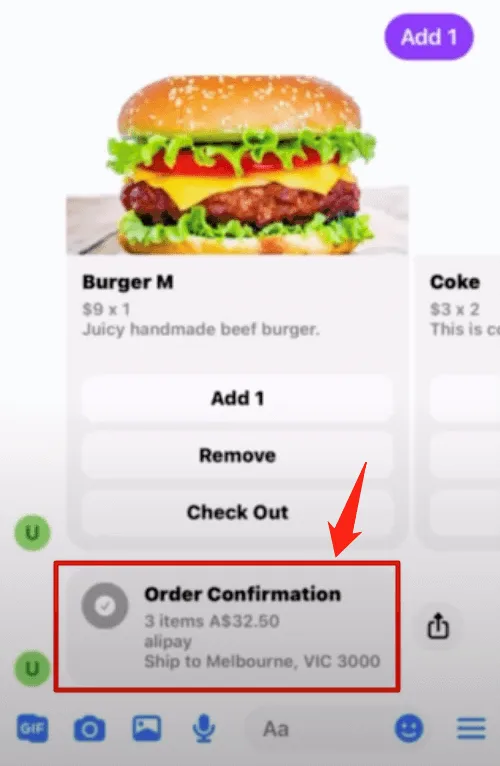
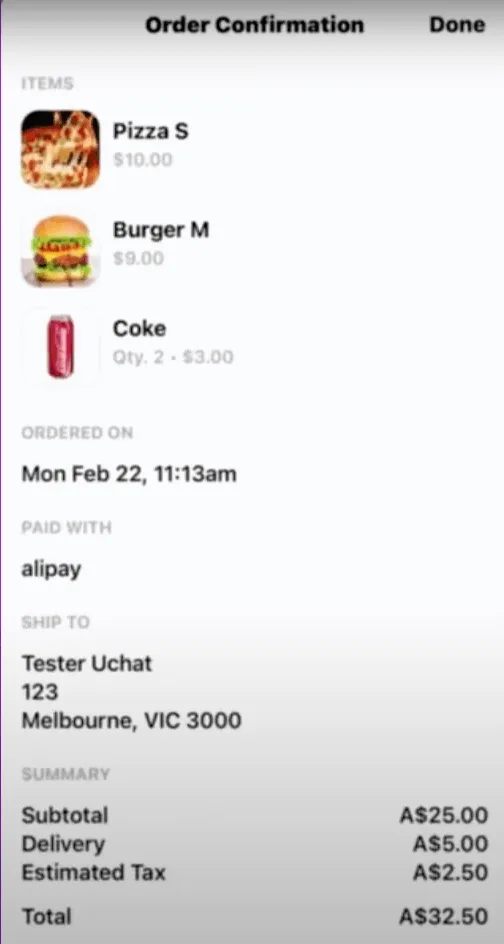
An order confirmation is sent when the payment is successful. Click on the confirmation to see the order details.
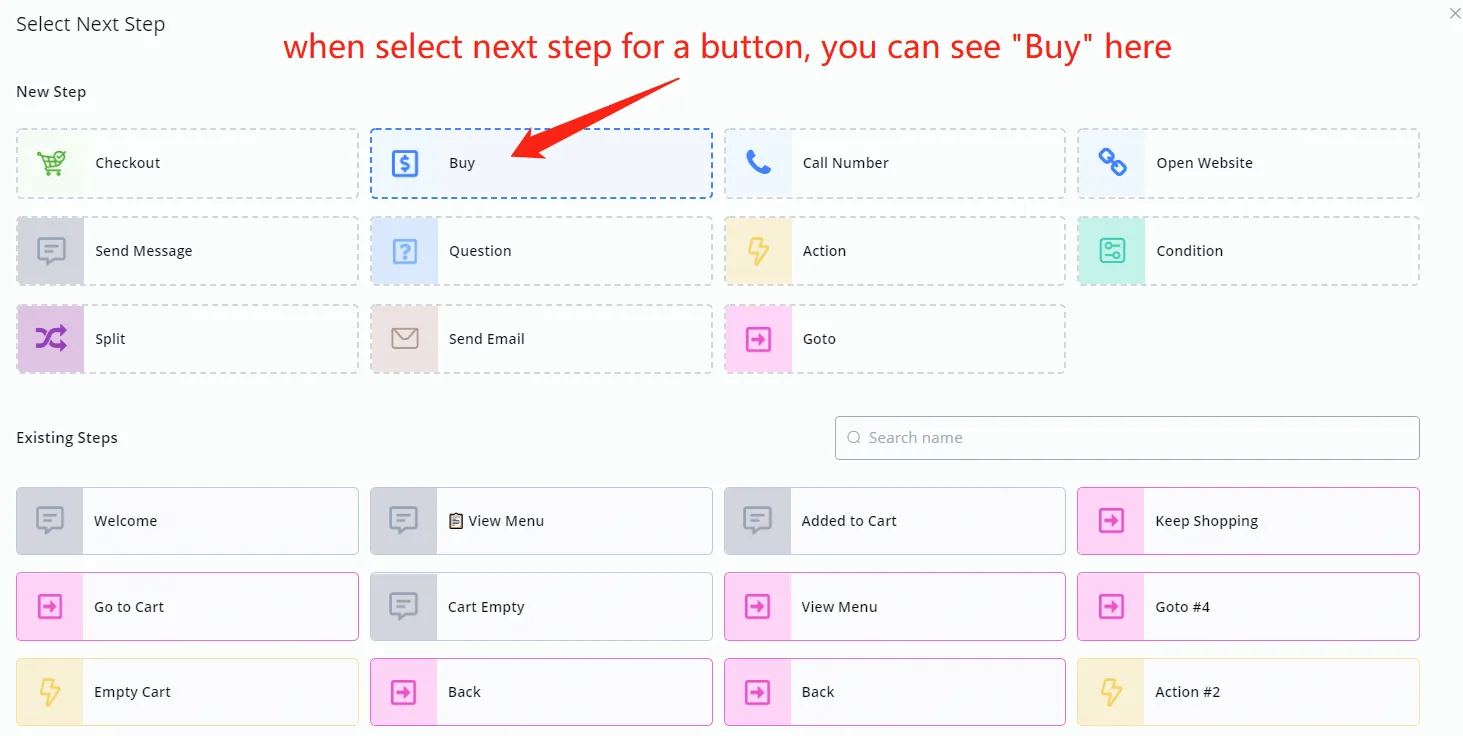
"Buy" is actually a feature that has nothing to do with the built-in ecommerce system. After setting up your Stripe integration, users can buy a product (which can be from your Stripe account) with one click on the "Buy" button, without any ecommerce system configuration.
The feature is suitable for ticket-type products, without options, or for subscription payments, among other cases.
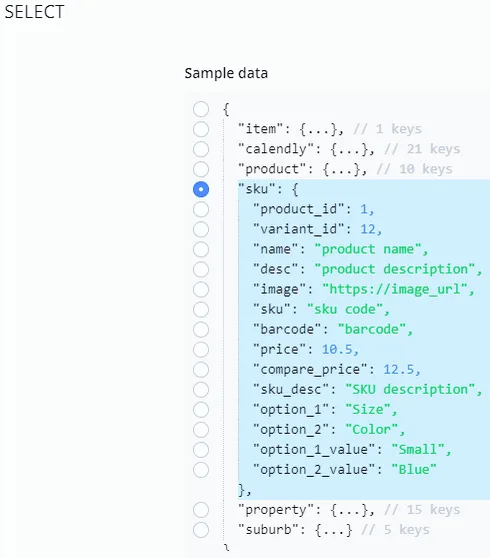
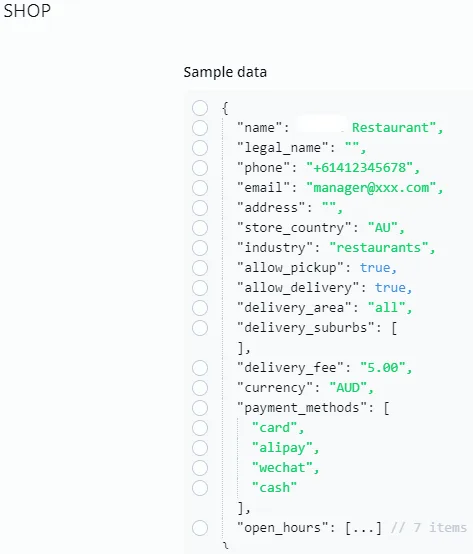
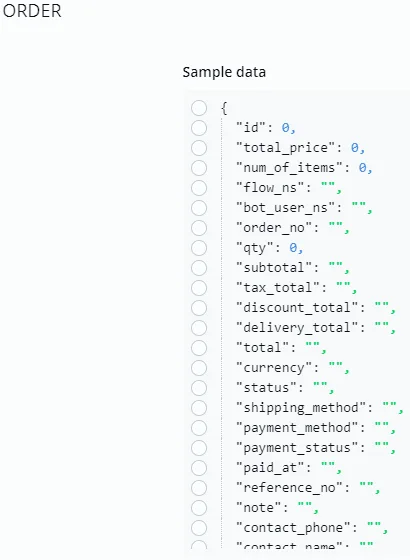
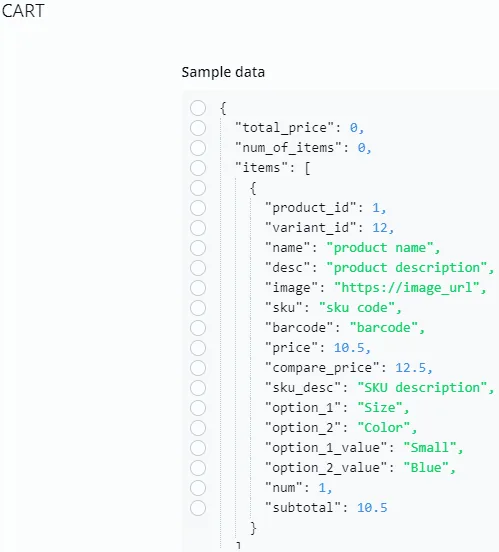
There are several system fields that store information about the ecommerce system. Usually, the system itself indicates where to find them, in data like this:
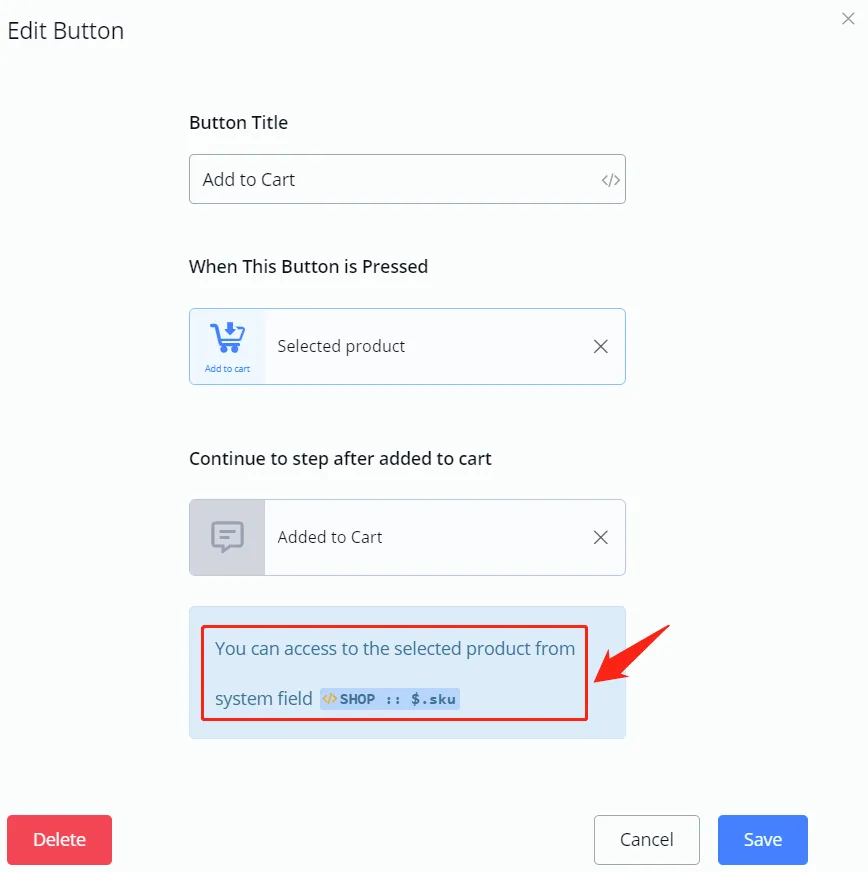
You can access them whenever you see "</>":
"SHOP" stores all the information about your ecommerce settings.
"ORDER" stores the user's last order. You only get an order after checkout.
"CART" stores the user's shopping cart.
When you choose “Select” when a button is pressed, the selected item is stored in “SELECT”.
SELECT.product:
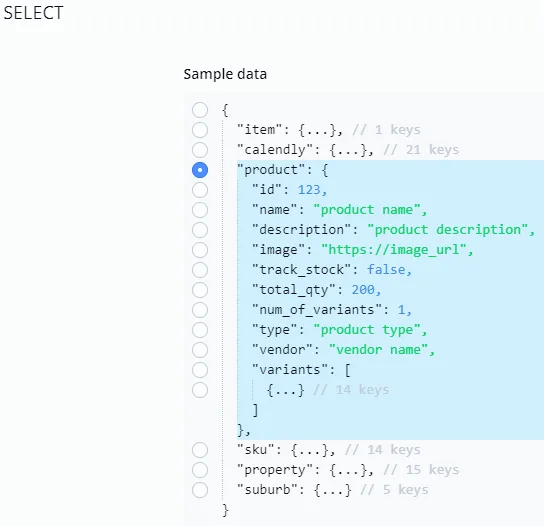
SELECT.sku: