

Ecommerce Setup
Here is where you manage your products. When you add new products,

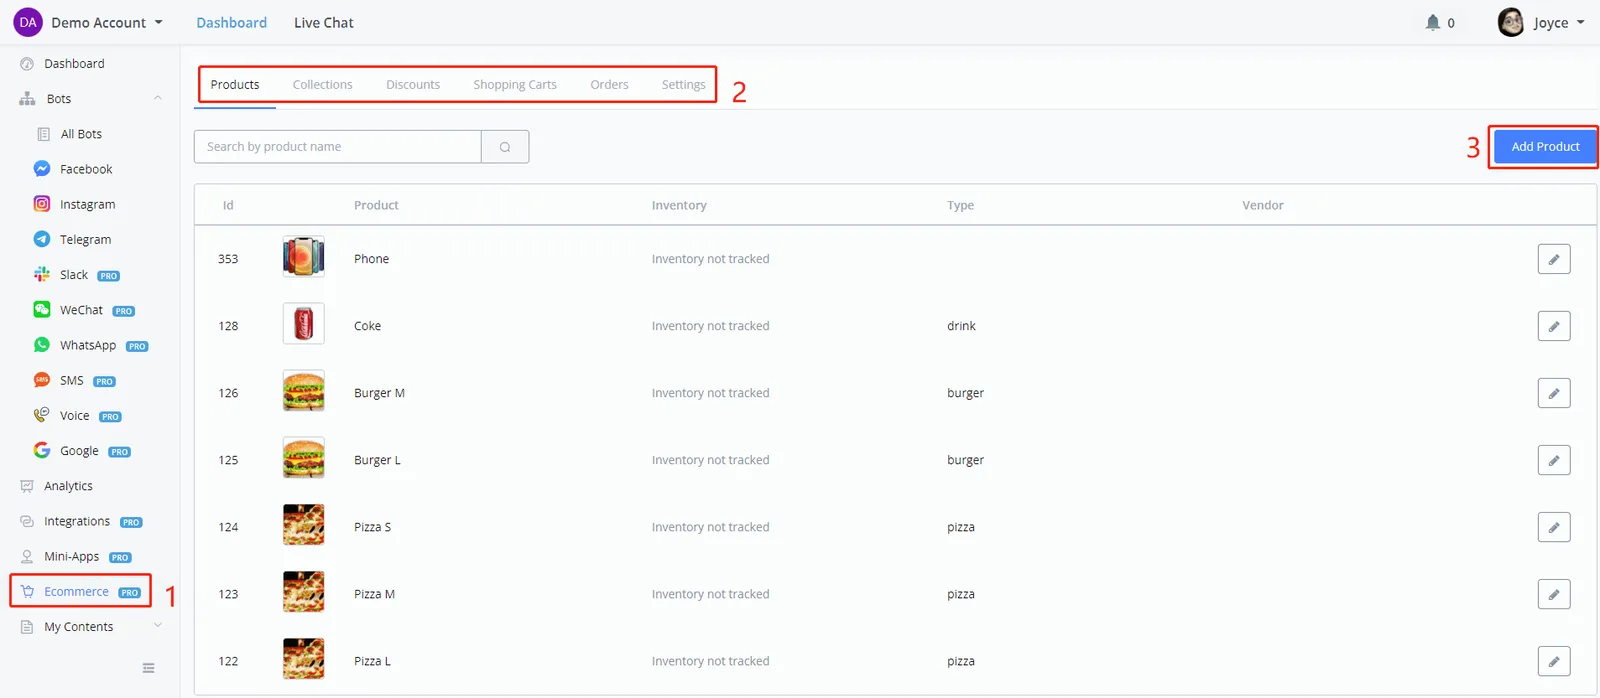
Here is where you manage your products. When you add new products,
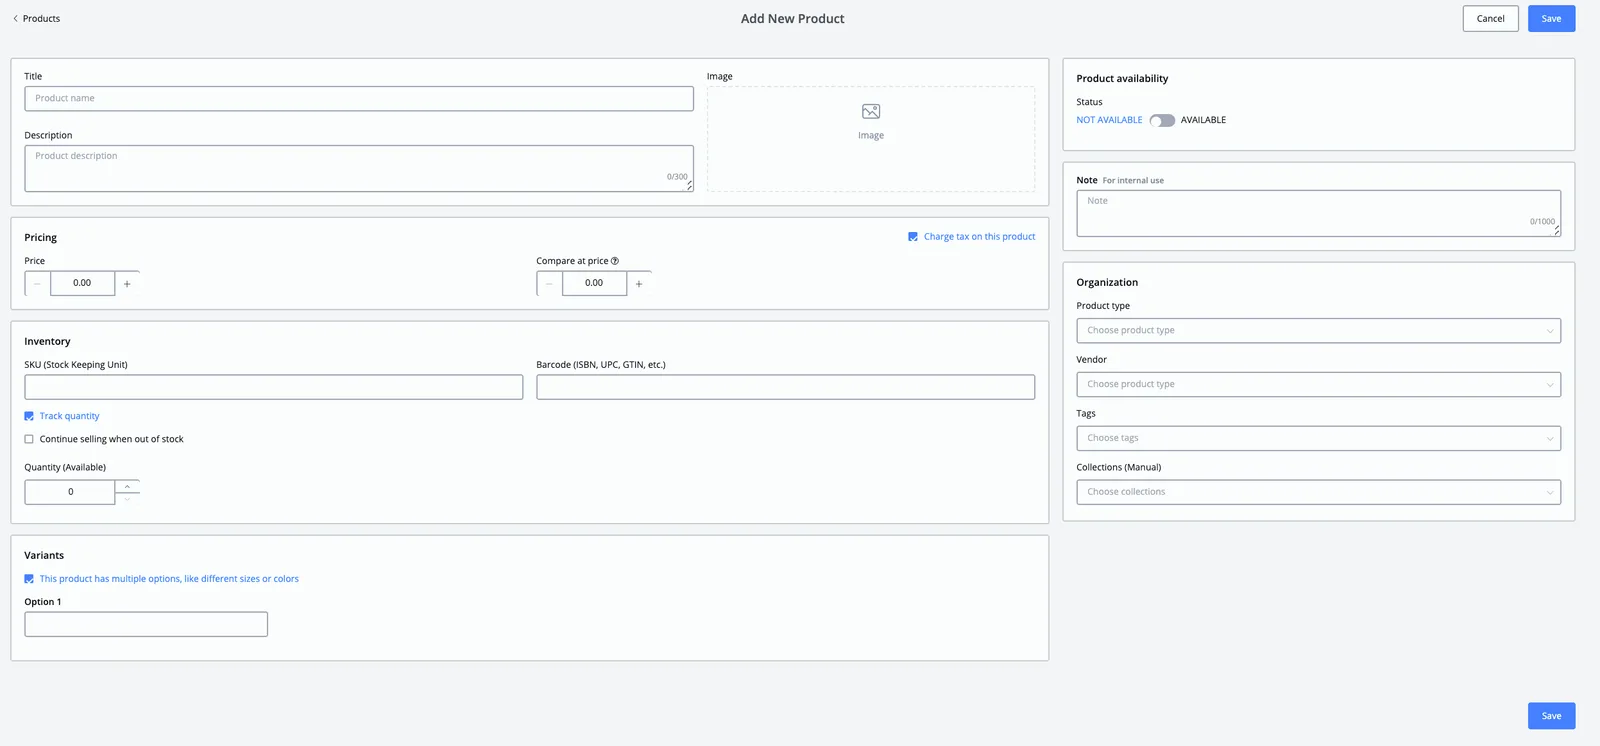
Remember to set the product availability status. Use the Organization section to sort and organize your products:
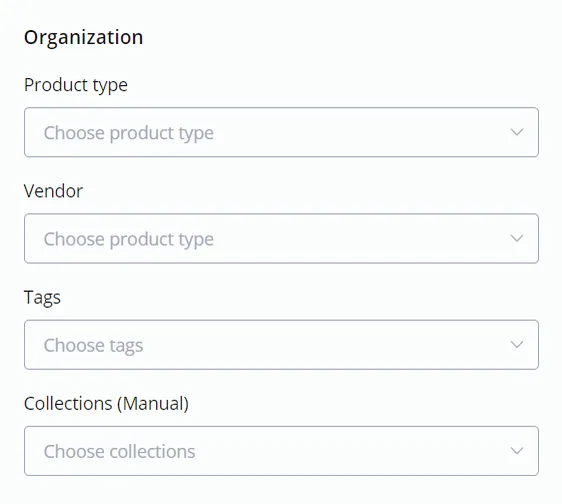
When you click to choose the product type, the vendor, the tags and the collections, the list may appear empty at first.
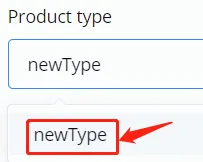
Don't worry: just type a new name and click it to create one. See the picture above. To create a new collection, however, you need to access “Collections” — see below.
If a product has multiple options, use “Variants”.
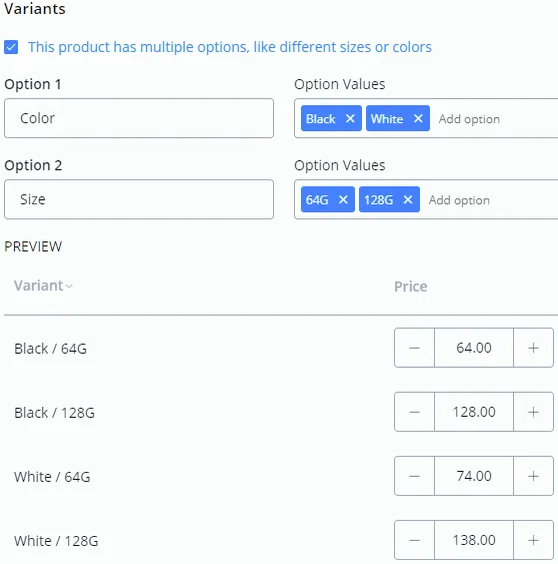
In the screenshot above, tick the checkbox first and give the option a name, such as size, color, weight, etc. (maximum of 2 options). Then, under "Option Values", list all the available values of that option: type in the field, for example, 128G and enter a comma or press the "enter" key on your keyboard. The value then appears in a blue box with a delete button.
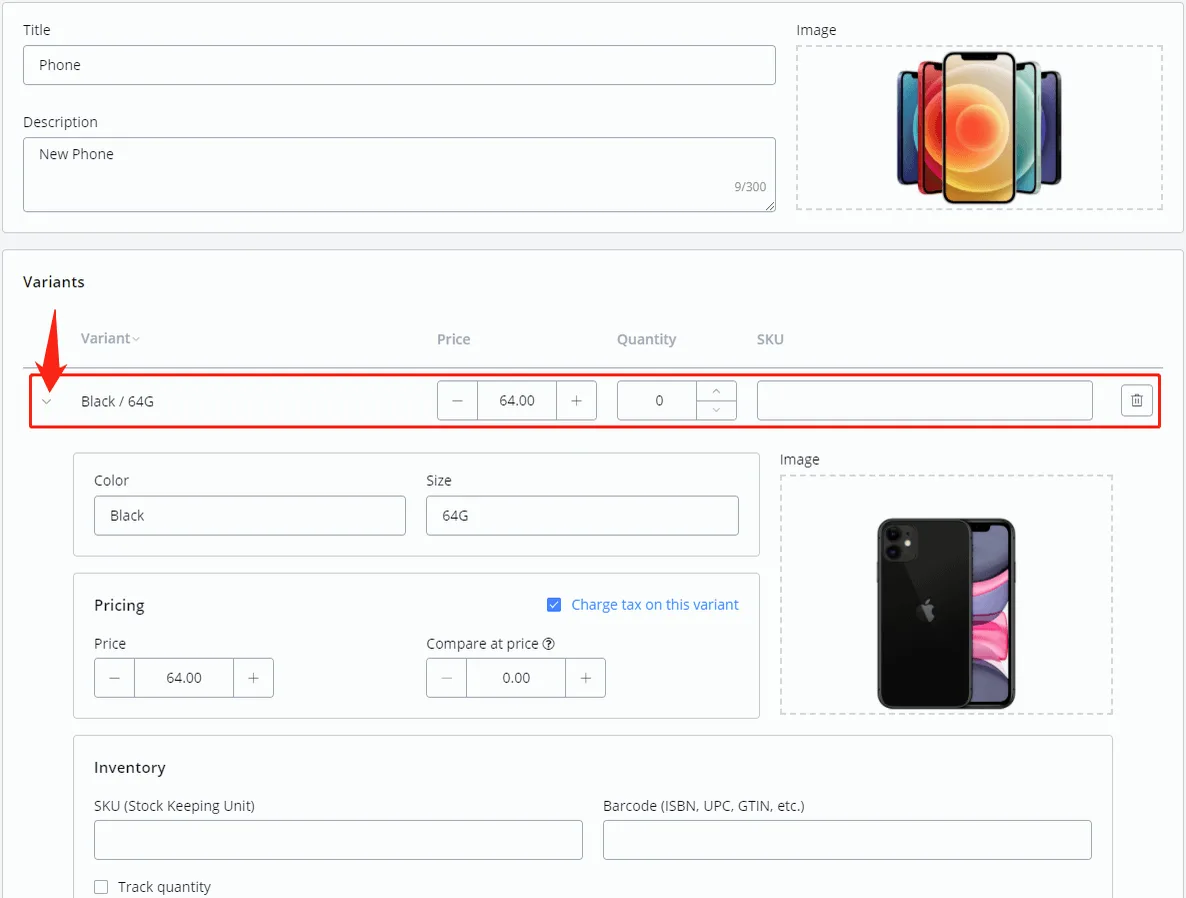
After setting up all the options, you can edit the price of each variant. Click "Save" to create the product and click the pencil icon to go back to the editing page and add more details of the variant, such as photo, compared price, inventory, etc.:
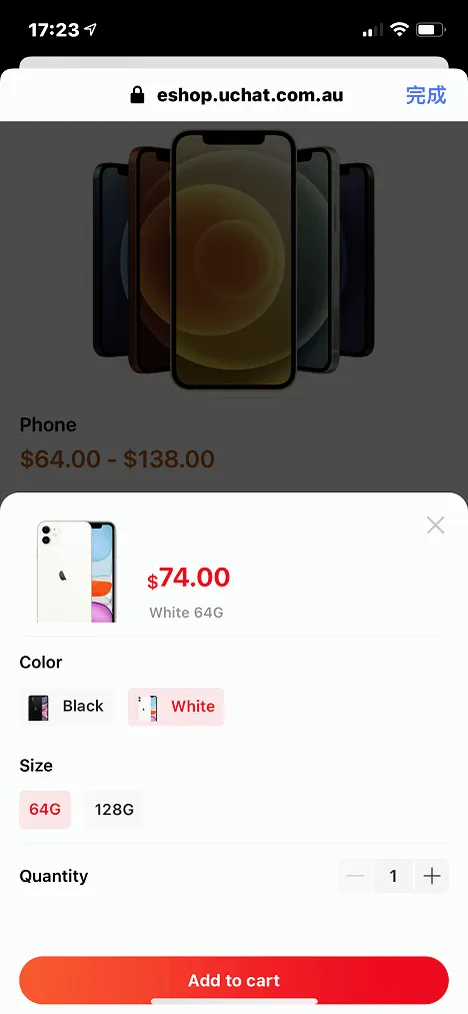
This is how it looks in the shopping interface:
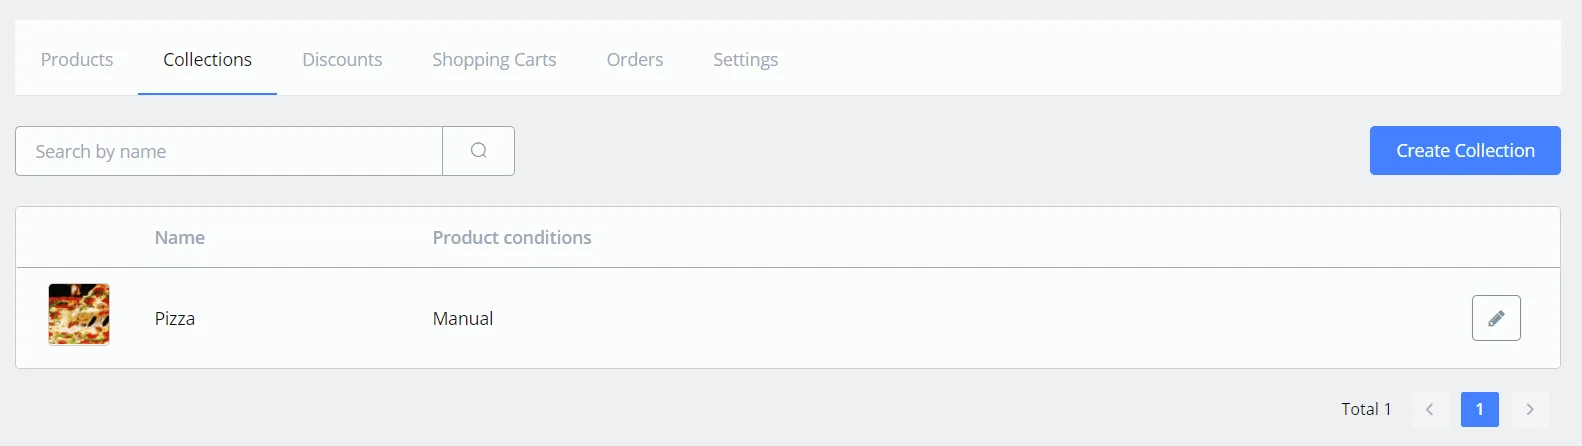
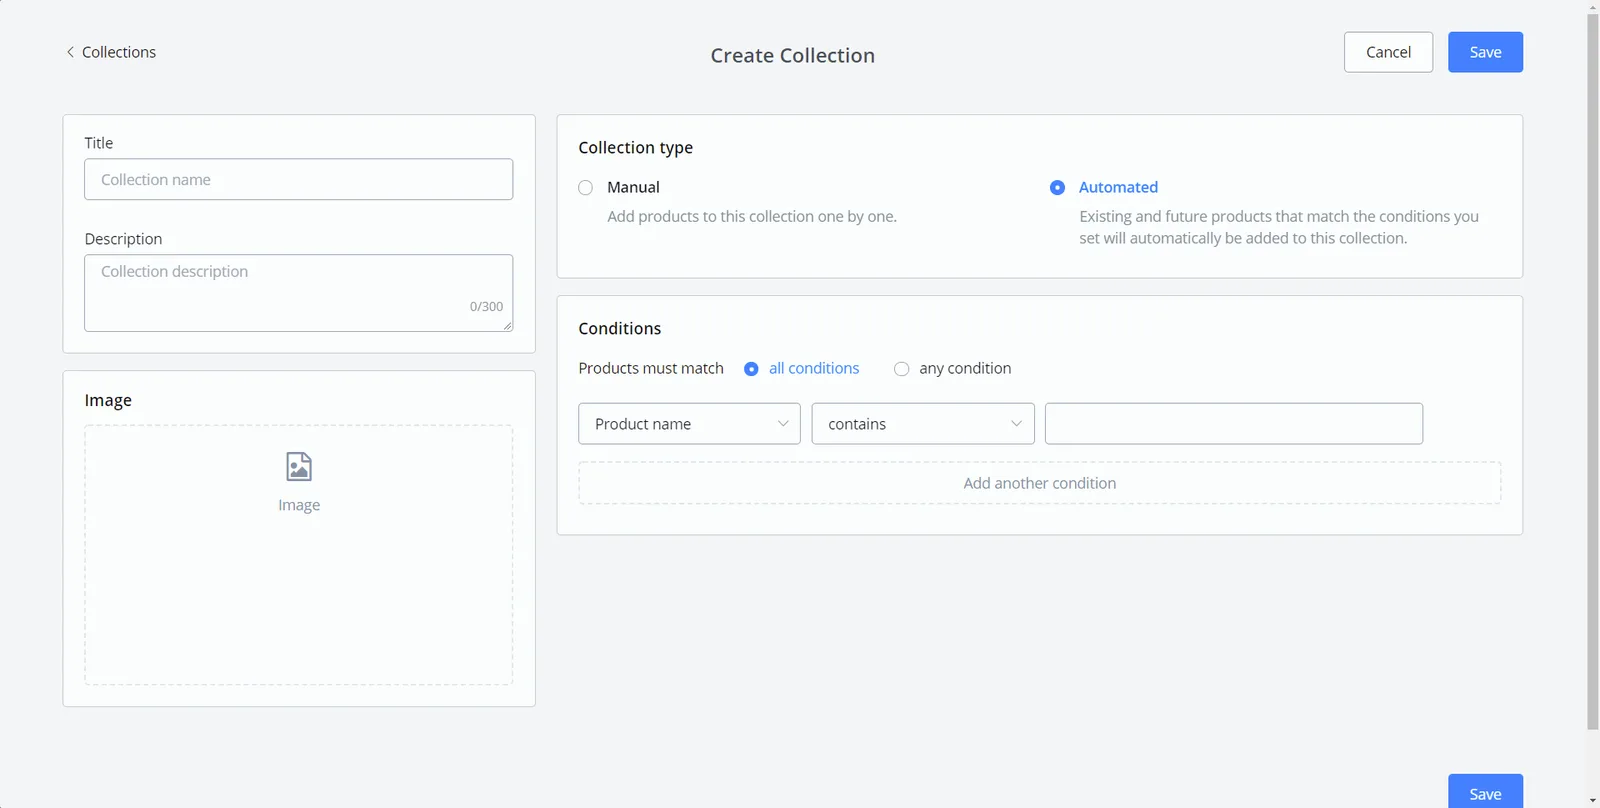
When you create a collection, you can add products to it in two ways:
- manually add existing products to it
You need to choose the “Manual” option and save it first; then click the pencil icon to add products. When adding products, click the "Search" button without any keyword to get the full list of all existing products, or type a keyword to search.
- add automatically by setting conditions
Set up the conditions before saving. "all conditions" means that only the product that matches all the conditions listed here will be added to this collection. "any condition", on the other hand, means that the product that matches any one of the conditions listed here will be added.
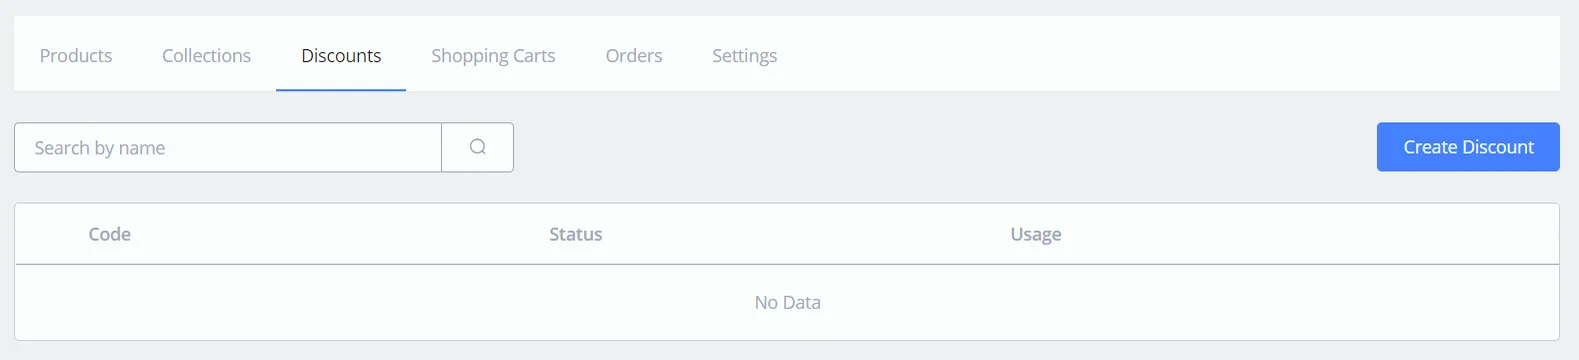
Select the “Discounts” tag and click “Create Discount”.
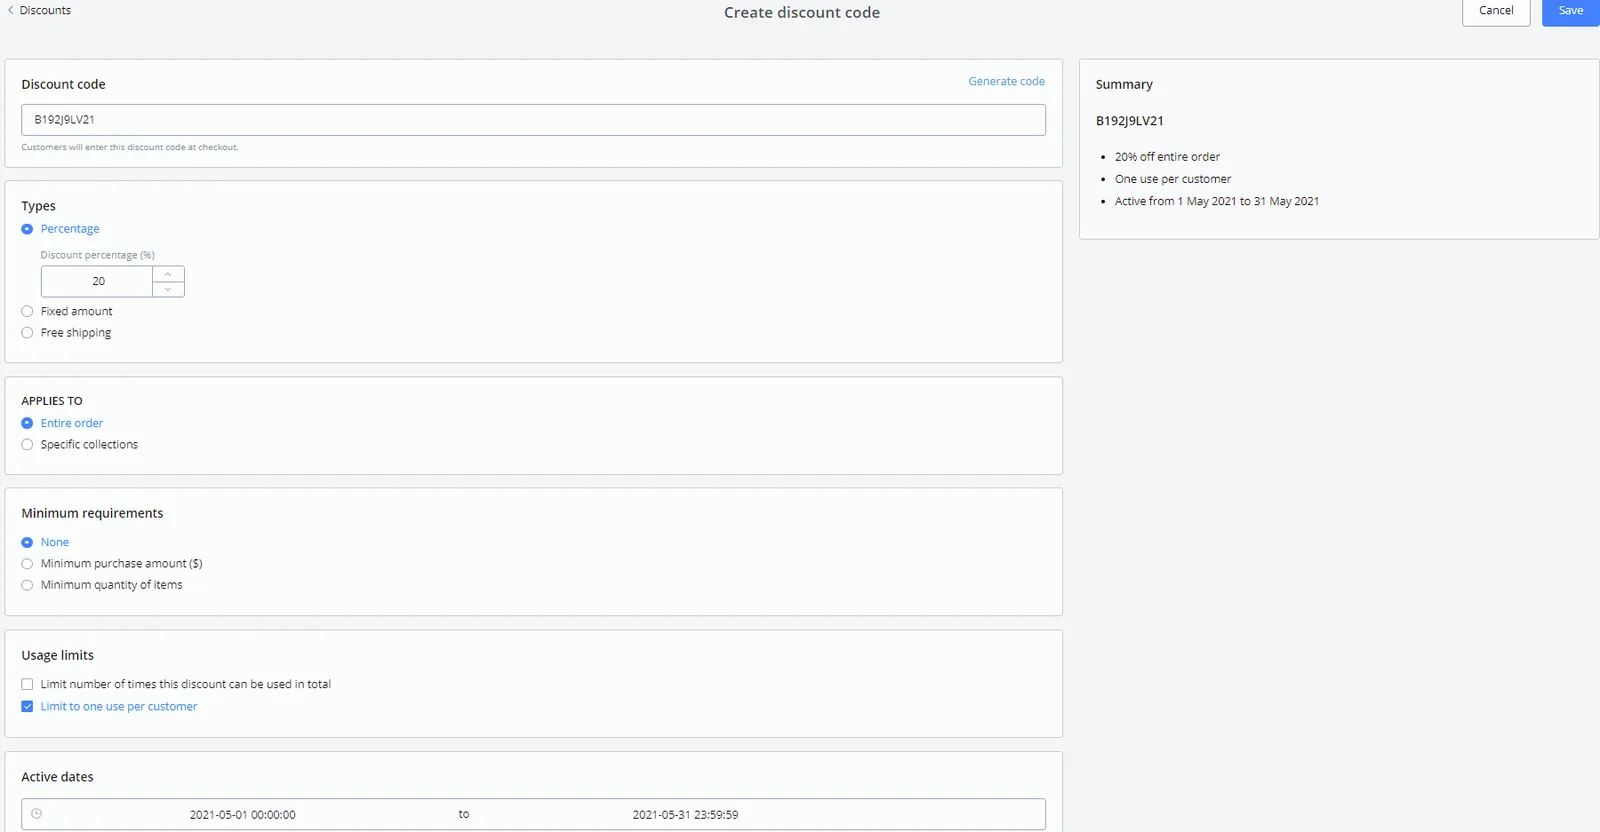
Use "Generate code" to get a random code or set a code yourself.
Customize the rest of the discount details as you like. Once done, click “Save”.
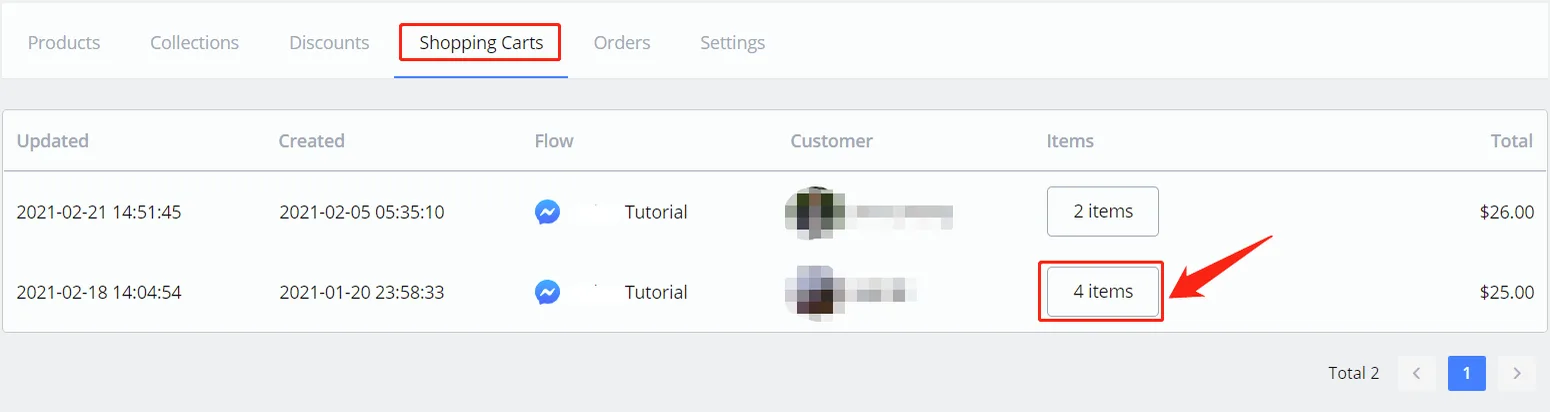
Here is where you check the users' cart information. Click the "x items" button to view the item details, as in the example:
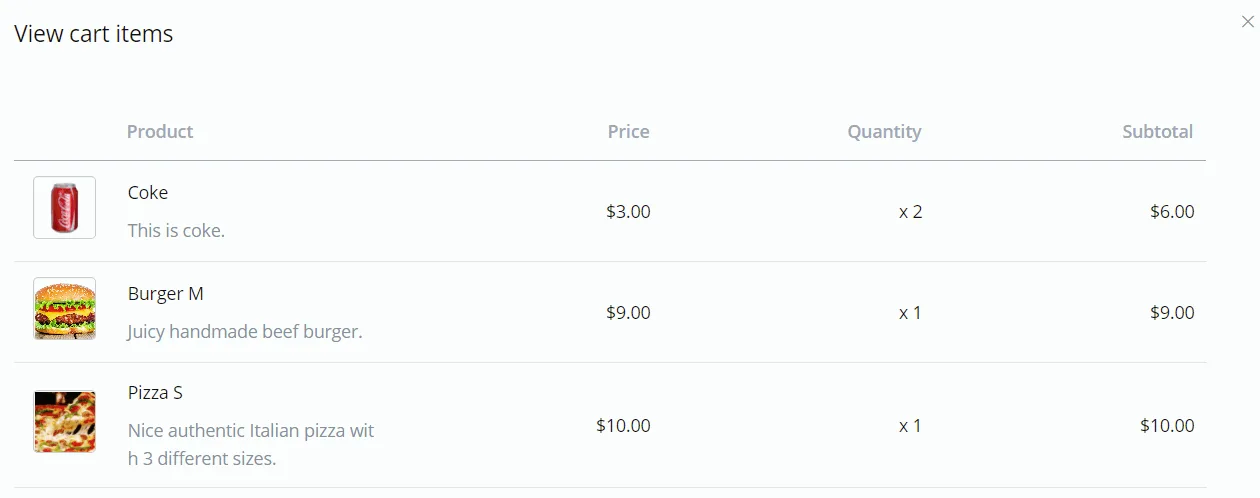
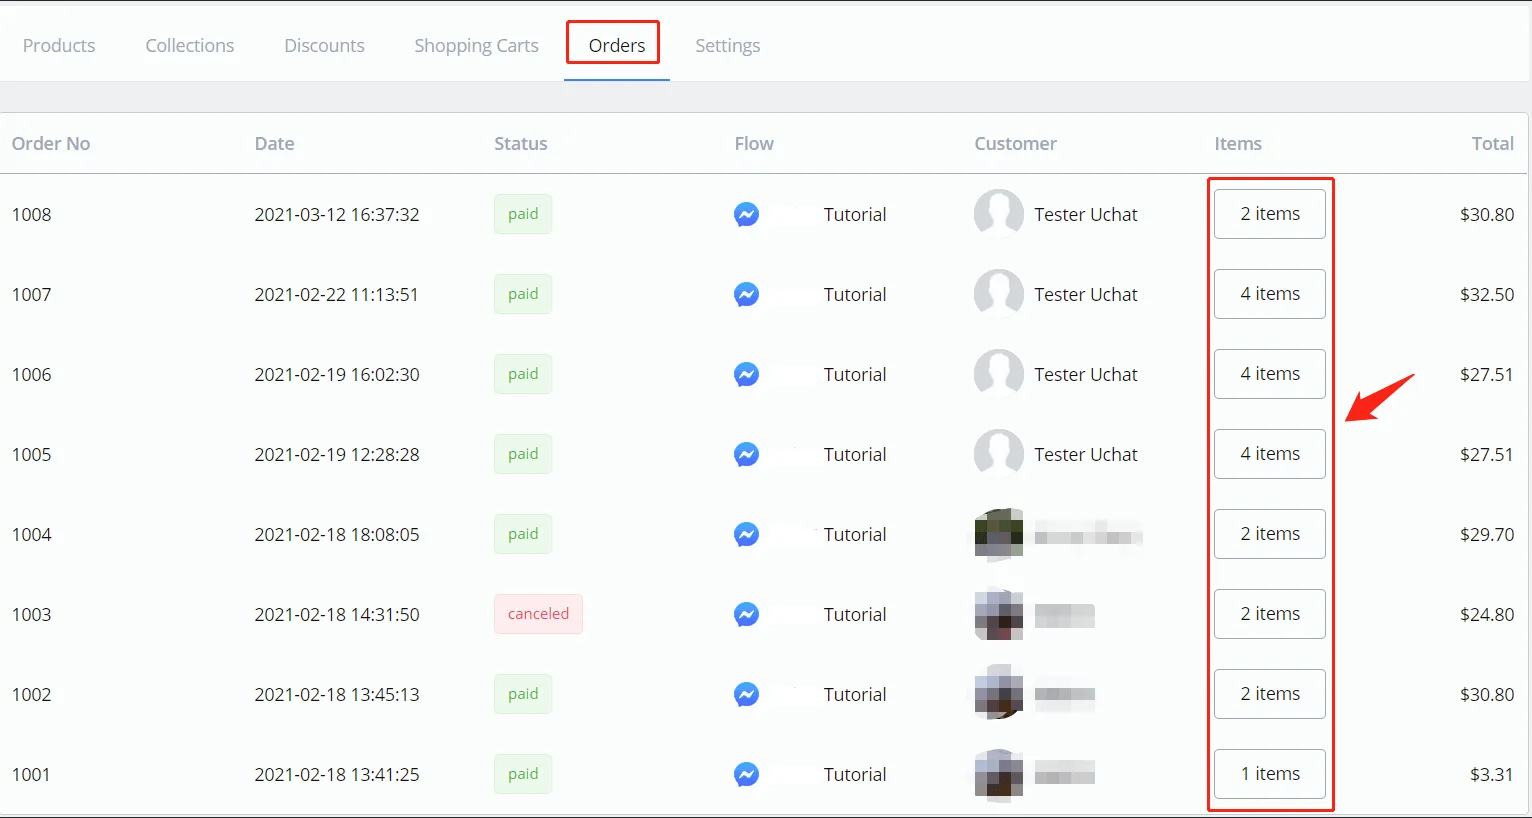
The entire order history is listed under "Orders". Again, click the “x items” button to view the item details.
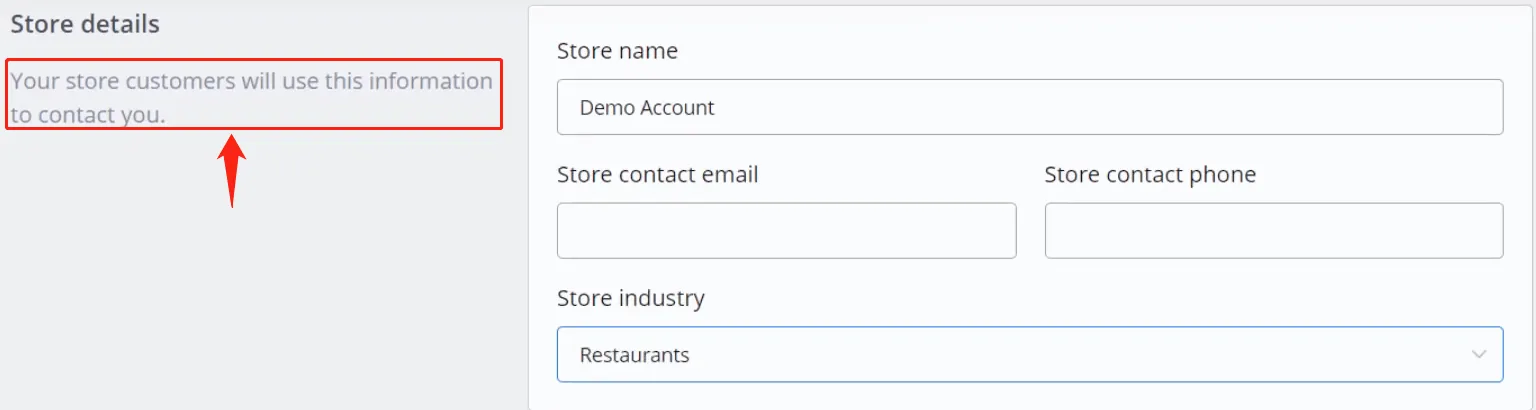
Enter your store details.
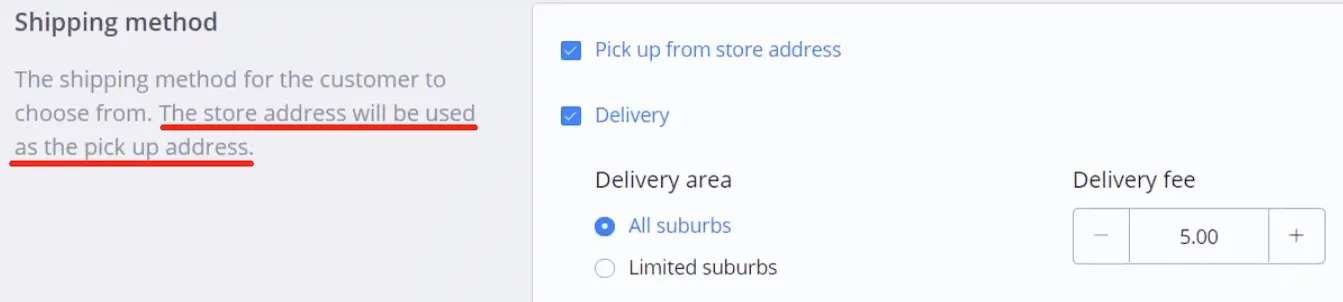
Check all the available shipping methods. If the "Pick up" option is checked, do not forget to fill in the "Store address", above "Shipping Method".
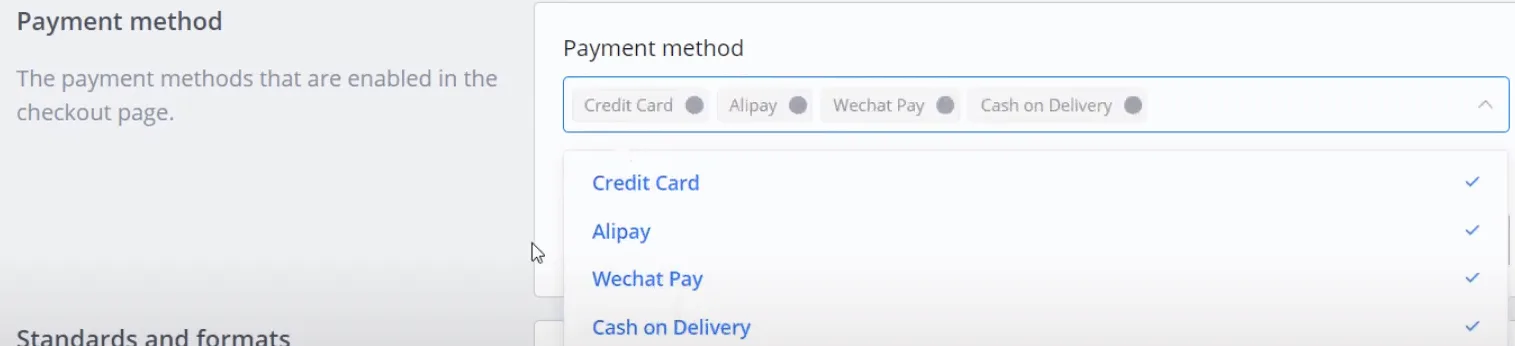
Check all the available payment methods and select the currency.
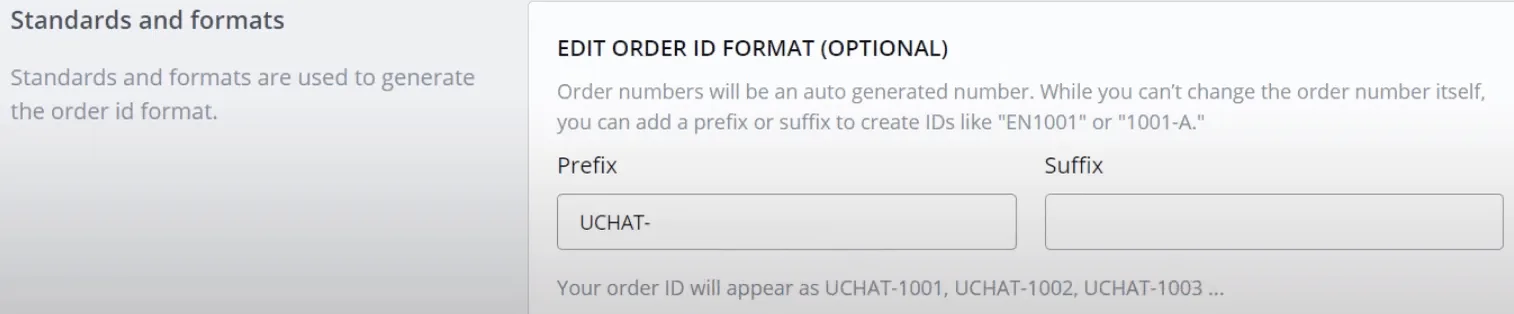
Finally, add a prefix or a suffix to your order ID, if needed.
All these settings can be accessed in the flow's “SHOP” JSON. Check the "SHOP" JSON variable.