

One-Time Use URLs
One-time use URLs are used to receive data. When you need someone to send data back to the app, you give that person a single use URL.
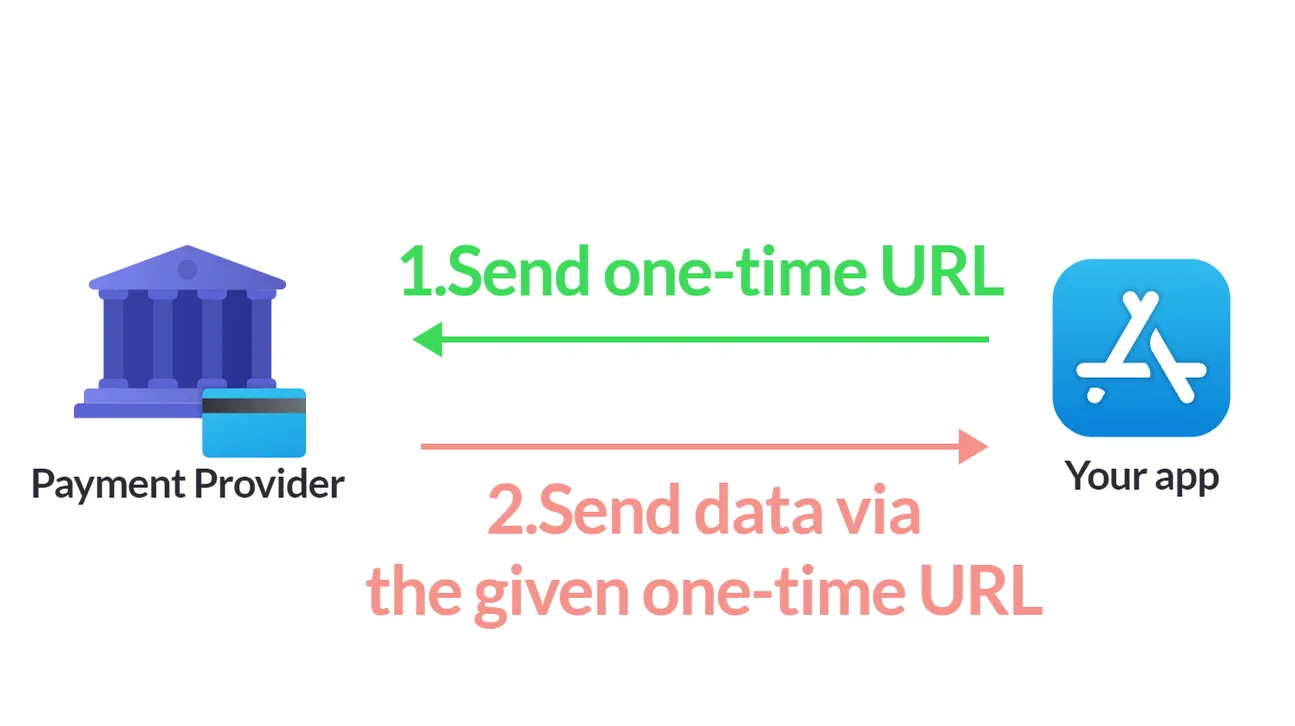
By generating a URL and sending it out, the app tells whoever receives it: to reply, send the data to this URL.
This is convenient for receiving data from anywhere and from anyone. However, as the name says, the URL is single use. You will need to generate a new URL for each new reception of data. The URL expires after being used or when the time runs out (5 to 60 minutes, default: 10 minutes).
A single use URL has 3 parts:
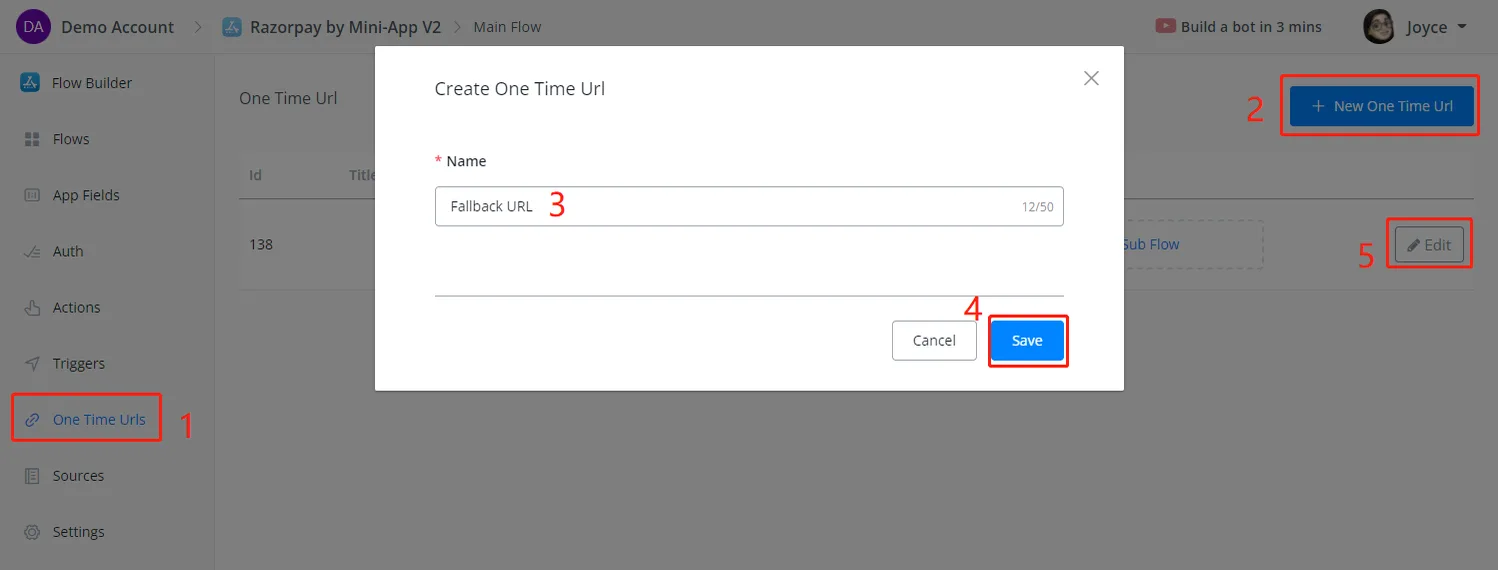
Follow steps 1 to 5 in the screenshot above to edit the single use URL.
In the parameters section, you will find the Sample Json Payload area. This is where you tell the app what the data it will receive looks like. That way, you can define in advance where to save each piece of data received.
You can fill in the sample JSON payload in two ways:
- enter the payload manually
- listen to real-time data
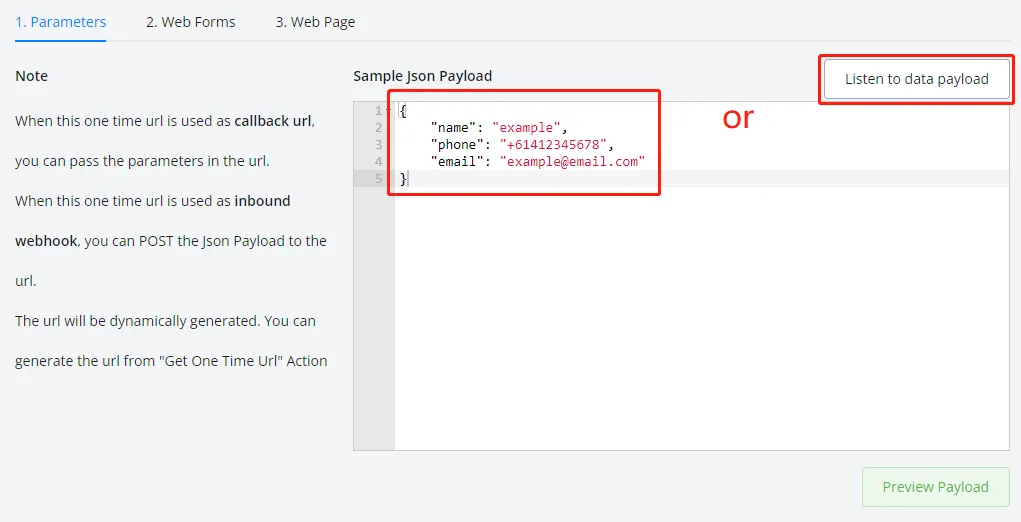
For example, in the screenshot above, the JSON with 3 values was entered manually.
To get real-time data, click the Listen to data button and copy the sample URL for testing. The single use URL supports the GET and POST methods.
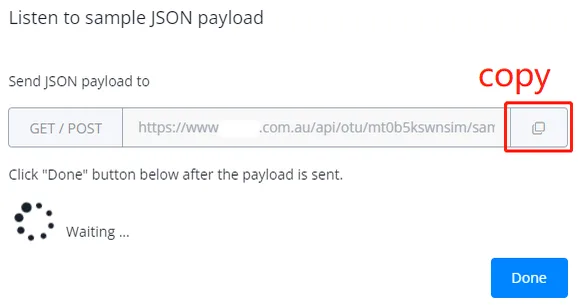
Run a live test by attaching this sample URL. For example, in your browser, visit:

You will see a blank page when you press Enter, because you have not yet created the confirmation web page.
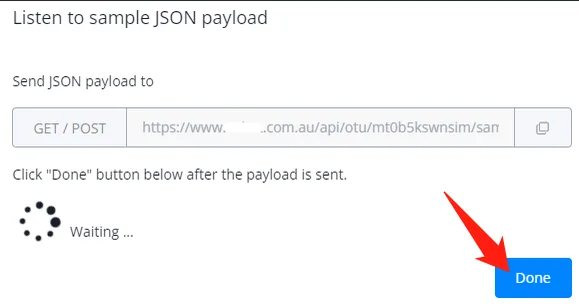
After the test, go back to the Listen to payload window and click "Done":
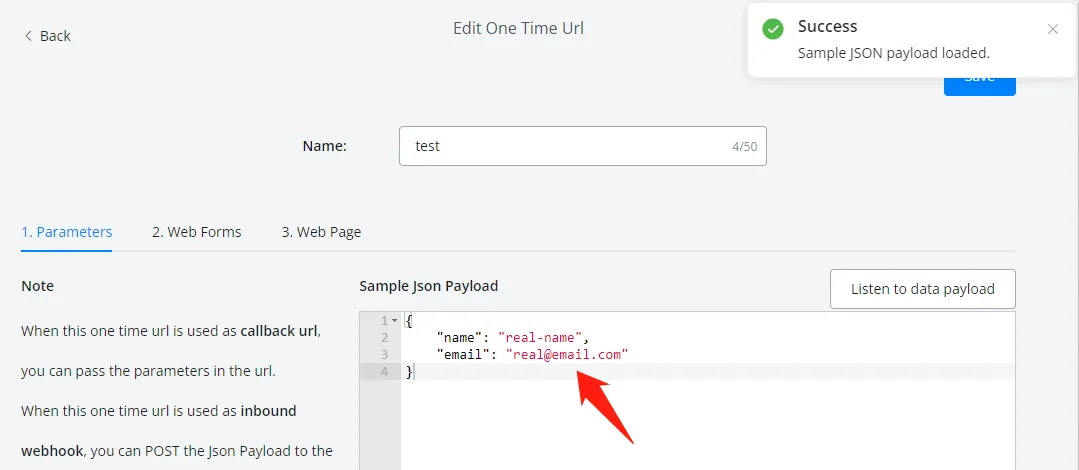
You will see the data received in real time in the sample JSON payload area.
Click Preview Payload and let's map them to app fields:
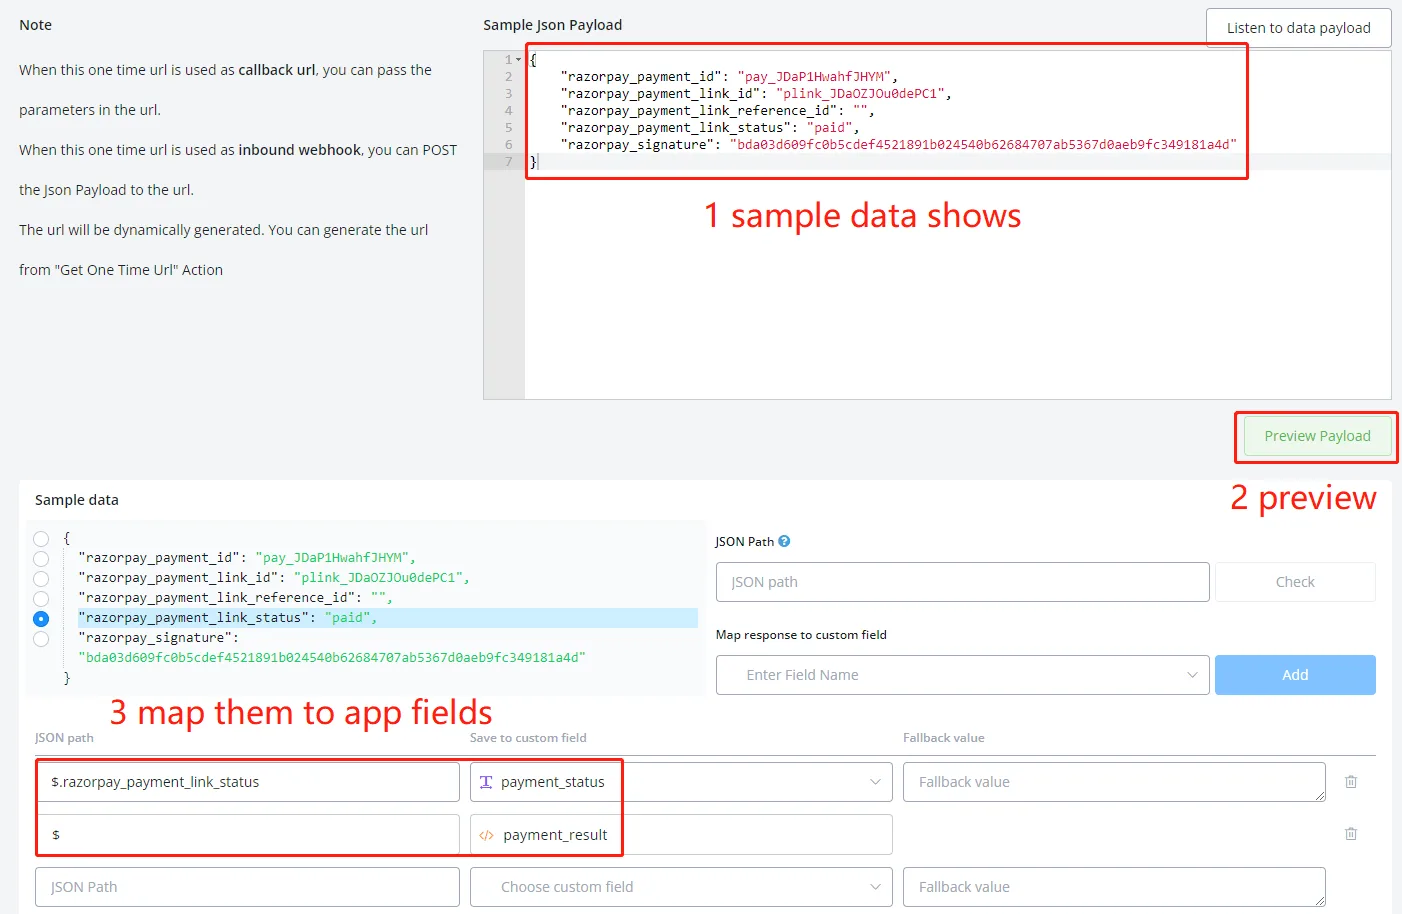
To map the data:
- click the data in the sample data area, on the left side
- the JSON path appears on the right side
- create a new field by typing a new name and clicking it, or search for an existing field
- click the Add button to add it to the mapping list
Click Add Item to start adding web form inputs.
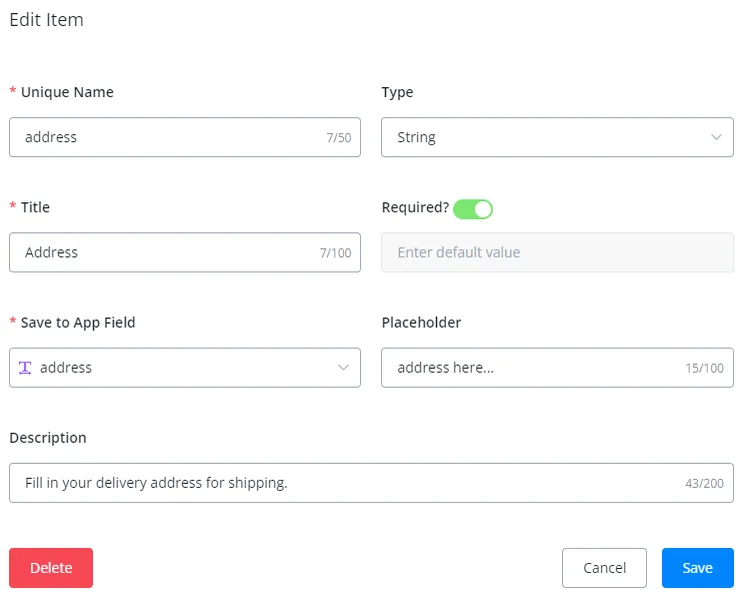
Add as many web form inputs as you need and click Save when you finish. Check the result in the Preview area.
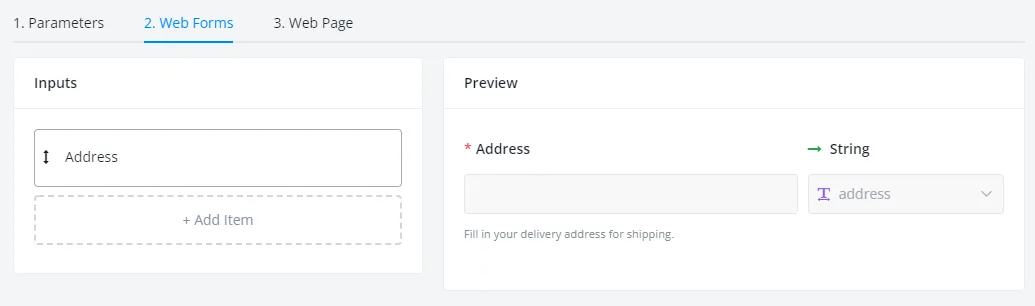
Design a simple web page to display confirmation messages.
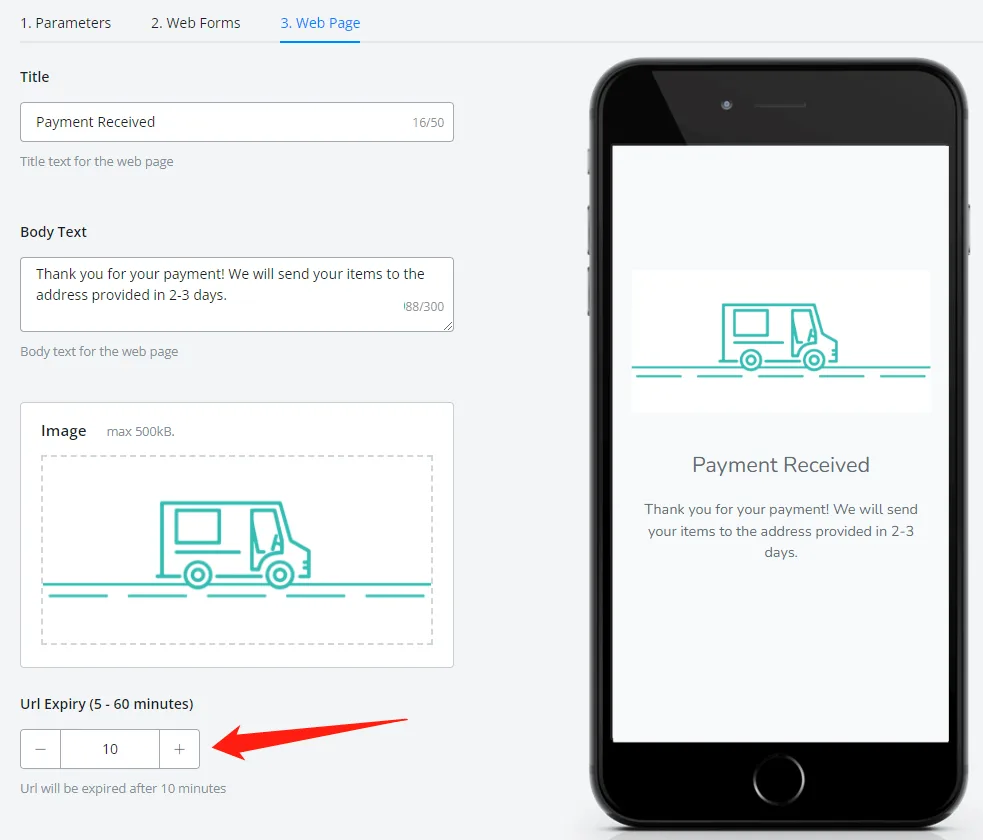
Choose the URL expiry time for your single use link, from 5 to 60 minutes. By default, the link expires in 10 minutes.
Finally, select a subflow to run after the web page is displayed.
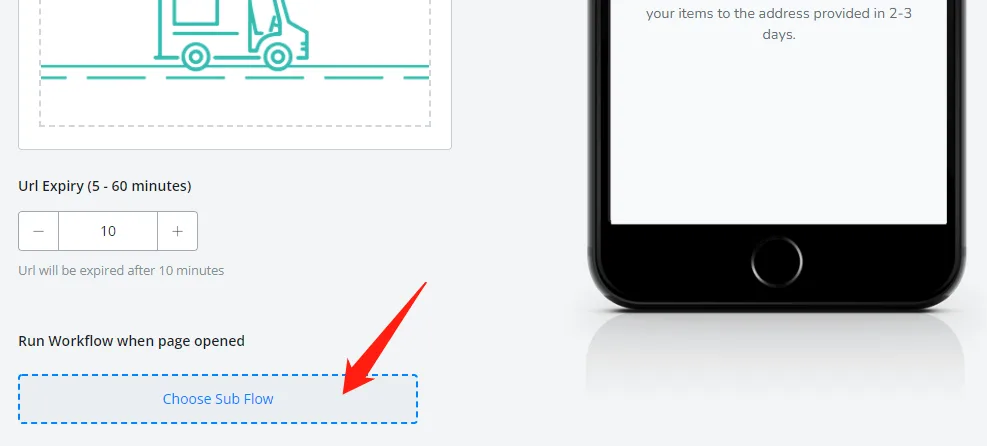
Usually, we fire a trigger in this subflow to notify the chatbots about the update.
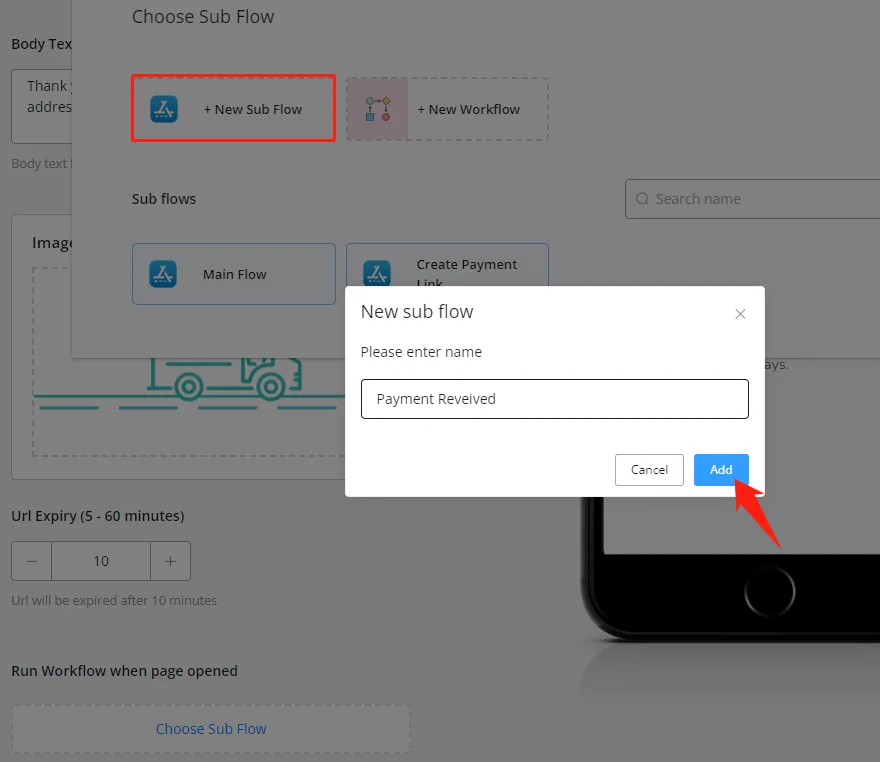
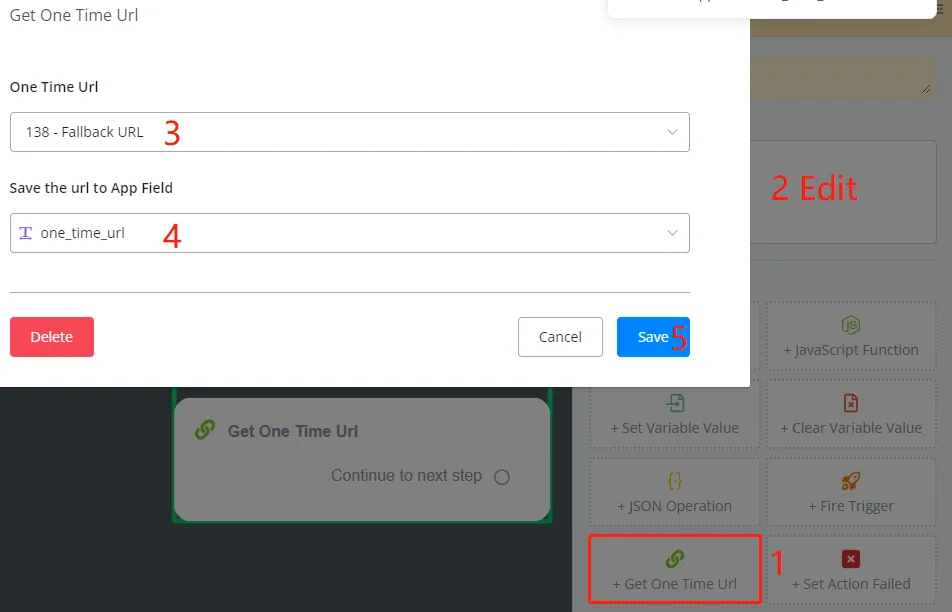
Use an Action step to generate the URL and save it in an app field, to send out later.