

Razorpay (Indian payment gateway)
This demo shows you, step by step, how to build a NicoApp from scratch. Razorpay is a payment service provider in India. In this demo we will create a "Create Payment Link" action and a "Payment Paid" trigger.
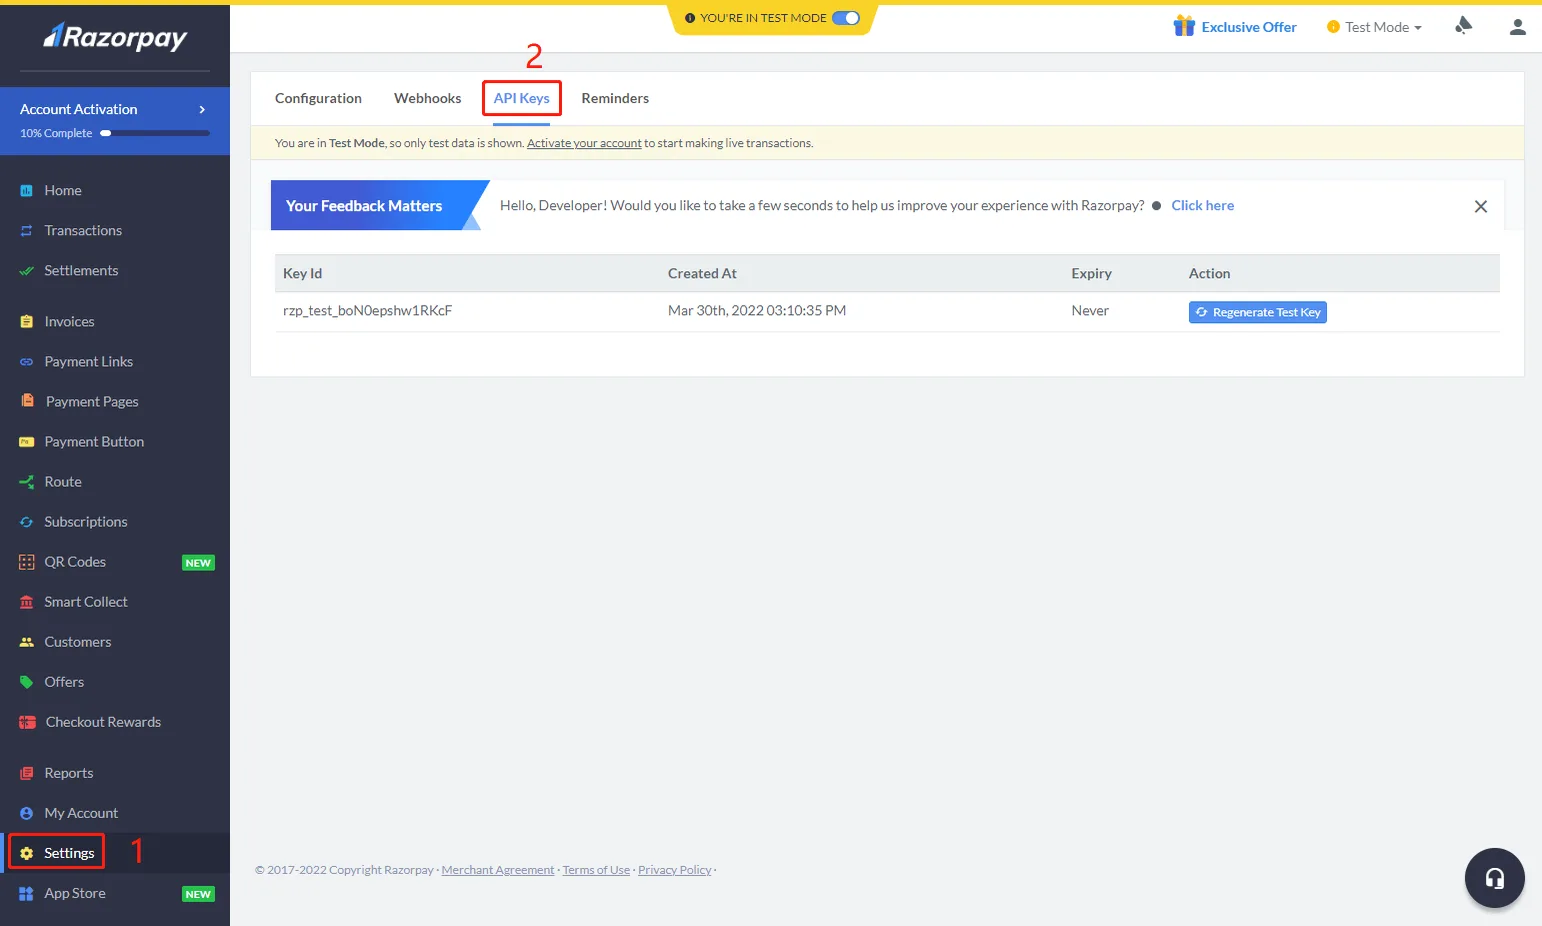
First of all, register an account at Razorpay and get your API key in Settings - API Key:
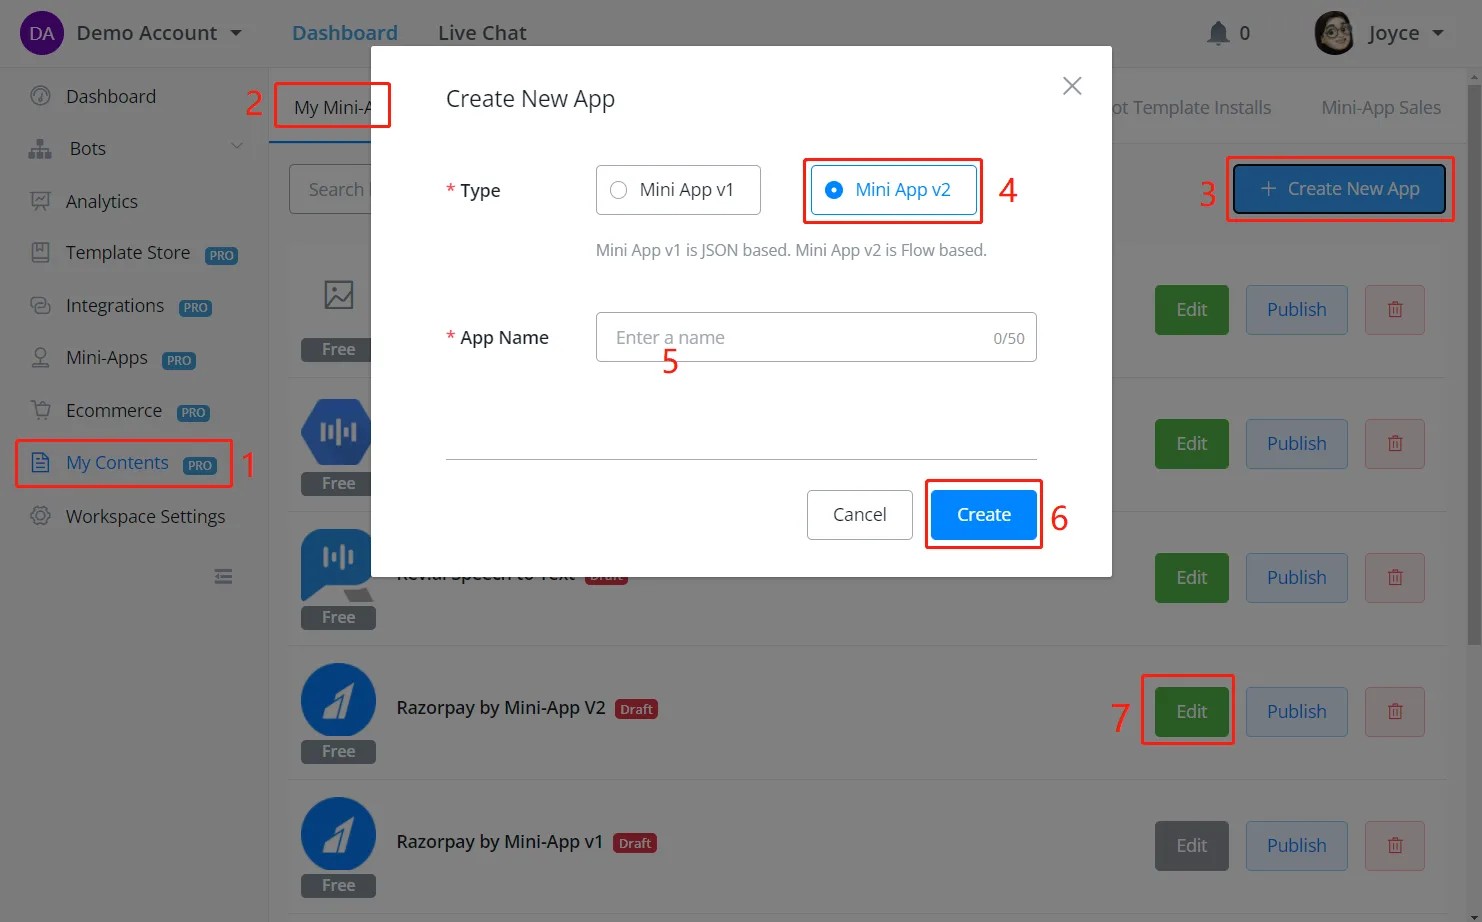
On your dashboard, follow steps 1 to 7 in the screenshot above to create a version 2 app and enter the app builder.
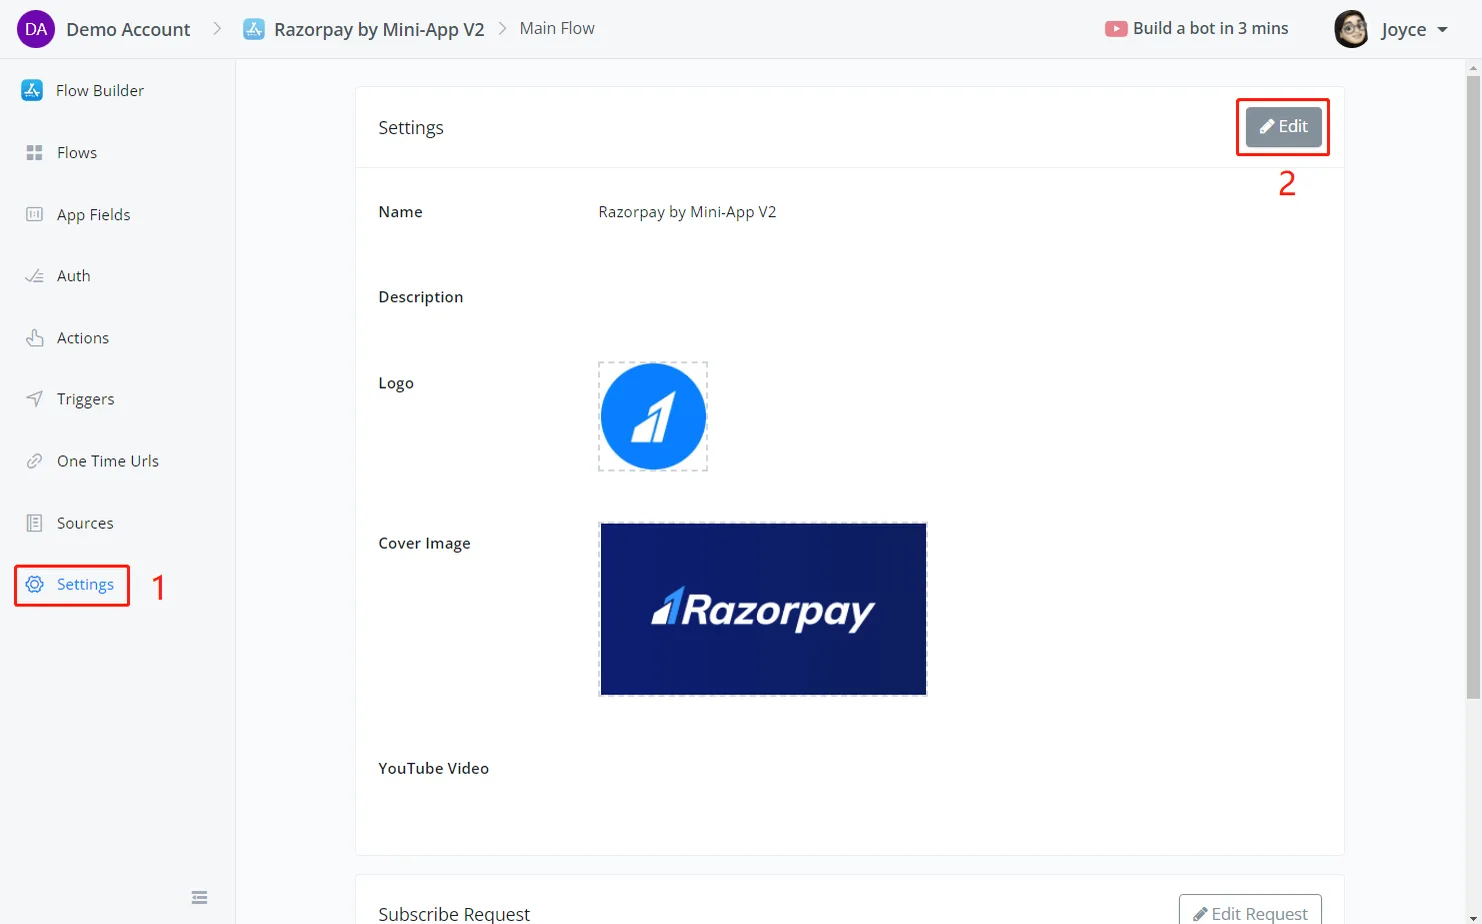
In the settings section, click Edit to edit the app information, including the app name, description, logo and cover image.
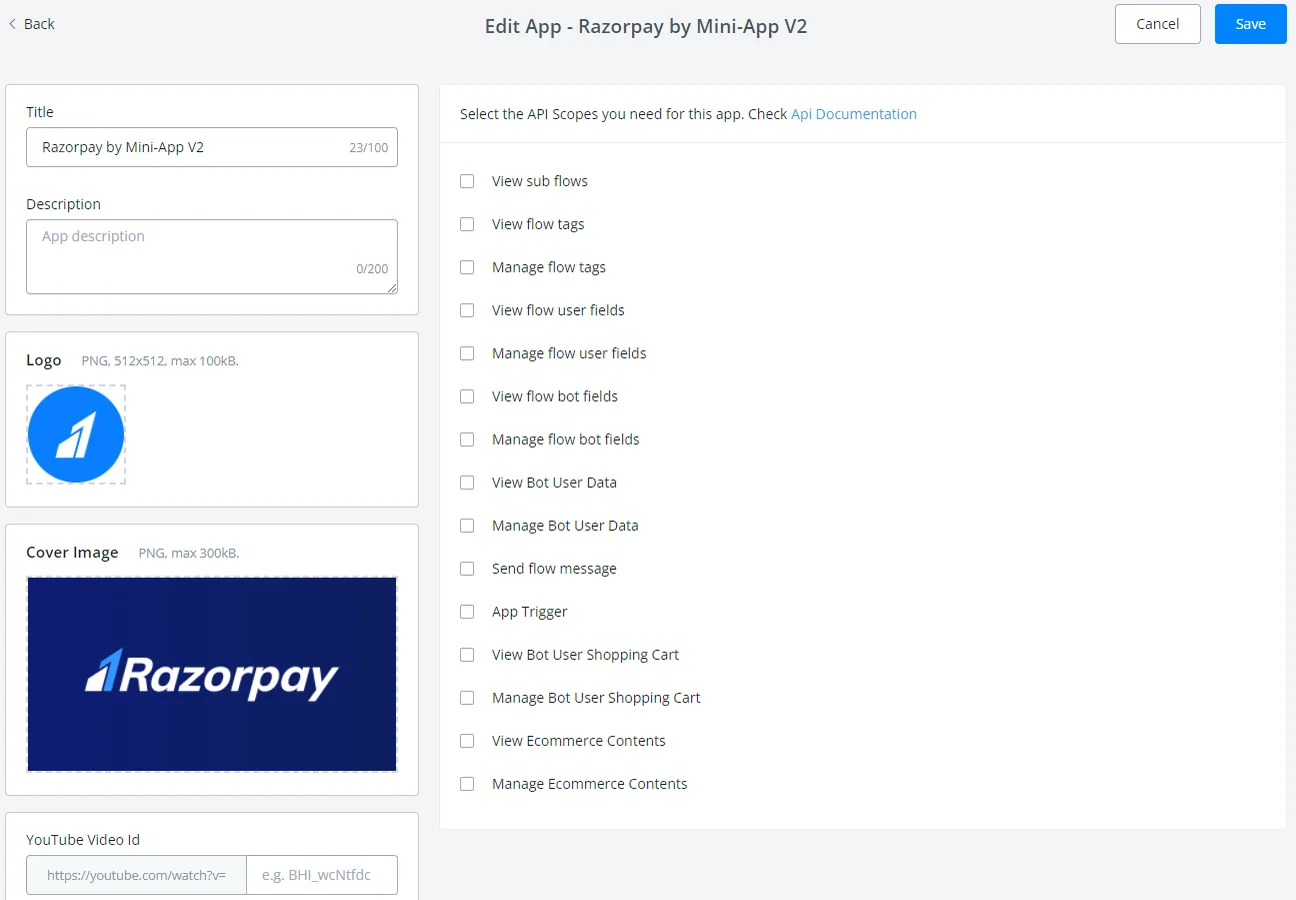
Users can view your app information before downloading it.
According to the Razorpay Auth Document, key_id and key_secret are required with Basic Auth authentication.
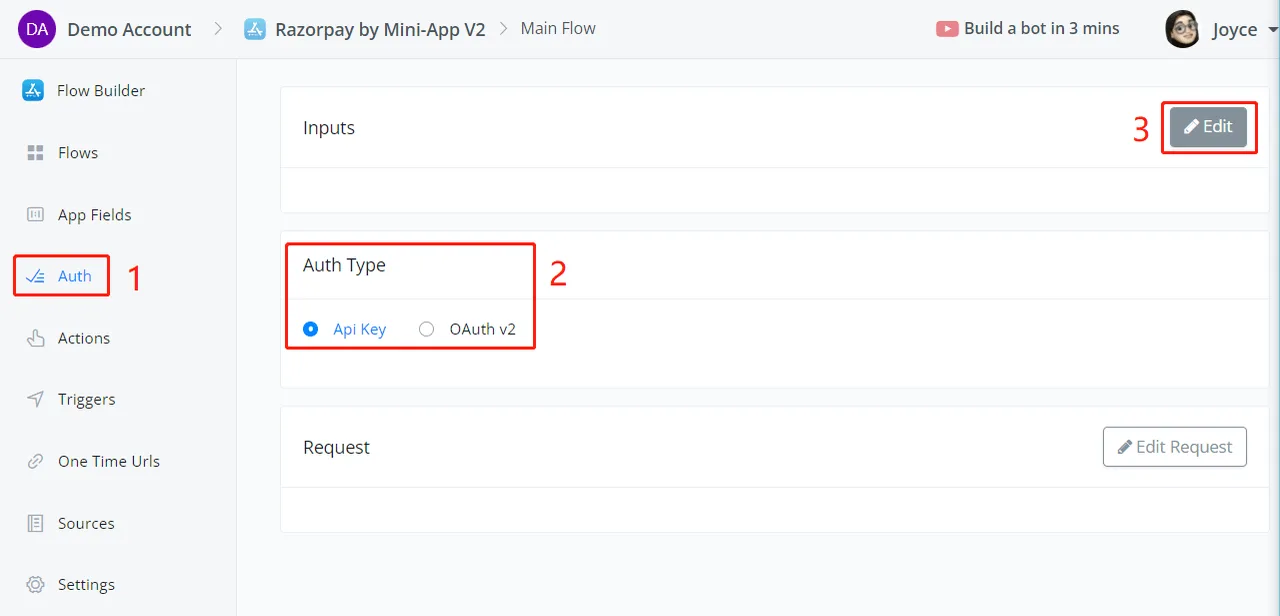
In the Auth section, select API Key as the Auth Type and click Edit to add the 2 auth inputs.
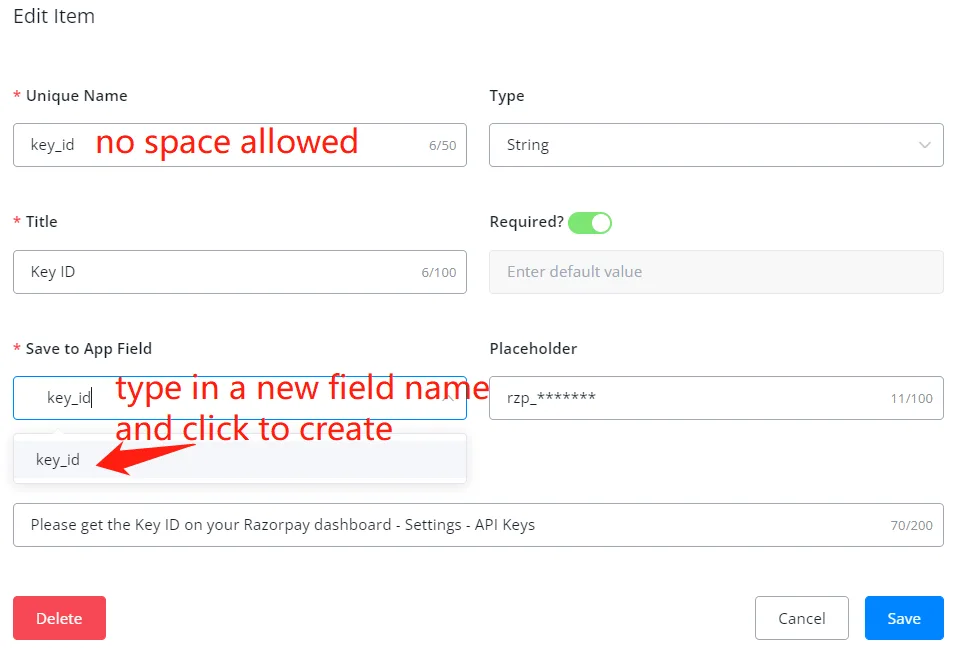
Click Save when you finish adding key_id and key_secret:
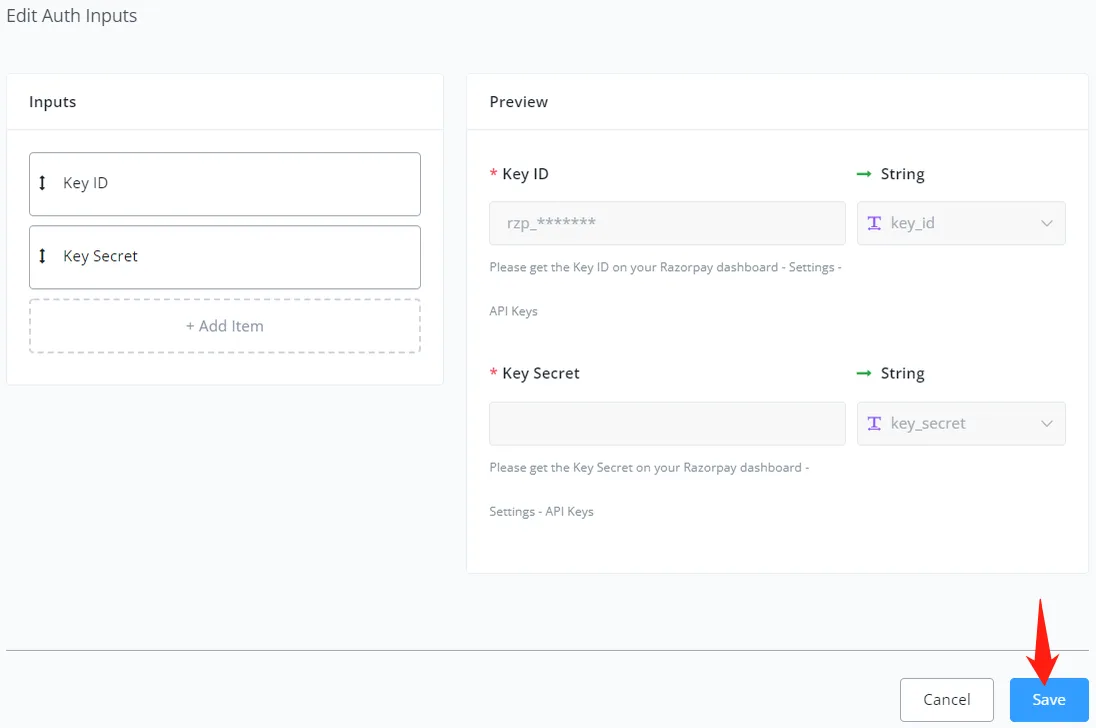
Now that we have set up the authentication part of your app, let's add actions!
API used: Create payment link.
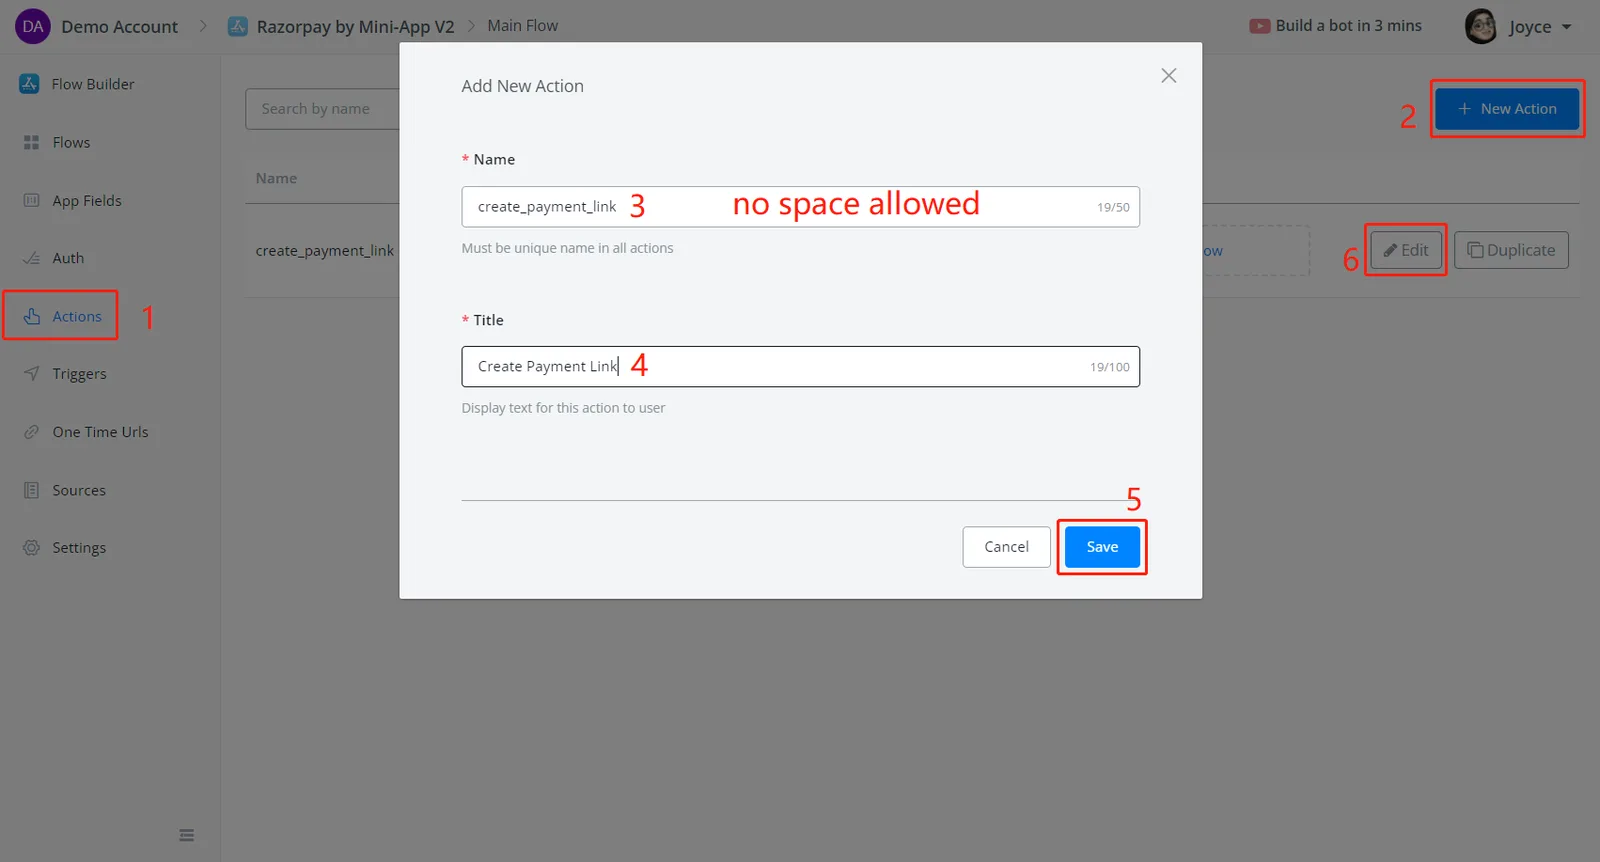
Follow steps 1 to 6 in the screenshot above to create the action and start editing it.
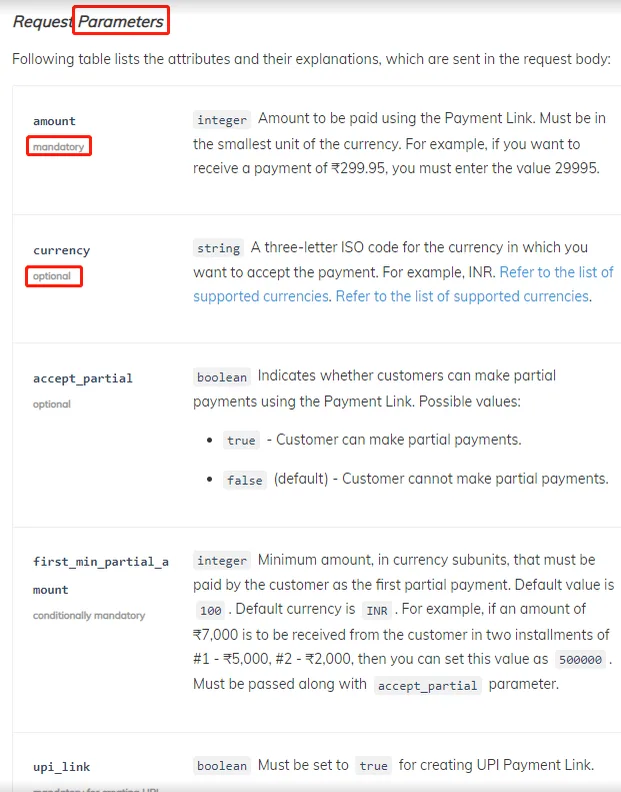
By following the API documentation, you can see which parameters exist, what types of values they take and whether they are mandatory or optional.
Click Add Items in the Inputs section:
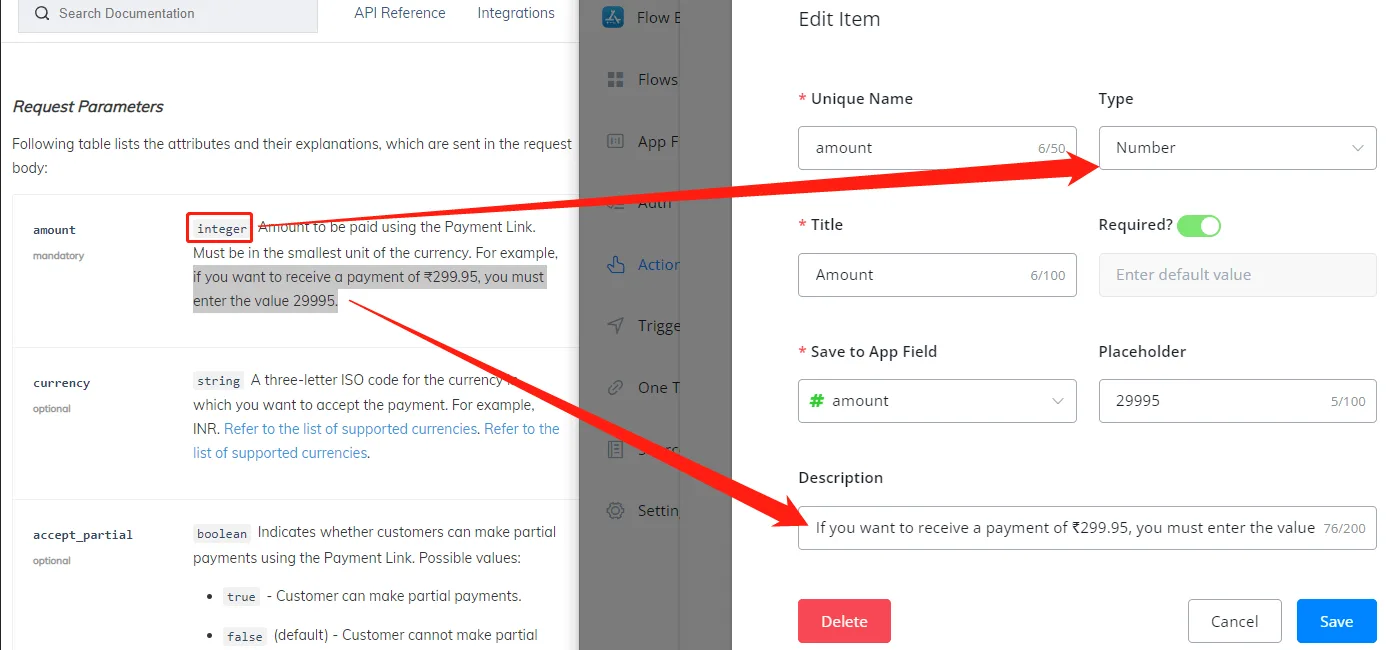
Keep the documentation and NicoChat side by side and copy and paste the corresponding information.
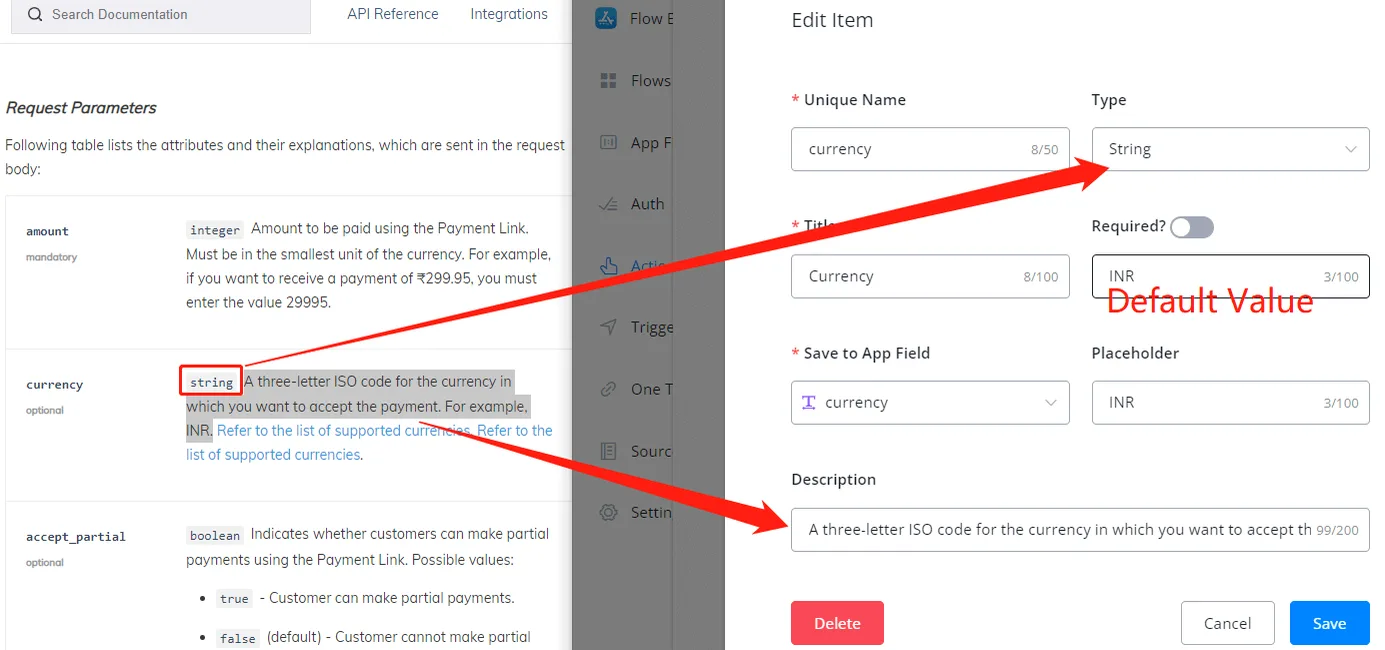
For optional parameters, turn off the Required? toggle and provide a default value if needed.
We suggest that you fill in the Inputs first and leave the Outputs until after we finish the subflow for this action.
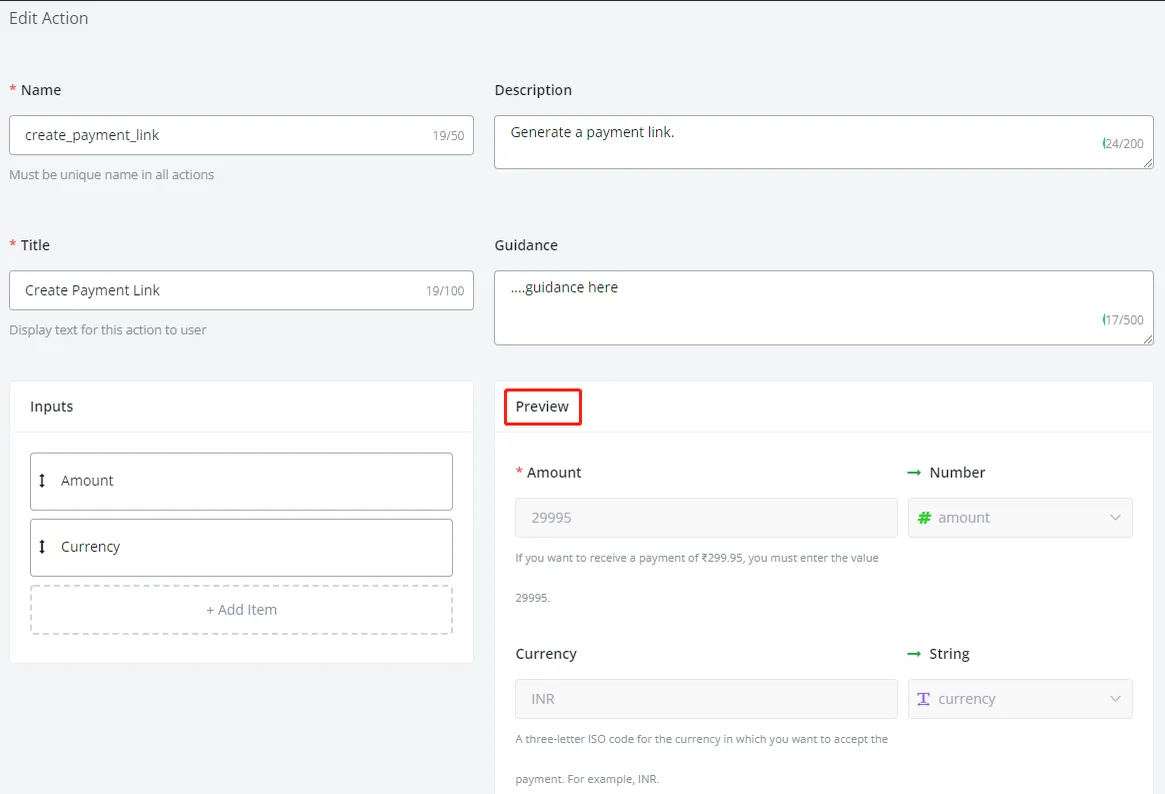
Write the necessary description and guidance and check the preview section for your inputs.
After editing the action information and inputs, create a subflow to run when users call this action:
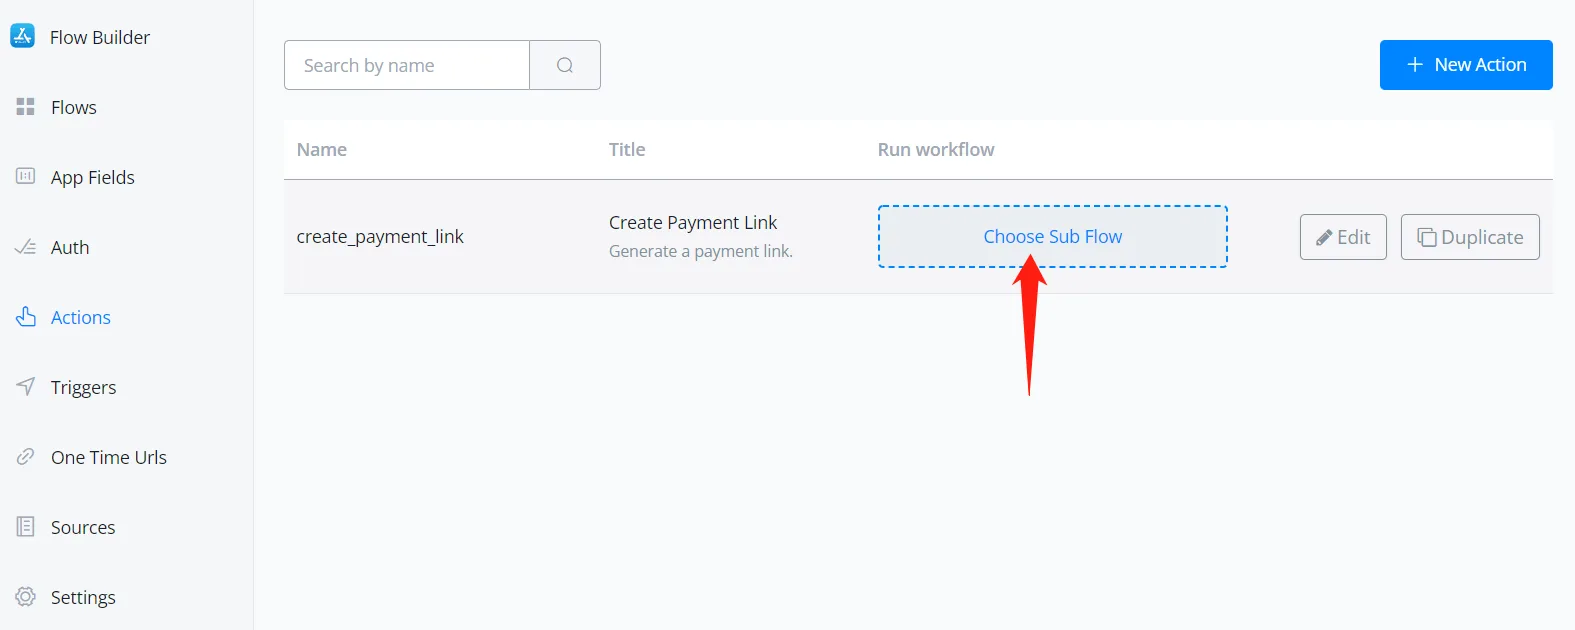
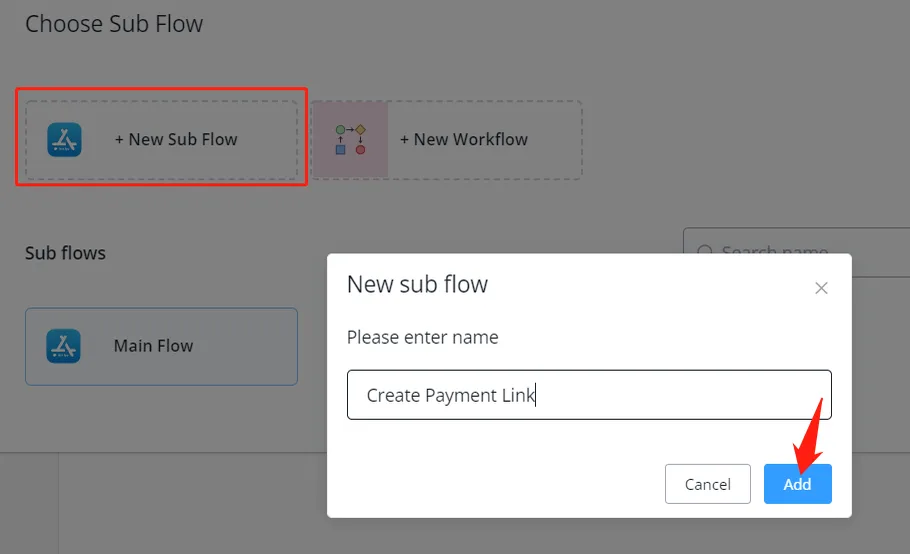
Go to the Flows section and open the subflow we have just created:
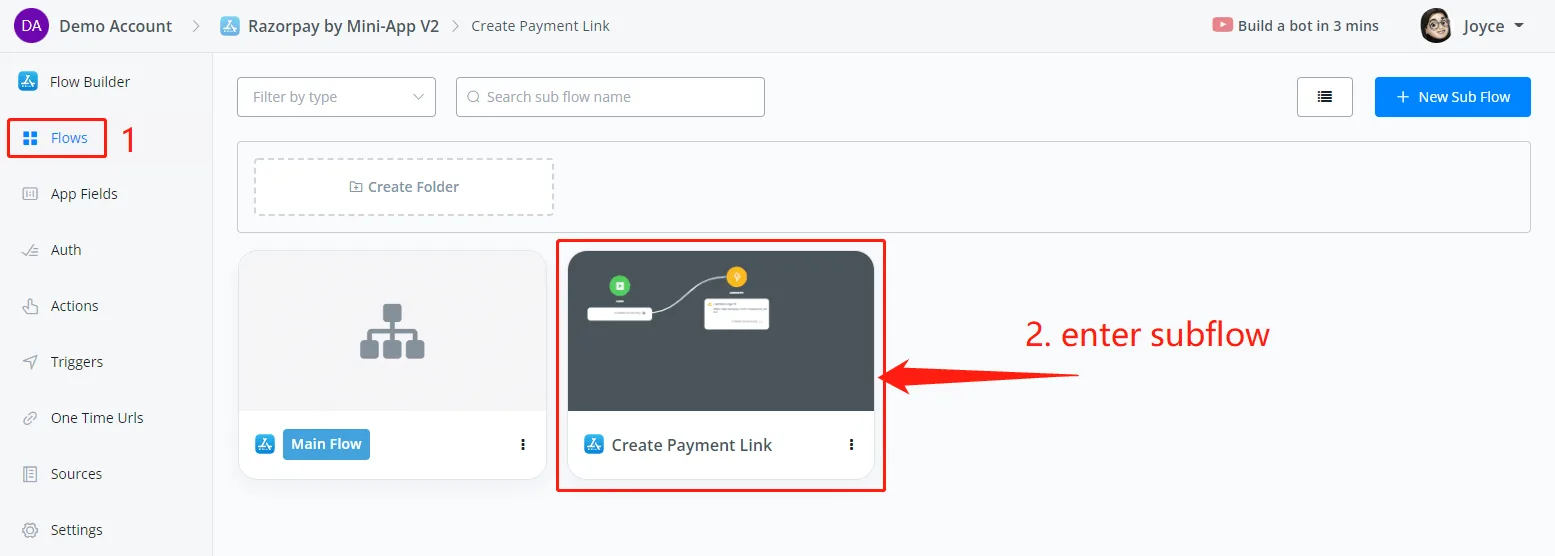
In the case of creating a payment link, one external request should be enough:
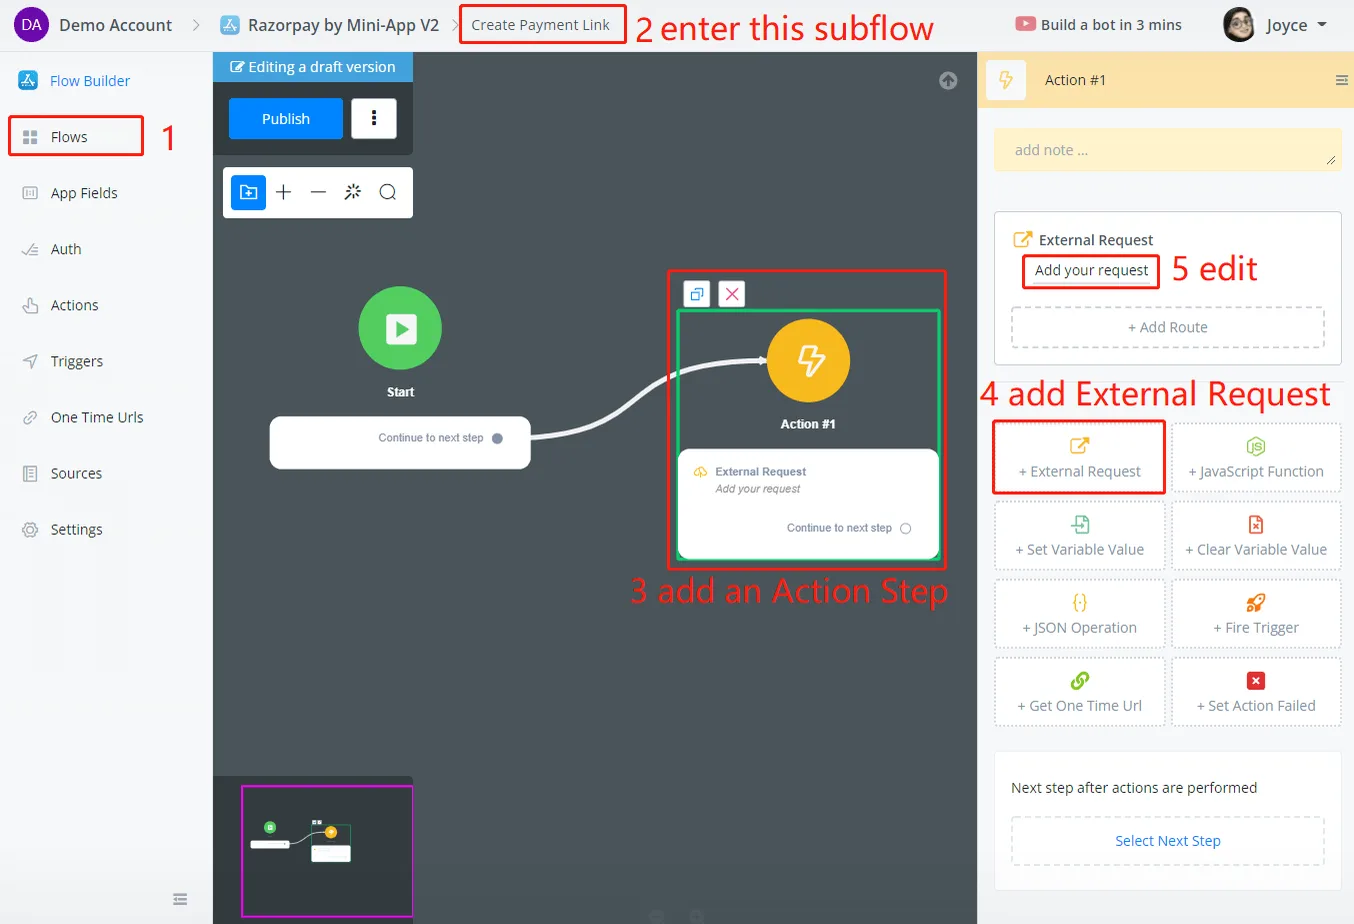
Follow steps 3 to 5 in the screenshot above to start editing the external request. Don't know how to add an Action Step? Don't worry: try right-clicking your mouse.
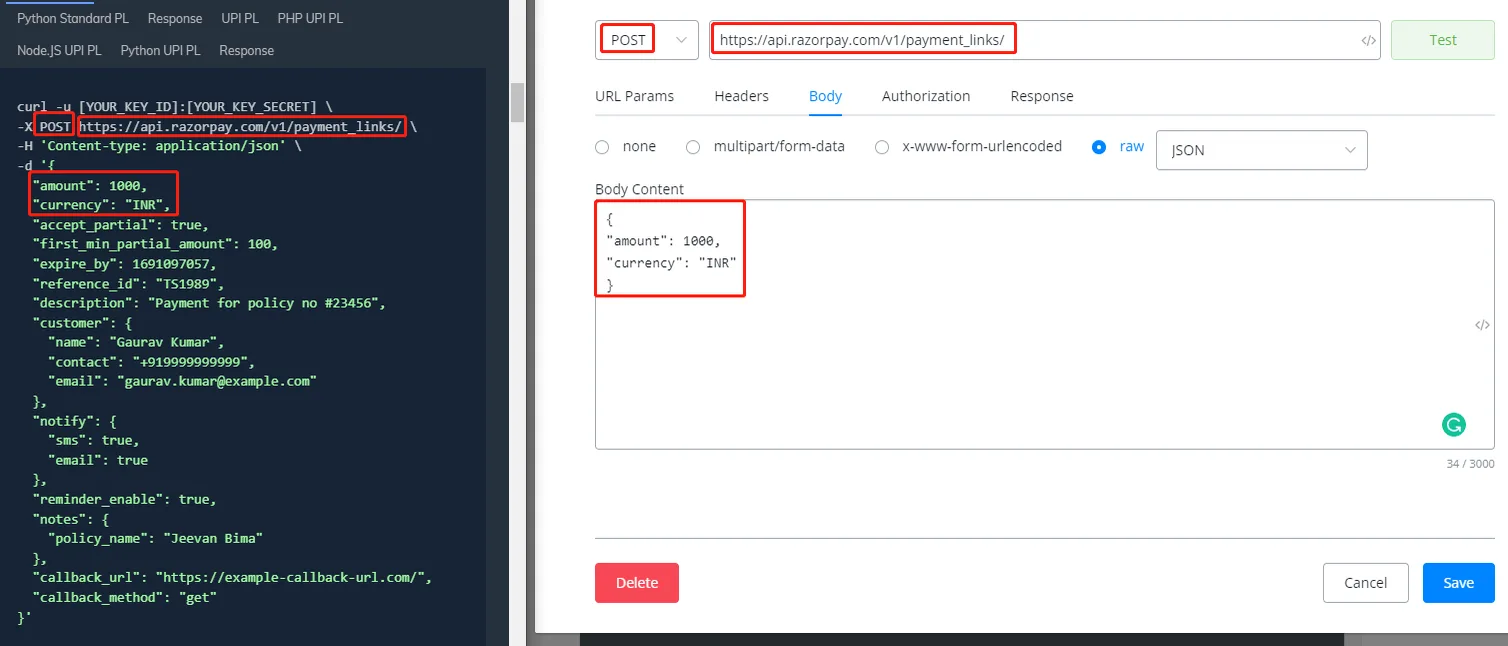
Select the POST type, paste the URL, select Body - raw - JSON and copy the 2 parameters, amount and currency.
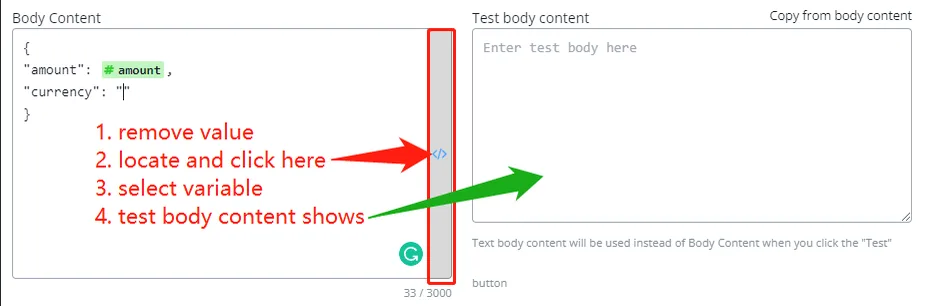
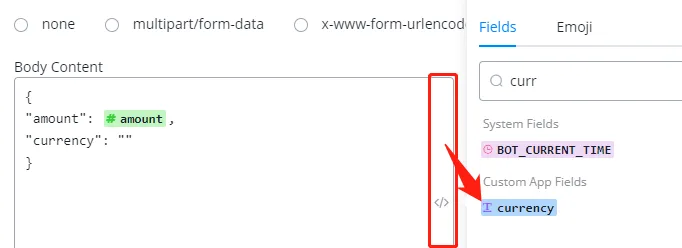
Replace 1000 and INR with the amount and currency app fields by pressing the </> button on the right side. In the pop-up, search for the field by name and click to select it:
When you insert app fields, the "Test body content" appears. That is where you specify the test values of the fields. Without a test value, the test can fail. Let's set the amount to 1000 and the currency to AUD:
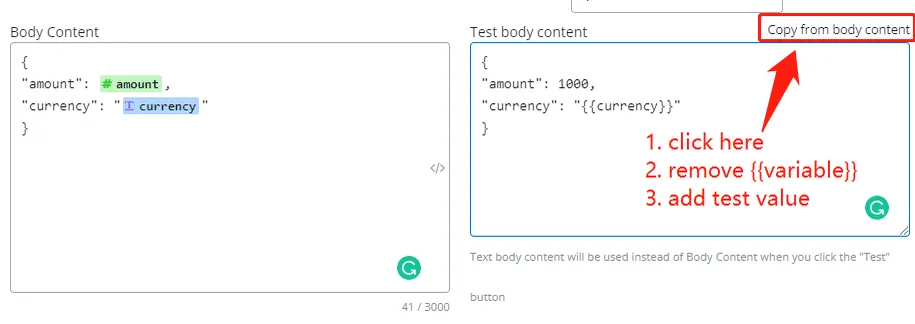
{{ to call a field, make sure there is no character such as " right after it. See the image below.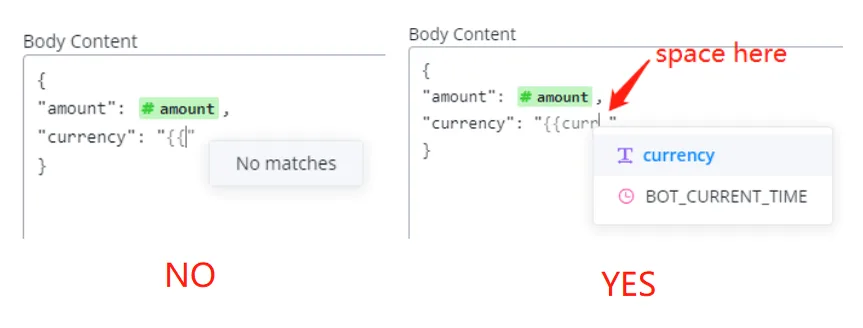
For authentication, we have already mentioned that the Razorpay API uses Basic Auth:
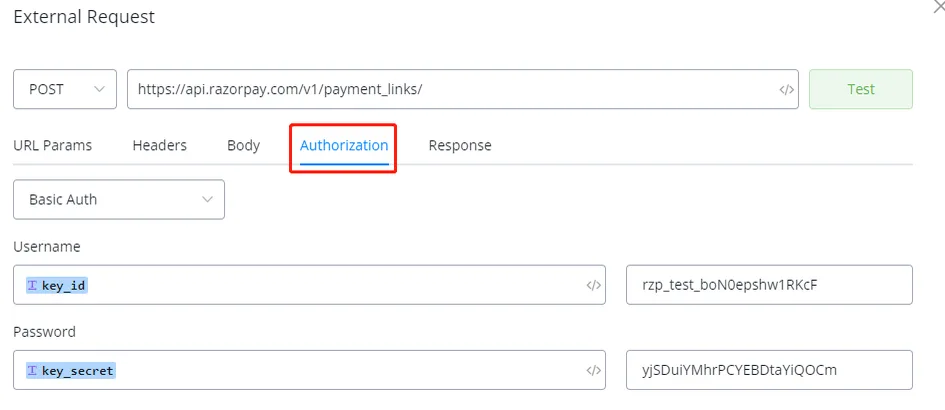
Select Basic Auth, fill in the app fields and remember to provide your test key_id and your test key_secret.
Everything seems fine. Click the Test button:
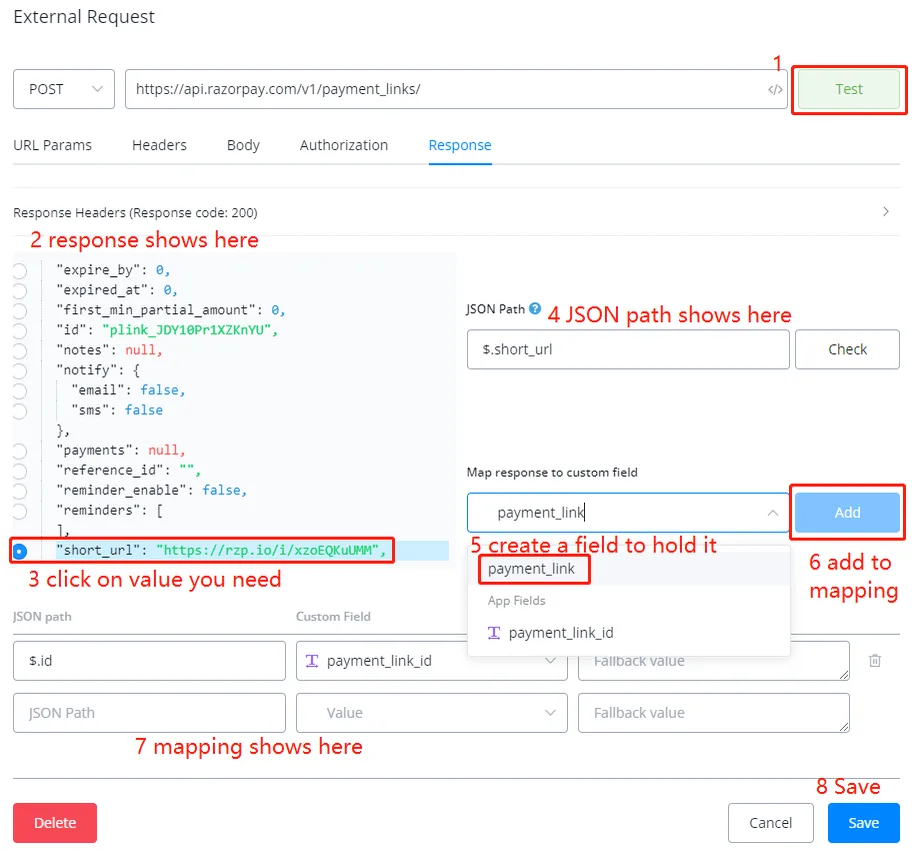
Follow steps 1 to 8 to save the test result to the app fields and click Save.
Excellent! The request was completed and we got the payment_link_id and the payment_link we need from the response data.
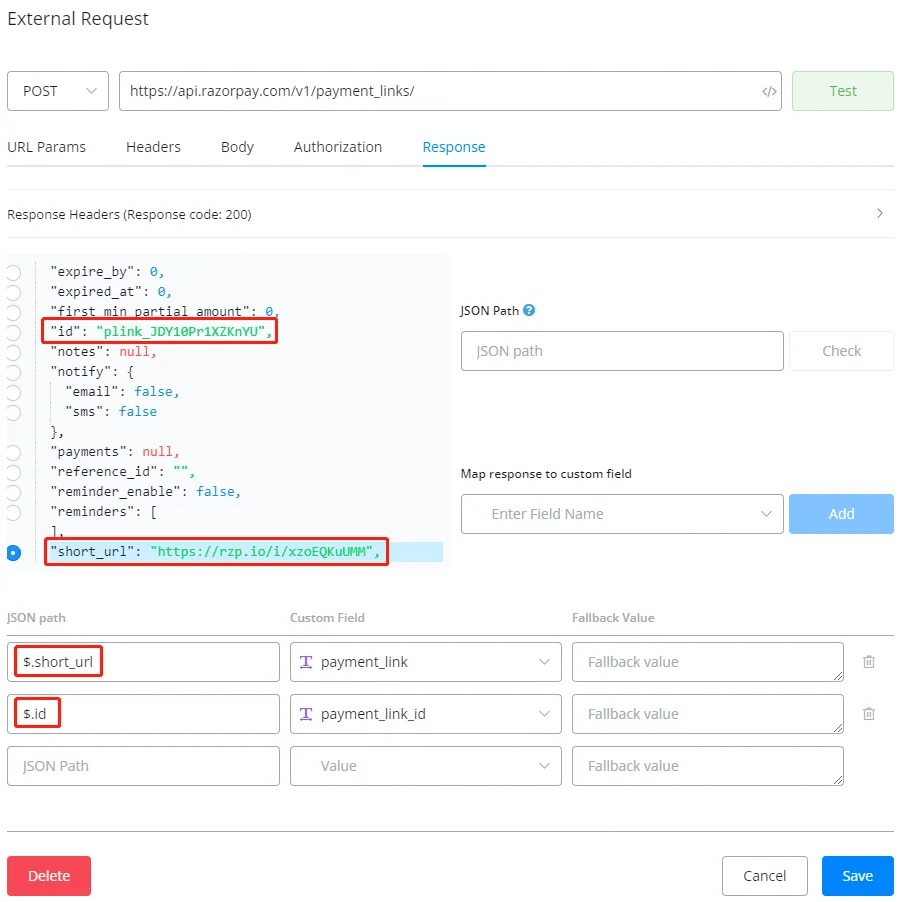
payment_link_id is the ID that identifies a payment link, and payment_link stores the link itself.
Try visiting the payment link:
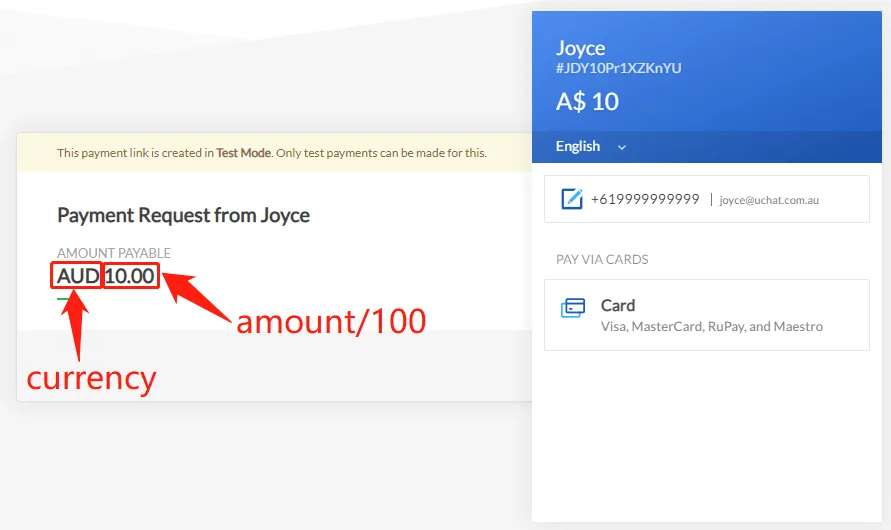
Perfect! Now, how do we return the payment link and the ID to the chatbot? Don't forget that we have not set up the Action Outputs yet!
Save and publish the subflow. Then let's go back to the section Actions:
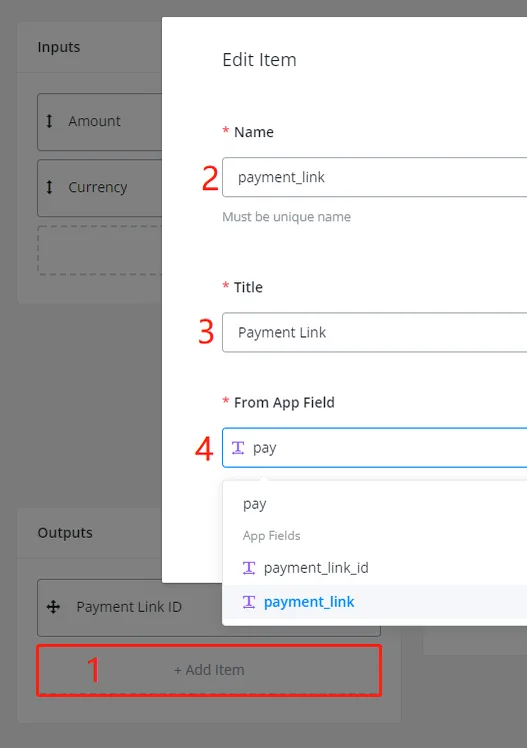
Add the 2 outputs and click the 2 Save buttons, to save not only the output editing, but also the action editing.
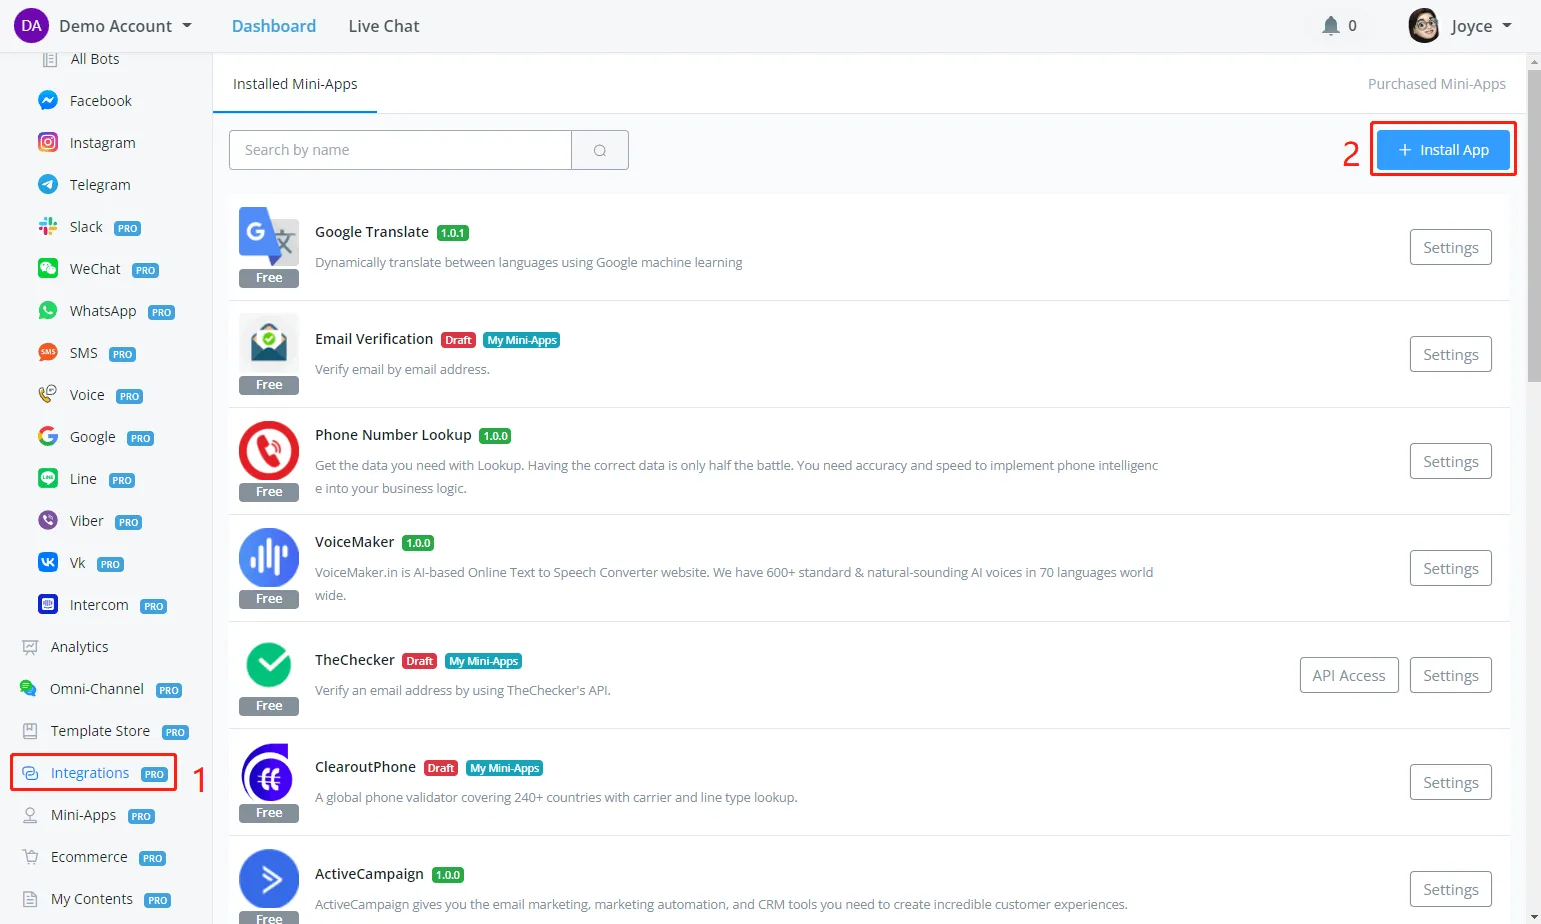
On your dashboard, follow the screenshots below to install the app in the draft version, since it has not been published yet:
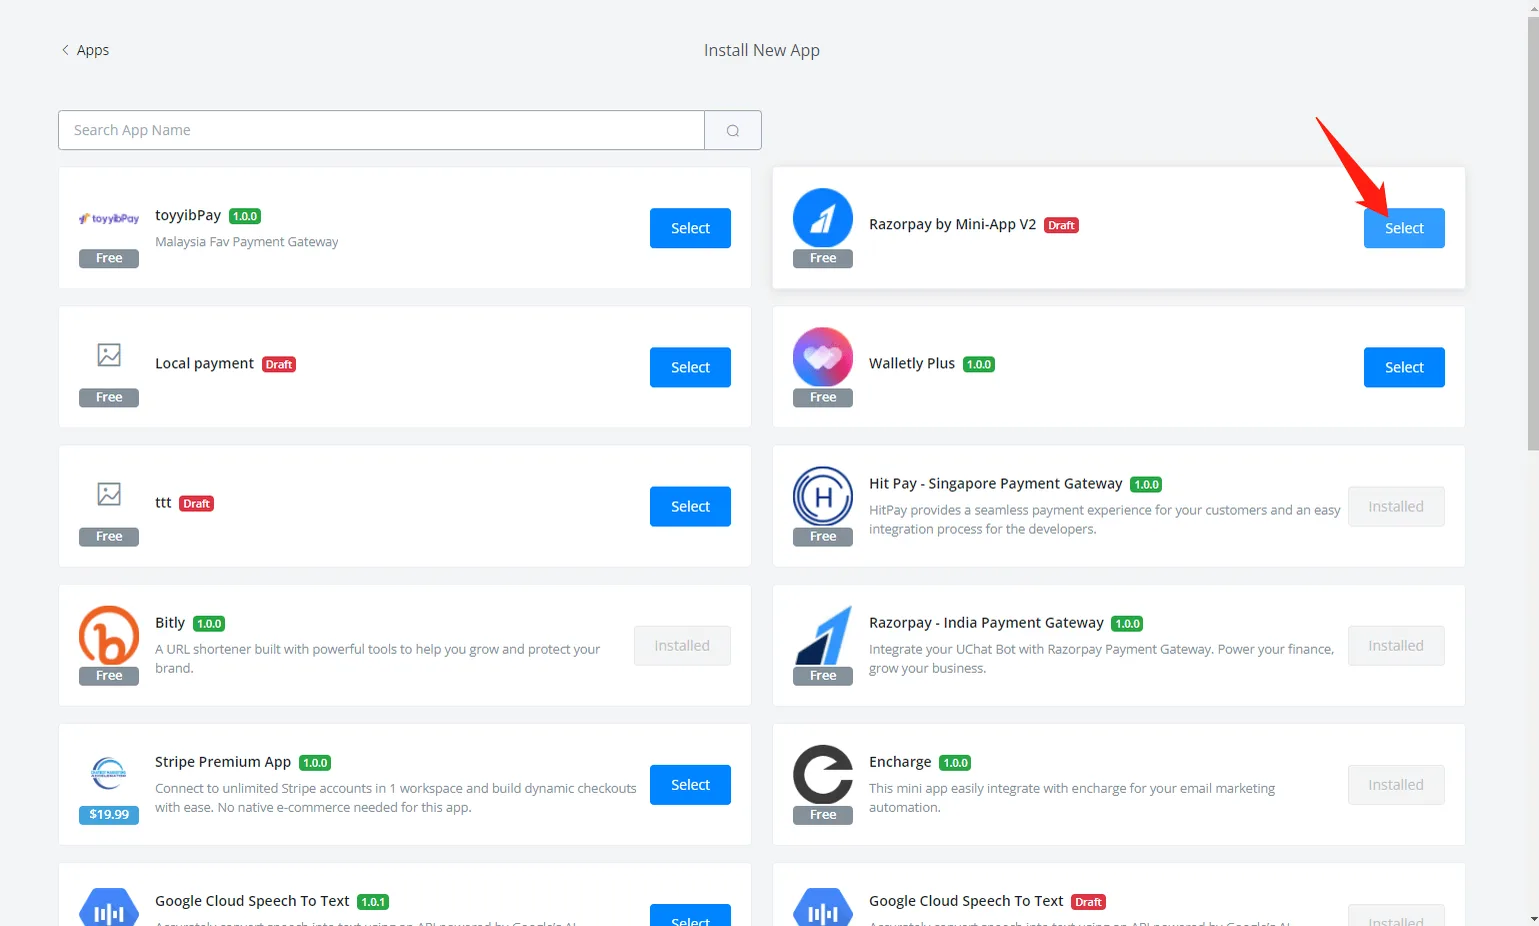
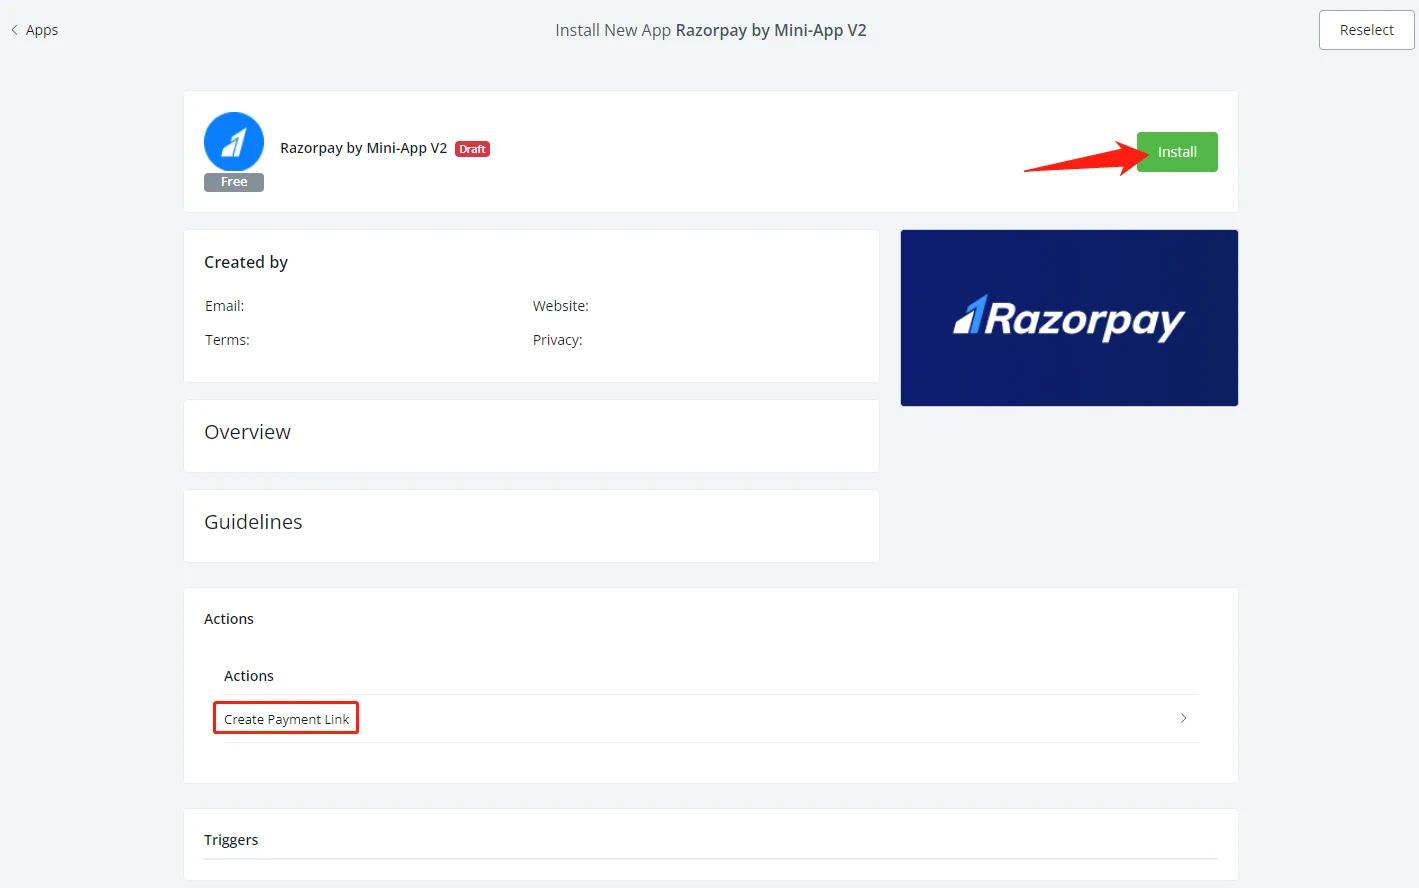
Fill in your credentials and save:
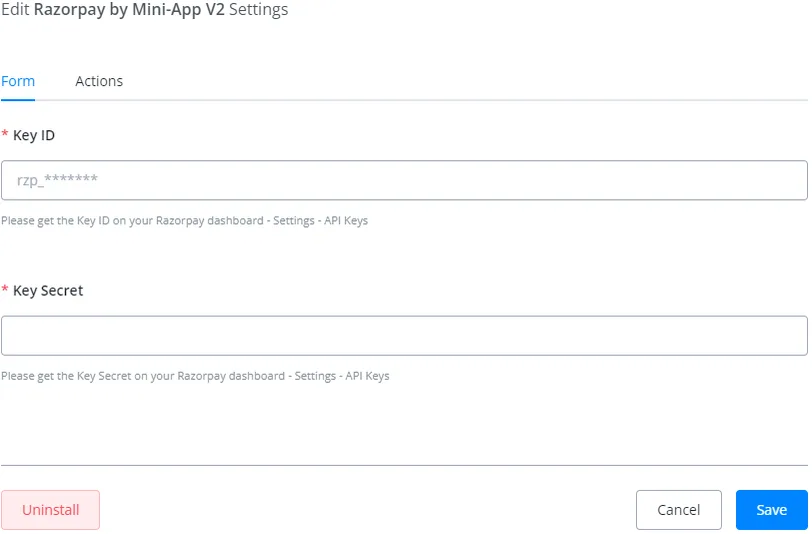
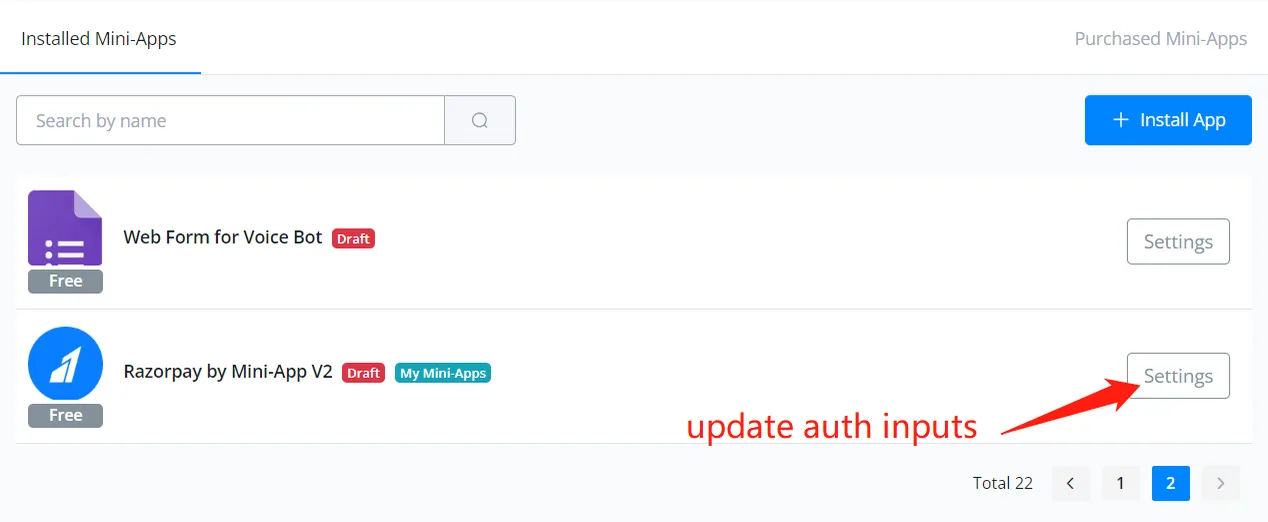
Update your credentials here if you need to:
Pick any one of your chatbots — for example, the Facebook chatbot:
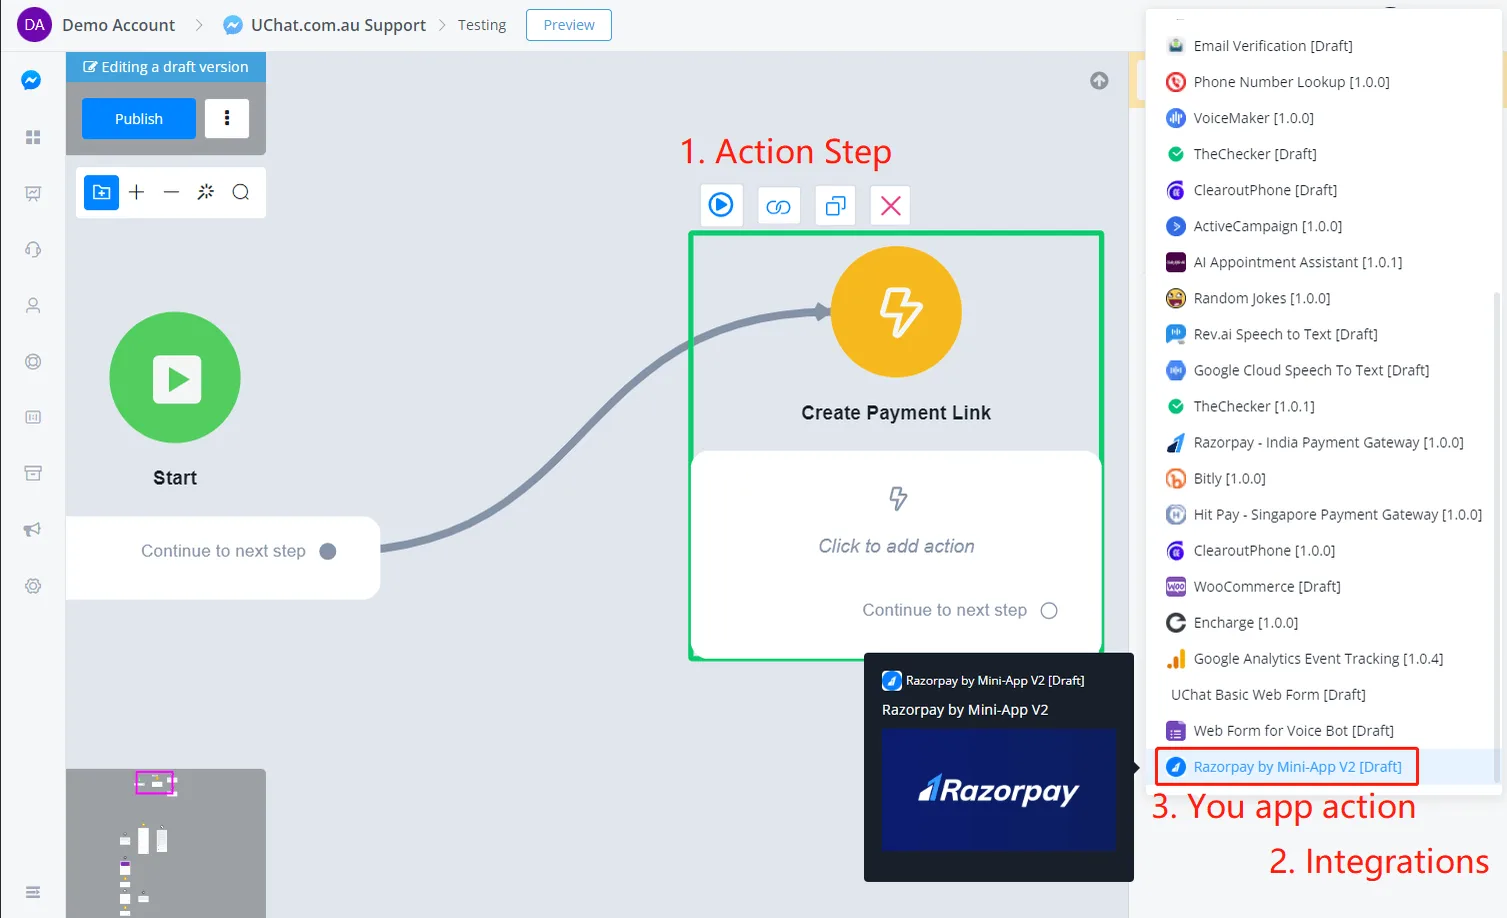
Create an Action Step, go to Integrations and select your app action.
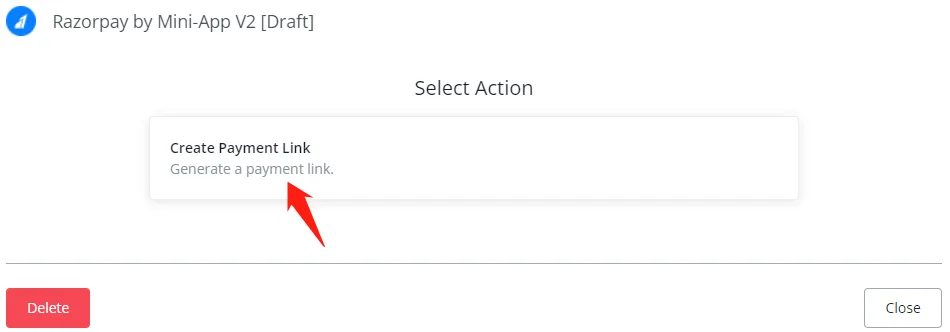
Fill in the inputs, set up the outputs and click Save:
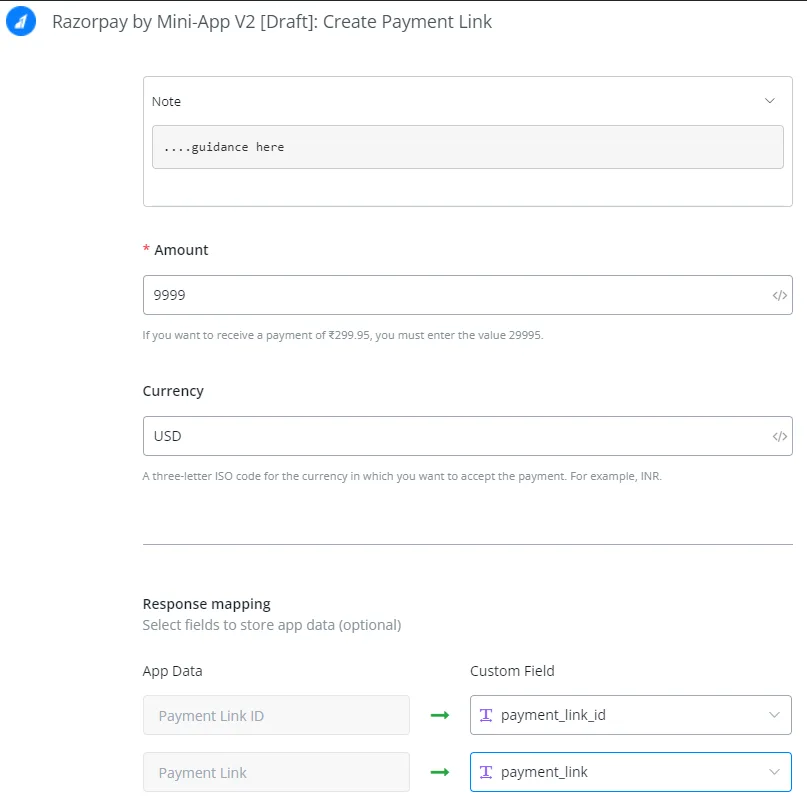
Add 2 more Send Message steps to handle 2 different situations:
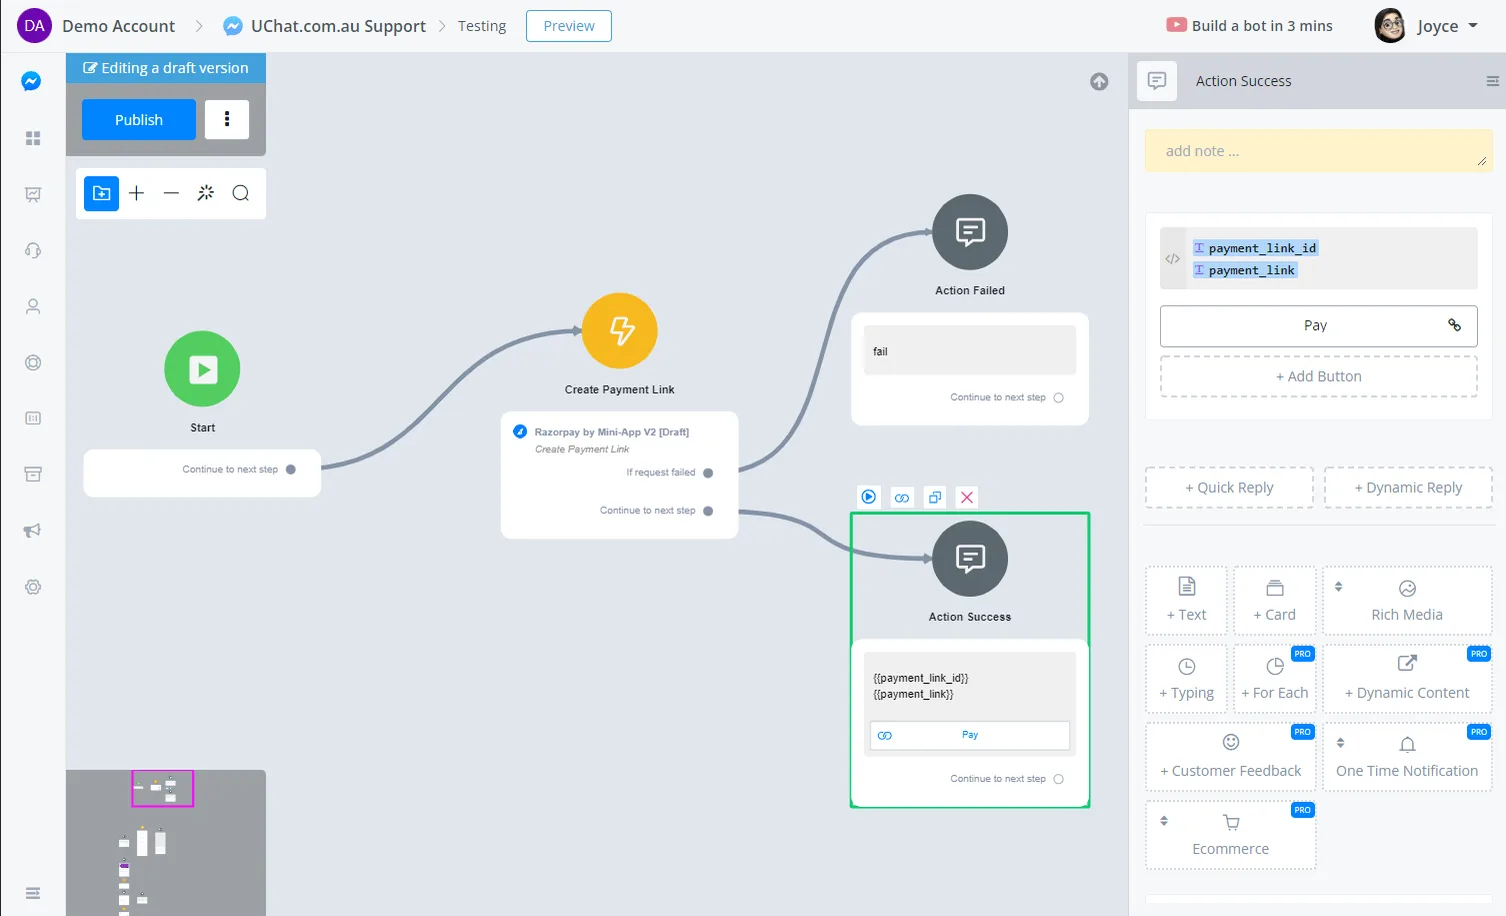
Show the result and also put the payment link on a URL button.
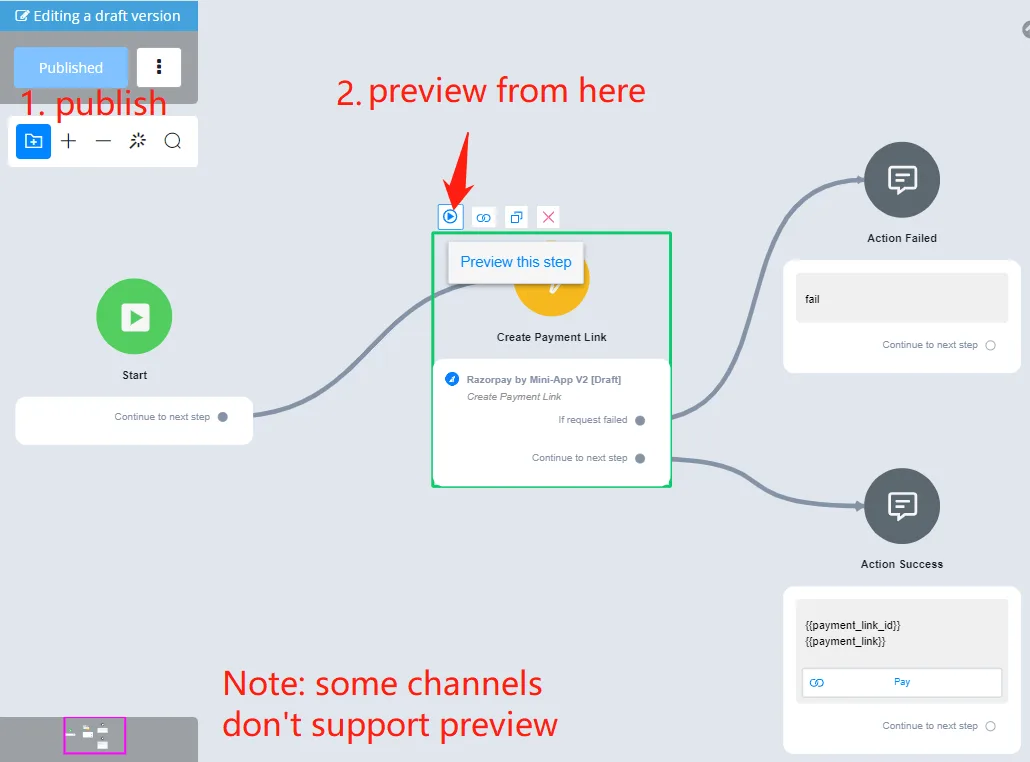
Preview from the Action Step and you will see this message arrive in your Messenger:
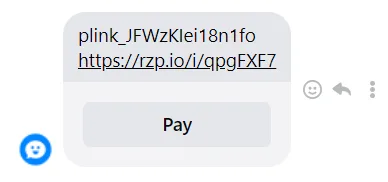
Click the Pay button and you will see the Razorpay payment page showing a US$ 99.99 payment:
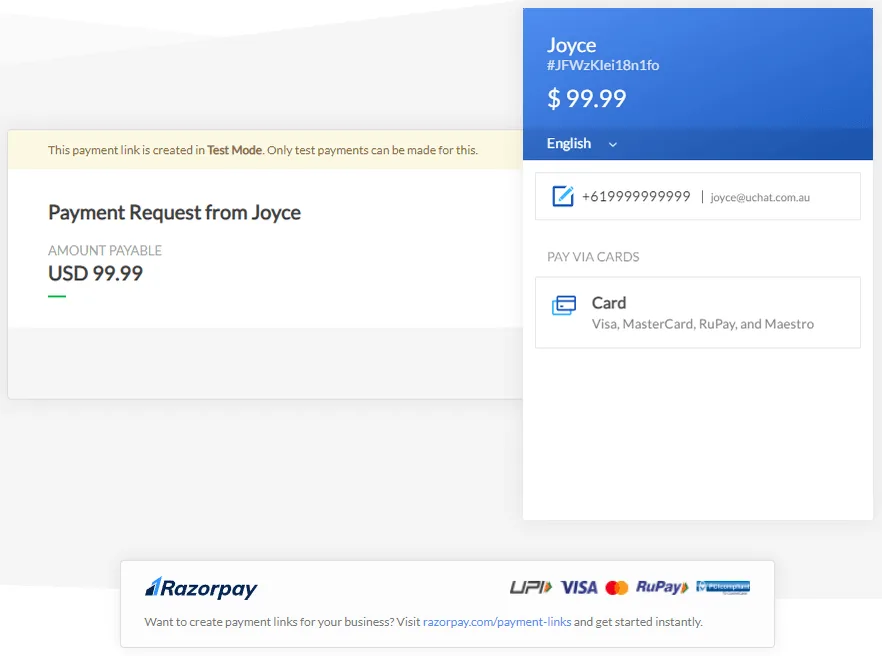
You may not receive this message because some payment links are blocked automatically by Facebook. In that case, it is worth using a URL shortening service, such as Bitly, among others (the Bitly app is available in the NicoChat app store).
If the message does not arrive on Facebook, check it in Live Chat:
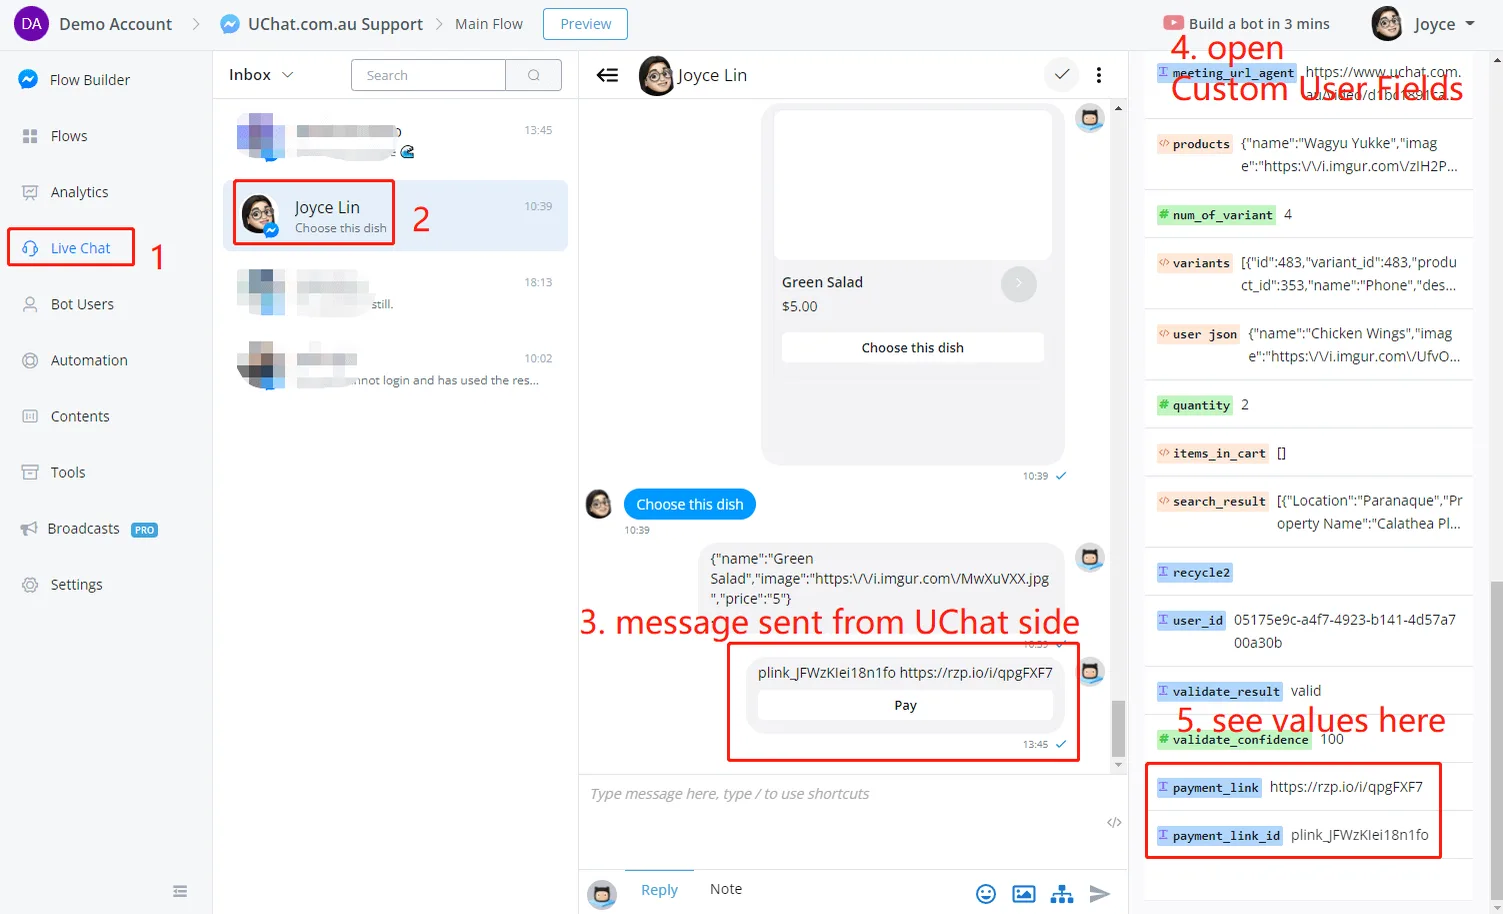
The action seems to be working just fine!
Your app is almost ready! But wait: the payment is made on the Razorpay website, so how do we know whether it was paid or failed? Payment providers usually offer a parameter called Callback URL:
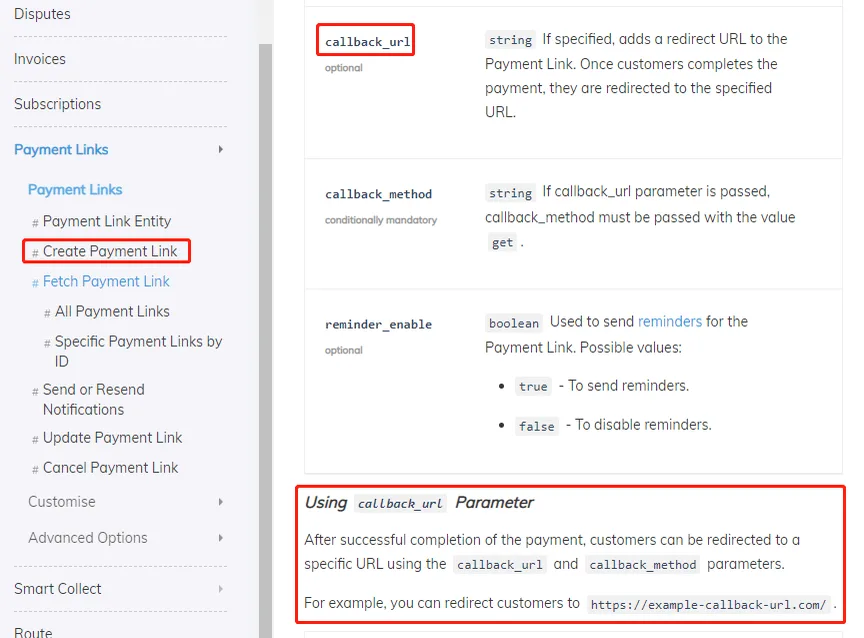
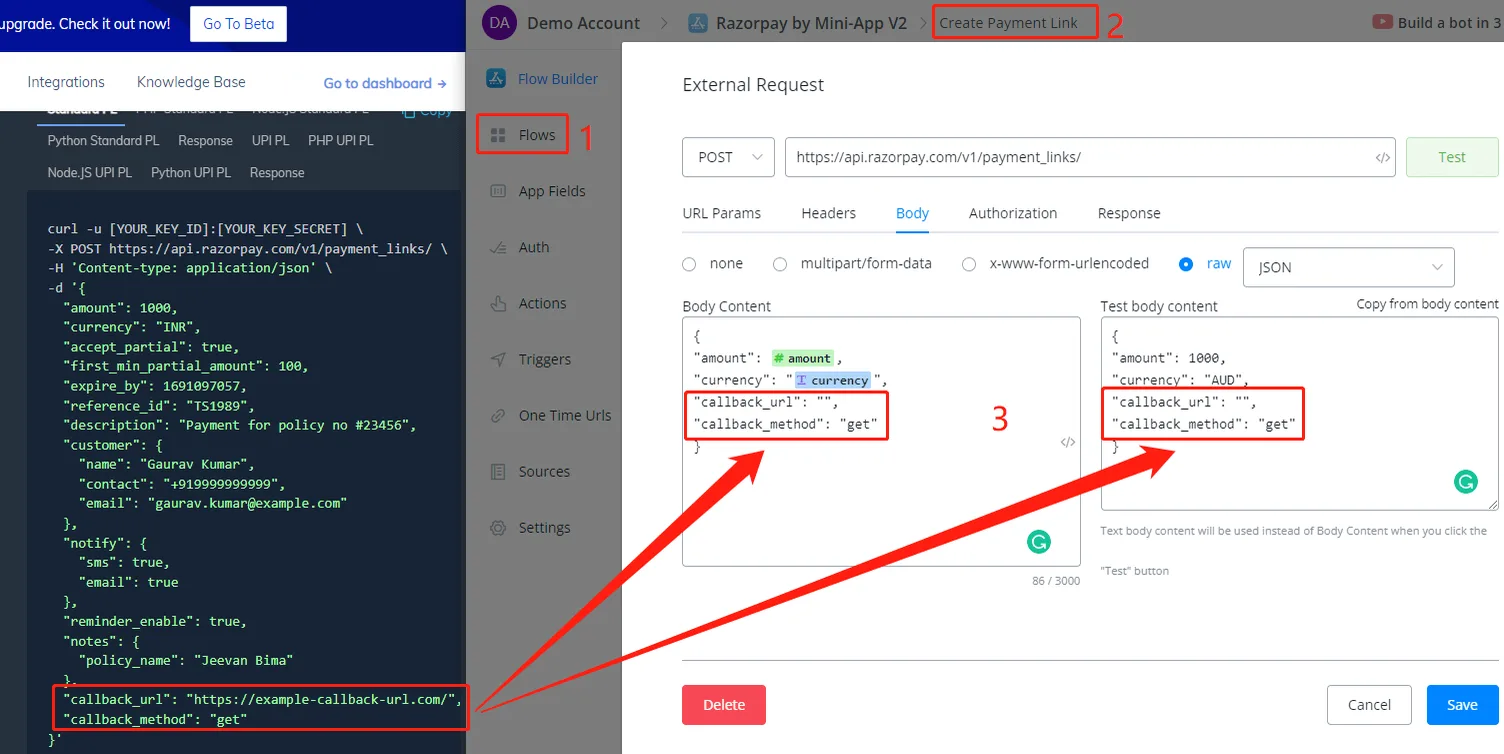
According to the documentation, callback_url is the address where Razorpay sends the payment result. That is, we need to give Razorpay a callback_url telling it where to send the information back.
A Single Use URL can be used as a Callback URL here.
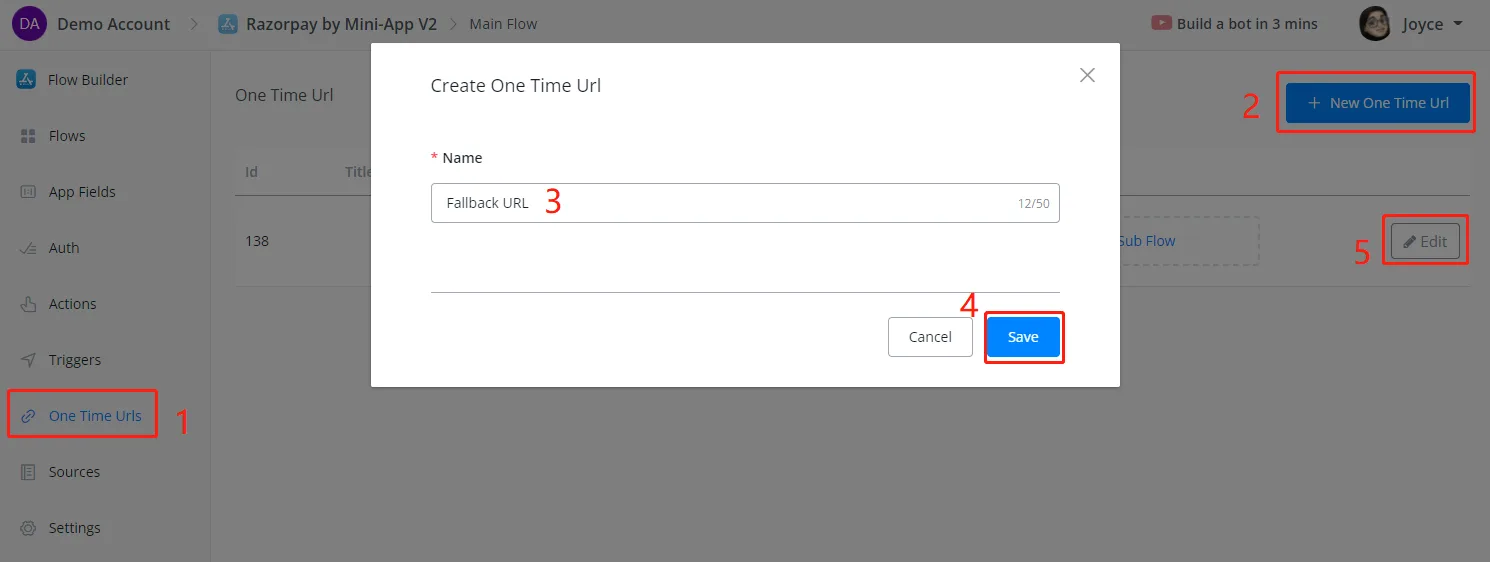
Follow steps 1 to 5 in the screenshot above to create and edit the Single Use URL.
Let's open another app page before entering the Single Use URL editing page.
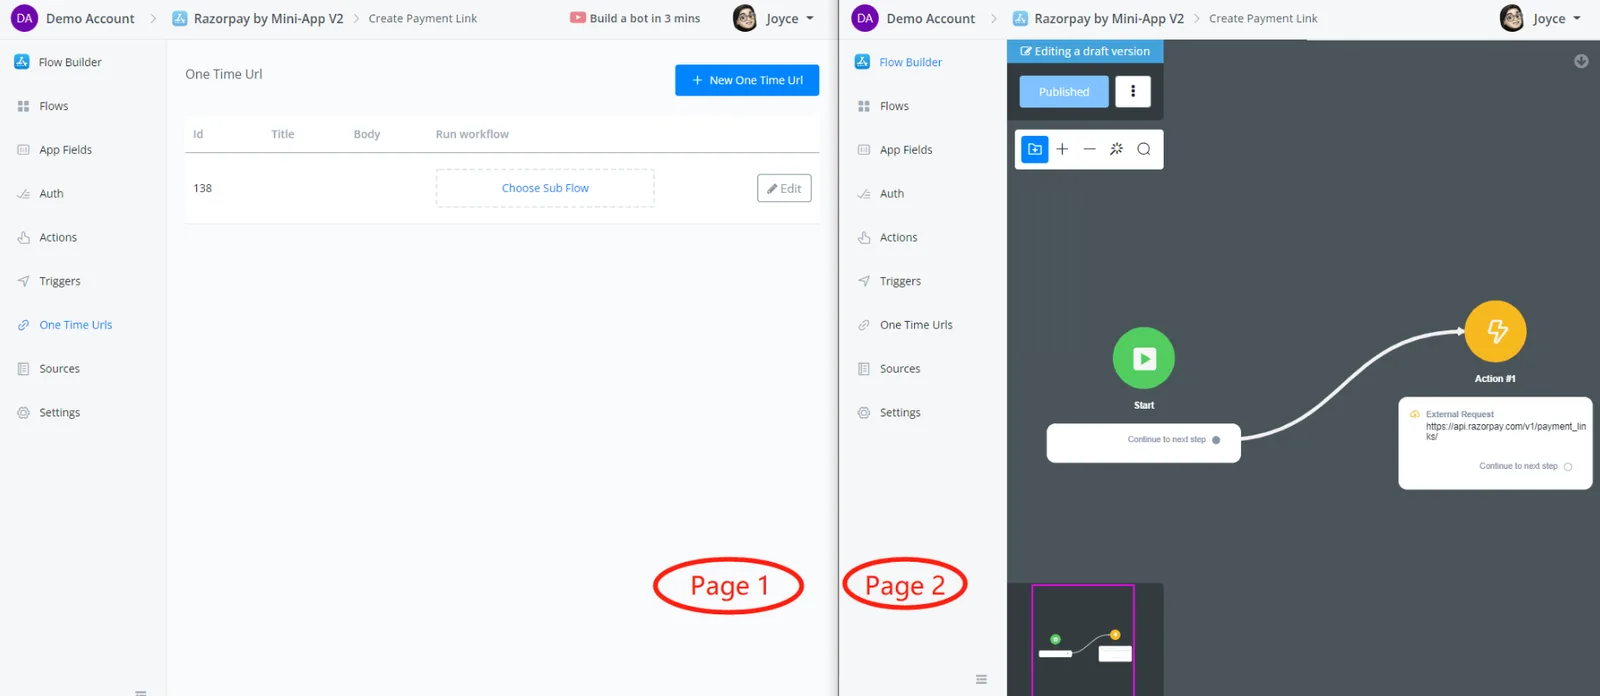
Go to the "Create Payment Link" action on Page 2 and add the 2 parameters to the body section:
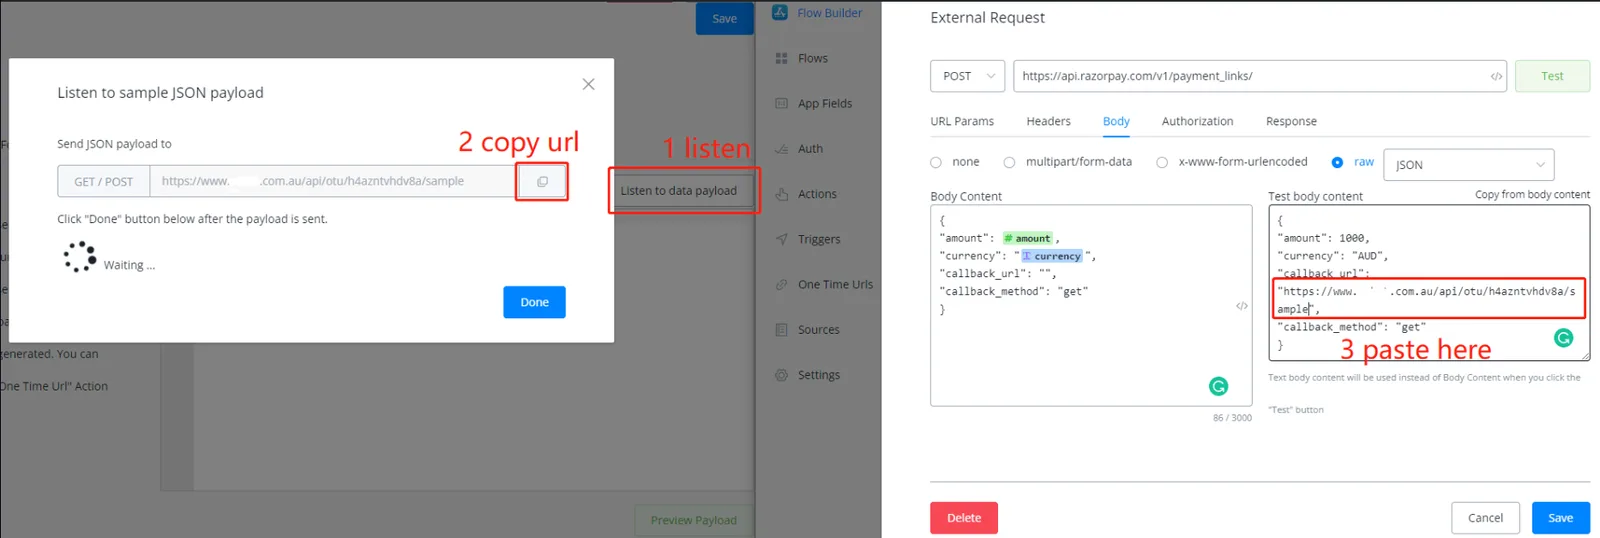
Listen to the payload for a live test. Note that the test URL must be pasted into "Test body content", and not into "Body Content":
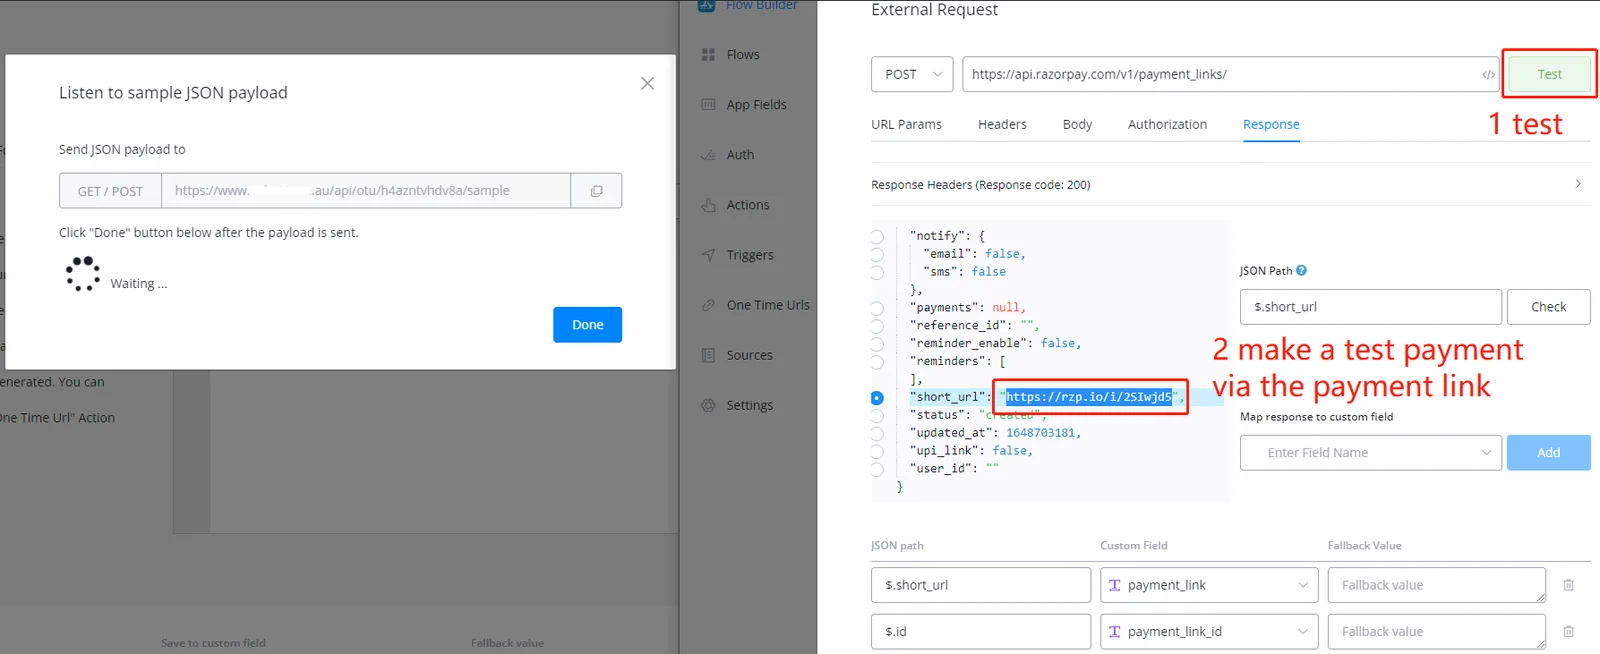
When you finish, click Test and you will get a payment link, as you have seen before. Visit the link and make a test payment:
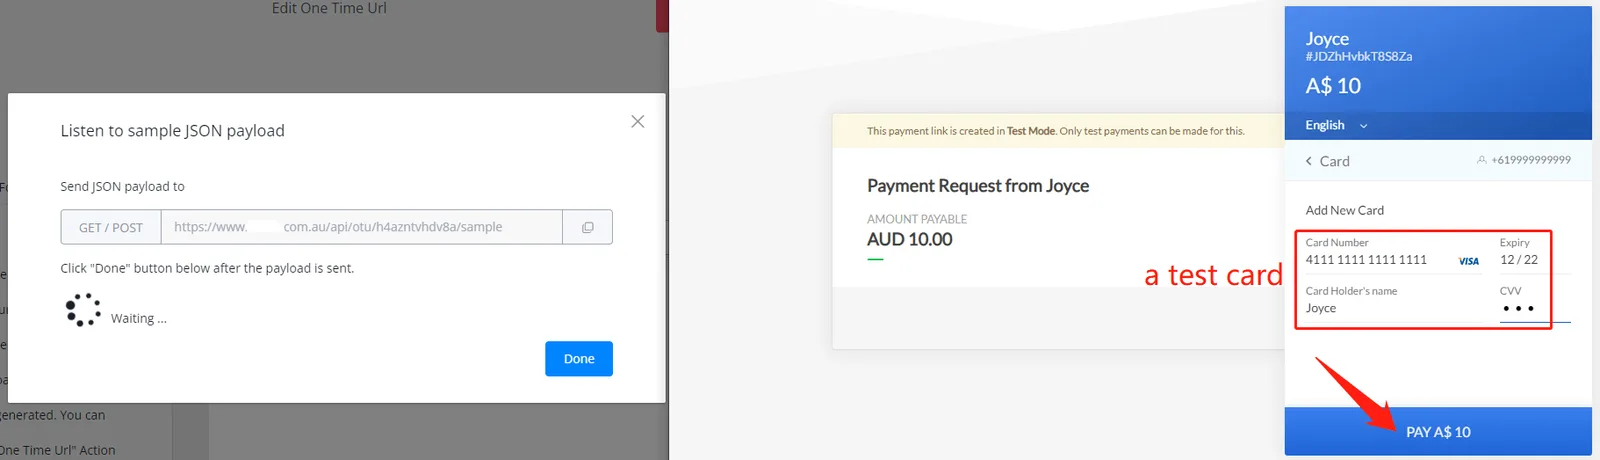
Use a test card to simulate the payment process.
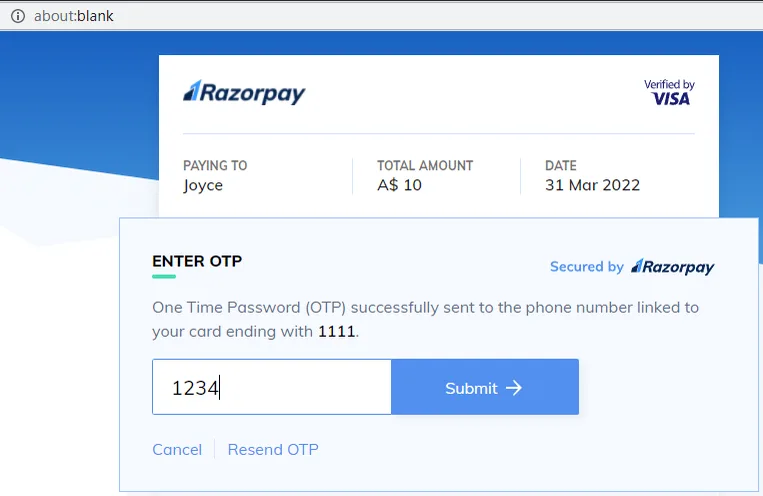
Provide a random OTP code and click Send.
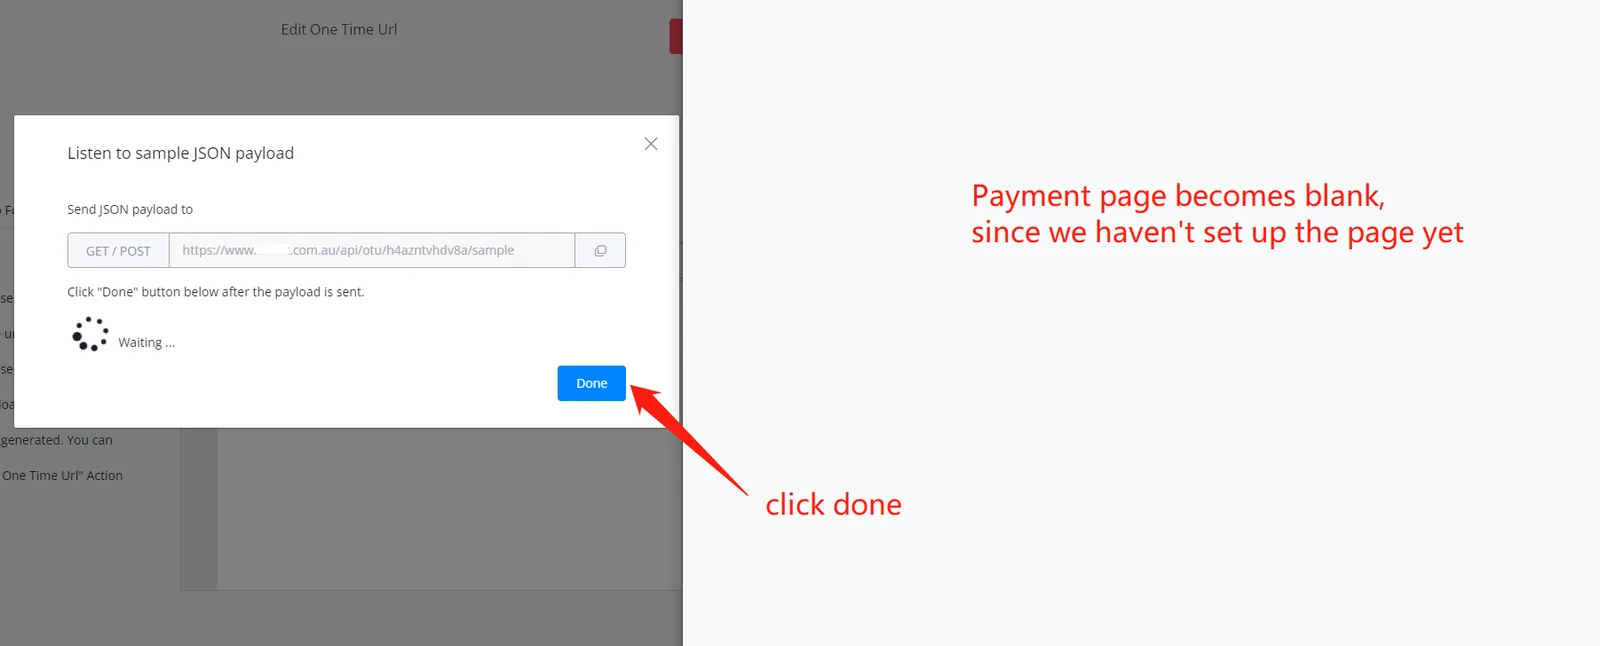
Finally, click Done and you will see the data we need when a real payment is made:
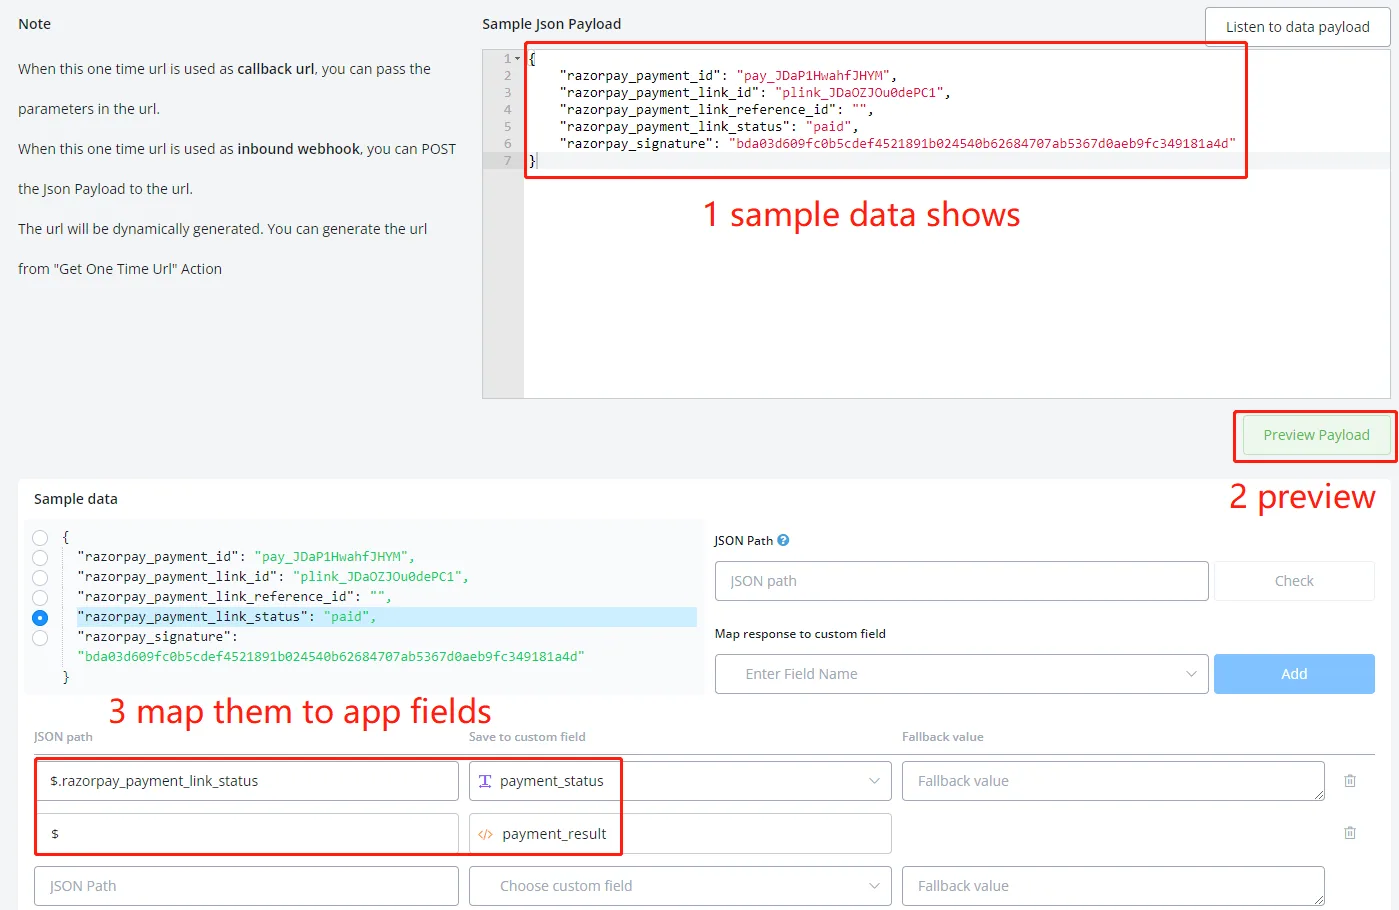
We have now finished the first section, parameters, of the "Single Use URL".
Web Forms is for collecting extra information through a web form, which is not required in this case. Let's go straight to the design of our Web Page:
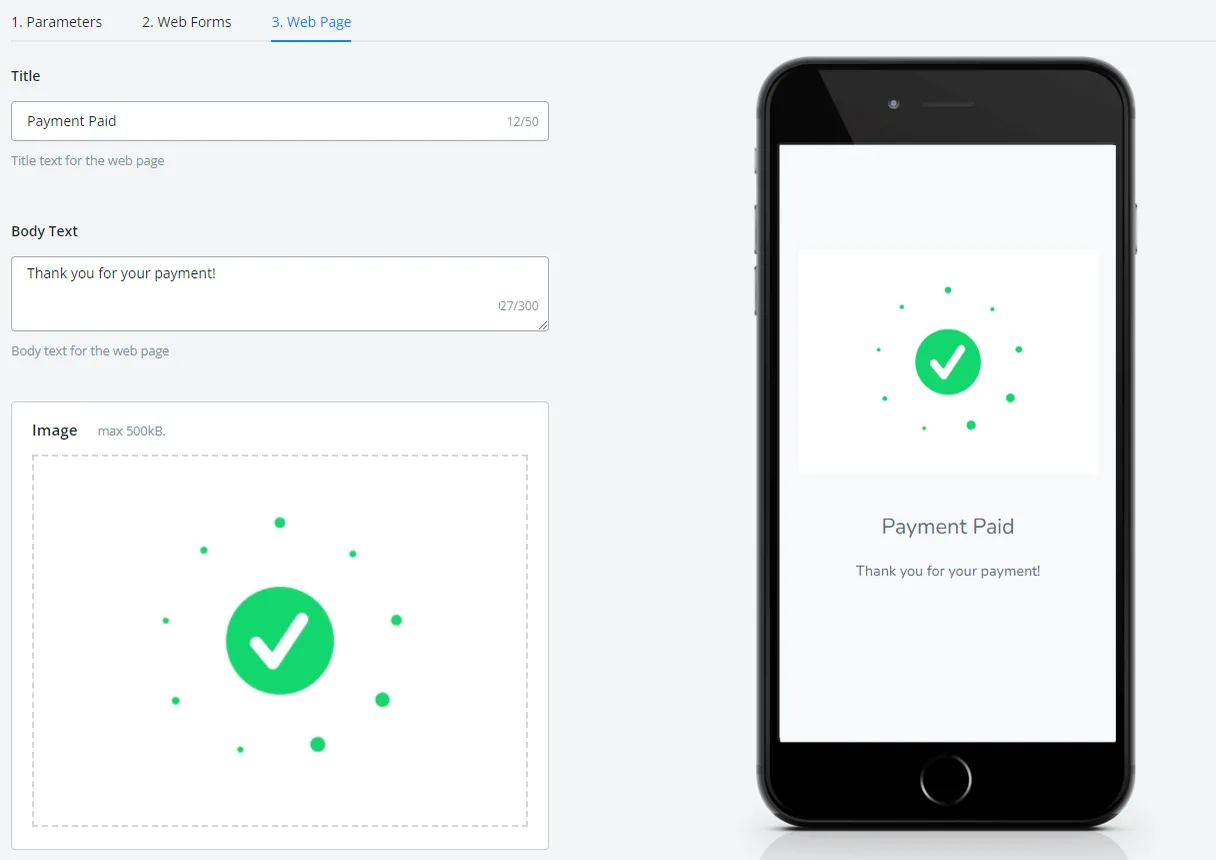
It looks good. At the bottom, set an expiration interval for the Single Use URL. By default, the link expires in 10 minutes. The final step of the Single Use URL is to specify a subflow to run when this page is opened by users:
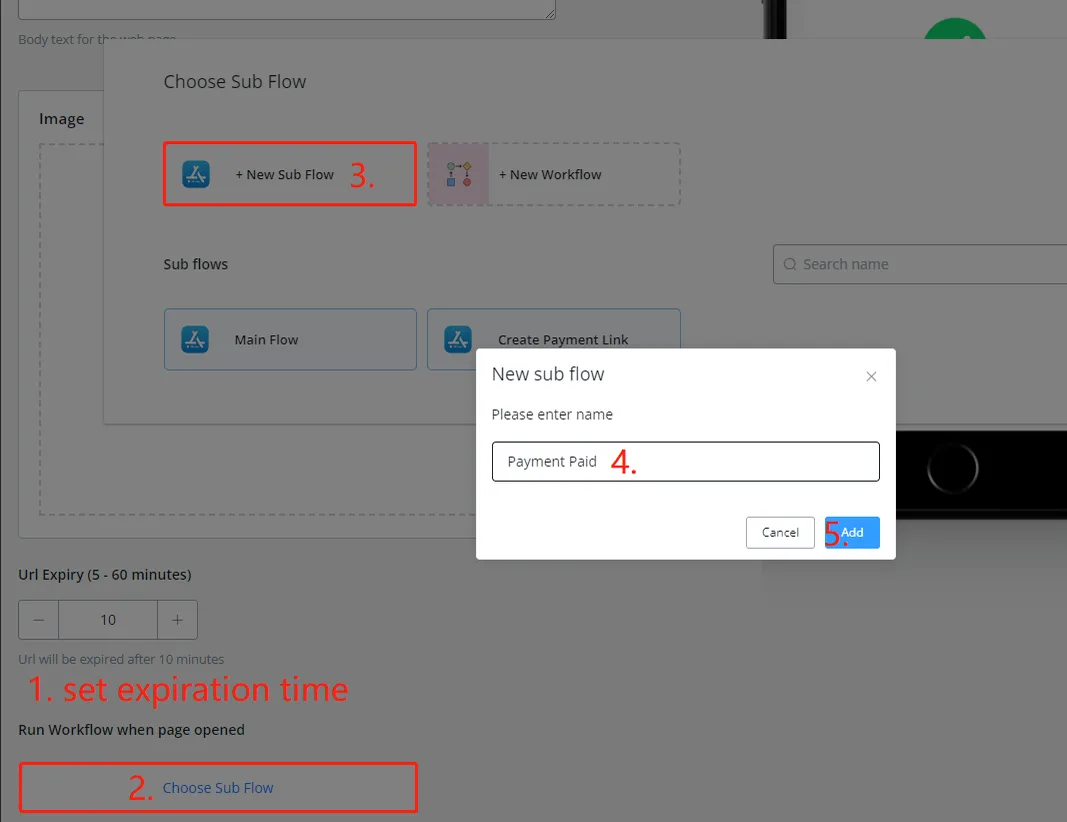
Don't forget to click Save in the upper right corner, and the Single Use URL will be ready:
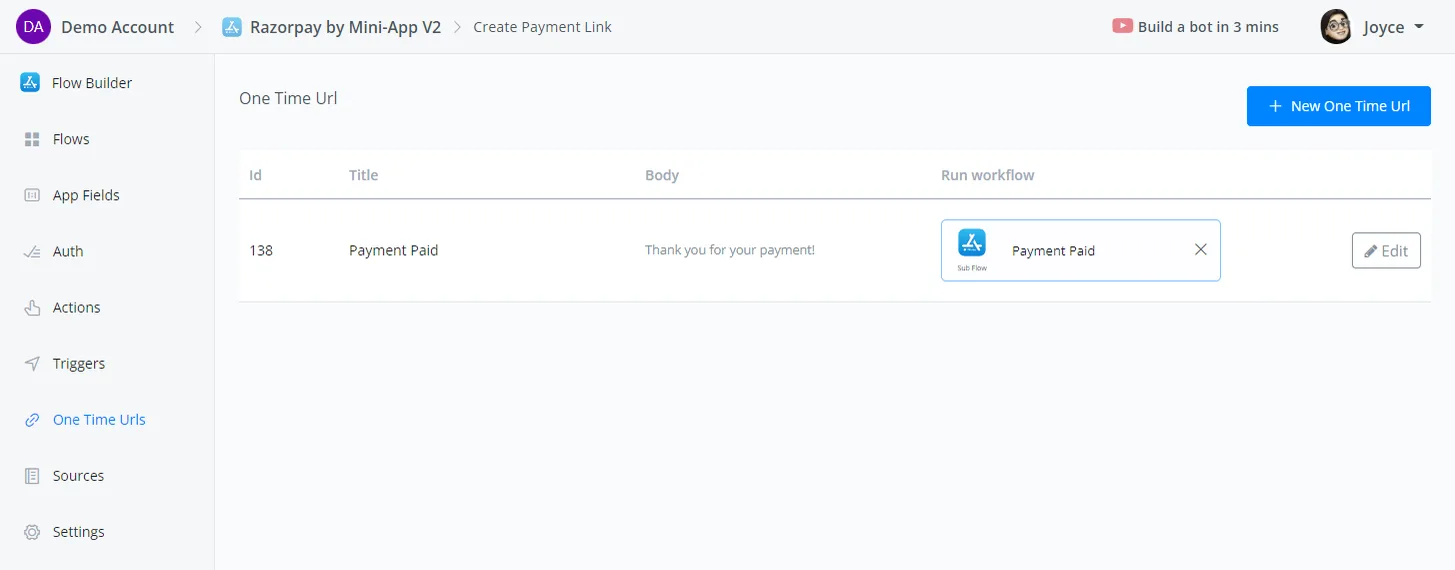
After setting up the Single Use URL, let's add it to the Create Payment Link action:
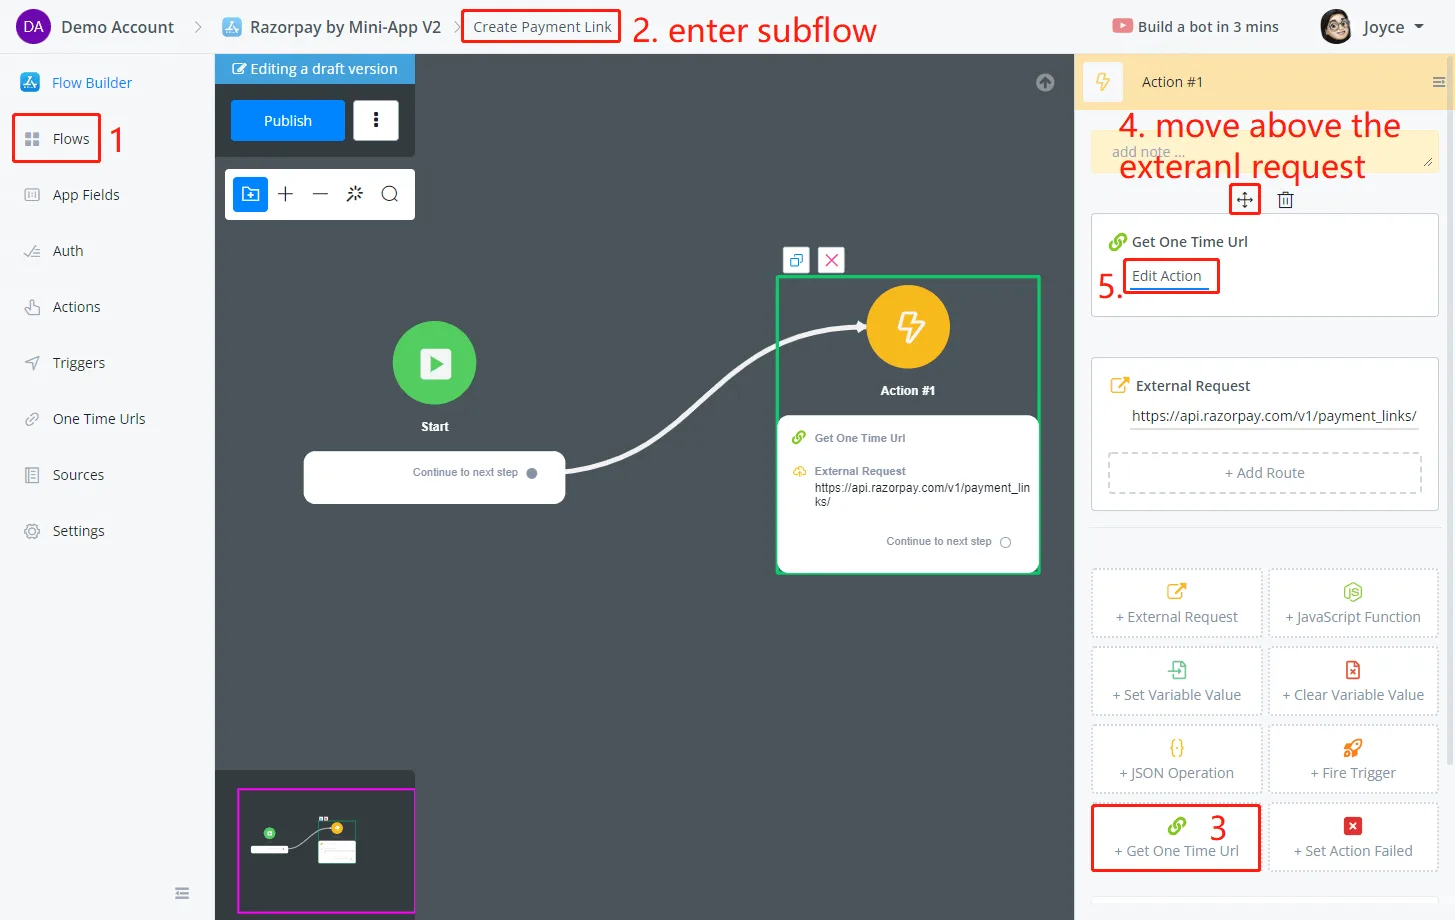
In the Create Payment Link subflow, add a Get One Time Url action before the external request (click and drag to move).
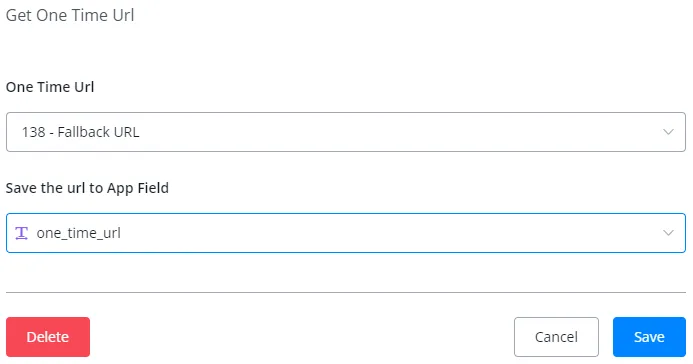
Save the newly generated URL in an app field and edit the external request to insert the field:
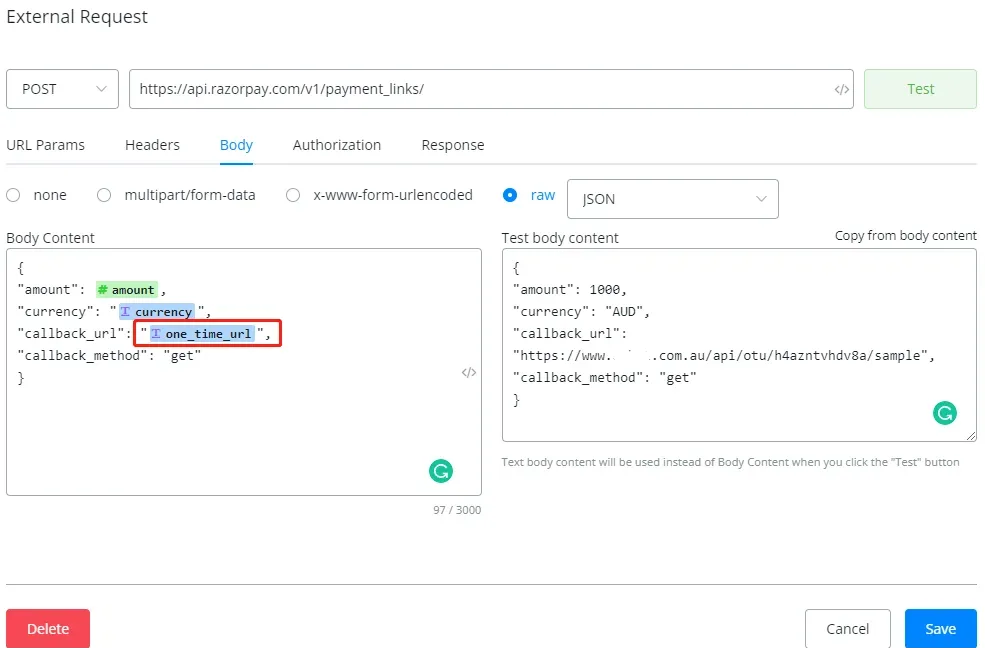
Save the editing and publish the subflow.
The app can already receive the payment results from Razorpay. Now let's send the result back to the chatbot through a trigger.
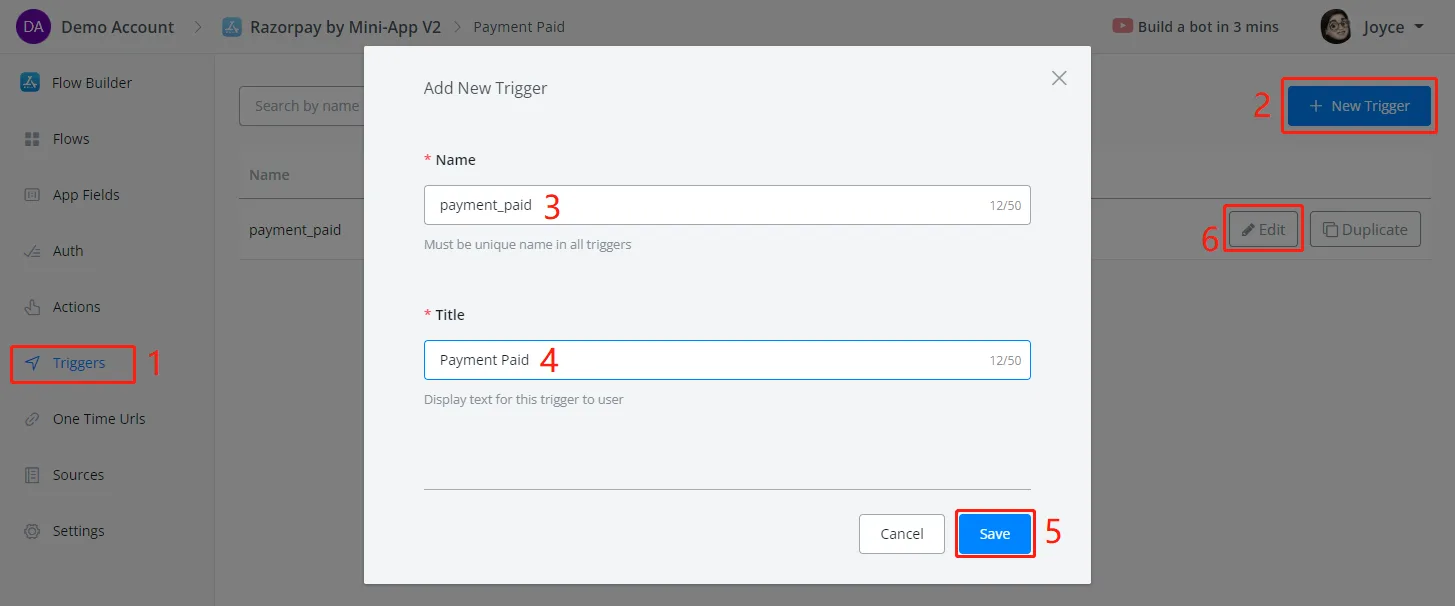
Follow steps 1 to 6 in the screenshot above to create a trigger and start editing it:
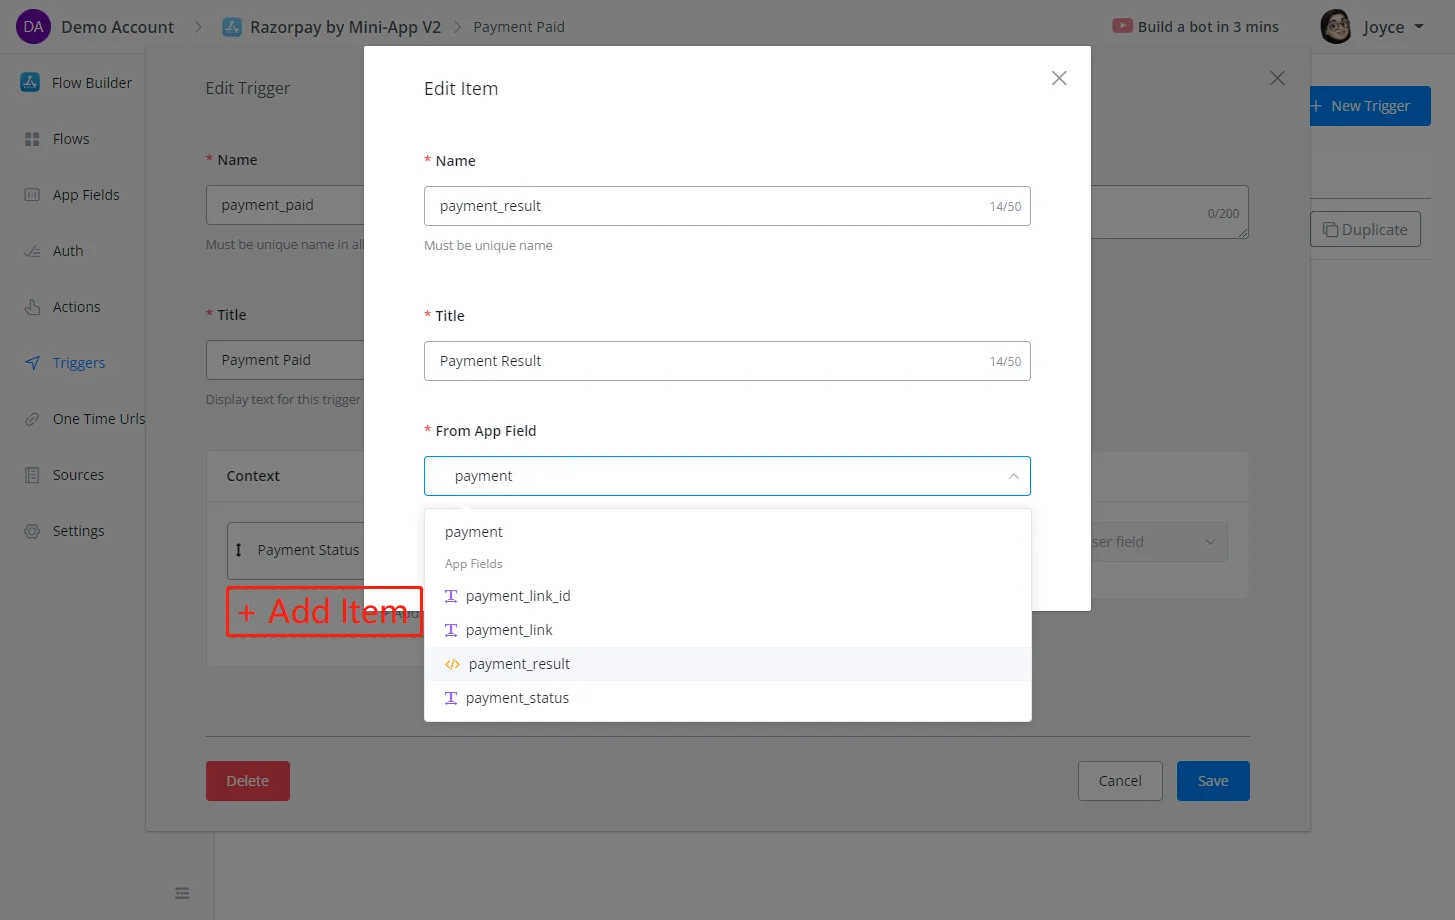
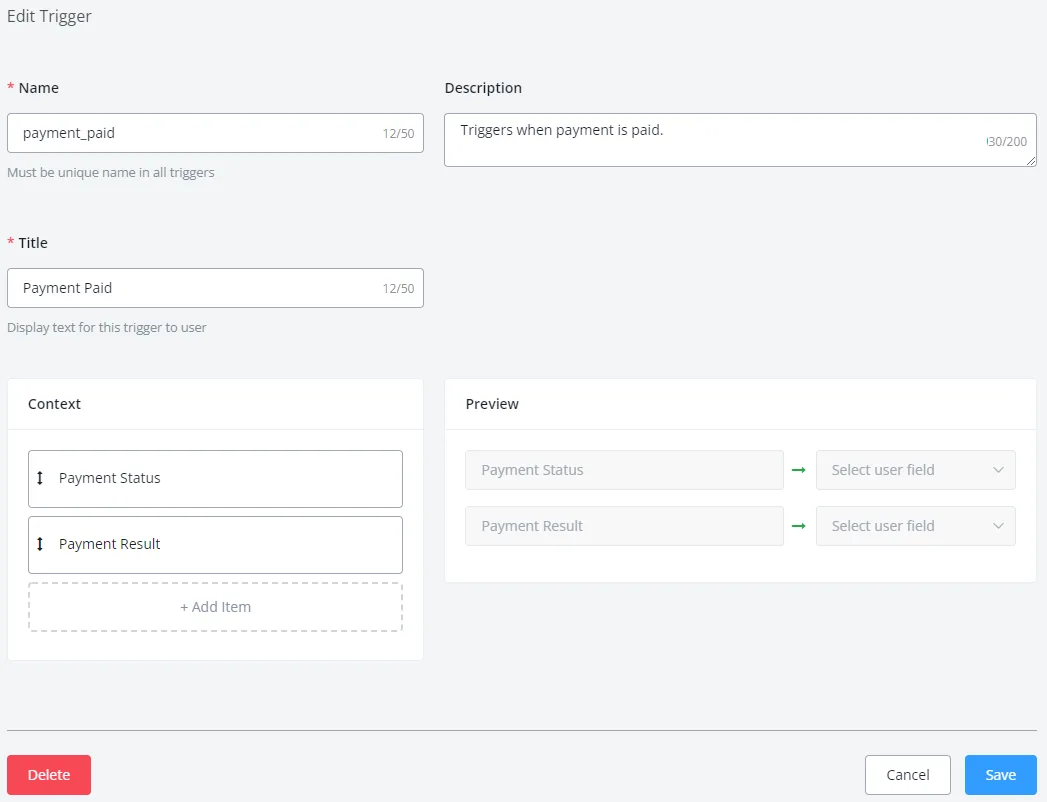
This is where you specify which data to send back to the chatbot. In this case, we send both the payment_status and the whole payment_result JSON.
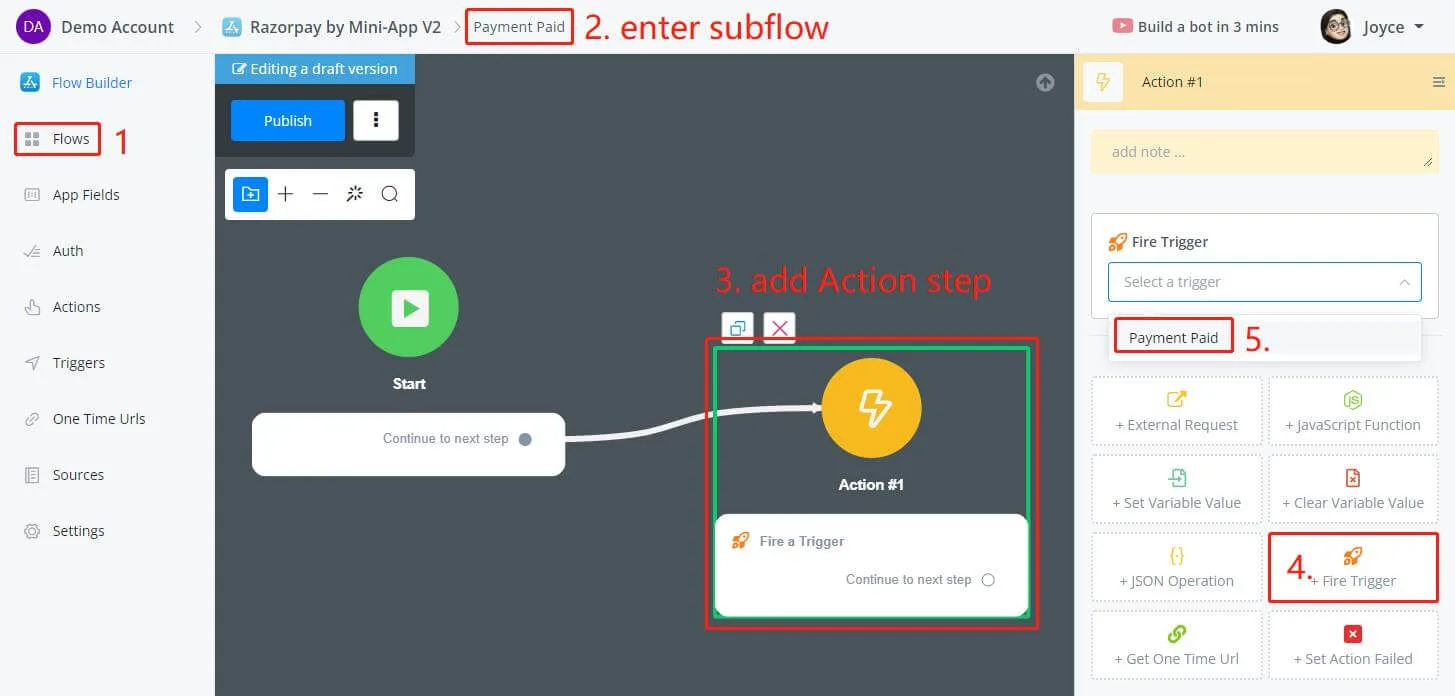
After that, we can fire the trigger in the subflow that the Single Use URL runs when the payment is received:
There is nothing to edit in the previous chatbot flow, but the trigger needs to be set up in Automation before testing the payment process again:
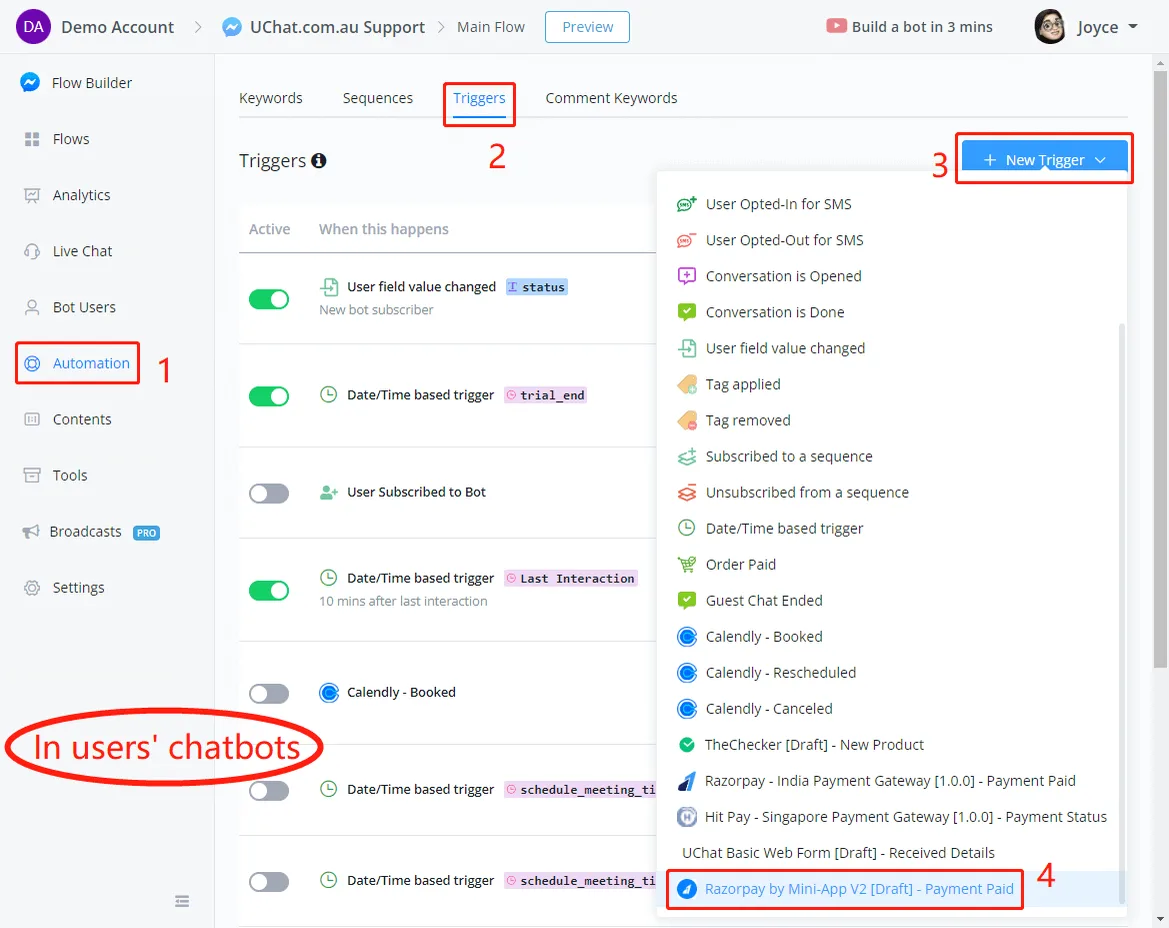
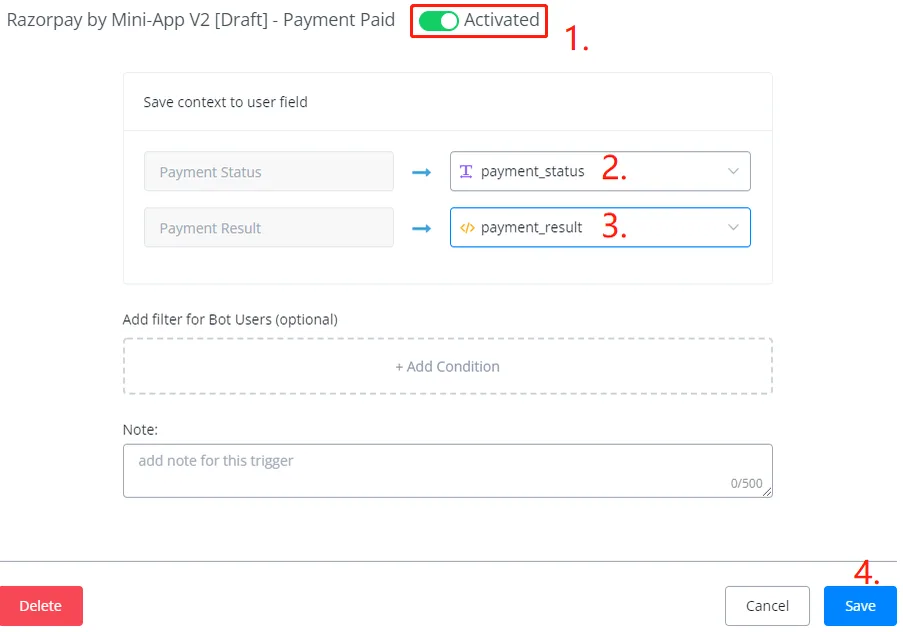
Follow steps 1 to 4 in the screenshot above to add the trigger and name 2 custom fields to save the data in NicoChat:
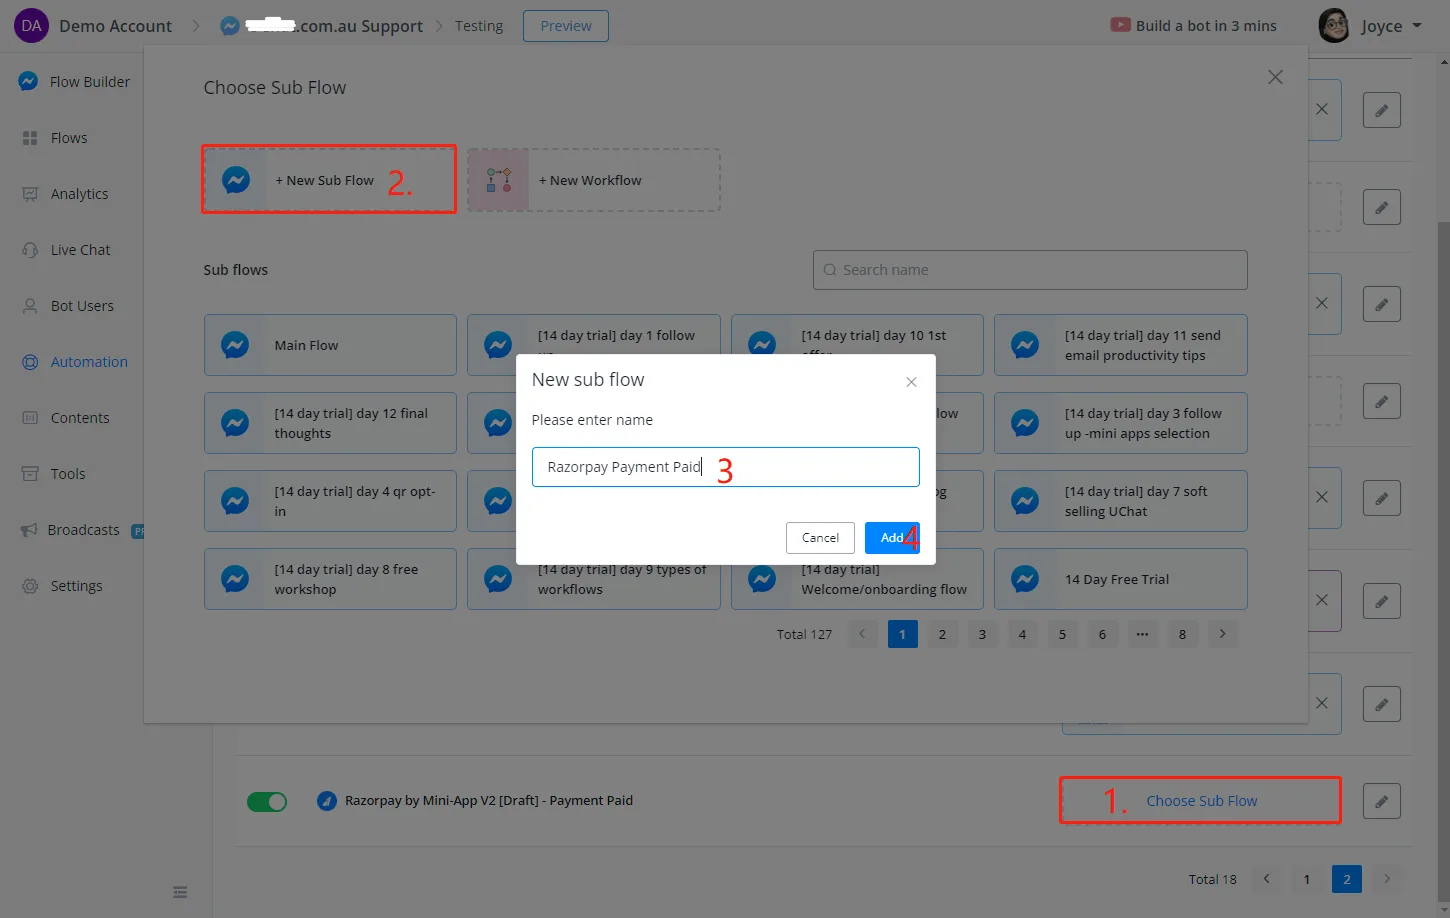
Create a new subflow for this trigger. The subflow will run as soon as the chatbot receives the data from the app:
In the subflow, simply display the data we received:
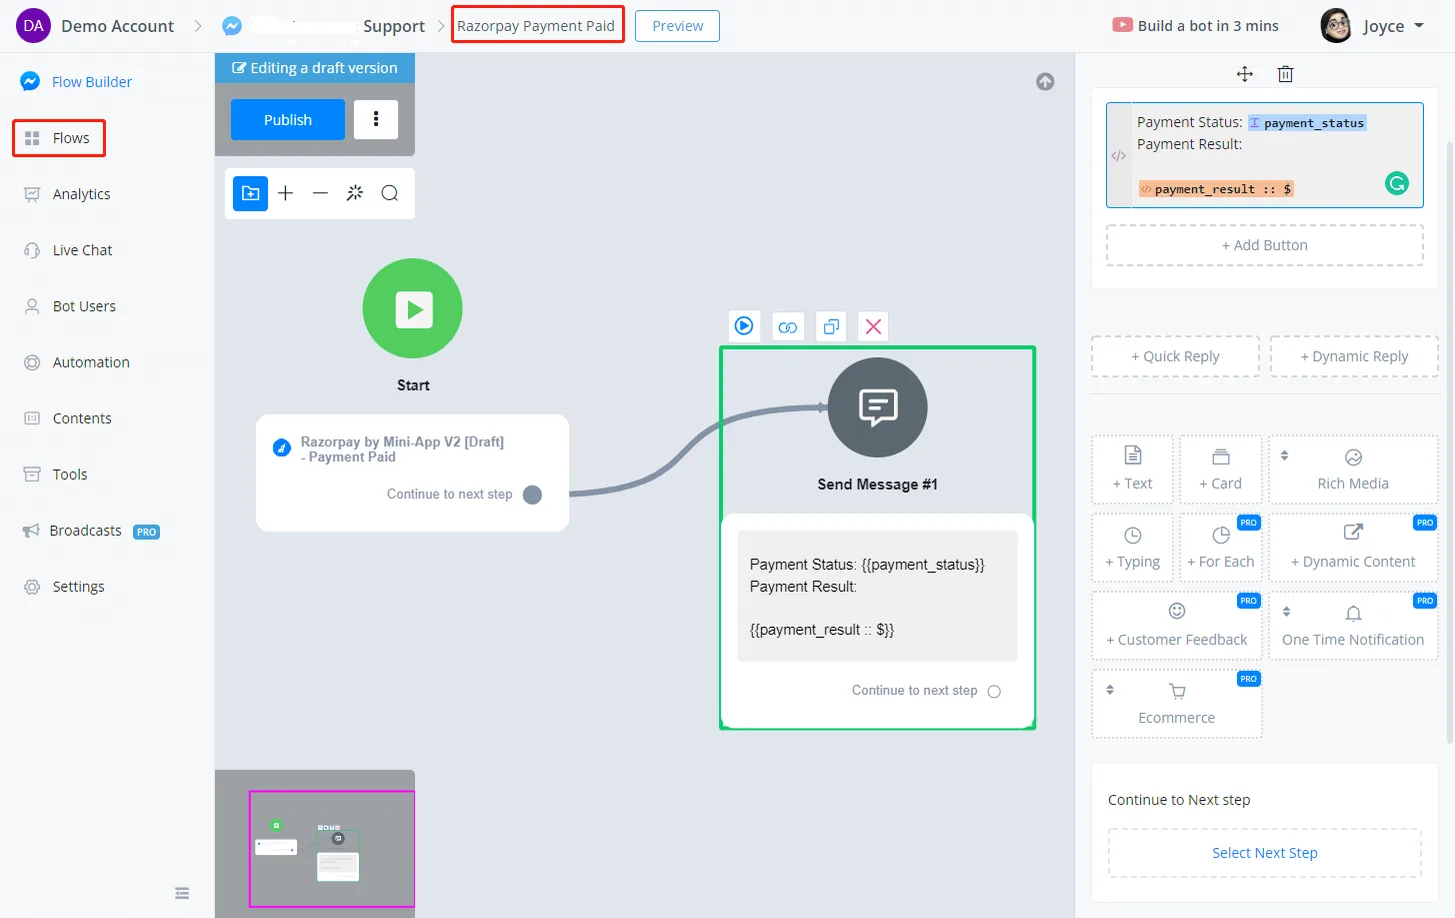
All set. Let's publish the subflow and go back to the previous subflow to preview again from the Action Step:
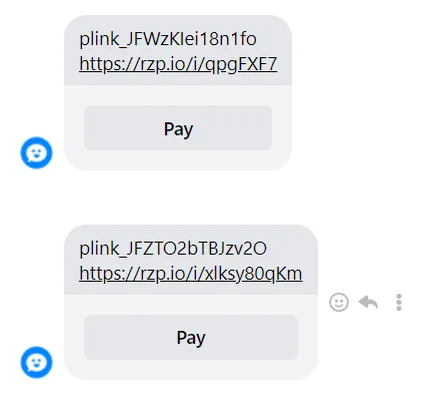
We received another link. Click Pay and use the test card again to process the payment:
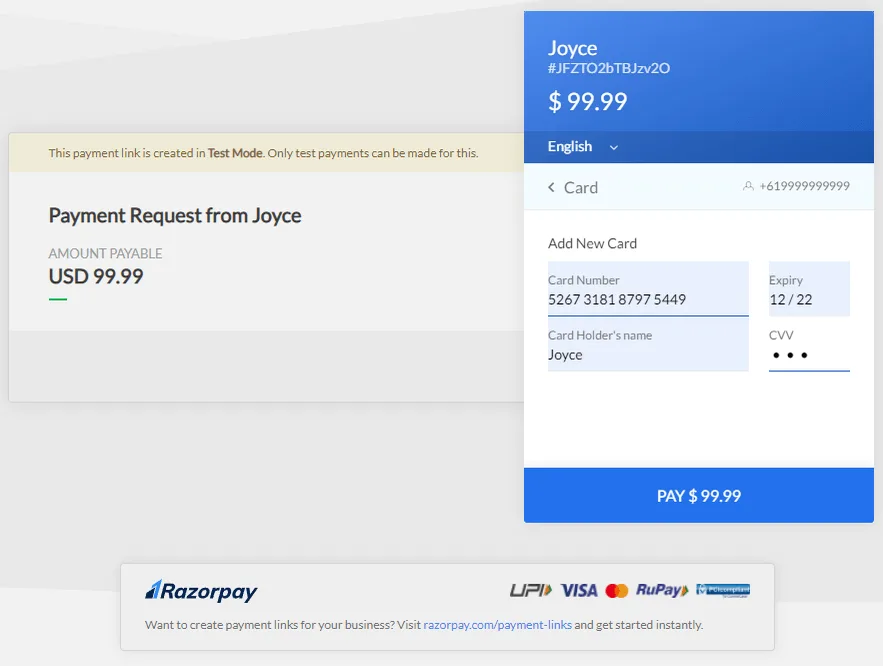
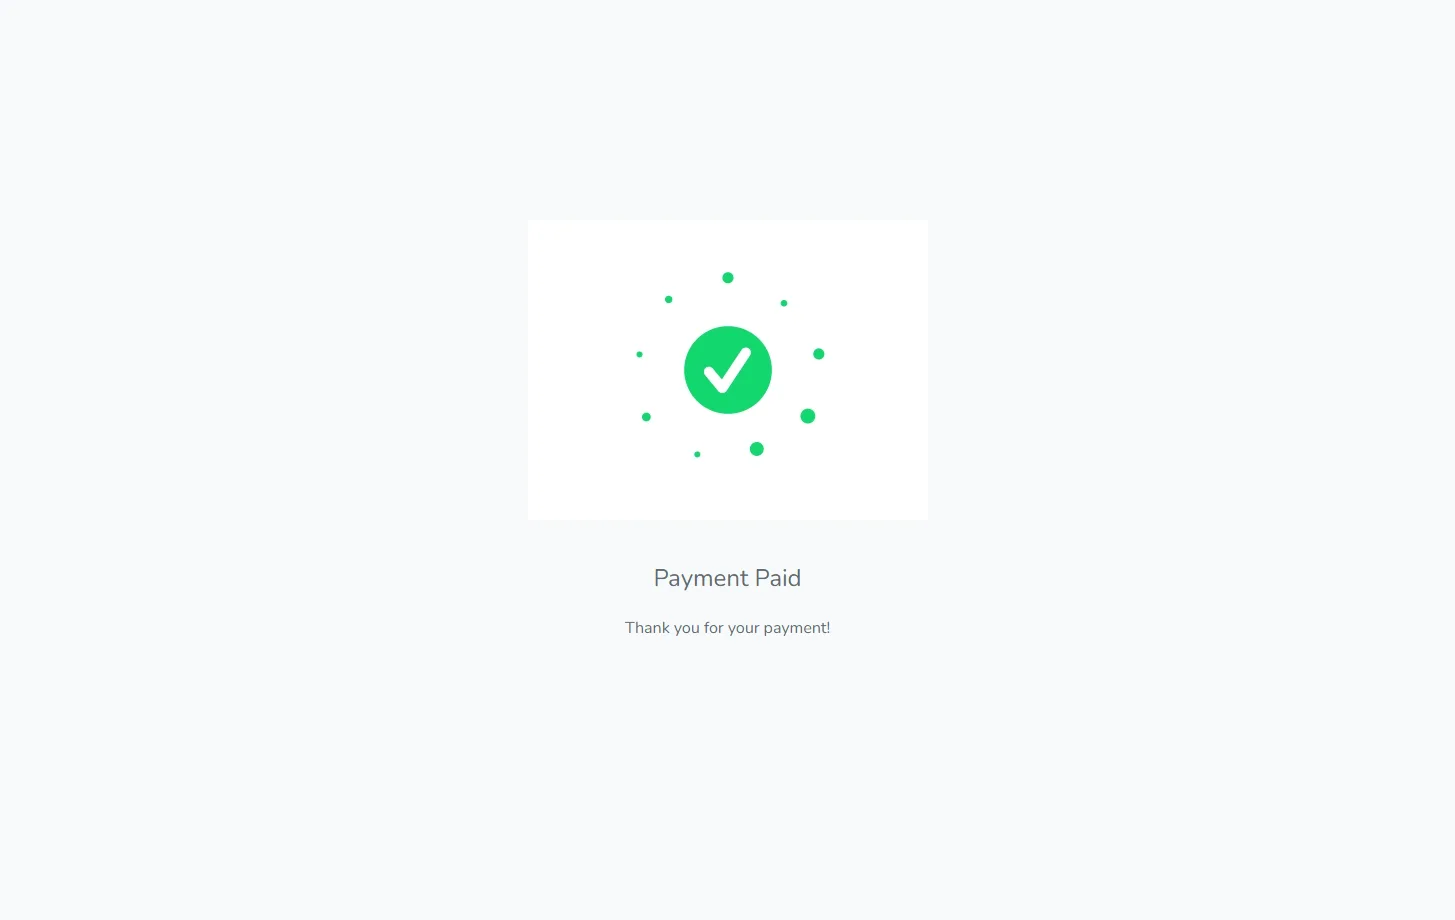
The web page we designed appears as expected:
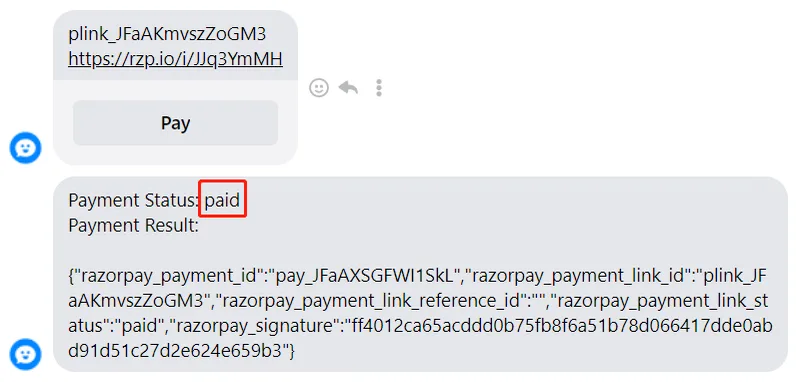
Ding! A message also arrived in Messenger:
🚀 Congratulations!! You have created your first app! 😍