Authentication
The Authentication section is where you configure authentication. In general, most API services require authentication to prevent unauthorized requests.
The NicoApp V2 system offers two types of authentication: API Key and OAuth v2.
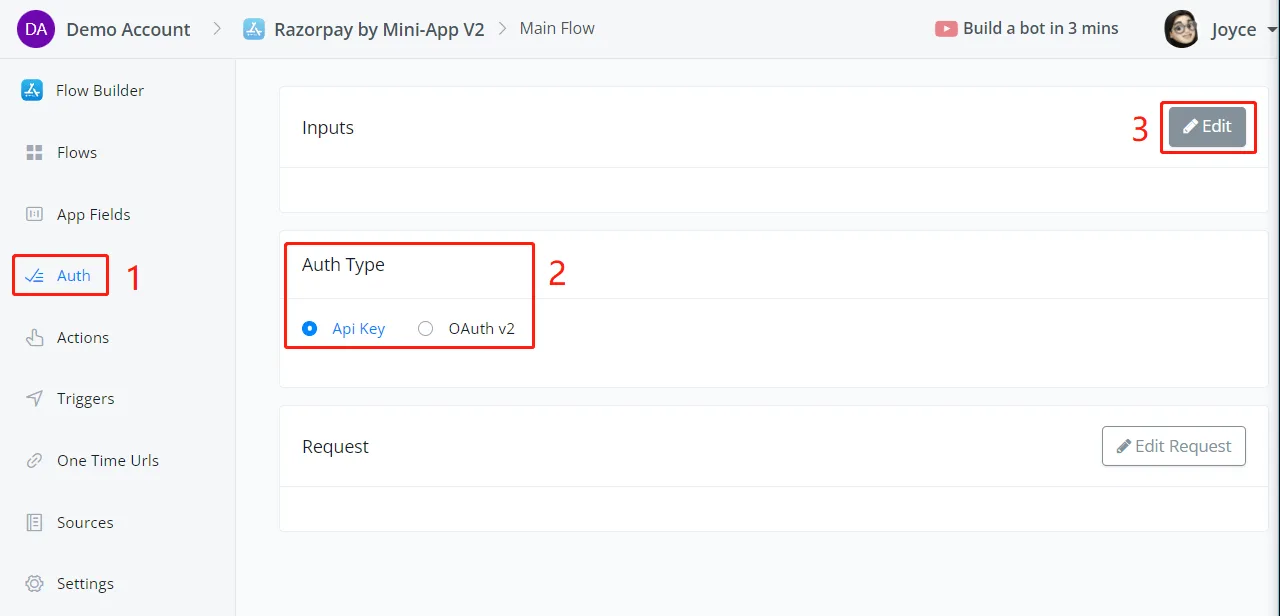
Choose API Key in Auth Type, click Edit and then Add Items to add auth inputs.
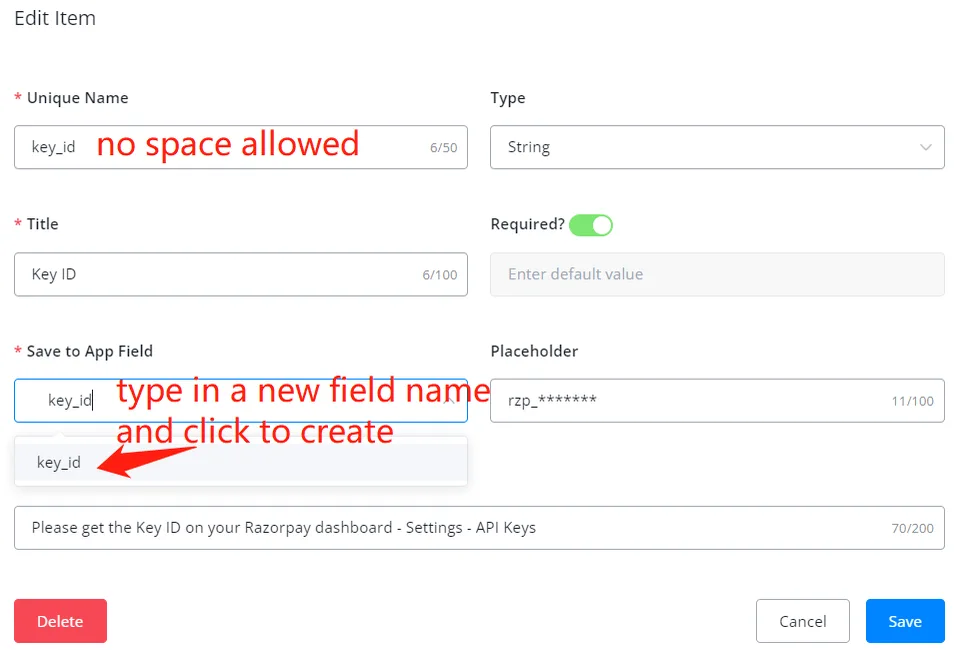
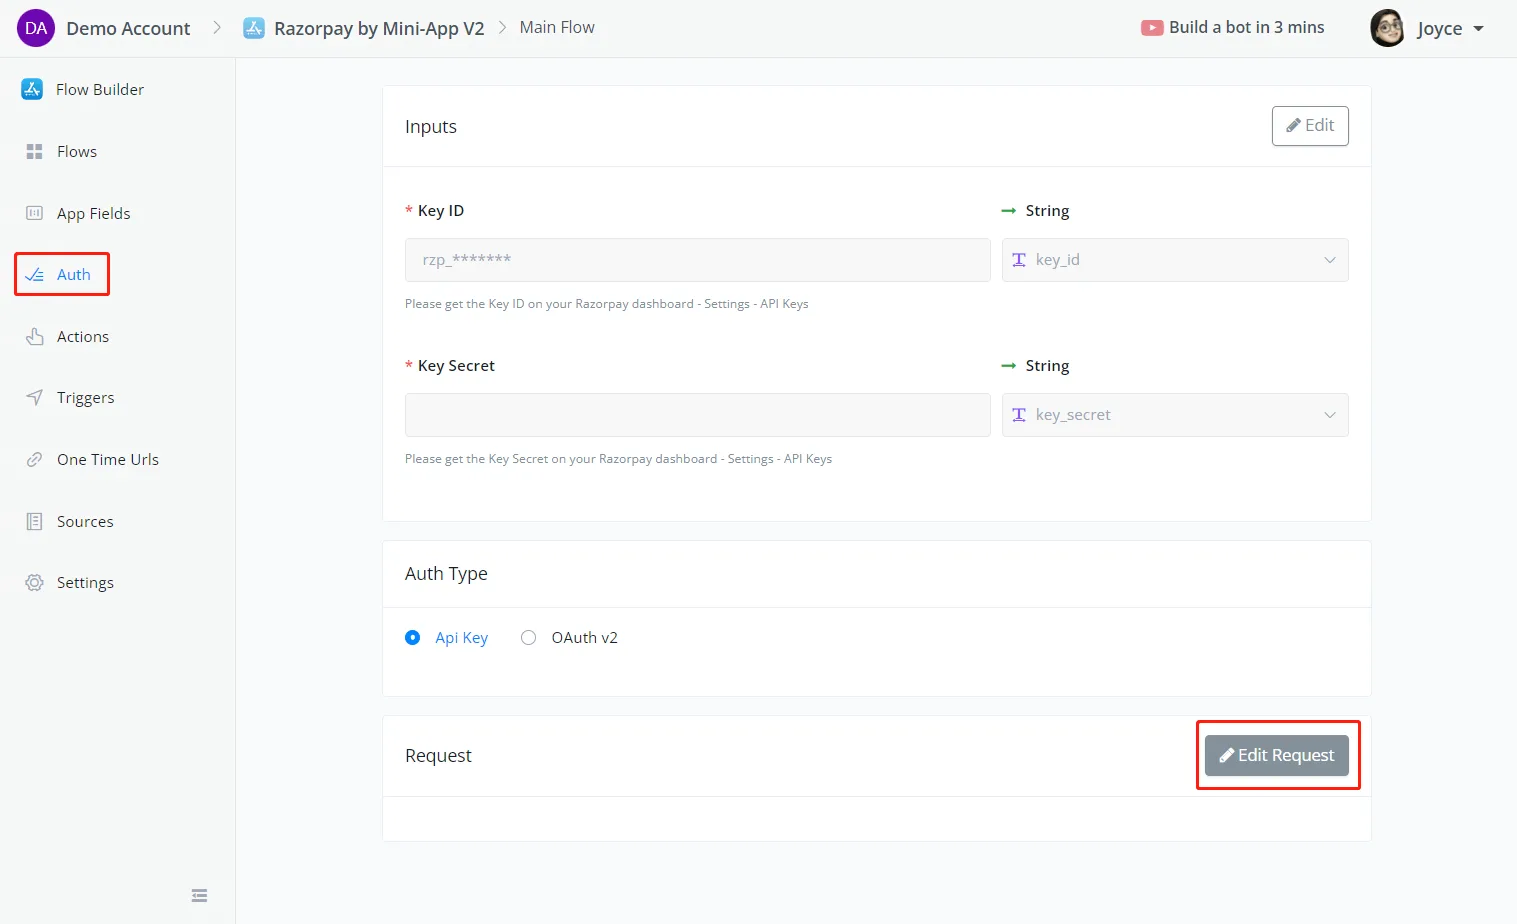
Add as many auth inputs as you need and click Save when you finish.
Choose OAuth v2 in Auth Type and configure the three steps shown below.
If you need to send the auth inputs to get more information, use Auth Request.
For example, some third-party service providers require users to provide their username and password. With these two values, they generate a token for later communication within a few hours.
In this case, you can gather username and password in the auth inputs and send the token request in Auth Request.
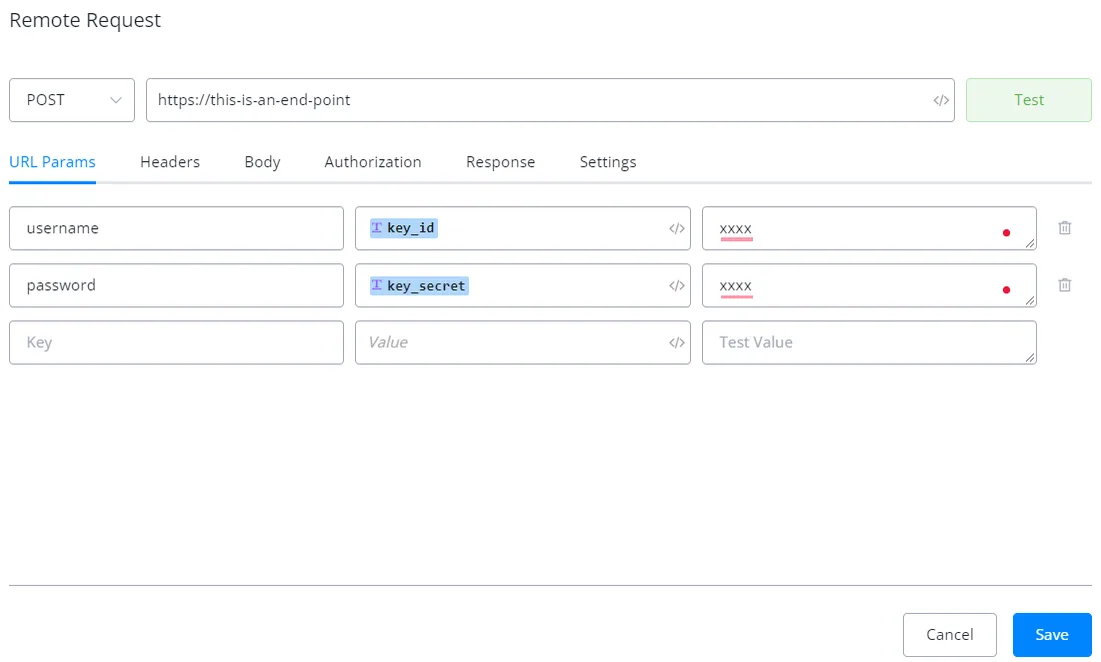
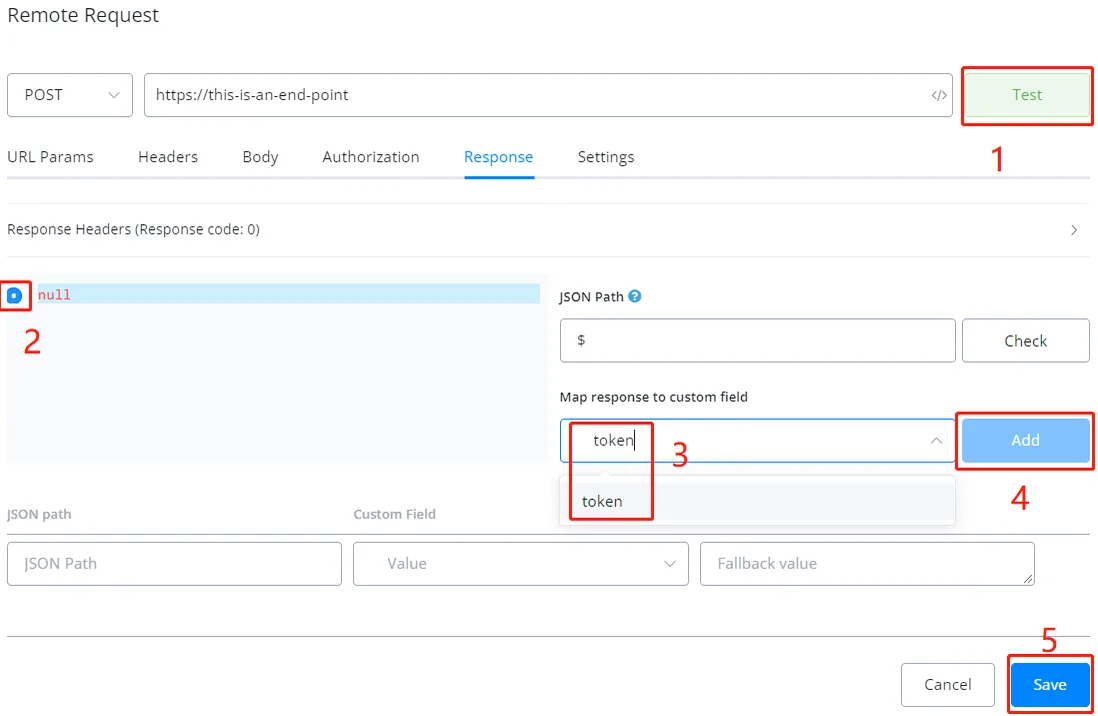
Configure the external request and click Test: the data you need appears in the response area. Select the token and map it back to the app by clicking the Add button. Click Save to save the auth request: