Actions
The action is the core of the app: it is what shows what your app does. On the user's side, they only need to provide the inputs and get the outputs. Each NicoApp action has 3 parts:
2026-08-12
Inputs (optional)
To get data from the chatbot
Outputs (optional)
To return data to the chatbot
SubFlow
Runs when the action is called
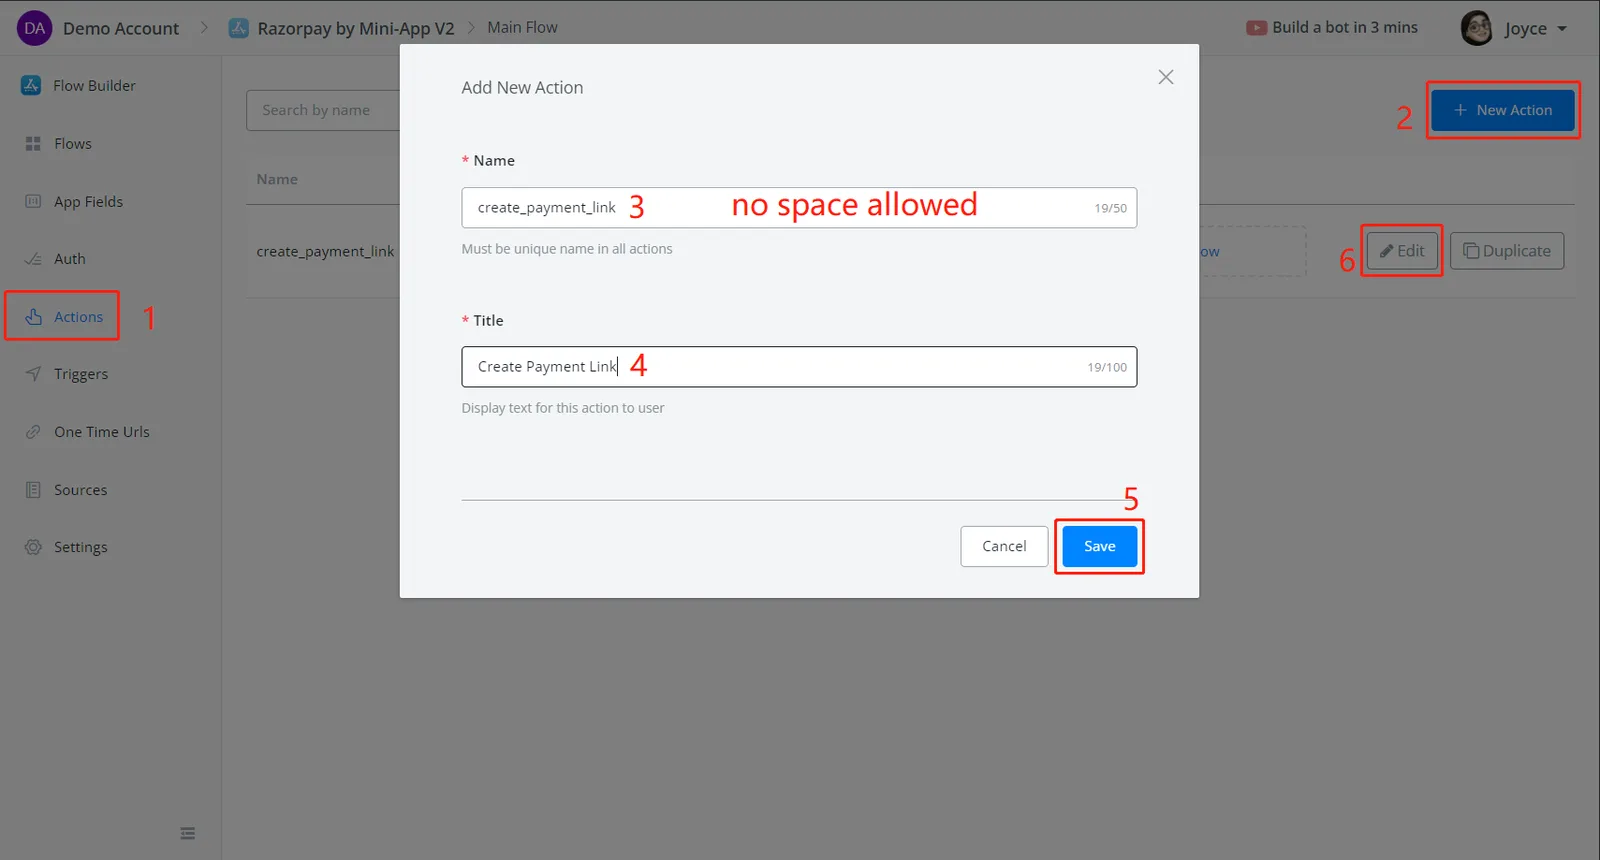
Follow steps 1 to 6 in the screenshot above to create an action and start editing it.
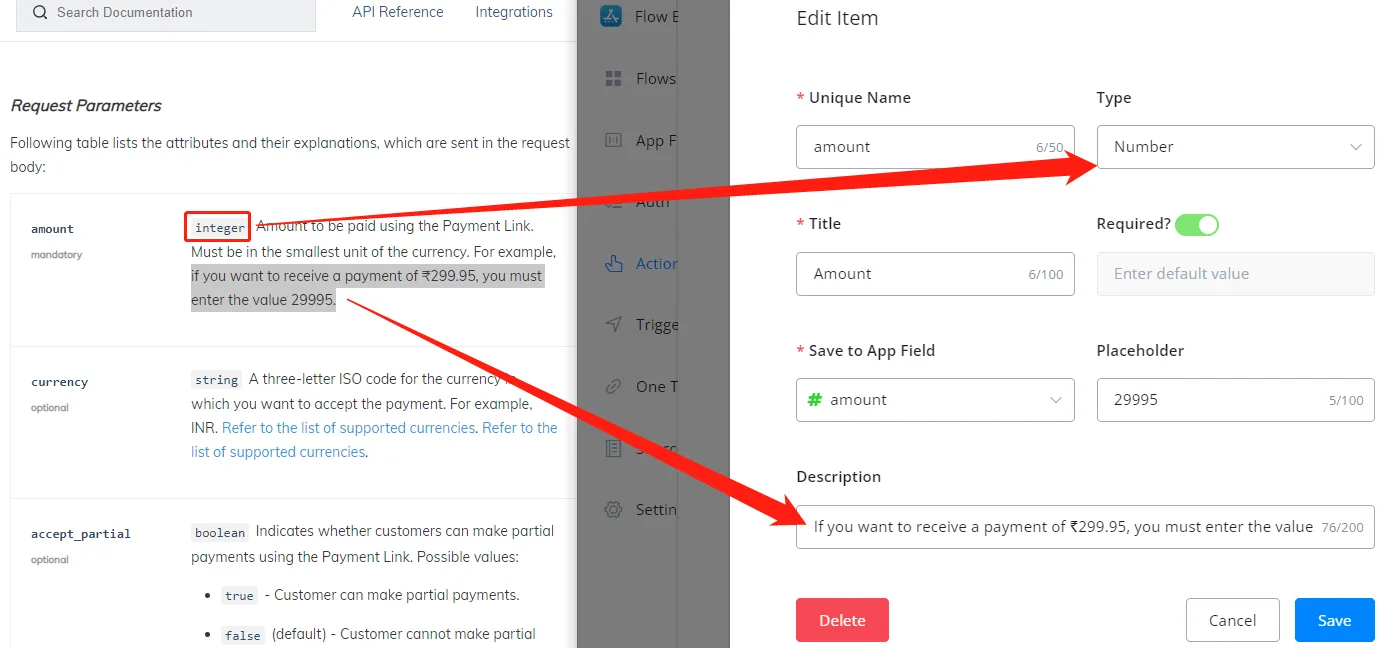
In the API documentation, you can see which parameters are required, what type each value is and whether they are mandatory or optional.
Click on Add Items in the Inputs section:
Keep your documentation and NicoChat side by side and copy the information from one to the other.
Unique Name
Unique among all auth inputs. You cannot use a space: separate words with underscores or hyphens
Type
Choose String for text without line breaks, Number for integer or floating-point numbers, Text for text with line breaks, Select for static or dynamic source input
Title
The title shown in the interface
Required?
Is this input required? If not, switch the option off and provide a default value if needed
Save in App Field
Specify where to store the value. Create a new app field right here by typing a field name and choosing a field type in the pop-up, or search for an existing field
Example text
Grey text shown inside the input box
Description
Black text shown under the input box
Note
TIP - We suggest filling in the Inputs first and leaving the Outputs until after you finish the subflow for this action.
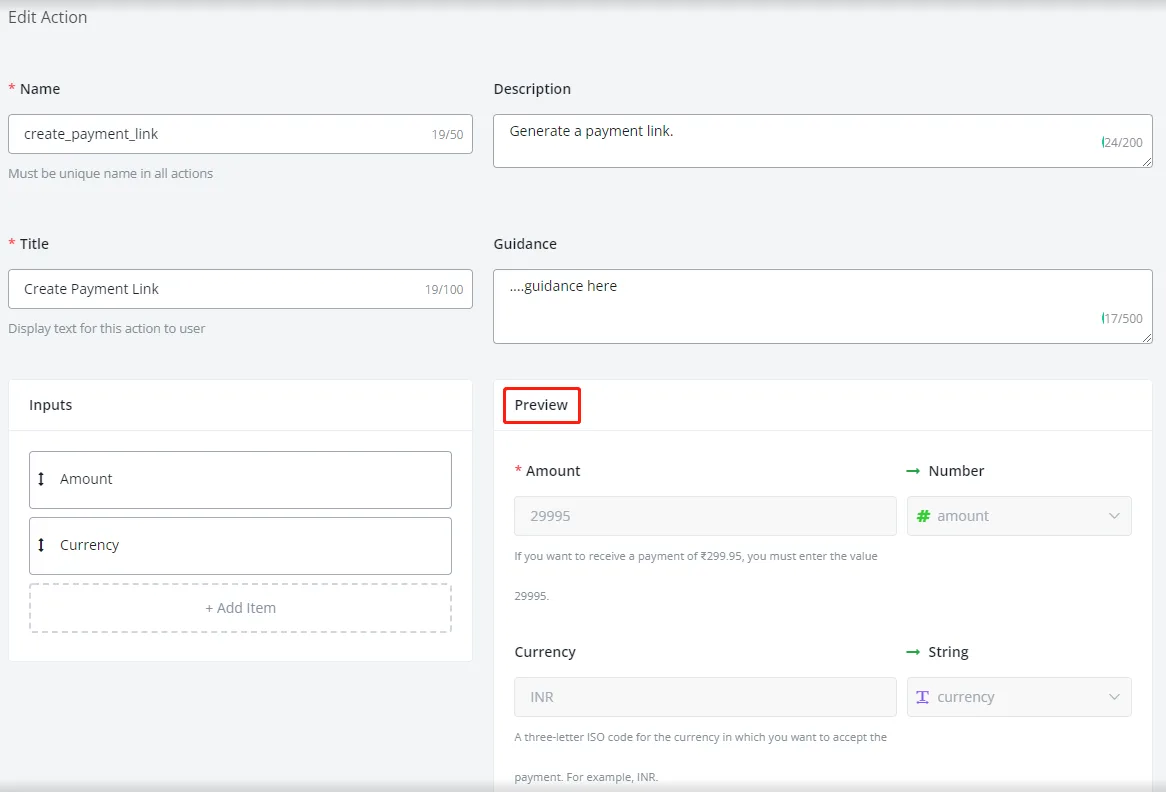
Fill in the necessary description and guidance and check in the preview section how your inputs turned out.
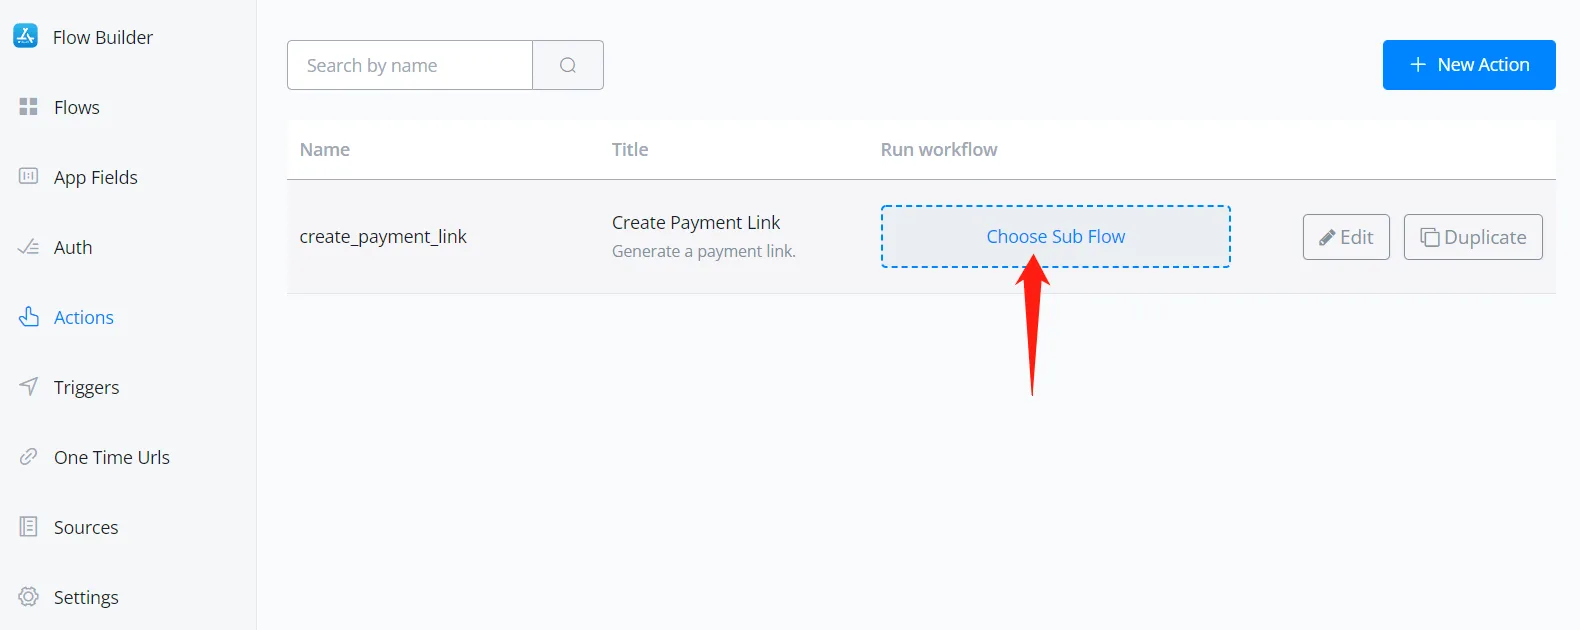
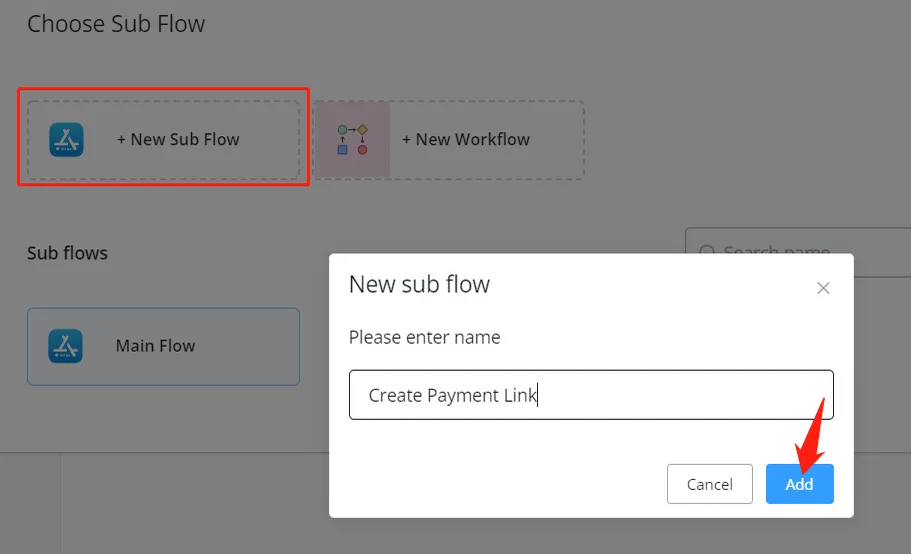
After editing the action information, create a subflow that will run when users call this action:
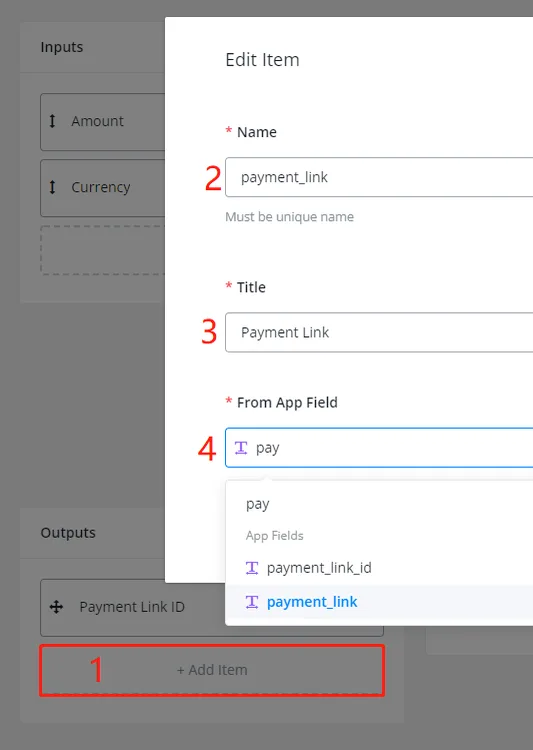
Add the outputs you need and click the 2 Save buttons, to save both the output editing and the action editing.
Note
TIP - Here you cannot create a new app field in From the App Field. Go to the App Fields section to create new app fields.
Warning
Before leaving the action editing, always remember to click “Save” instead of Cancel. Otherwise, you lose everything you edited in the action.