

Workspaces
YouTube video (embedding unavailable)
As already mentioned, the workspace should be seen as a team, and the members/users are the people who work in that team.
In general, a workspace is designed for one company and organizes all of its resources: payment accounts, email sender profiles, product information, etc.
Each workspace has its own billing and its own limits for members, contacts and number of bots (with fees for the flexible add-ons).
A workspace can connect to:
- only 1 omnibot (8 channels)
- only 1 Facebook account
- only 1 Google account for Google My Business
- only 1 Google account for Google Sheets
- only 1 Google account for Gmail
- only 1 Google account for Dialogflow
- only 1 Intercom account
- only 1 Stripe account
- only 1 PayPal account
- only 1 Cloudinary account
- only 1 Calendly account
- only 1 MongoDB Cloud account
- only 1 Twilio account
- only 1 SignalWire account
- only 1 MessageMedia account
- only 1 SendGrid account
- only 1 MailChimp account
- up to 10 SMTP profiles (SMTP email sender)
In addition, each NicoApp can only be downloaded once per workspace. For example: you download the WooCommerce NicoApp and connect your workspace to a WooCommerce account, but you cannot download it again to connect another WooCommerce account — unless the app developer has designed it to connect more than one account.
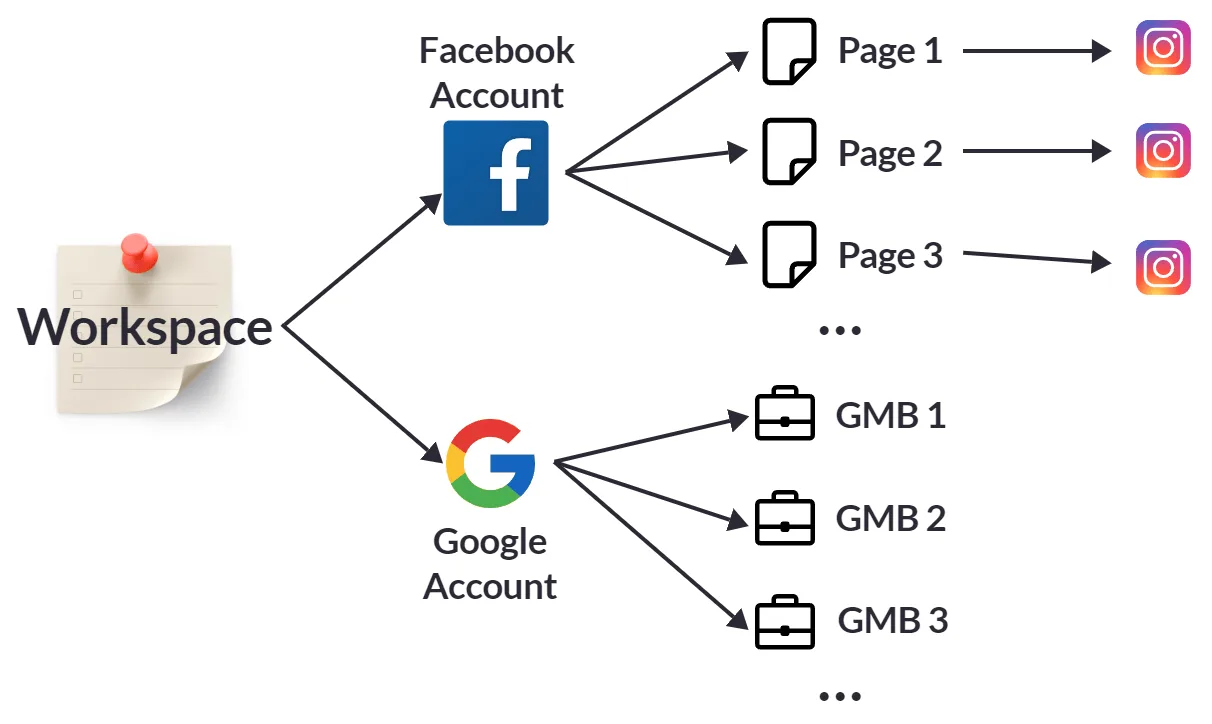
You can connect to any Facebook page or Google My Business listing and create bots for them, as long as you are the owner or administrator of those pages or businesses.
When you connect your Facebook account, select all the pages you need to manage — and that's it. For example: if you want to create bots for your clients, just ask them to invite your Facebook account to be an administrator of their pages.
The same goes for Google My Business: ask your clients to invite your Google account to be an administrator of their businesses, and then you will be able to create Google bots for them.
The choice is yours.
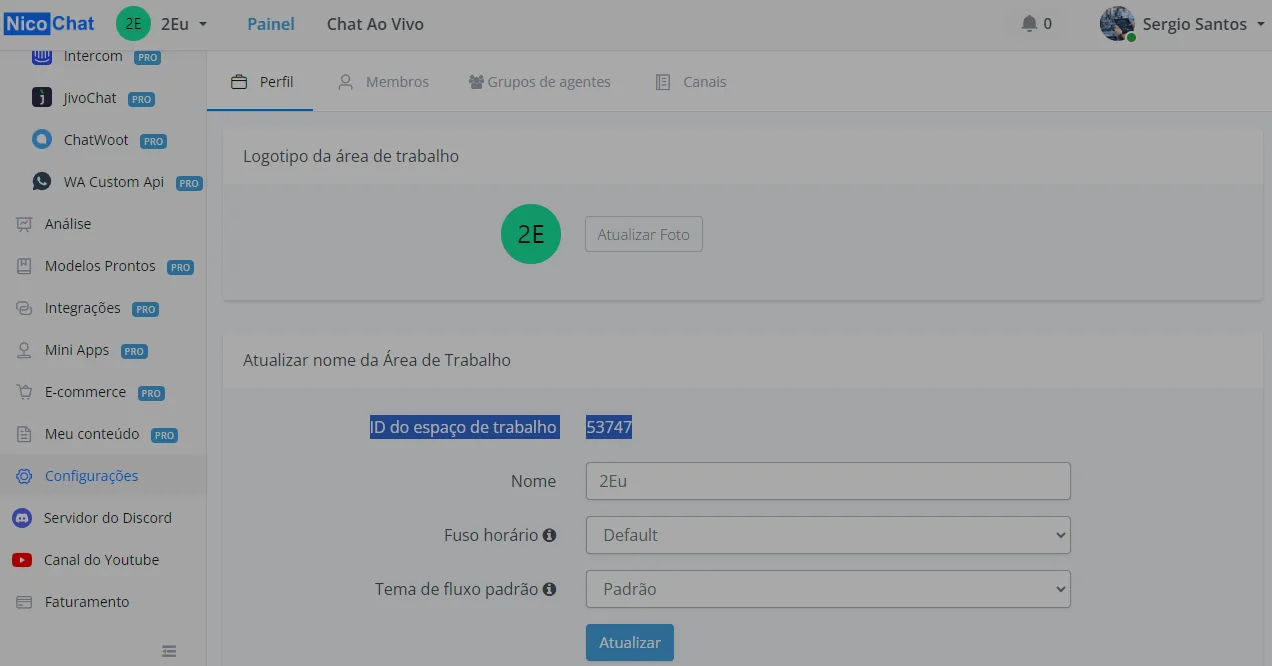
To edit your workspace profile, click Workspace Settings and then Profile, as shown in the screenshot above. You can change the logo, the workspace name, the timezone and the default flow theme.
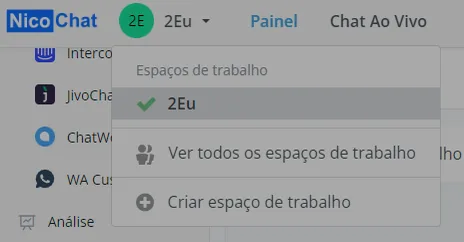
In the upper left corner of the dashboard, click a workspace name to switch to it. By clicking 1 and 2, you go to the workspace management page:
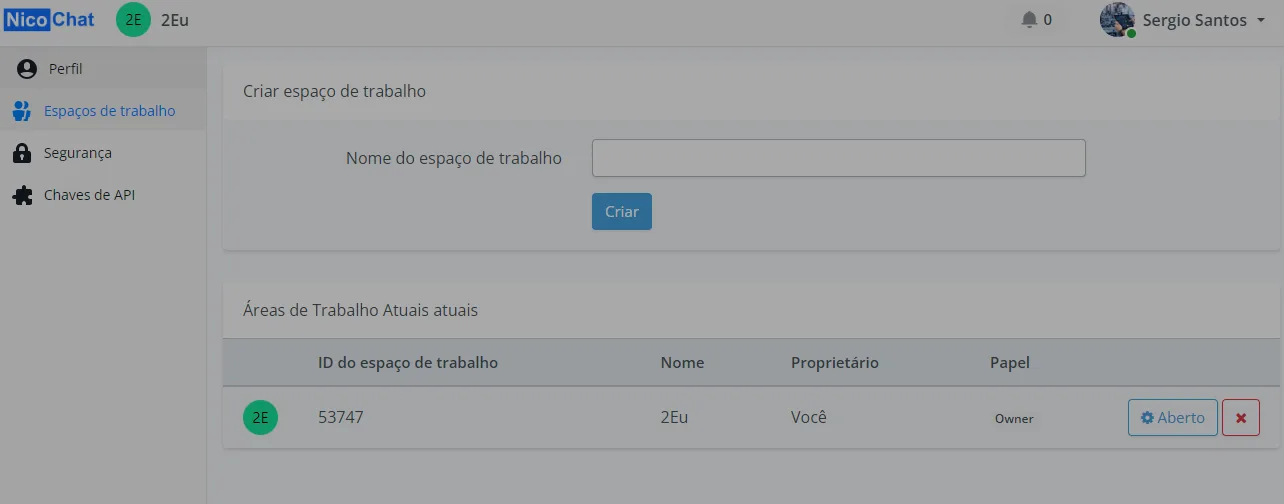
Here you see all the workspaces you belong to. As marked in the screenshot, you can:
- Create new workspaces (whoever creates a workspace becomes its owner)
- Switch to that workspace
- If you are not the owner of the workspace, click the yellow arrow to leave it.
- If you are the owner of the workspace, you will see a red x instead of the arrow. Click it to delete the workspace.
You can access the “API Keys” page from area 1 of the screenshot above.
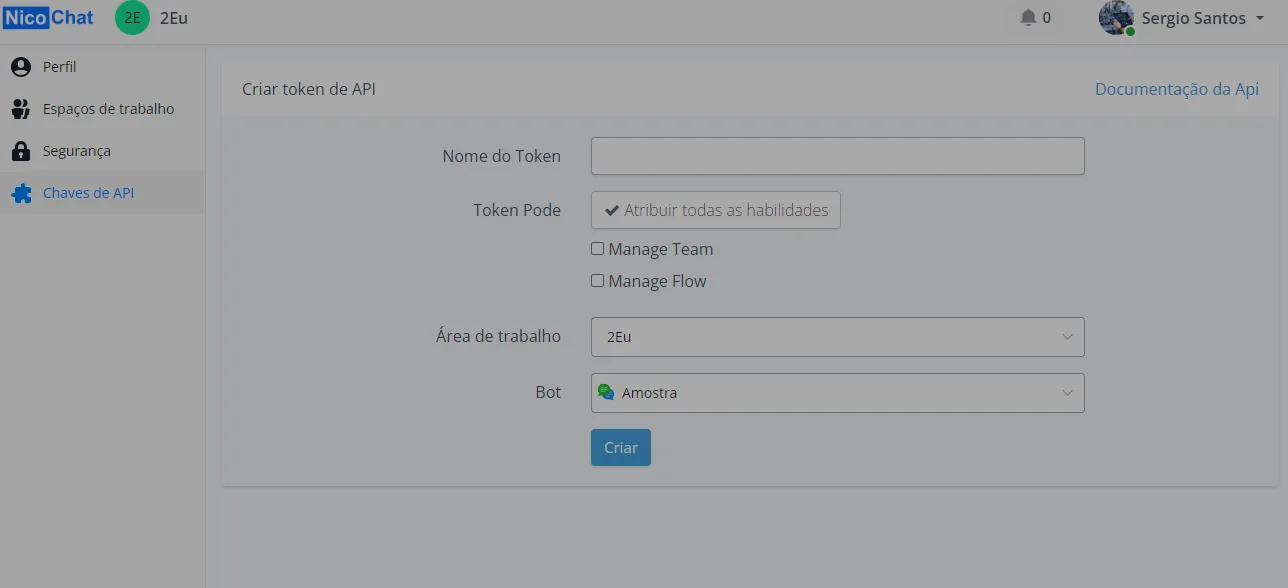
Select a workspace and a flow to create an API key that gives access to the flow through API calls. NicoChat also integrates with many third-party automation services, such as Zapier, Pabbly Connect, Integrately, Integromat, etc.
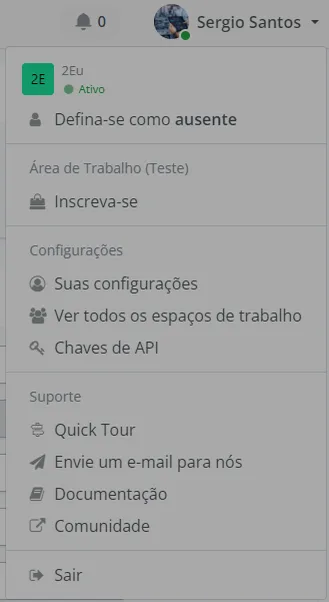
In the upper right corner, click your username and then “Your Settings”. You will also find support links here. For example, take the "Quick Tutorial" to get familiar with the dashboard!
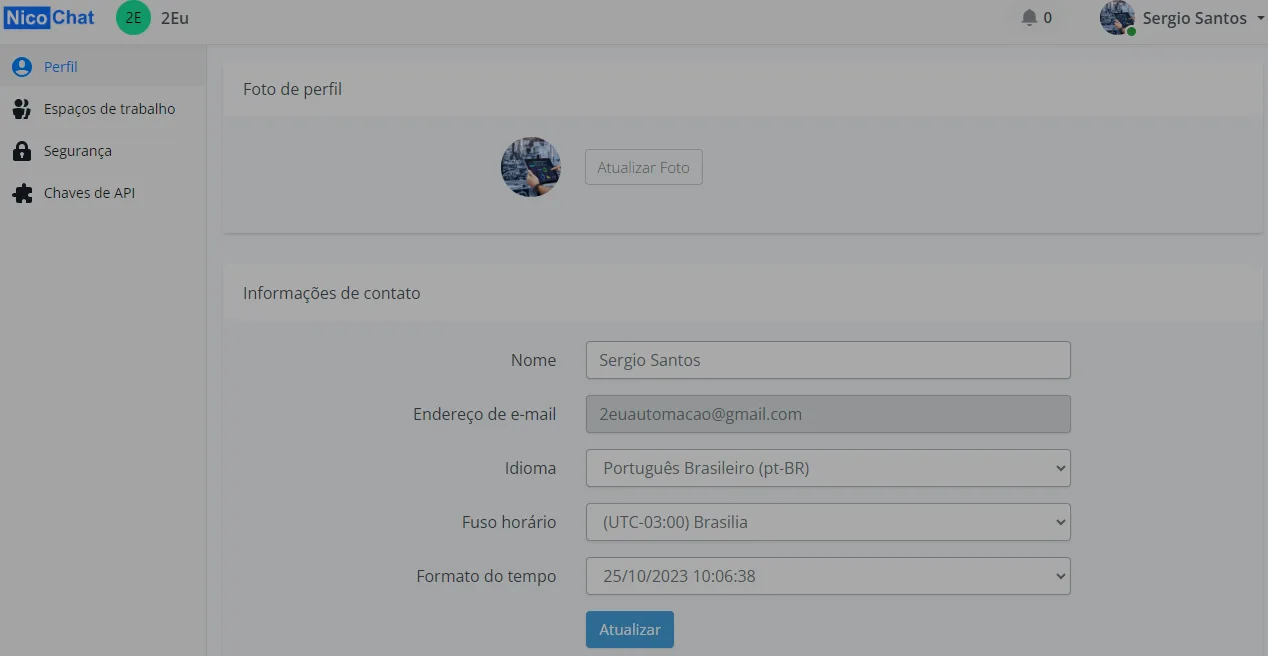
In the profile, you can update your photo, your username, your email address, the timezone and the time format.
YouTube video (embedding unavailable)
Each "NicoChat account" should be seen as a person/user. Members are all the people who have limited or full access to the workspace. There are 5 types of roles: Owner, Admin, Member, Live Chat Supervisor and Live Chat Agent.
The user who creates the workspace becomes its only owner.
- Serve customers only through Live Chat
- Have limited access to the boards
- Serve customers only through Live Chat
- Assign Live Chat conversations to different Live Chat agents
- Access the analytics section (custom events and reports; other analytics, such as webhooks, are not included)
- Access the boards
- View and edit all flows
- Access all analytics
- Have all the features of the Member
- Manage the channel connections (add numbers and agents, connect pages, etc.)
- Manage all integrations
- Manage the e-commerce system
- Manage templates
- Manage NicoApps
- Have all the features of the Admin
- Manage the workspace profile
- Manage the workspace members (invite, delete, edit the role)
- Manage the subscription and the payment
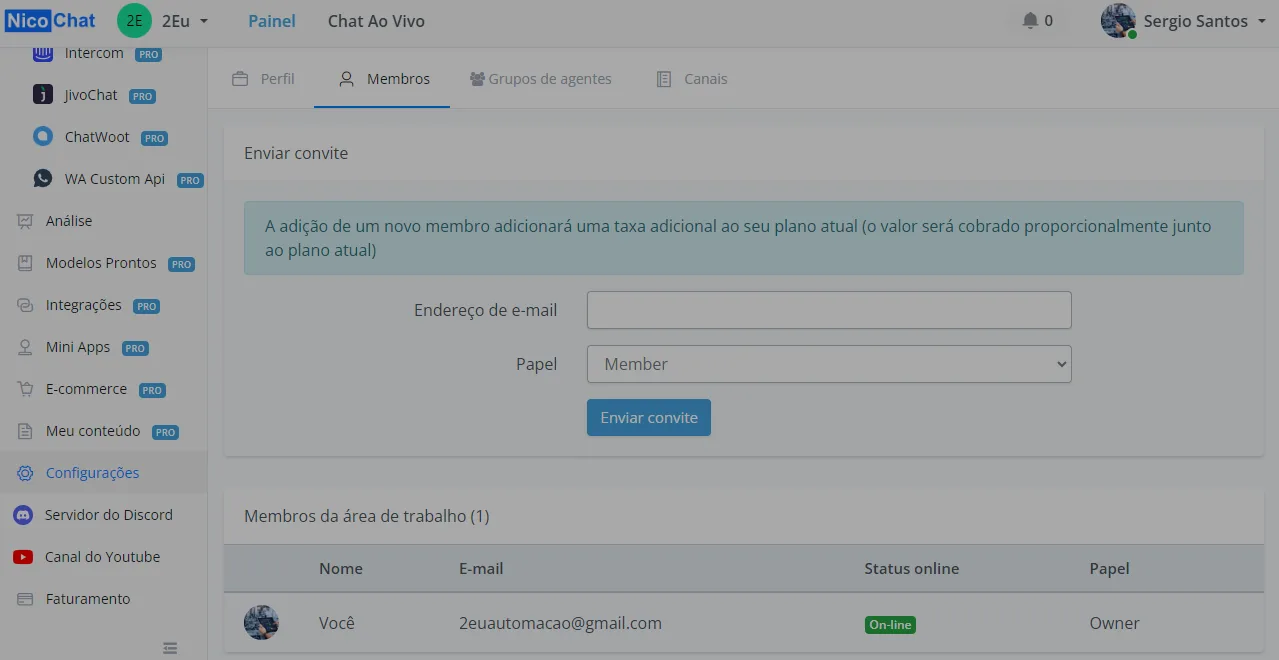
(Owner Only) Follow steps 1, 2 and 3 in the screenshot above to send an invitation to a new member, providing their email address and the role they will have.
If the new member is already a NicoChat user, they can accept the invitation in the NicoChat notification center (the bell icon in the upper right corner; see the 2 screenshots below).
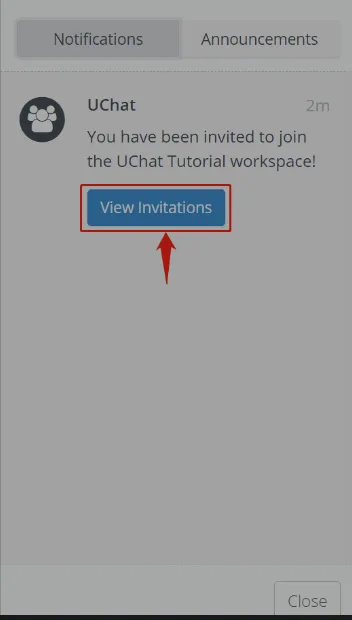
If the new member is not a NicoChat user yet, the invitation email will contain a link to create a password. After that, they will also be able to access the workspace with their own login details.
(Owner Only) You can assign a role at the moment you invite a new member, or edit it later on the members page. Click the gear icon to change a member's role.