

Zapier - MCP
The Zapier MCP Server is a type of server that connects NicoChat (or any other AI client that uses the OpenAI API) to more than 8,000 apps available on Zapier, such as Gmail, Slack, Google Sheets, Google Calendar, Notion, and others.
The Zapier MCP Server is a type of server that connects NicoChat (or any other AI client that uses the OpenAI API) to more than 8,000 apps available on Zapier, such as Gmail, Slack, Google Sheets, Google Calendar, Notion, and others.
👉 It works as a bridge between NicoChat and Zapier, allowing NicoChat to perform real actions in your tools using only text commands.
With the Zapier MCP Server, NicoChat can:
✅ Send emails
✅ Create calendar events
✅ Add or look up data in spreadsheets
✅ Send messages on Slack
✅ Create or update records in Notion, HubSpot, Airtable and much more
Practical example in NicoChat:
"Create an event tomorrow at 3 PM called 'Project Review' in my Google Calendar."
NicoChat will understand it, call the MCP Server, and Zapier performs the action in Google Calendar.
✅ No need to code integrations from scratch
✅ Connection to thousands of apps without leaving the chat
✅ Less time spent on manual tasks
✅ Smarter and more integrated workflows
✅ Secure control through an API Key and a private URL
- Go to: https://mcp.zapier.com
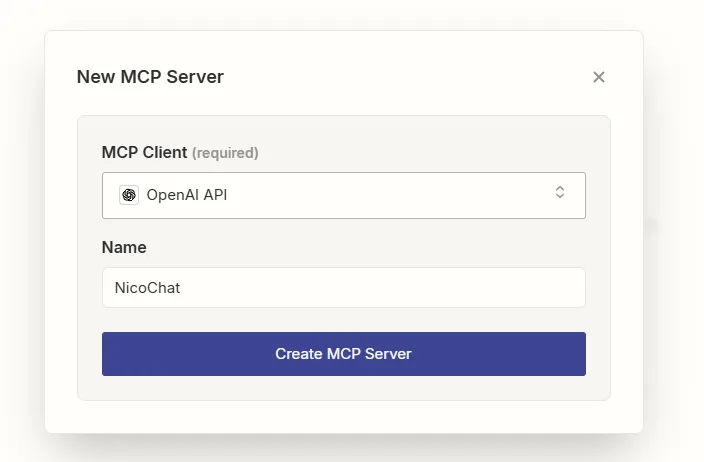
- Click “New MCP Server”
- On the screen that opens (Image 1):
- MCP Client: Select OpenAI API
- Name: Choose the name (example: NicoChat)
- Click the “Create MCP Server” button
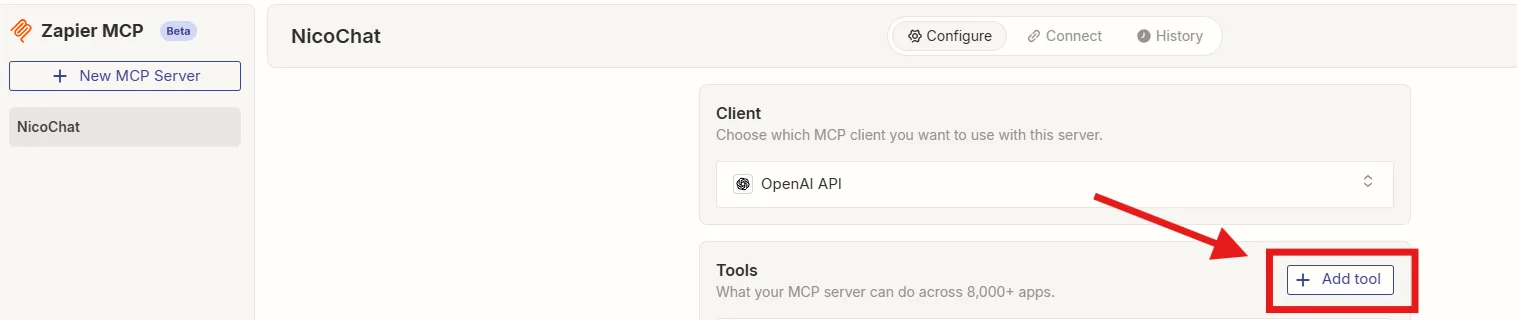
- Inside your server, go to the Configure tab
- Find the Tools section
- Click the “+ Add tool” button
- A list of the available apps will open:
- Examples of apps you can choose:
✅ Gmail
✅ Google Calendar
✅ Google Sheets
✅ Slack
✅ Notion
✅ HubSpot
✅ Airtable
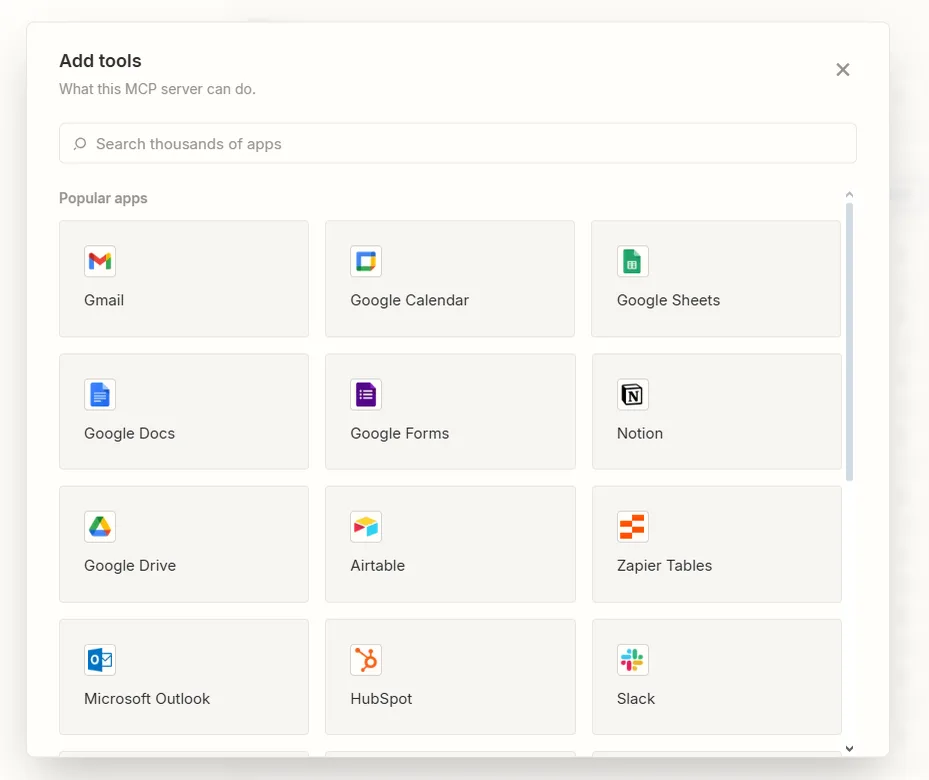
- Click the app you want to integrate
- Choose which action NicoChat will be able to perform with that app (example: “Send Email” in Gmail or “Create Event” in Google Calendar)
- Follow the instructions to connect your account (example: signing in to Gmail or Google Calendar)
- Click Save
After signing up, the Zapier team will review your case and, if approved, may release higher limits, including plans with up to 500 calls per hour, 1,000 per day and 10,000 per month, plus priority support. While you wait for the release, a good practice is to create multiple MCP Servers in Zapier, organize the integrations by server and limit the number of active tools, avoiding unnecessary calls. It is also advisable to implement confirmations inside NicoChat before running critical actions, reducing the risk of excessive consumption of the available quota.
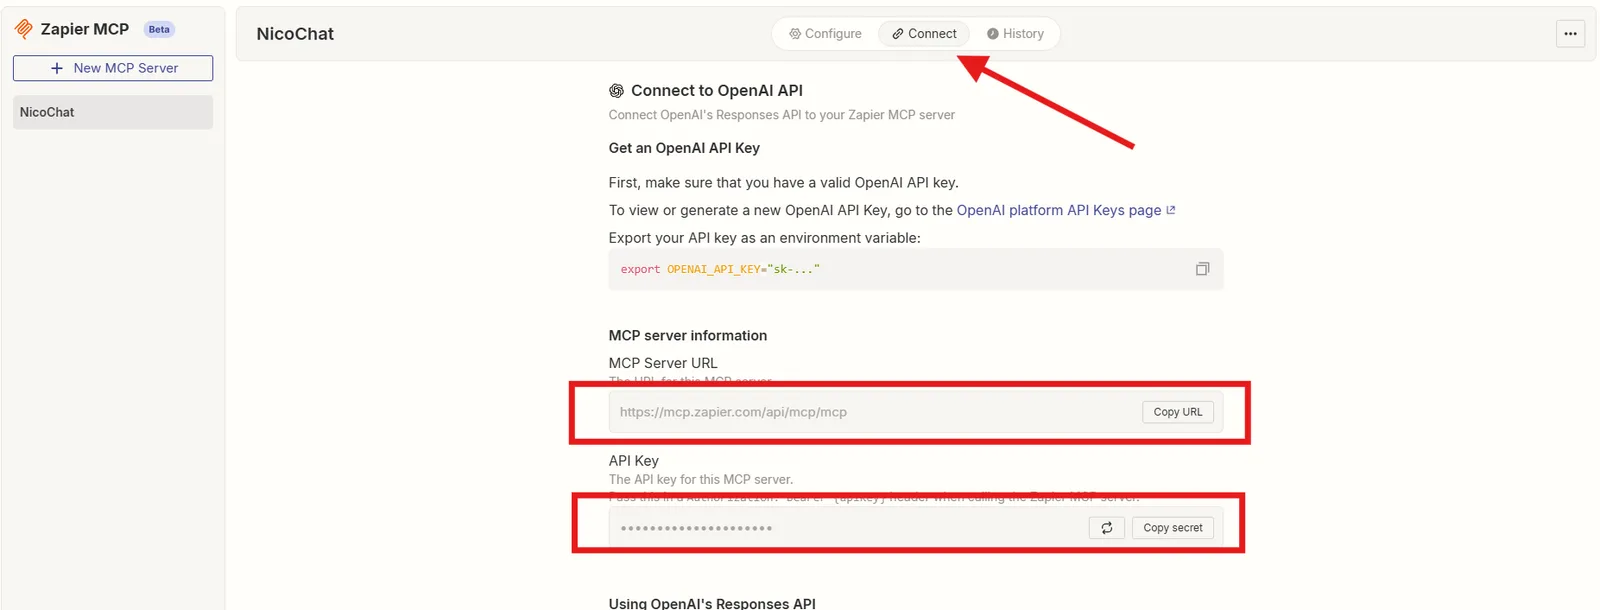
- At the top of the screen, click the Connect tab
- Copy the MCP Server URL (this is the URL NicoChat will use)
- Also copy the API Key (Secret) (it is used for secure authentication)
Centro de IA → Servidores MCP → Adicionar Servidor MCP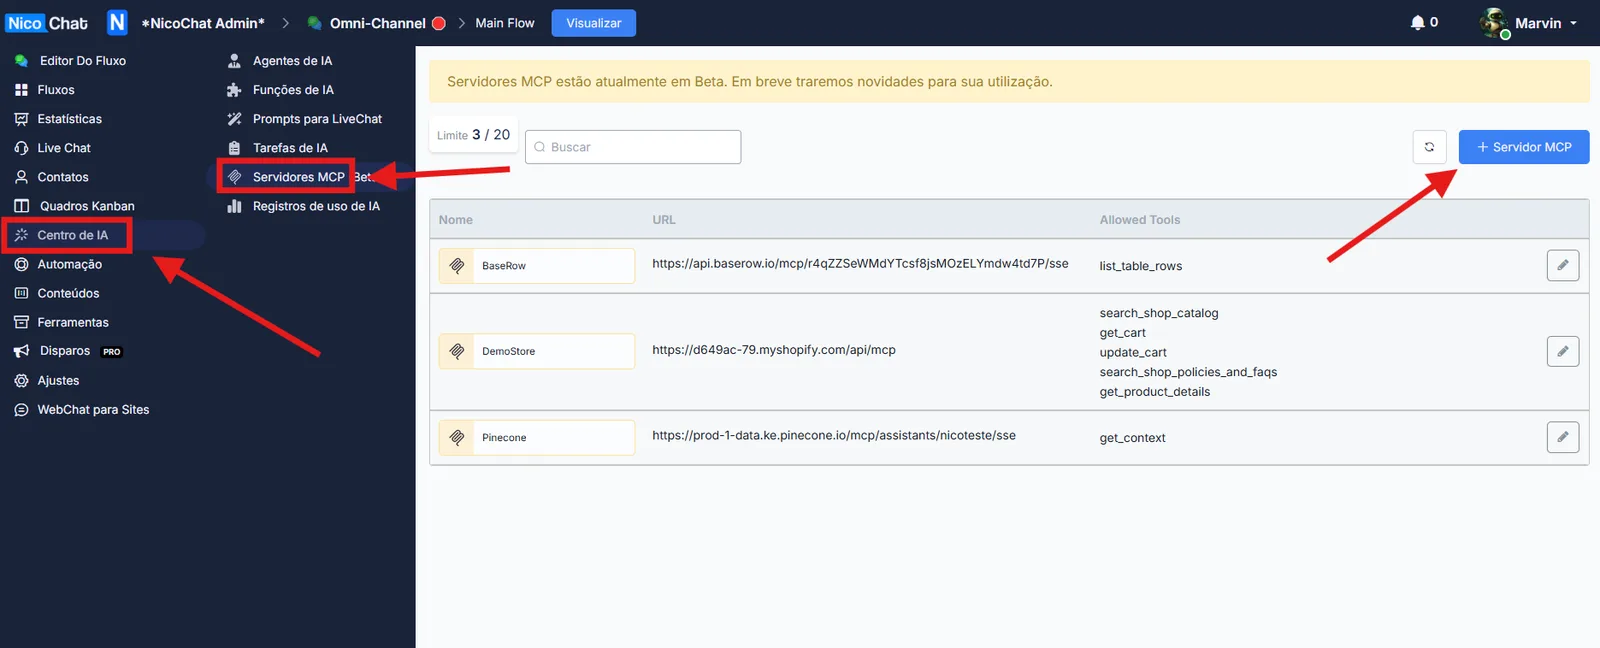
- Fill in the fields as follows:
Integracoes or Zapier)https://mcp.zapier.com/api/mcp/mcp)- Click List Tools so that NicoChat loads the tools available on that MCP server.
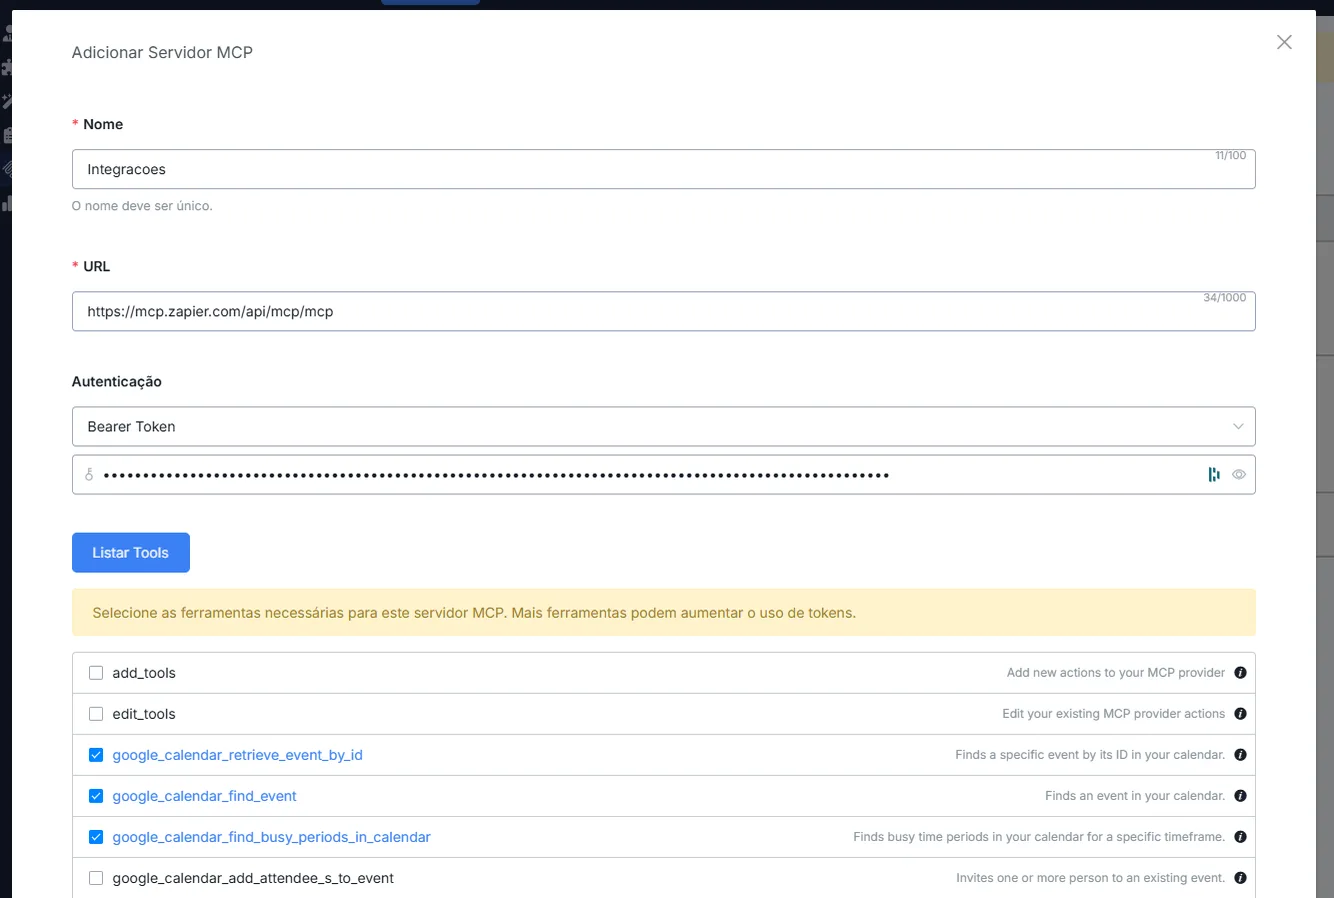
Example of a command you can give NicoChat to test it:
👉 "NicoChat, send an email through Gmail to joao@email.com with the subject 'MCP Test' and the body 'This is a test of the MCP Server.'"
👉 Or: "NicoChat, create an event in my Google Calendar for tomorrow at 10 AM called 'Project Review'."
NicoChat will trigger the Zapier MCP Server, which in turn performs the action inside the chosen app.
If you want to see the call history:
- Go to the History tab inside the MCP Server panel in Zapier
There you can follow all the requests made by NicoChat.
📌 Learn more about how to set this up in your flow at:
👉 MCP Servers