

SMTP for Emails
Let's take Hotmail as an example.
Let's take Hotmail as an example.
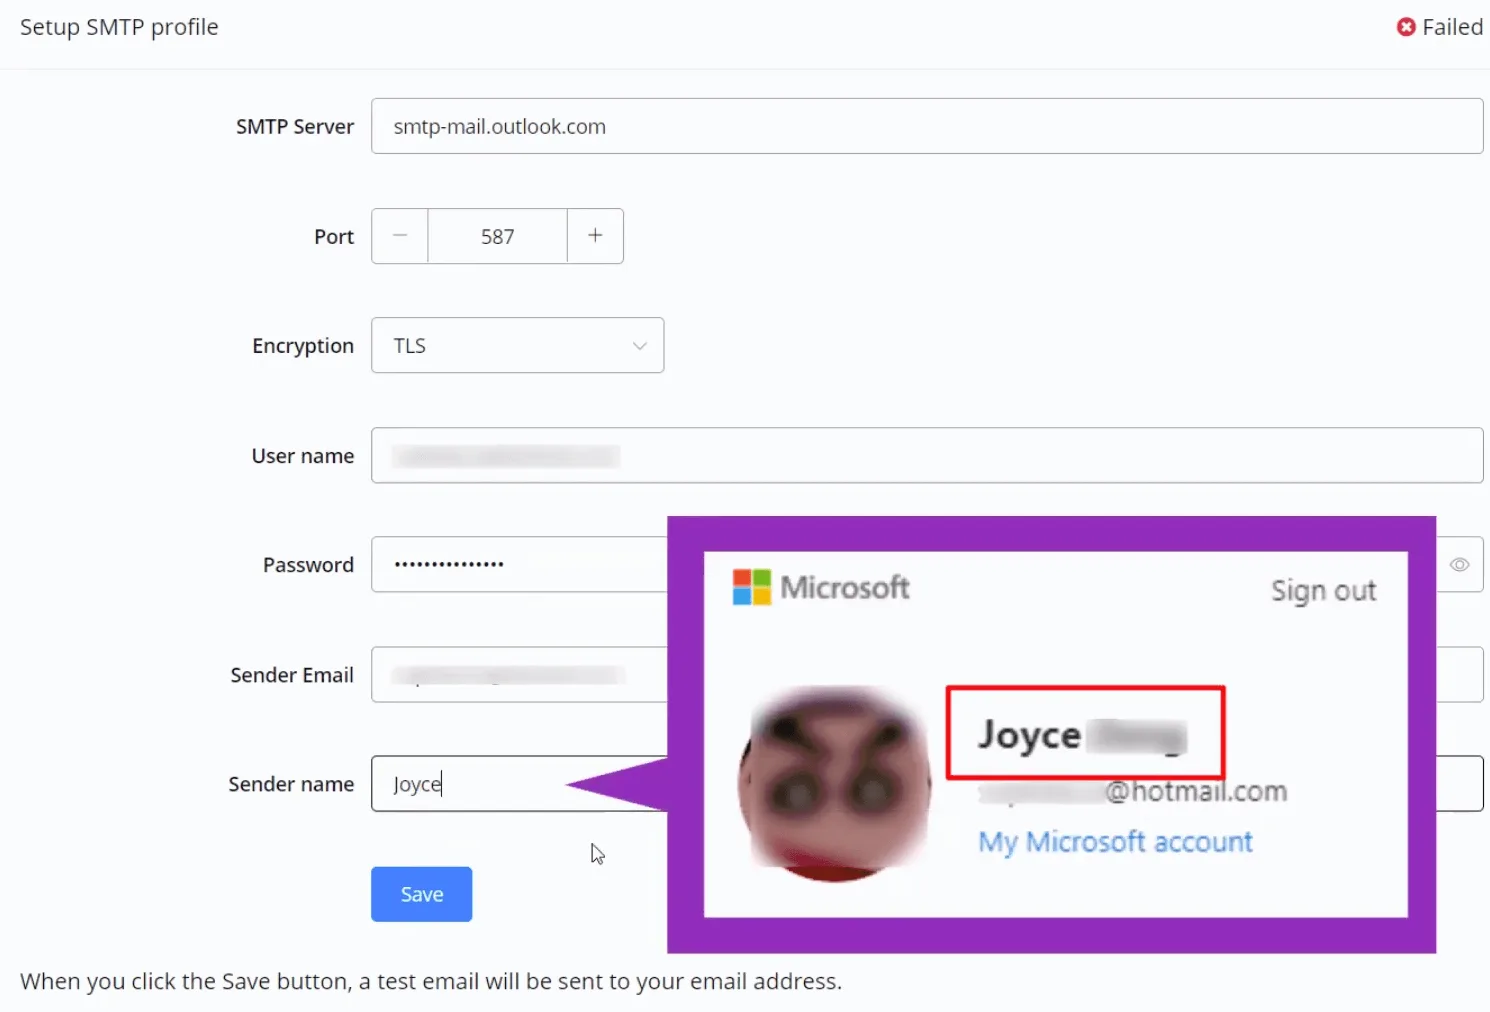
Fill in the fields as shown in the picture. Note that you can find your “Sender Name” in your account details. Once done, click “Save”. The indicator in the upper right corner shows whether it worked or not: “Failed” or “Verified”, like this:
You will receive a test email if your email address is verified.
Sometimes you need to connect a Gmail account through the SMTP profile because, in some use cases — such as connecting the client's Gmail account to NicoChat —, we don't have access to their Google account.
You need to enable a few things in the Google Account, as indicated below:
- Enable two-factor authentication
- Generate an app password, which allows an external app to access this SMTP profile.
First, let's enable two-factor authentication.
Go to Google Profile > Manage your Google Account > Security > 2-Step Verification
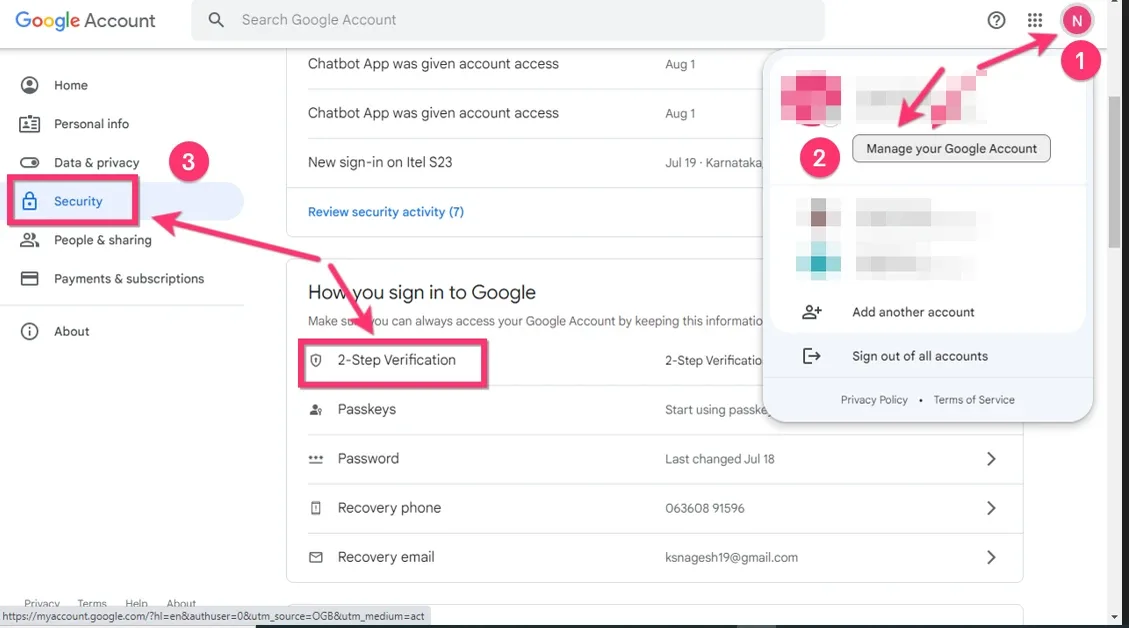
Once the 2-Step Verification is complete, let's generate the app passwords.
Search for “App passwords” > select the device > select Other (custom name),
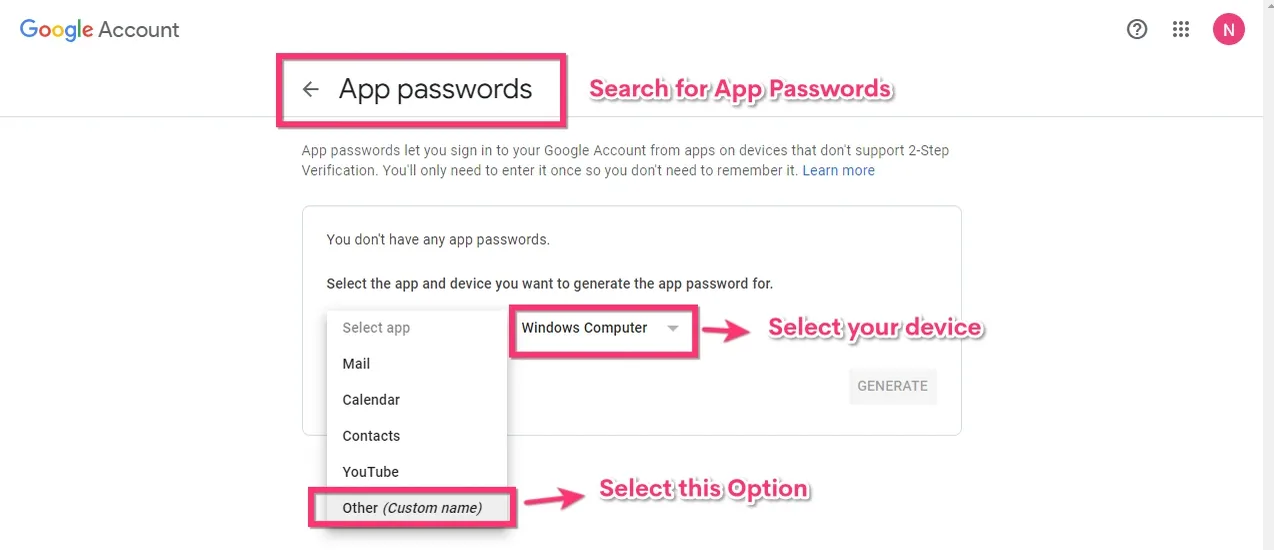
and type, for example, “NicoChat”; then click the Generate button.
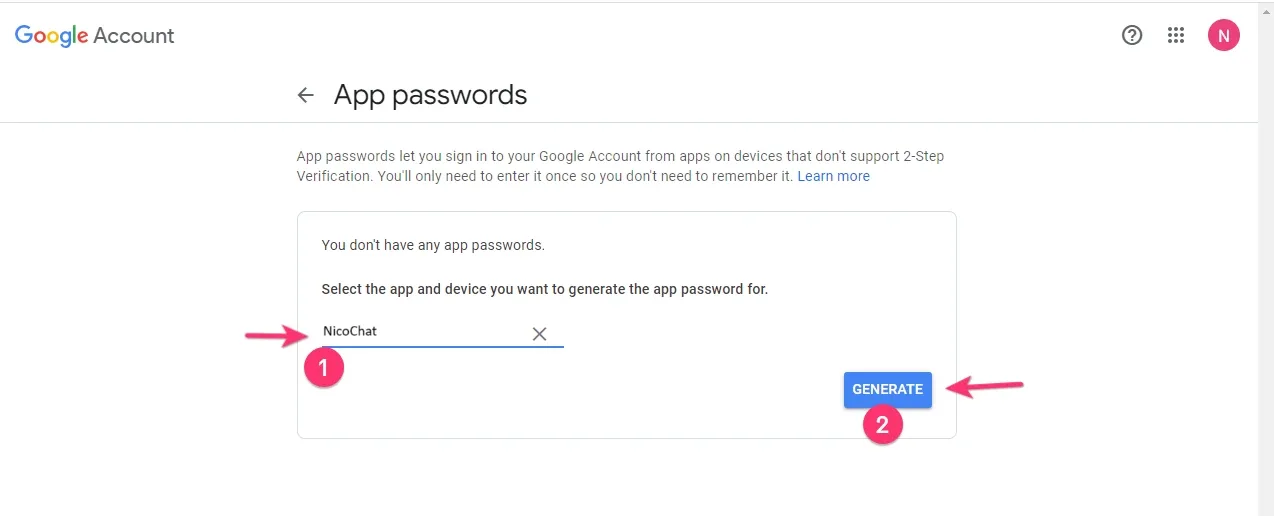
Now generate your password by clicking the Generate button. Then copy the password and click the “Done” button.
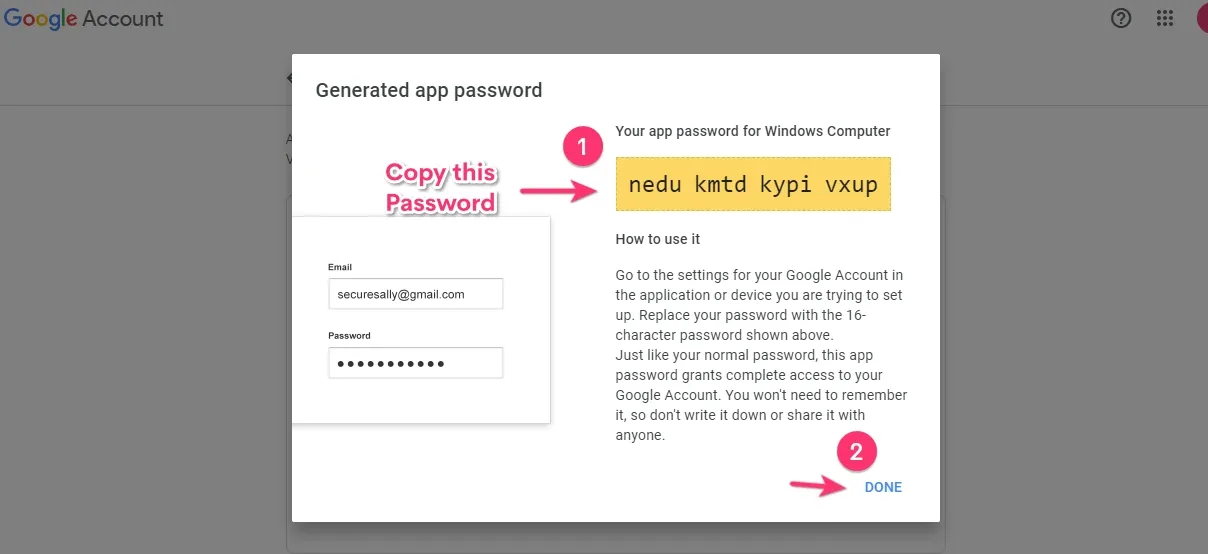
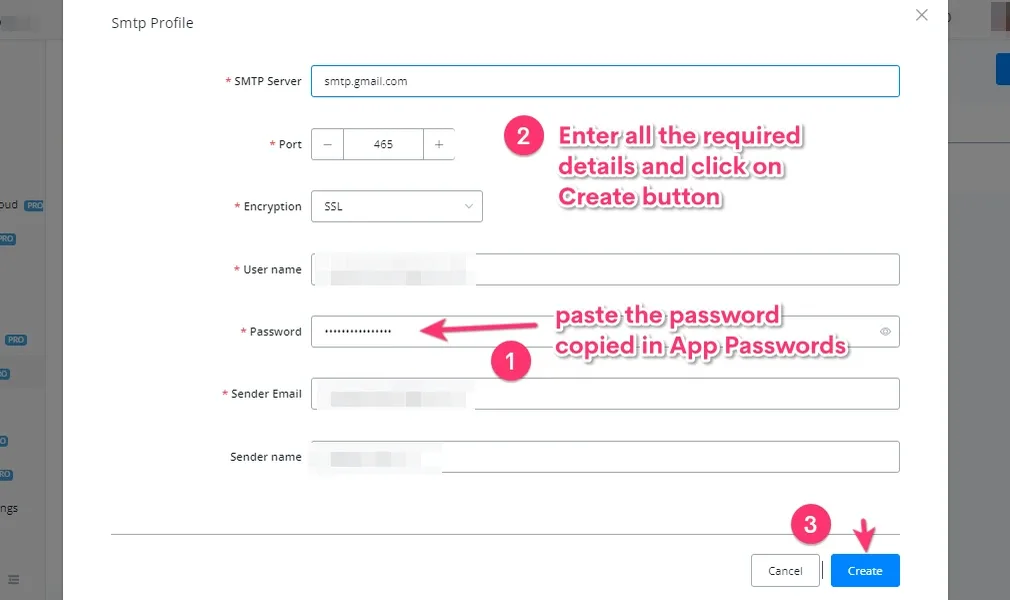
Copy the password, open the SMTP profile in the Integrations section of the workspace, paste this password and fill in all the required details.
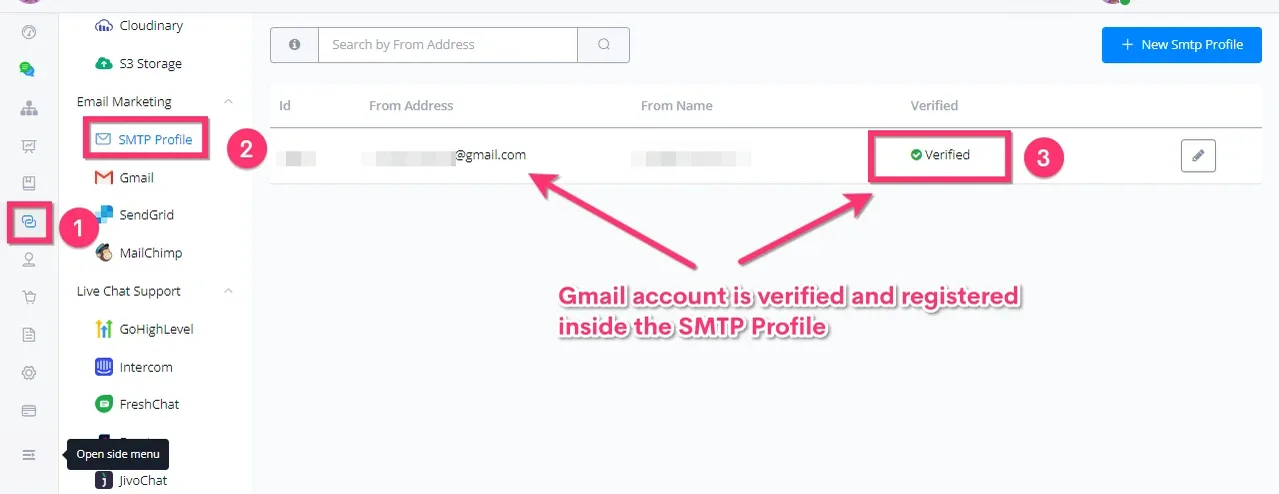
Finally, you will see that your Gmail account is registered using the SMTP profile.
To integrate Office365 with the SMTP profile inside NicoChat, you need to:
- Create an app password.
- Configure SMTP inside NicoChat.
- Log in to the Office 365 user account (myaccount.microsoft.com)
- Go to "Security info" (left panel)
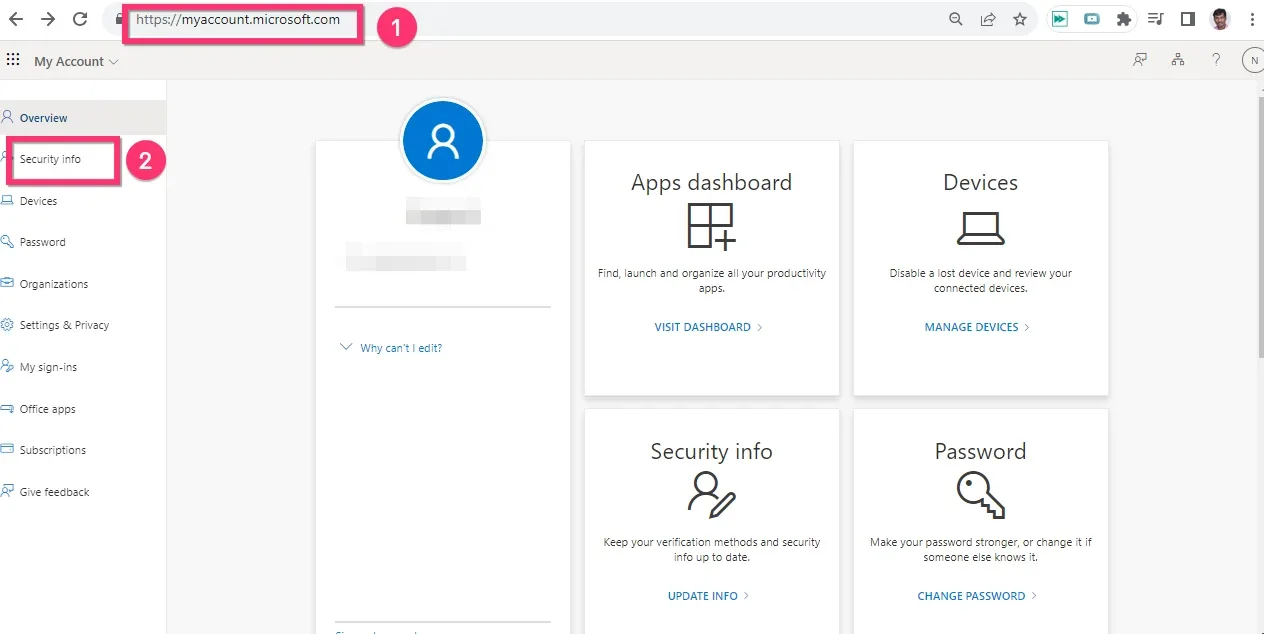
- Click "Add sign-in method"
- Select "App password" and follow the steps to create the app password. Save the password, for example in a notepad, because it is no longer visible once created.
Follow the steps above, create the password and save it, for example in a Notepad.
Now go to the NicoChat SMTP integrations and complete the setup as below:
- SMTP Server: smtp.office365.com
- Port: 587
- Encryption: TLS
- Username: <Email address>
- Password: <app password created>
After filling in all the details above and clicking the Create button, you will be able to connect to your verified Office365 email account.
Now, in the flow builder, when sending emails, you can select this SMTP profile from the dropdown and use it anywhere and in any channel we support.
After setting up your email integration, you can select it as the sender in the "Email Profile" list. See how to send an email notification.
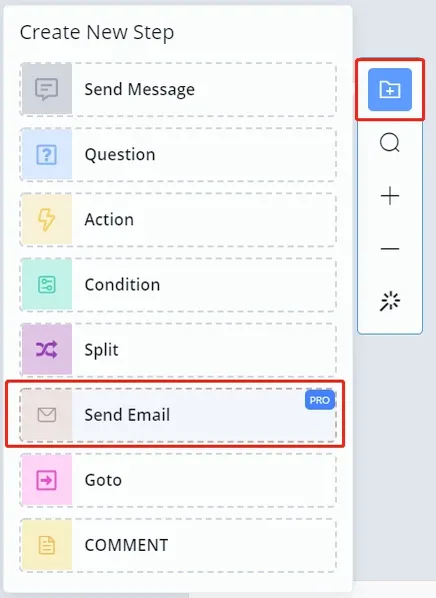
Add a Send Email step by right-clicking in your workspace or on the "Add new step" button:
This is what a Send Email step looks like:
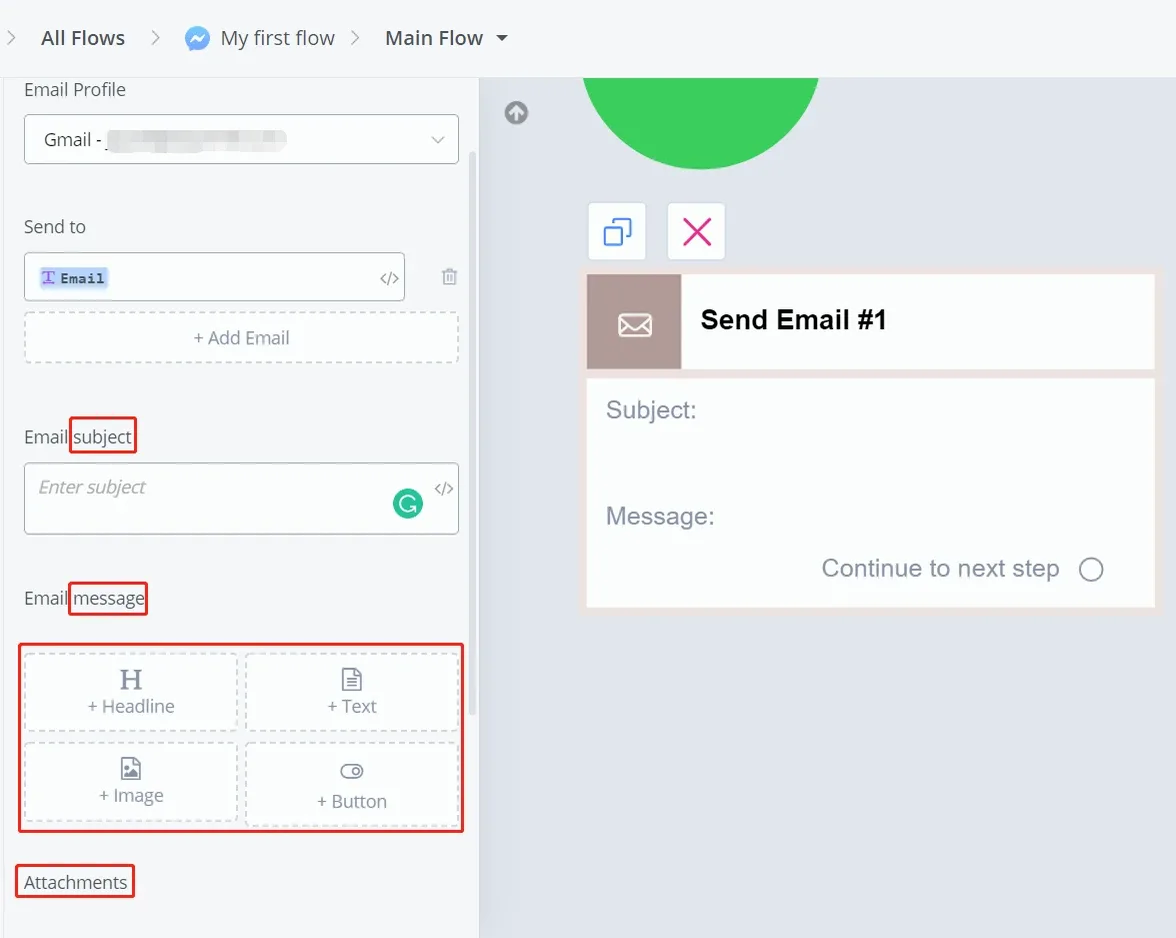
Name a sender and a receiver. There are three blocks of information: subject, message and attachment. Feel free to add what you need.