

SendGrid
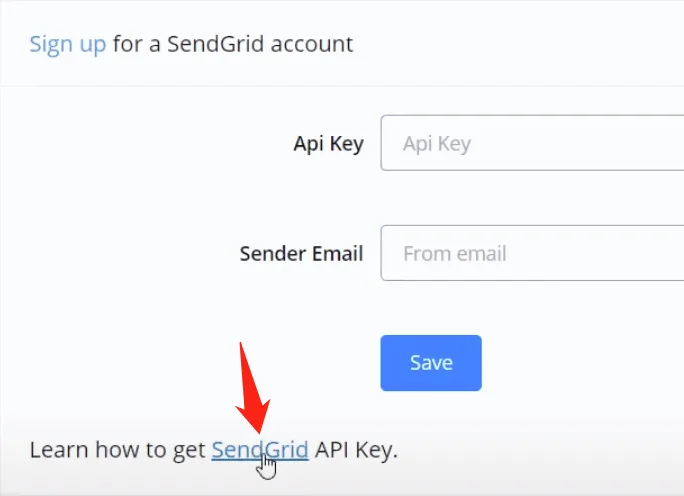
Select "SendGrid" and open the website:
Select "SendGrid" and open the website:
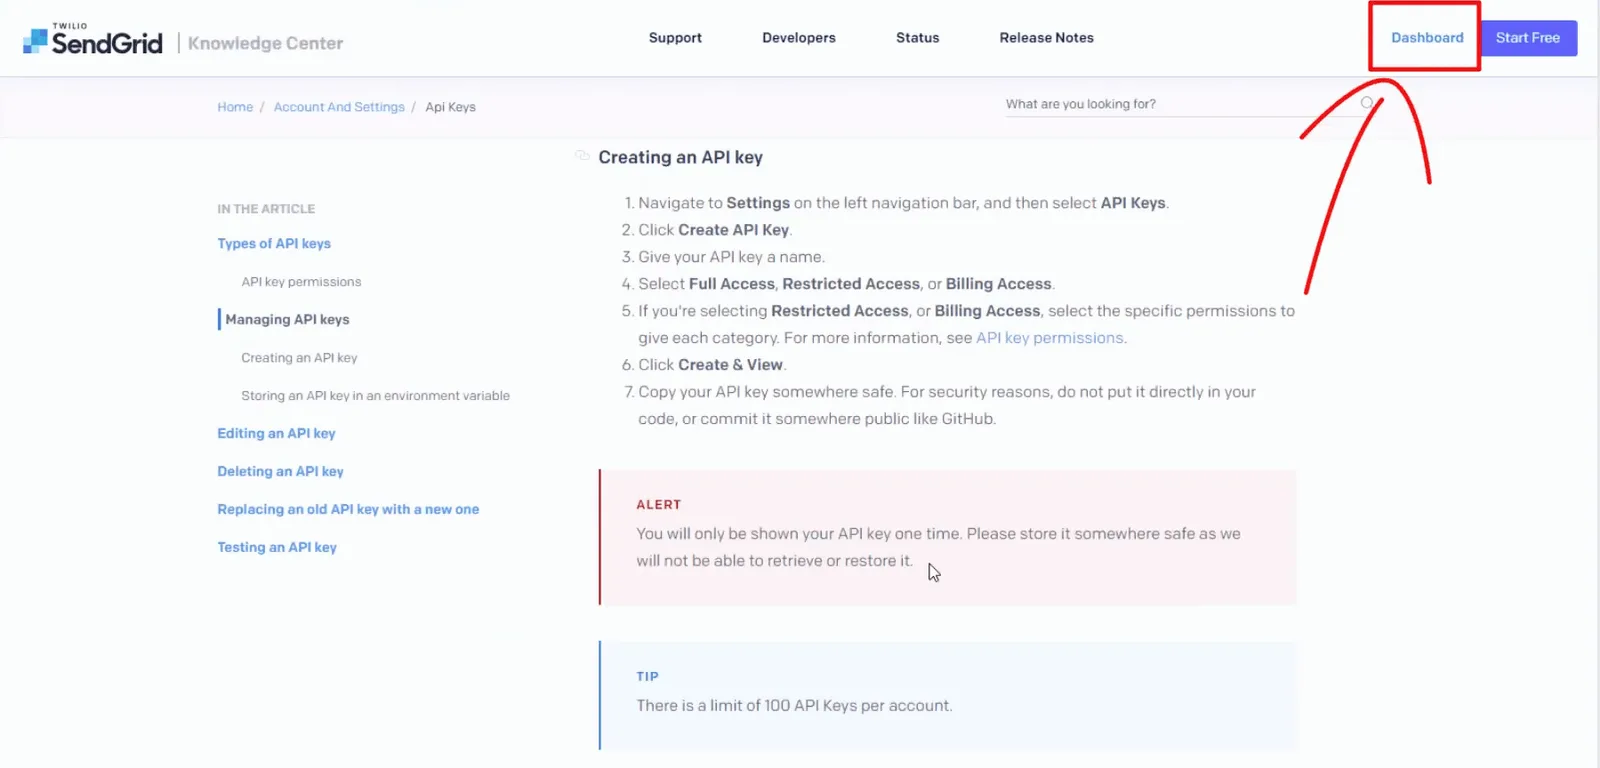
Log in and go to the SendGrid "dashboard", in the top right corner.
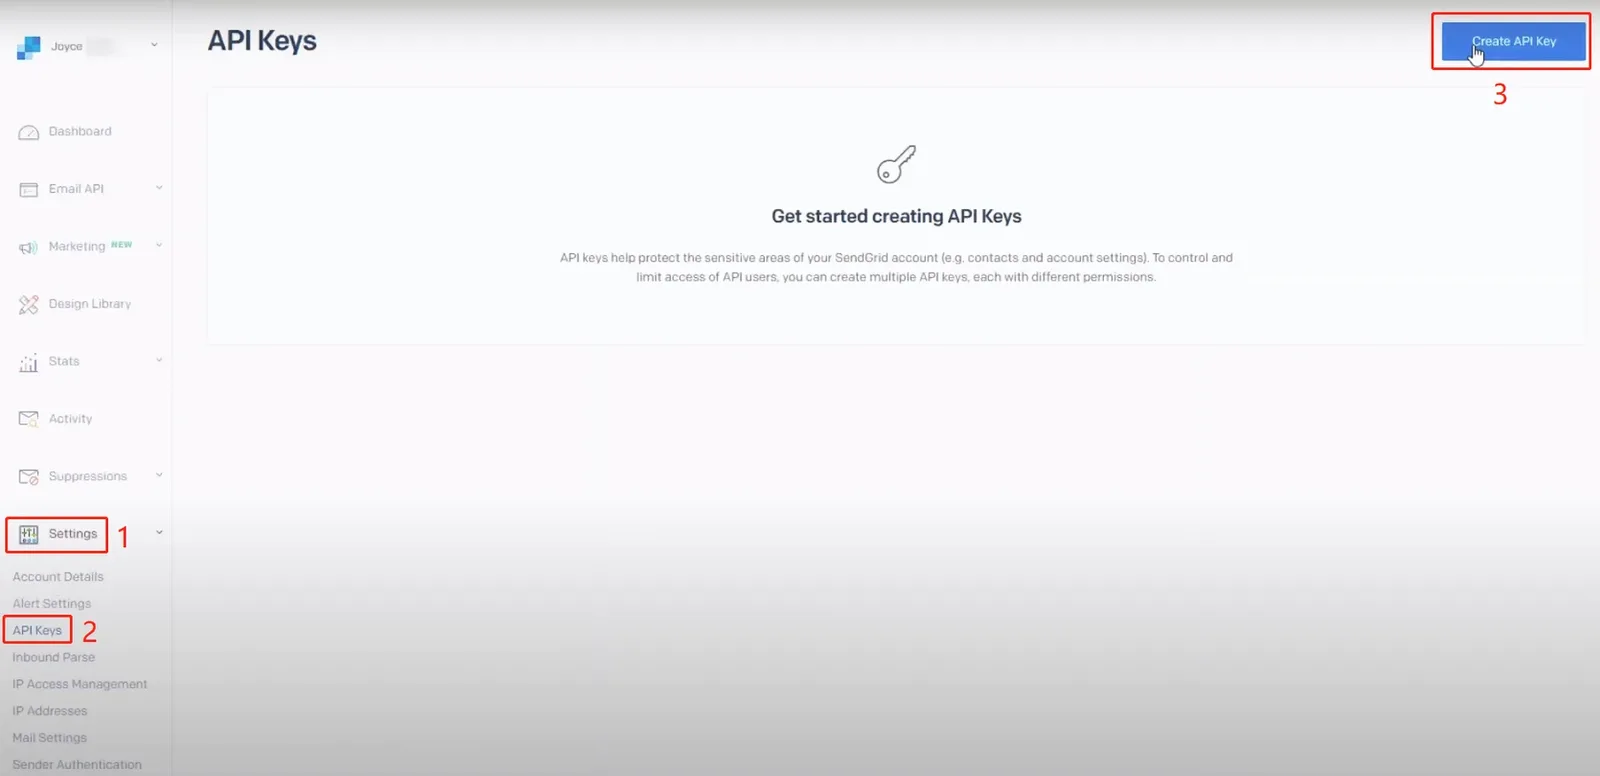
Follow steps 1, 2 and 3 to create the API Key:
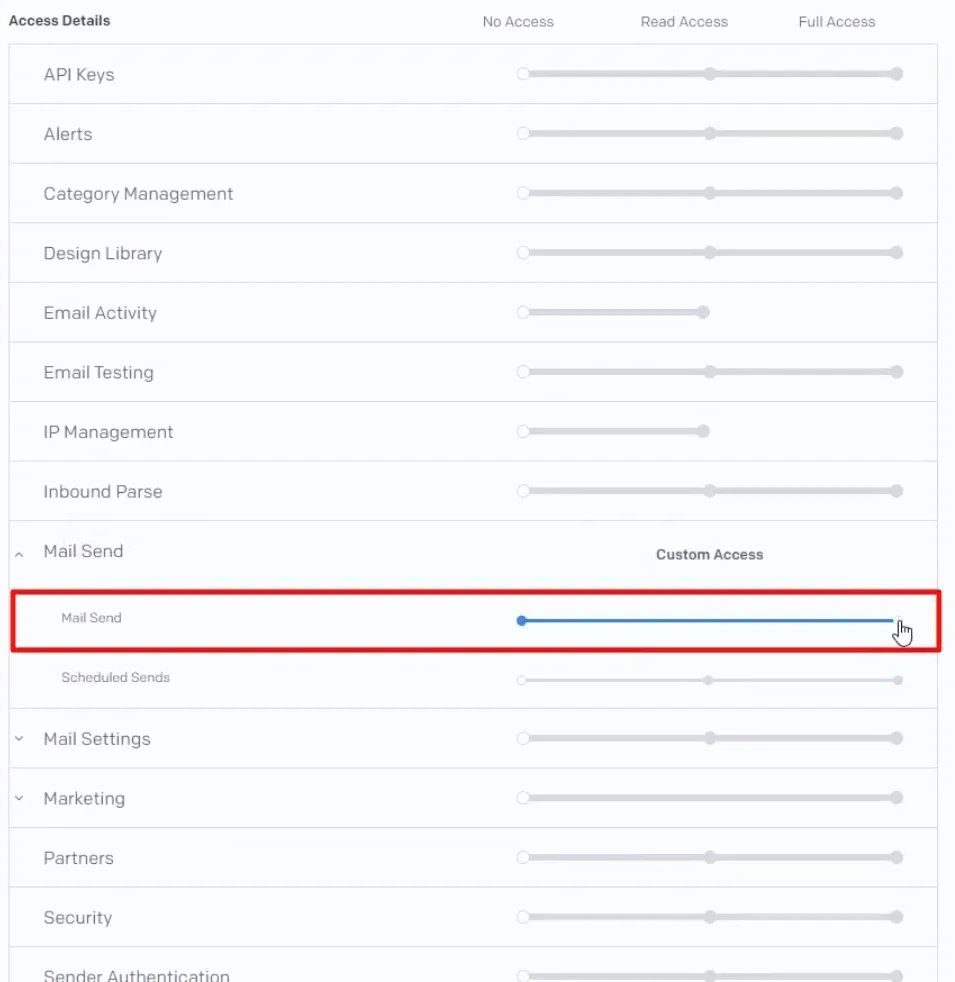
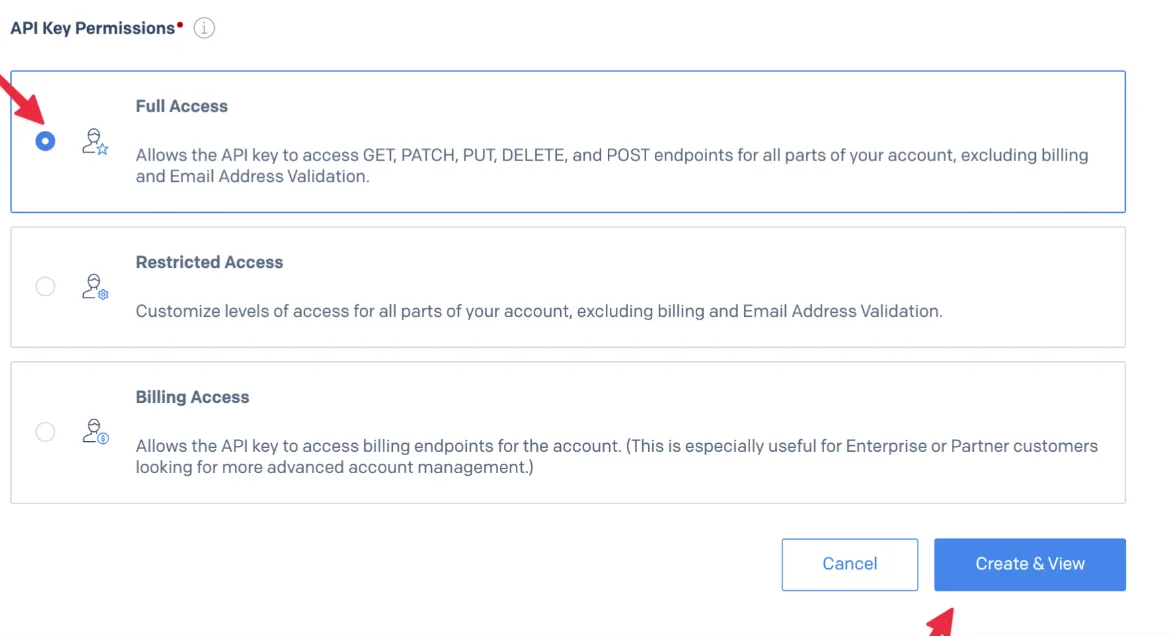
Give the API Key a name and select "Restricted Access".
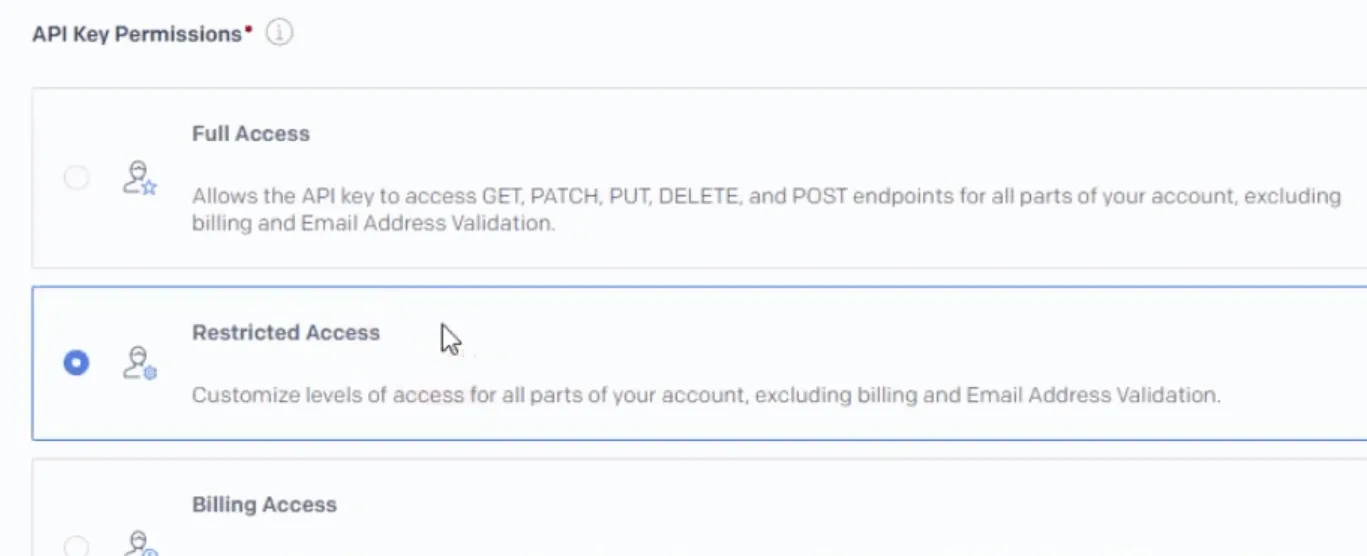
Make sure you grant NicoChat full access to "Mail Send" and click "Create & View" at the bottom of the page.
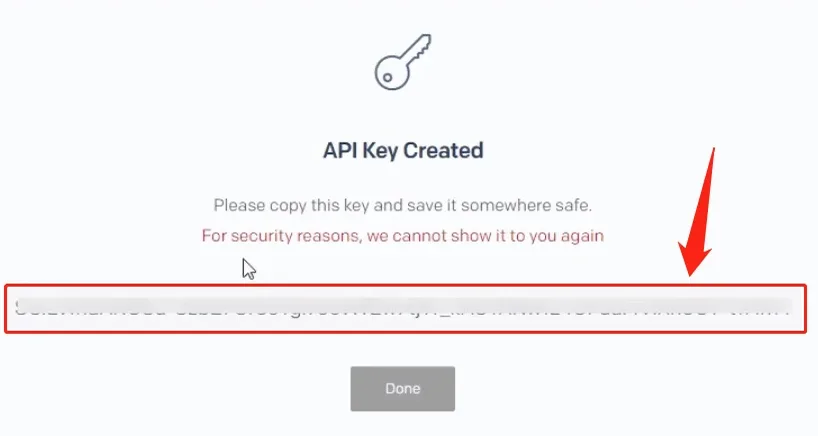
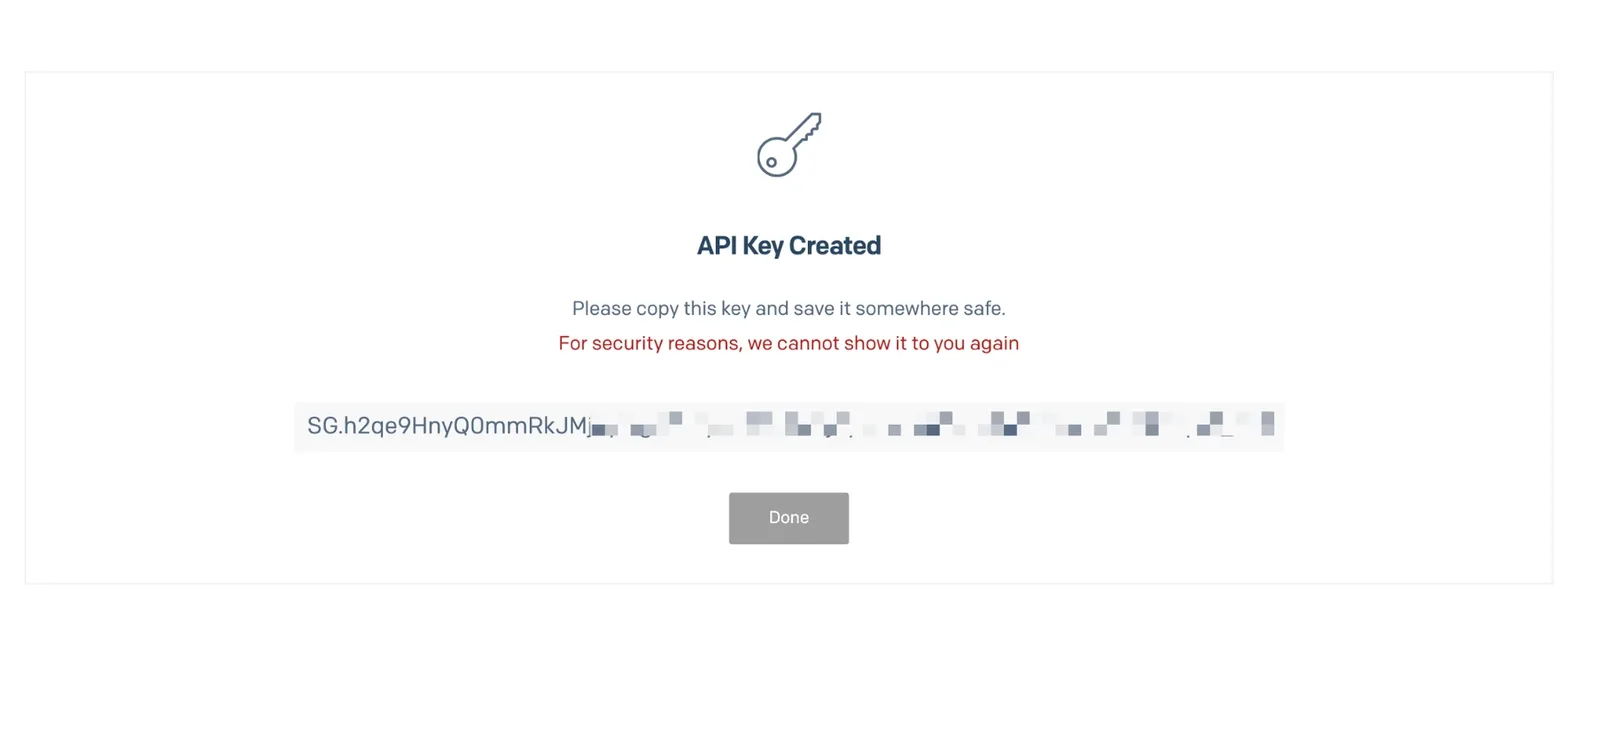
Once that is done, copy the key and paste it into NicoChat.
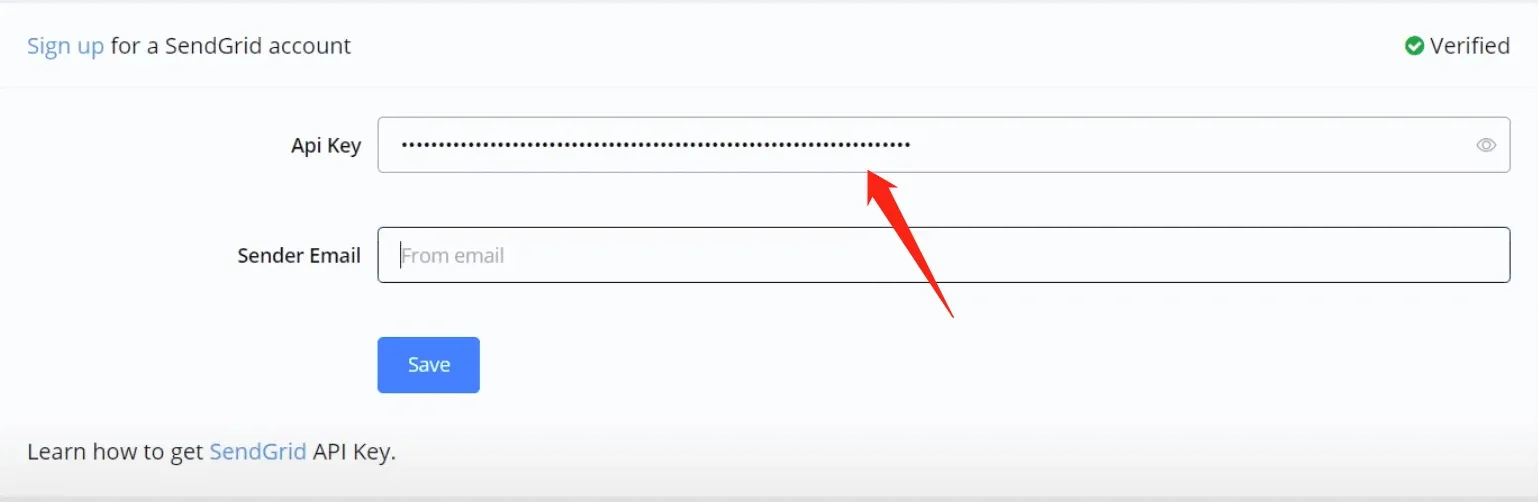
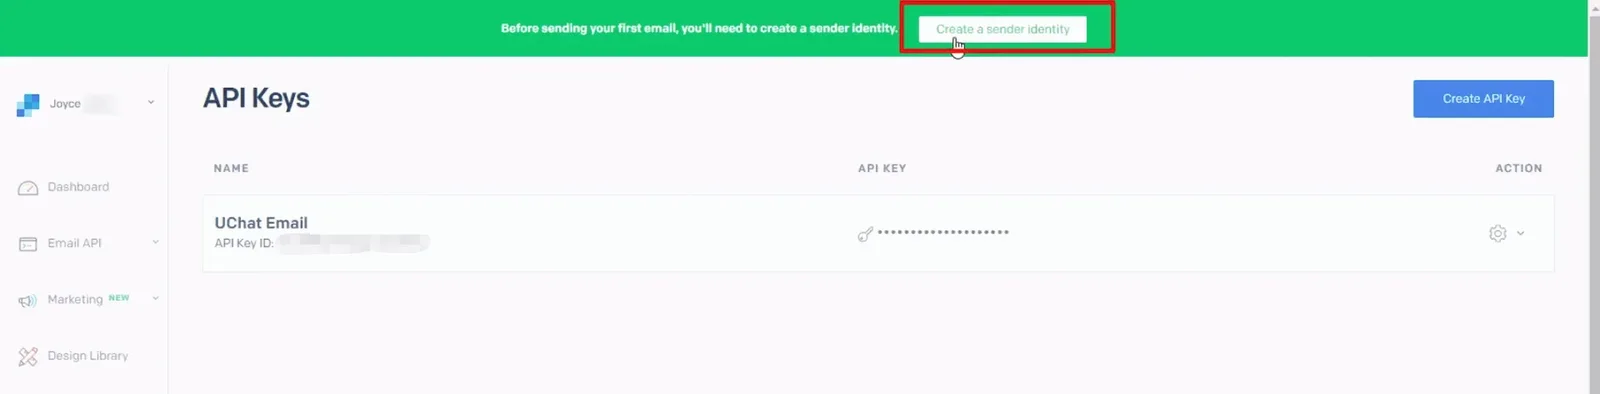
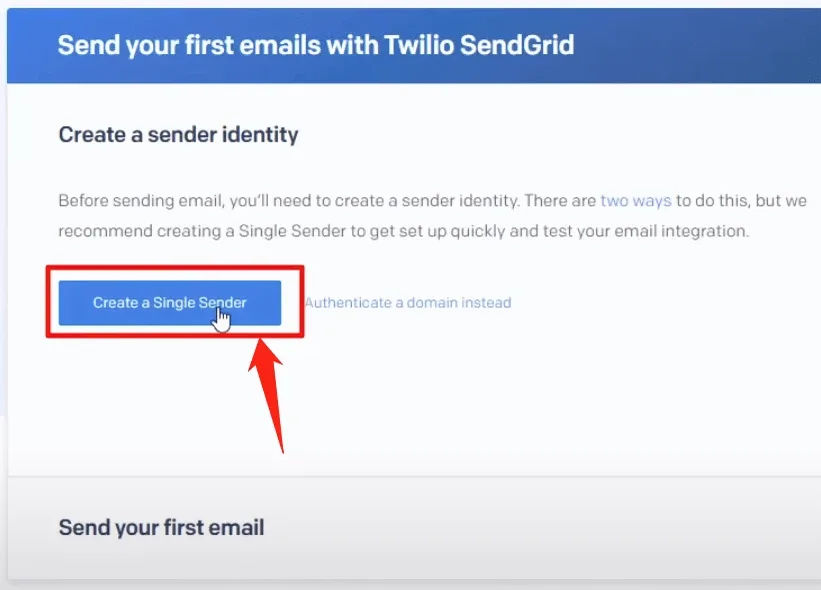
To get a “Sender Email”, go back to the SendGrid website. Click "Create a Sender Identity" and then "Get a Single Sender":
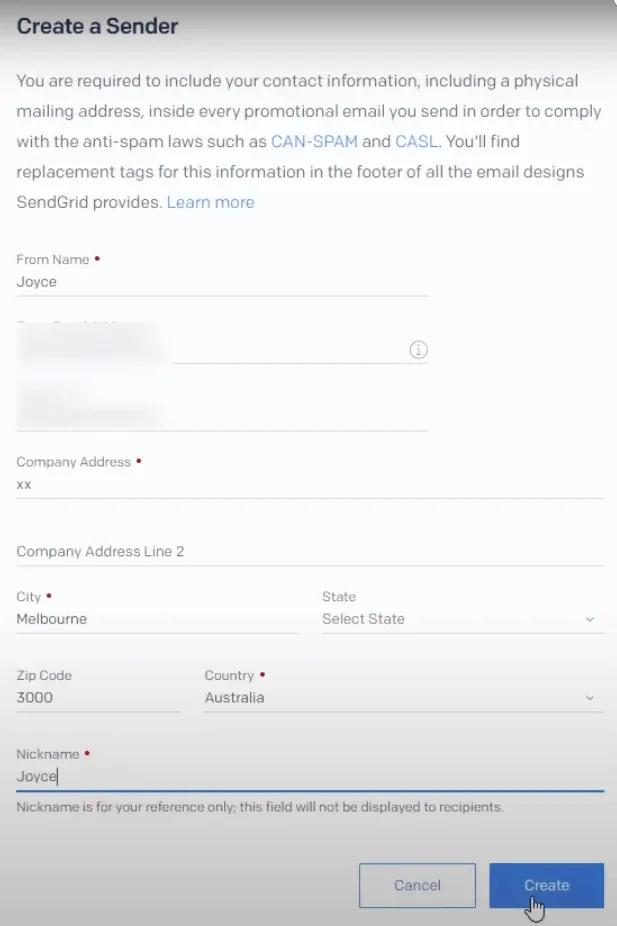
Fill in your details and click "Create":
A verification link will be sent to your email; click it to complete the verification.
Once you have set up the email integration, you can select it as the sender in the "Email Profile" list. See how to send an email notification.
We have released a new feature that lets you sync your email in both directions and even reply to incoming emails using our native SendGrid integration.
With that, you have a complete email marketing solution inside any of your channels.
First, we will need the SendGrid integration.
To connect to SendGrid, go to the integrations section of the NicoChat dashboard, then to the Email Marketing section, and choose SendGrid.
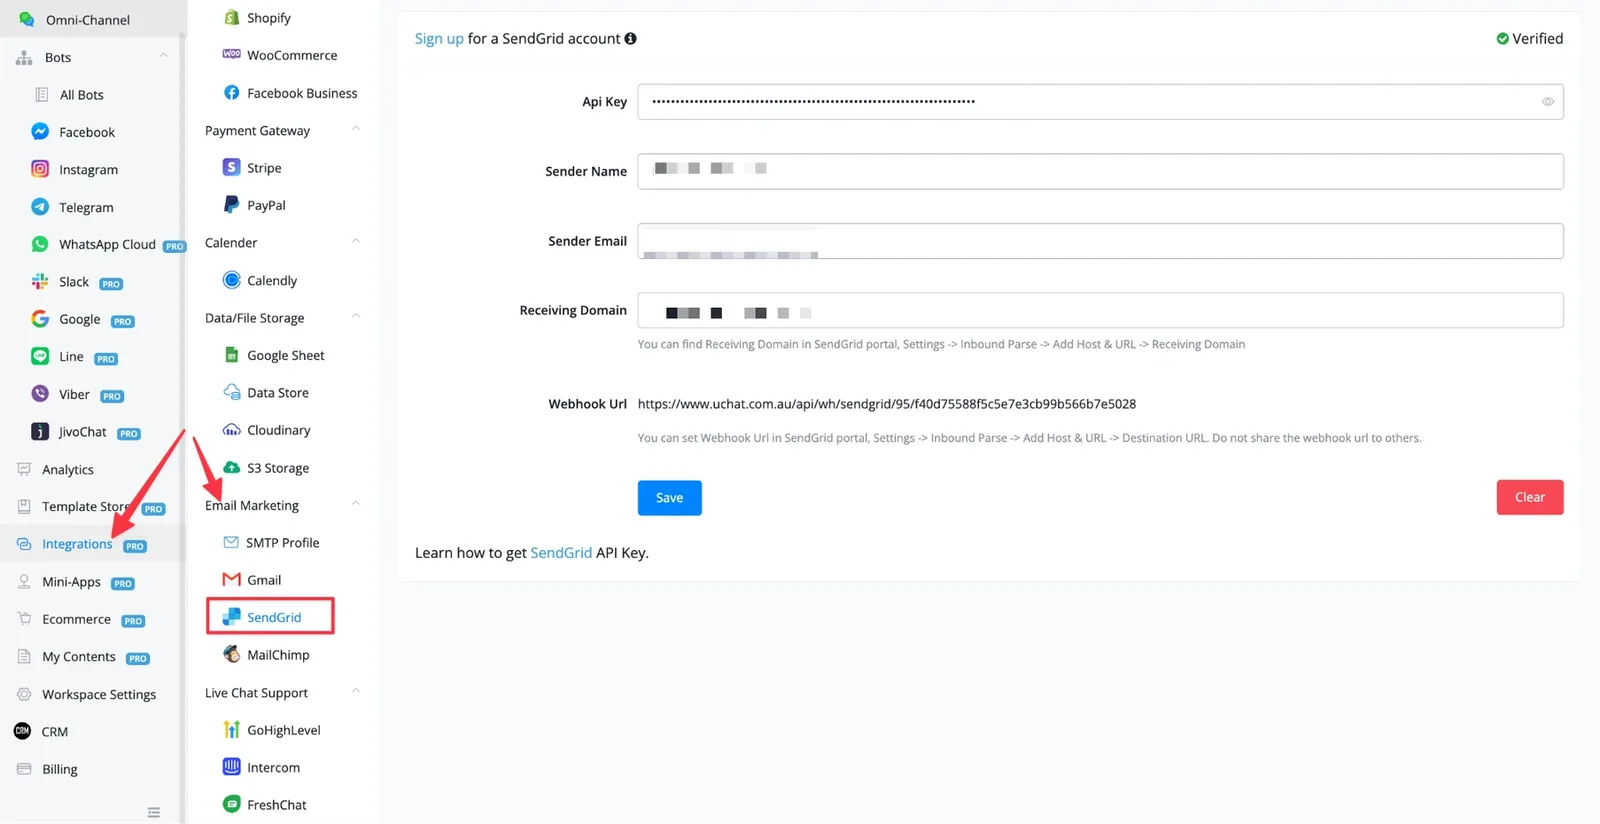
Here we will need 4 pieces of information:
- API Key
- Sender Name
- Sender Email
- Receiving Domain
Let's go into SendGrid and see which steps we need to follow:
First, let's get the API Key by going to Settings and selecting API Keys. Once there, click the “Create API Key” button.
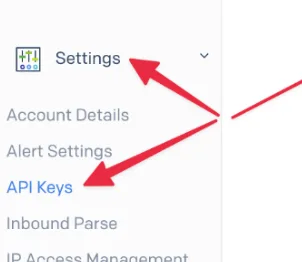
On the next screen, you need to give your API Key a name, grant it full access and, finally, click the “Create & View” button.
Copy and paste the API Key somewhere safe: this will be the only time you see it.
When you are done, let's move on to the next section: Authenticate a Domain.
In the left-hand menu, where you found the API Keys section, scroll down a little until you see Sender Authentication and click that option.
From here you will have an overview of your domains, but if this is the first time, that overview will be blank.
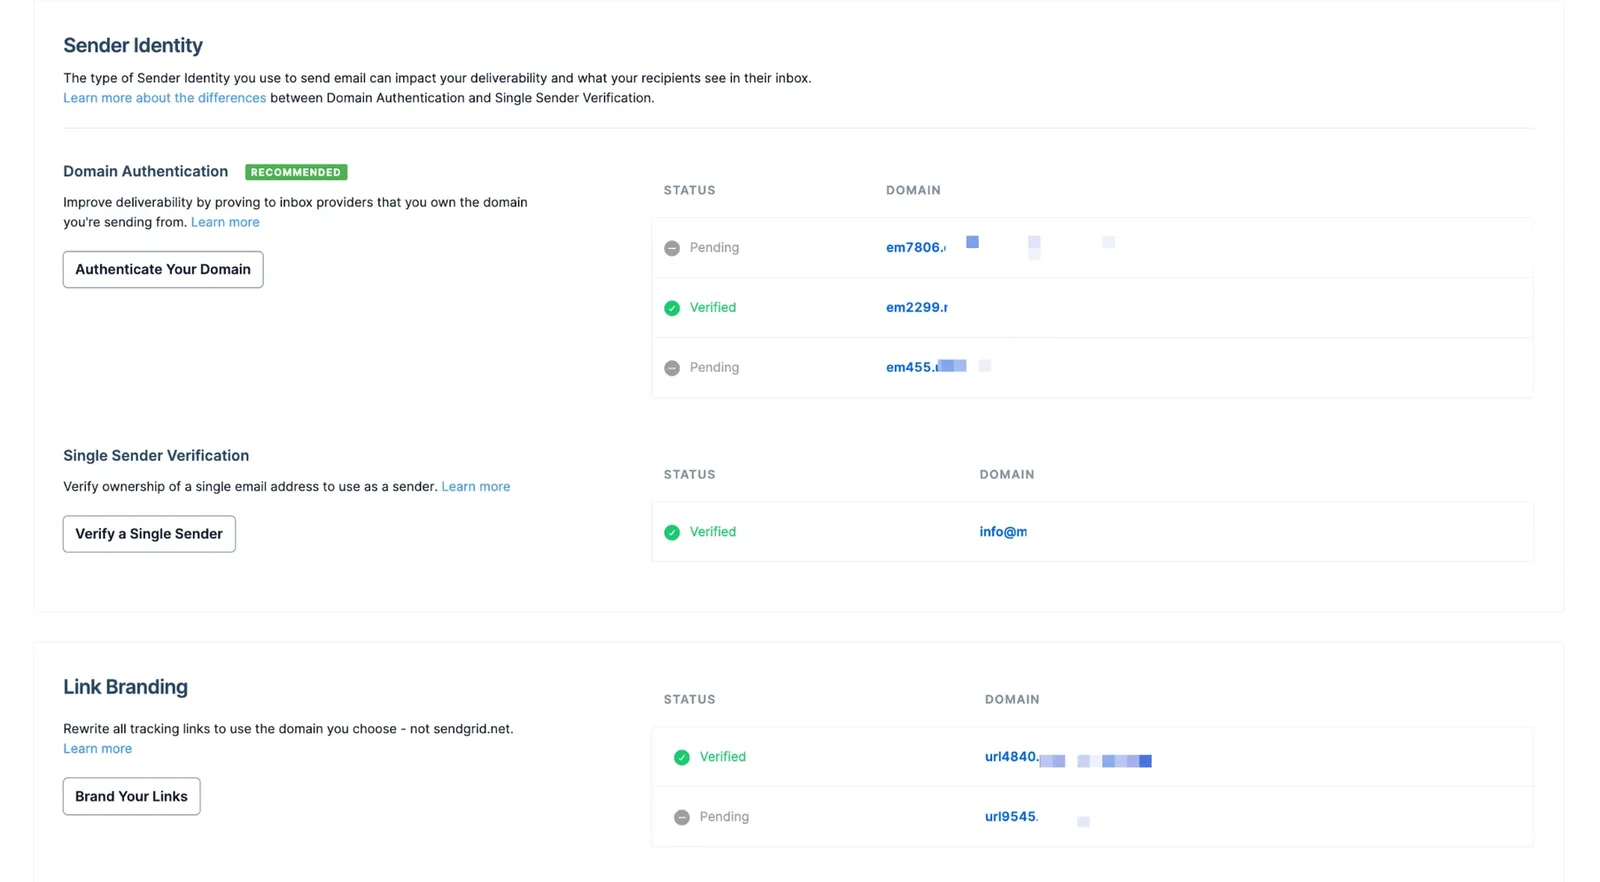
Click the first button, called “Authenticate Your Domain”.
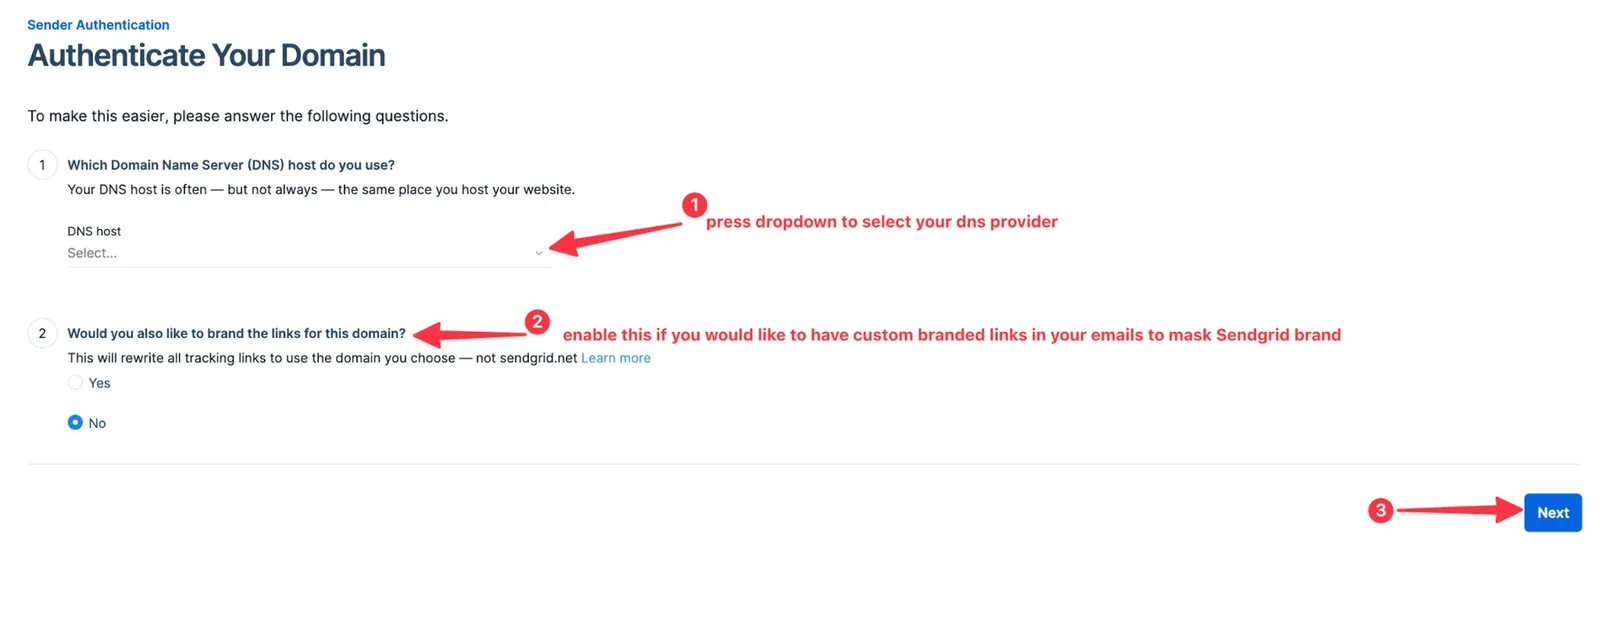
You will reach the overview above, where you will have two options to review.
- Select your DNS provider. When you open the dropdown, you will see the full list of providers. If yours is not among them, choose the last option, “other host (not listed)”.
- Branded links. If you want branded links to appear in your emails, enable this option. Once you do, an extra CNAME record will be added in the next overview.
With both options set, click the “Next” button.
Next, enter the domain you want to use. When you do, an example will appear on the right-hand side.
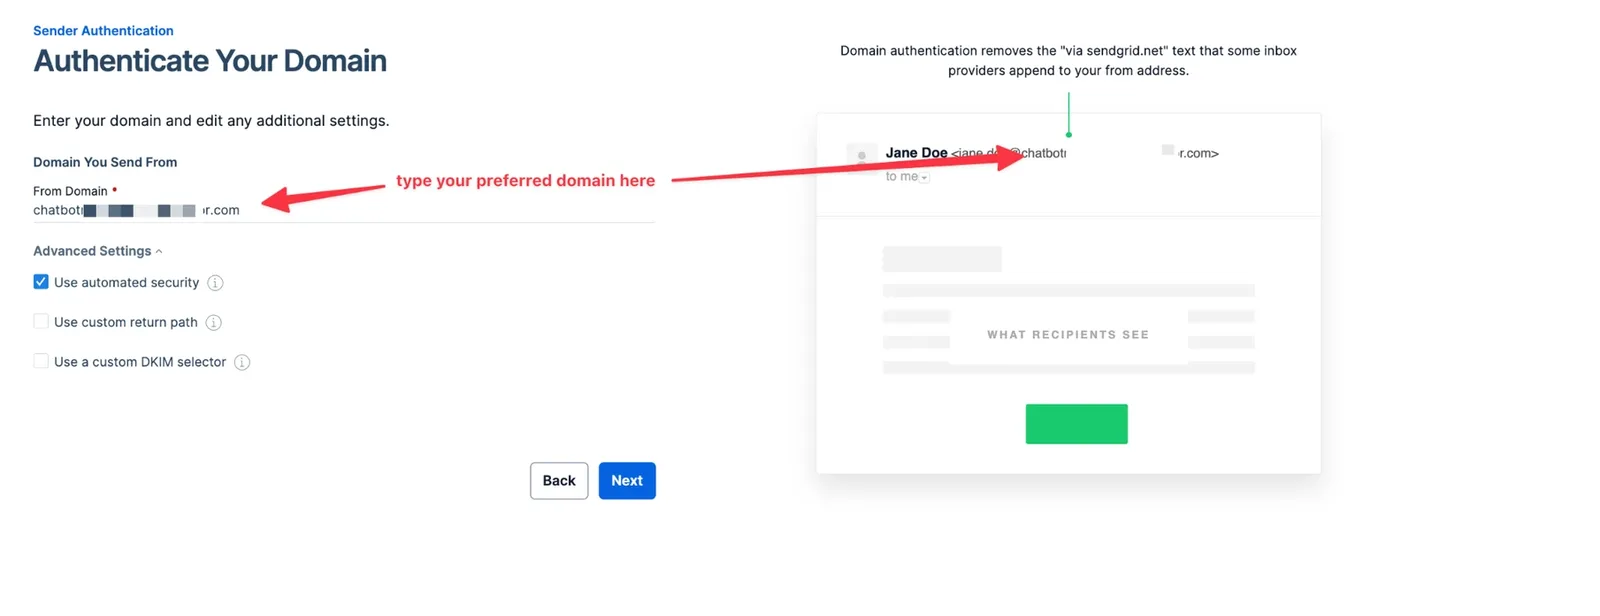
When you are done, you can go to the advanced settings, below the domain you entered, and choose any of the options. The default automated security is already enough.
Click the “Next” button to continue.
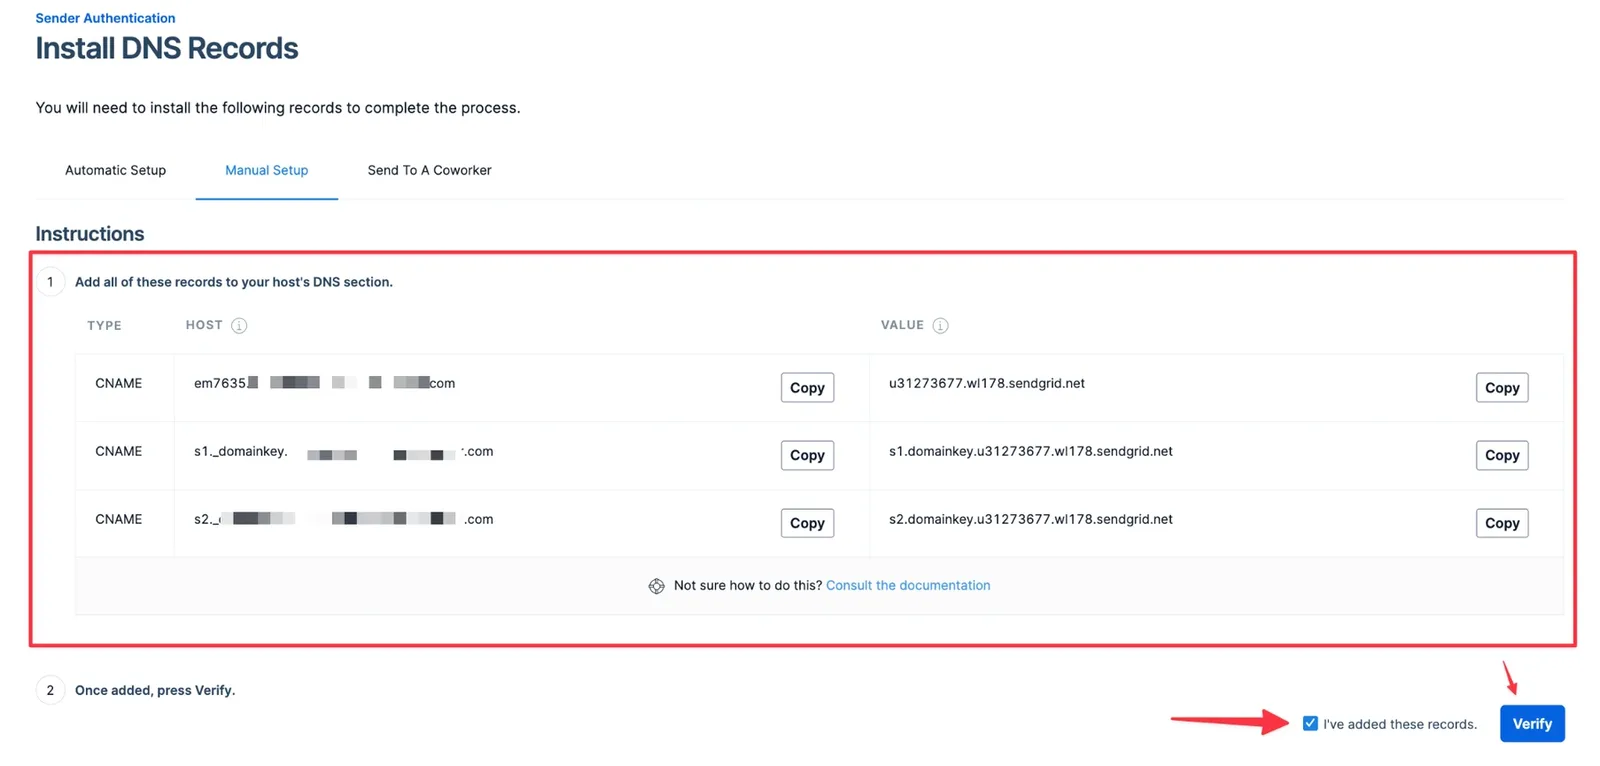
Now you will have an overview of the CNAME records you need to add to your DNS.
After adding the records and waiting a while, tick the box called “I've added these records” and click the “Verify” button. Both are in the bottom right corner of this DNS overview page.
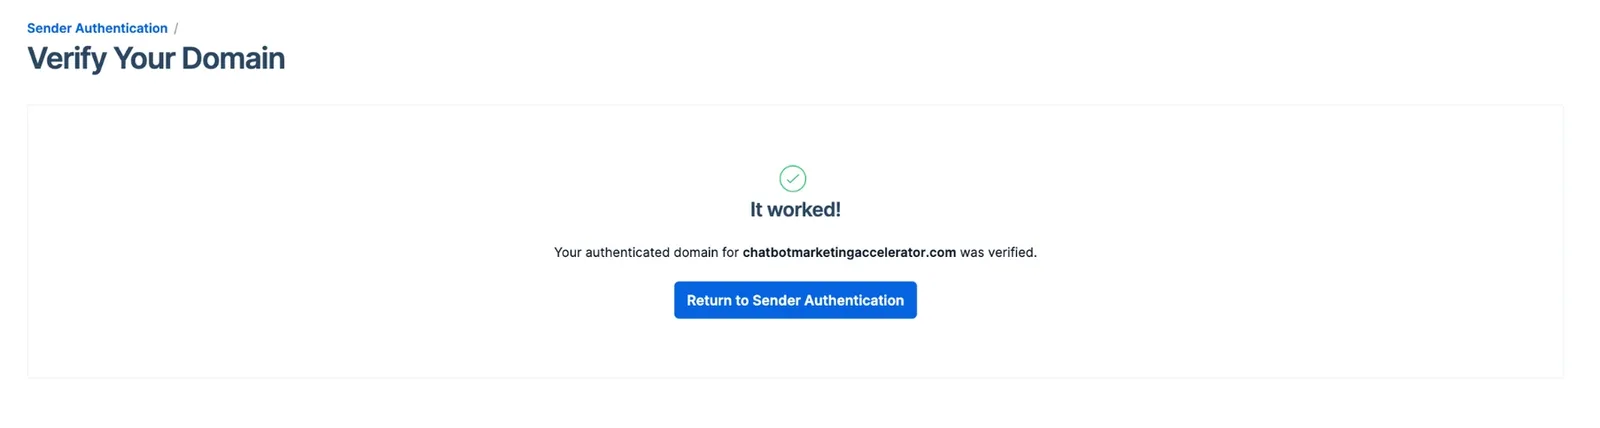
As soon as the verification passes, you will see a confirmation screen.
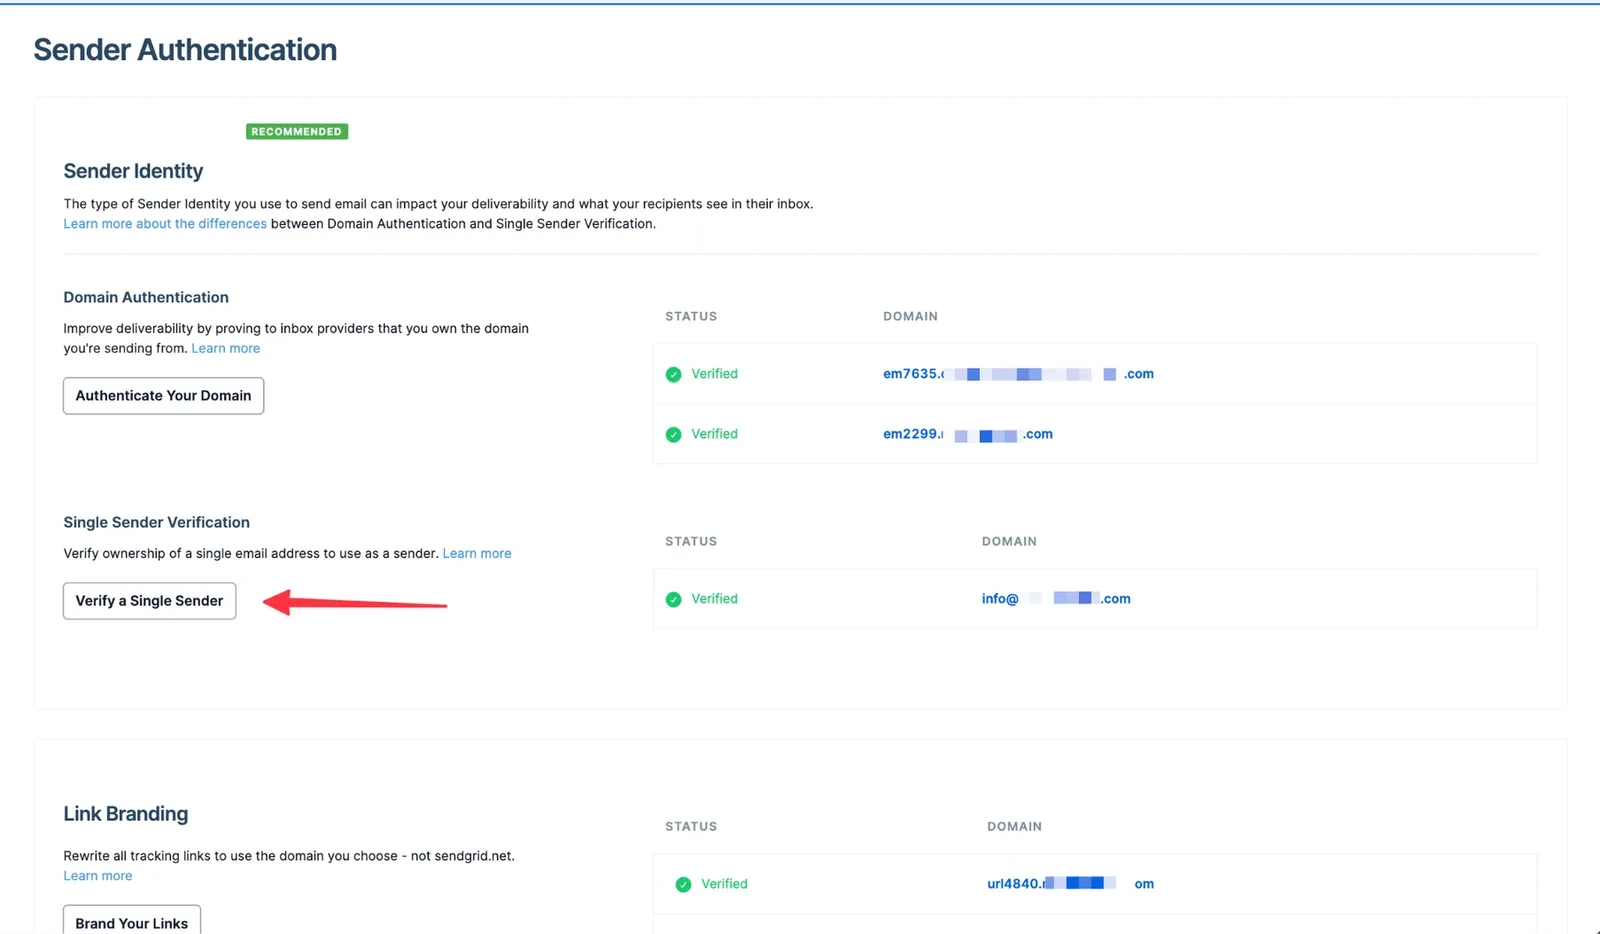
Now that the domain is registered, you need to verify an email address that can be used.
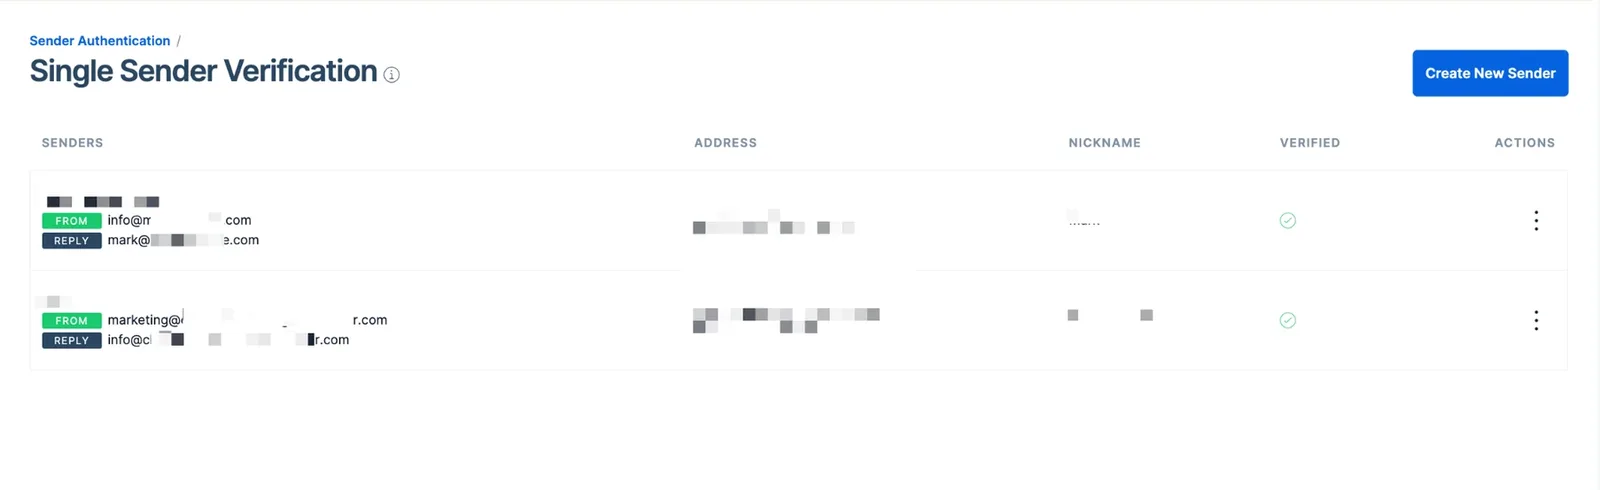
Click the “Single Sender Verification” button.
A new screen will appear for you to fill in all your details. Once that is done, click the button called “Create”.
Once that is done, you will see an overview of your verified email.
Now that we have all the information, it is time to fill it in on the NicoChat integration.
Just go to the section mentioned in your workspace and fill in the data.
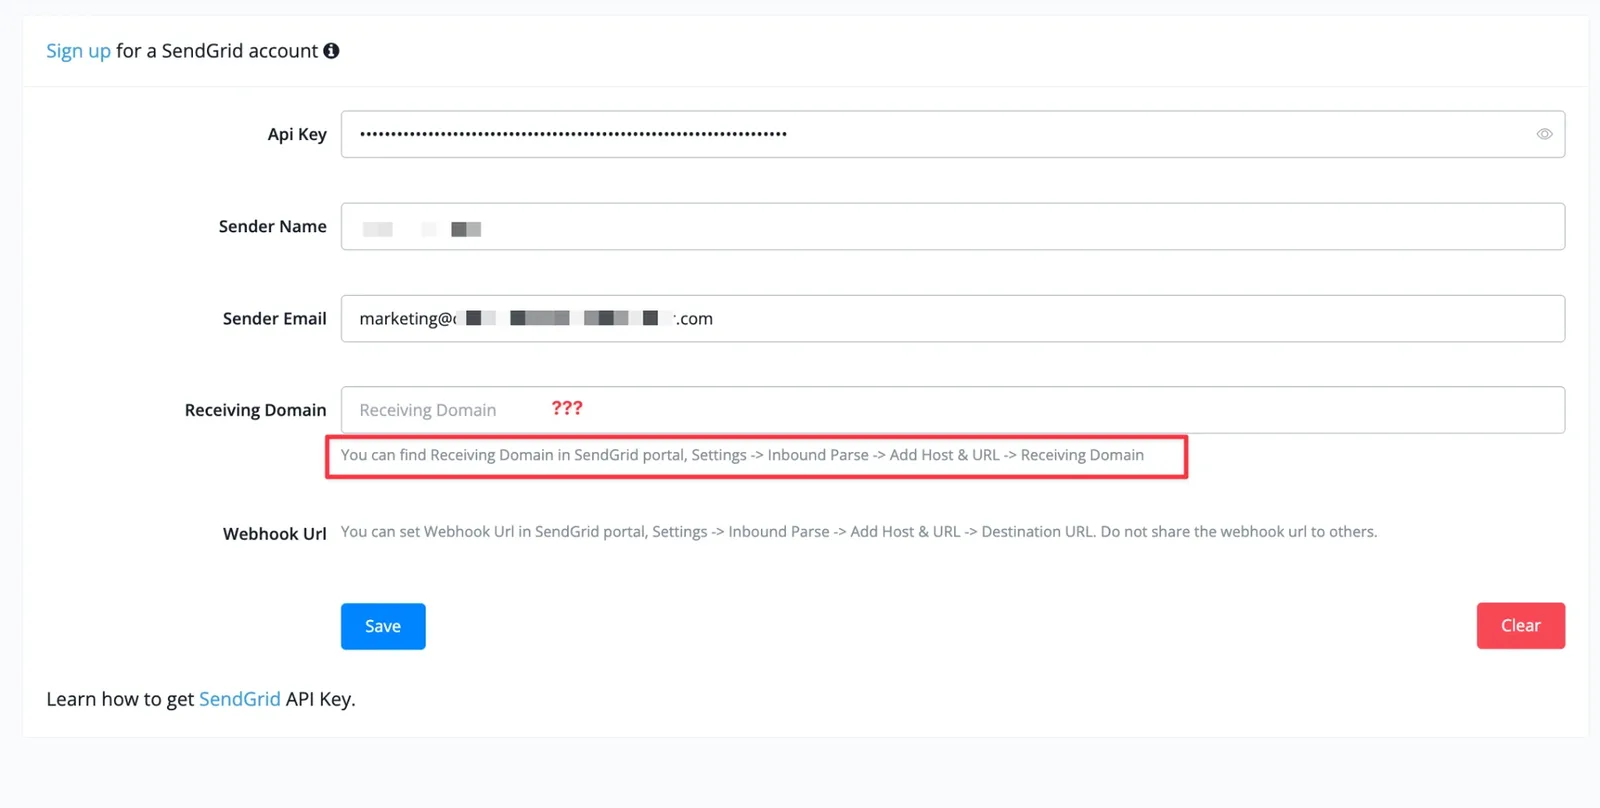
Now, in Receiving Domain, you can directly use one of the domains you have just verified in the Sender Authentication tab. Then click the Save button.
This will generate the Webhook URL that you will use in the next step.
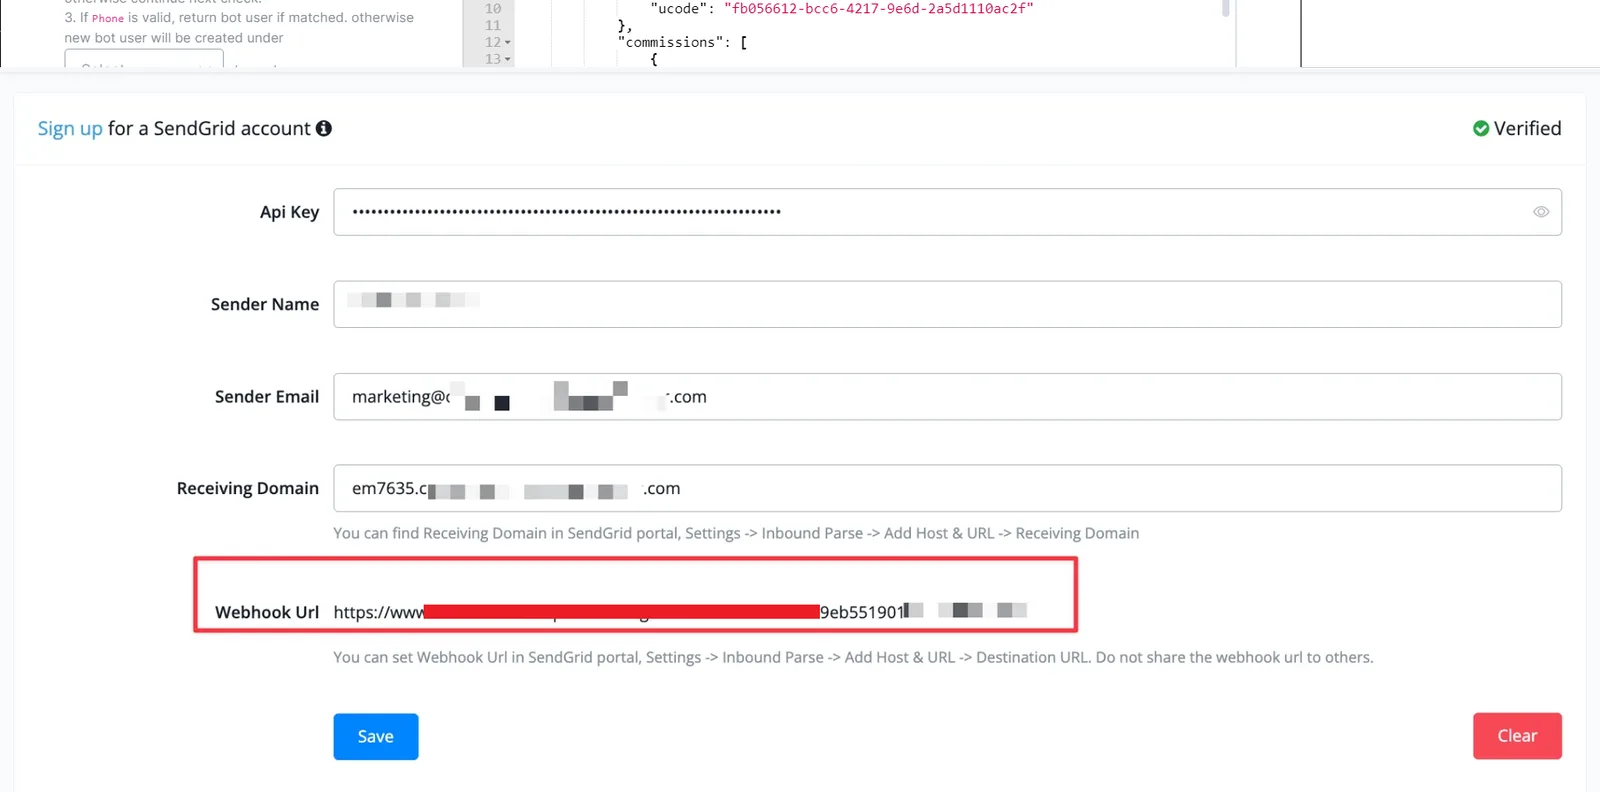
Just copy the Webhook URL and go back to SendGrid -> Settings -> Inbound Parse -> Add Host and URL -> Receiving Domain. From here, click the “Add Host and URL” button.
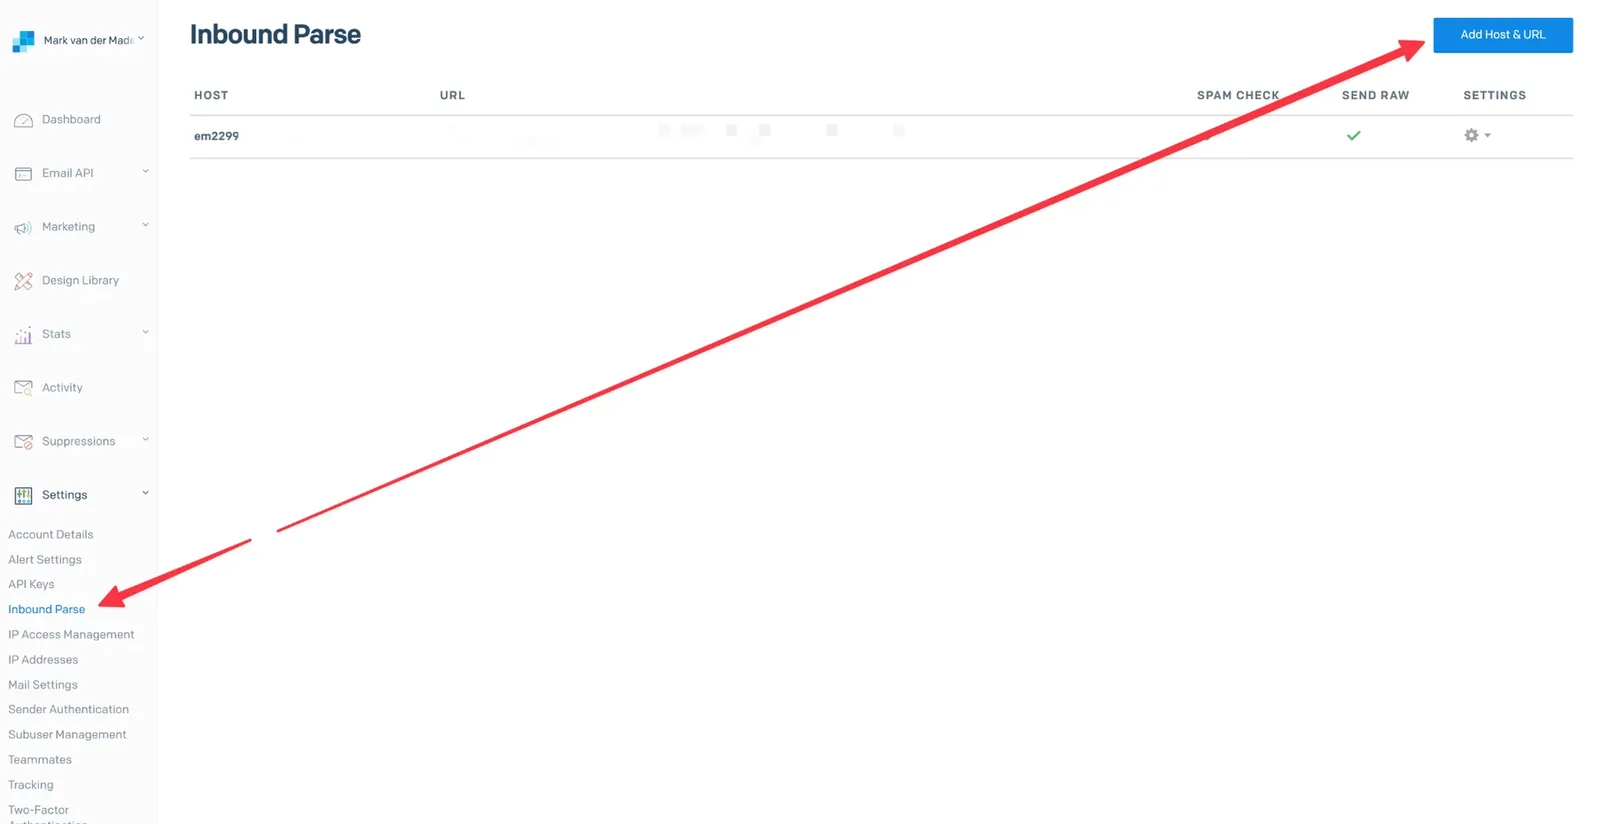
You will see the following overview:
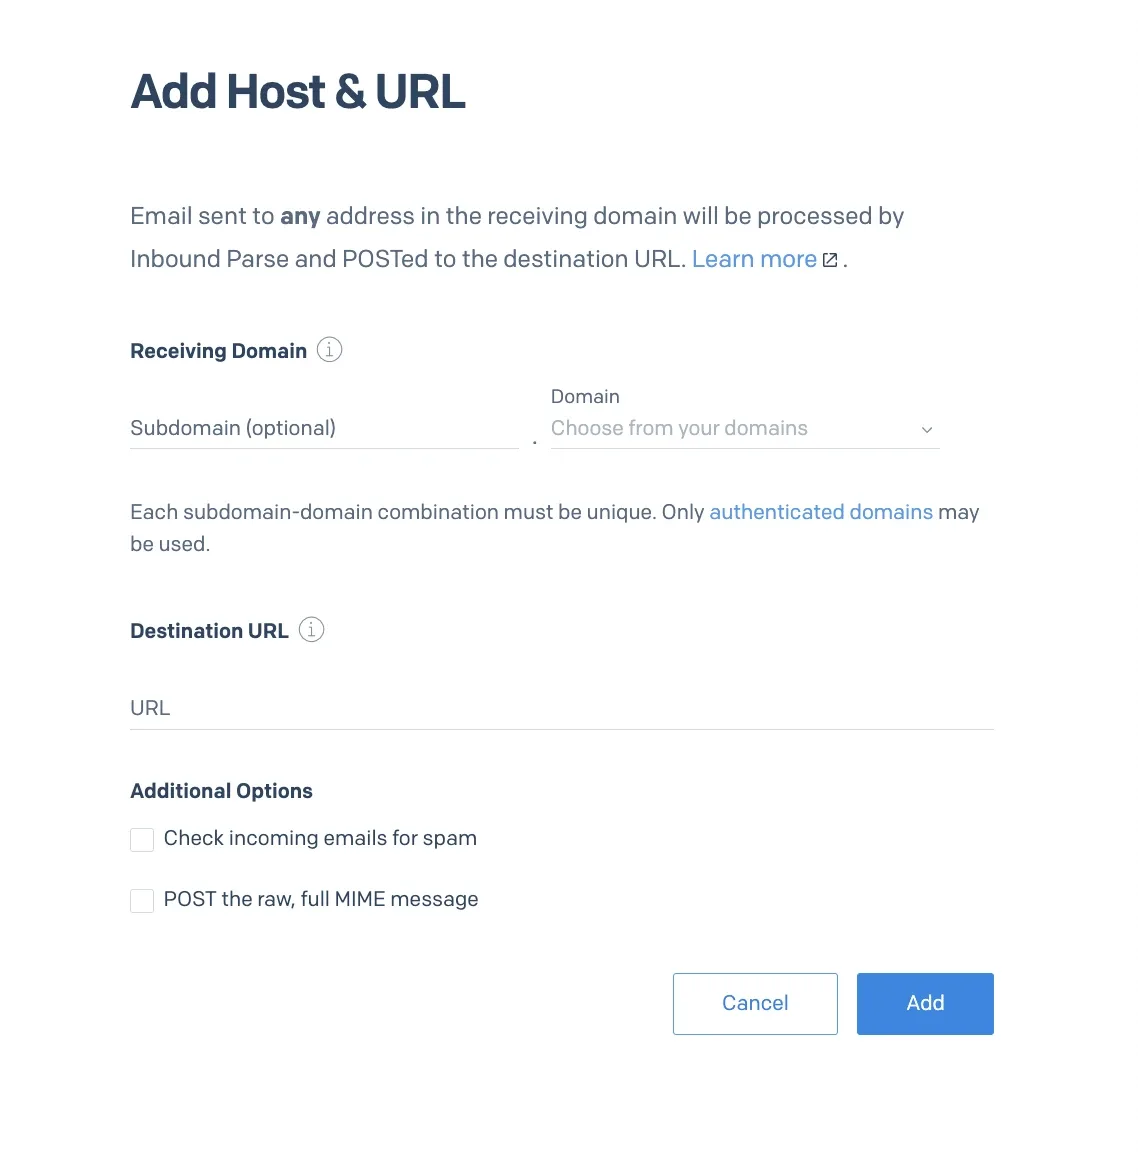
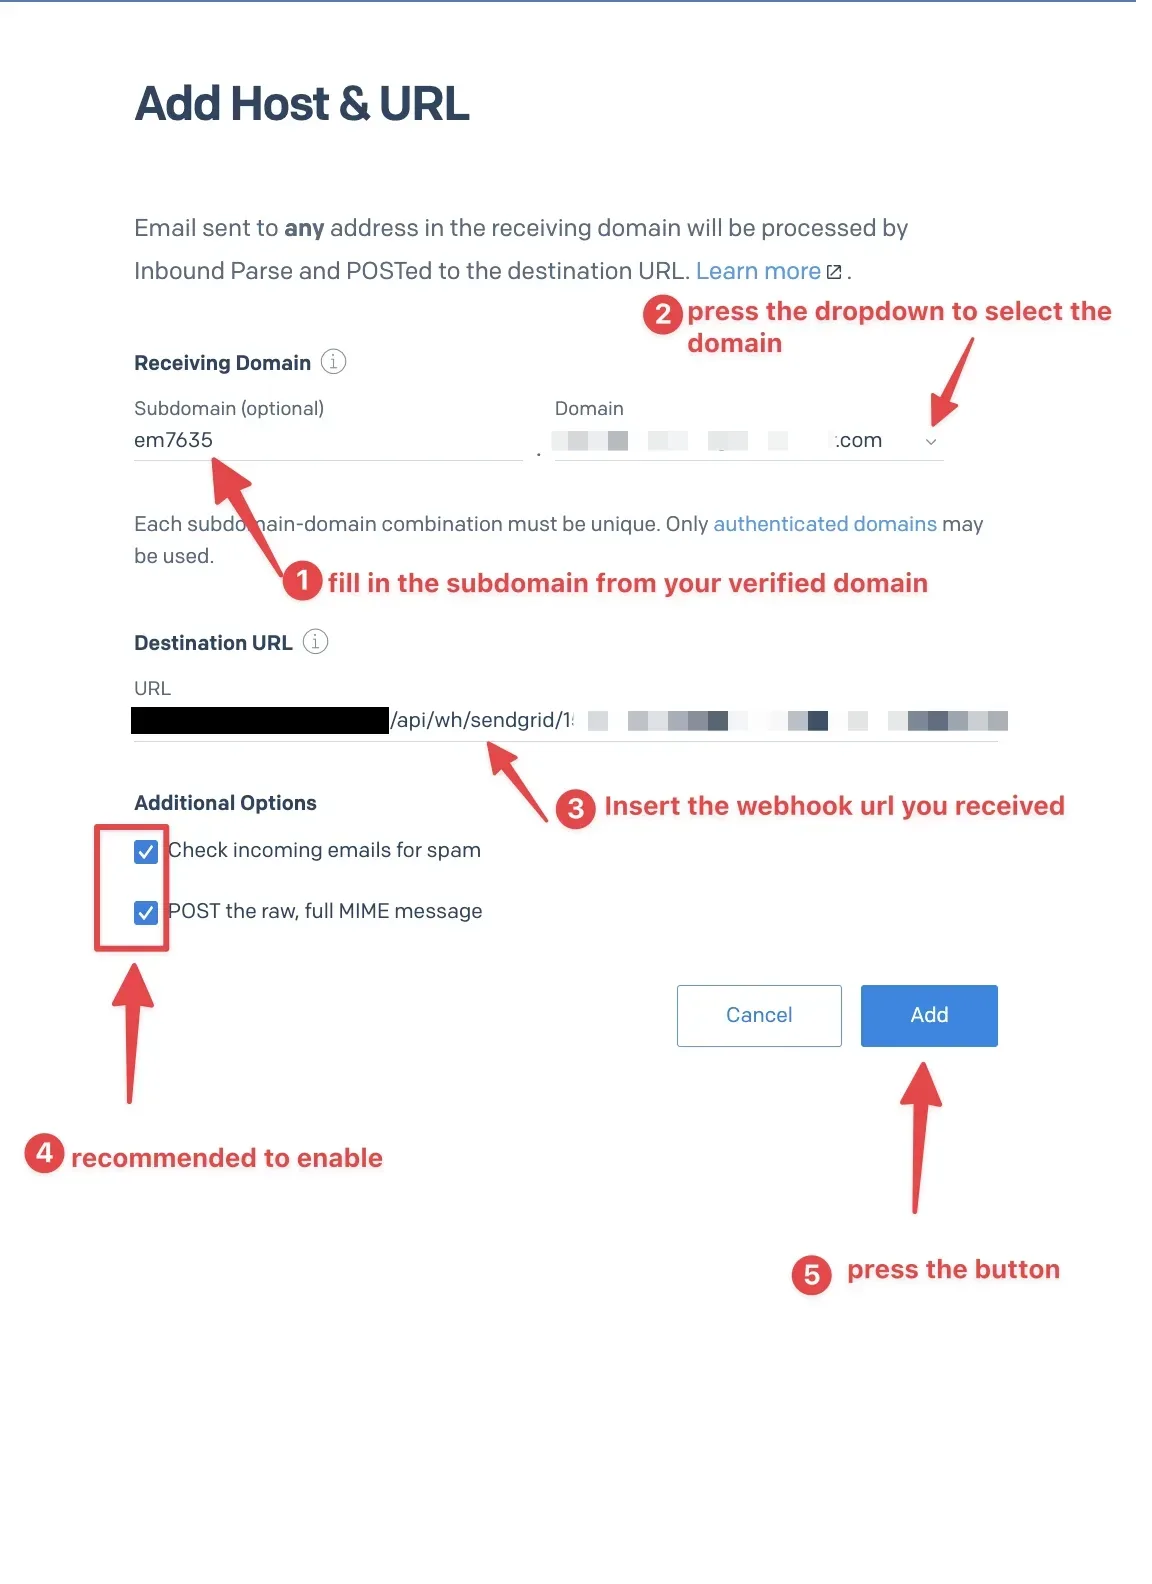
For the subdomain, you can take the beginning of the verified domain, which will be a string of letters and numbers. Just go back to the sender authentication section and copy that value.
As for the domain itself, choose your verified domain from the dropdown. Finally, paste the Webhook URL you received in NicoChat into the destination URL field.
We also recommend enabling the additional options. Once that is done, click the “add” button.
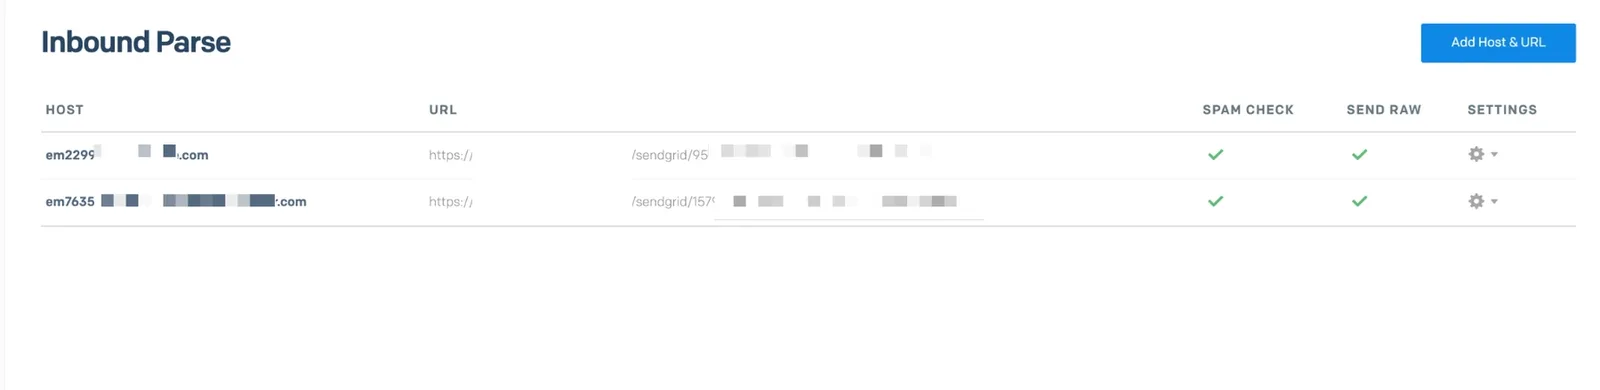
Once that is done, you will have an overview of your verified domains.
All that is left is to go back to NicoChat and click Save once more, so that all the changes take effect.
Now you are ready to use two-way email sync in NicoChat!
Let's go into a channel and open a LiveChat conversation with a contact who has already opted in to receive email, and create an email to send.
As you can see, the email has just been sent to the contact. All emails sent or received appear in purple, to make it clear what type of message it is.
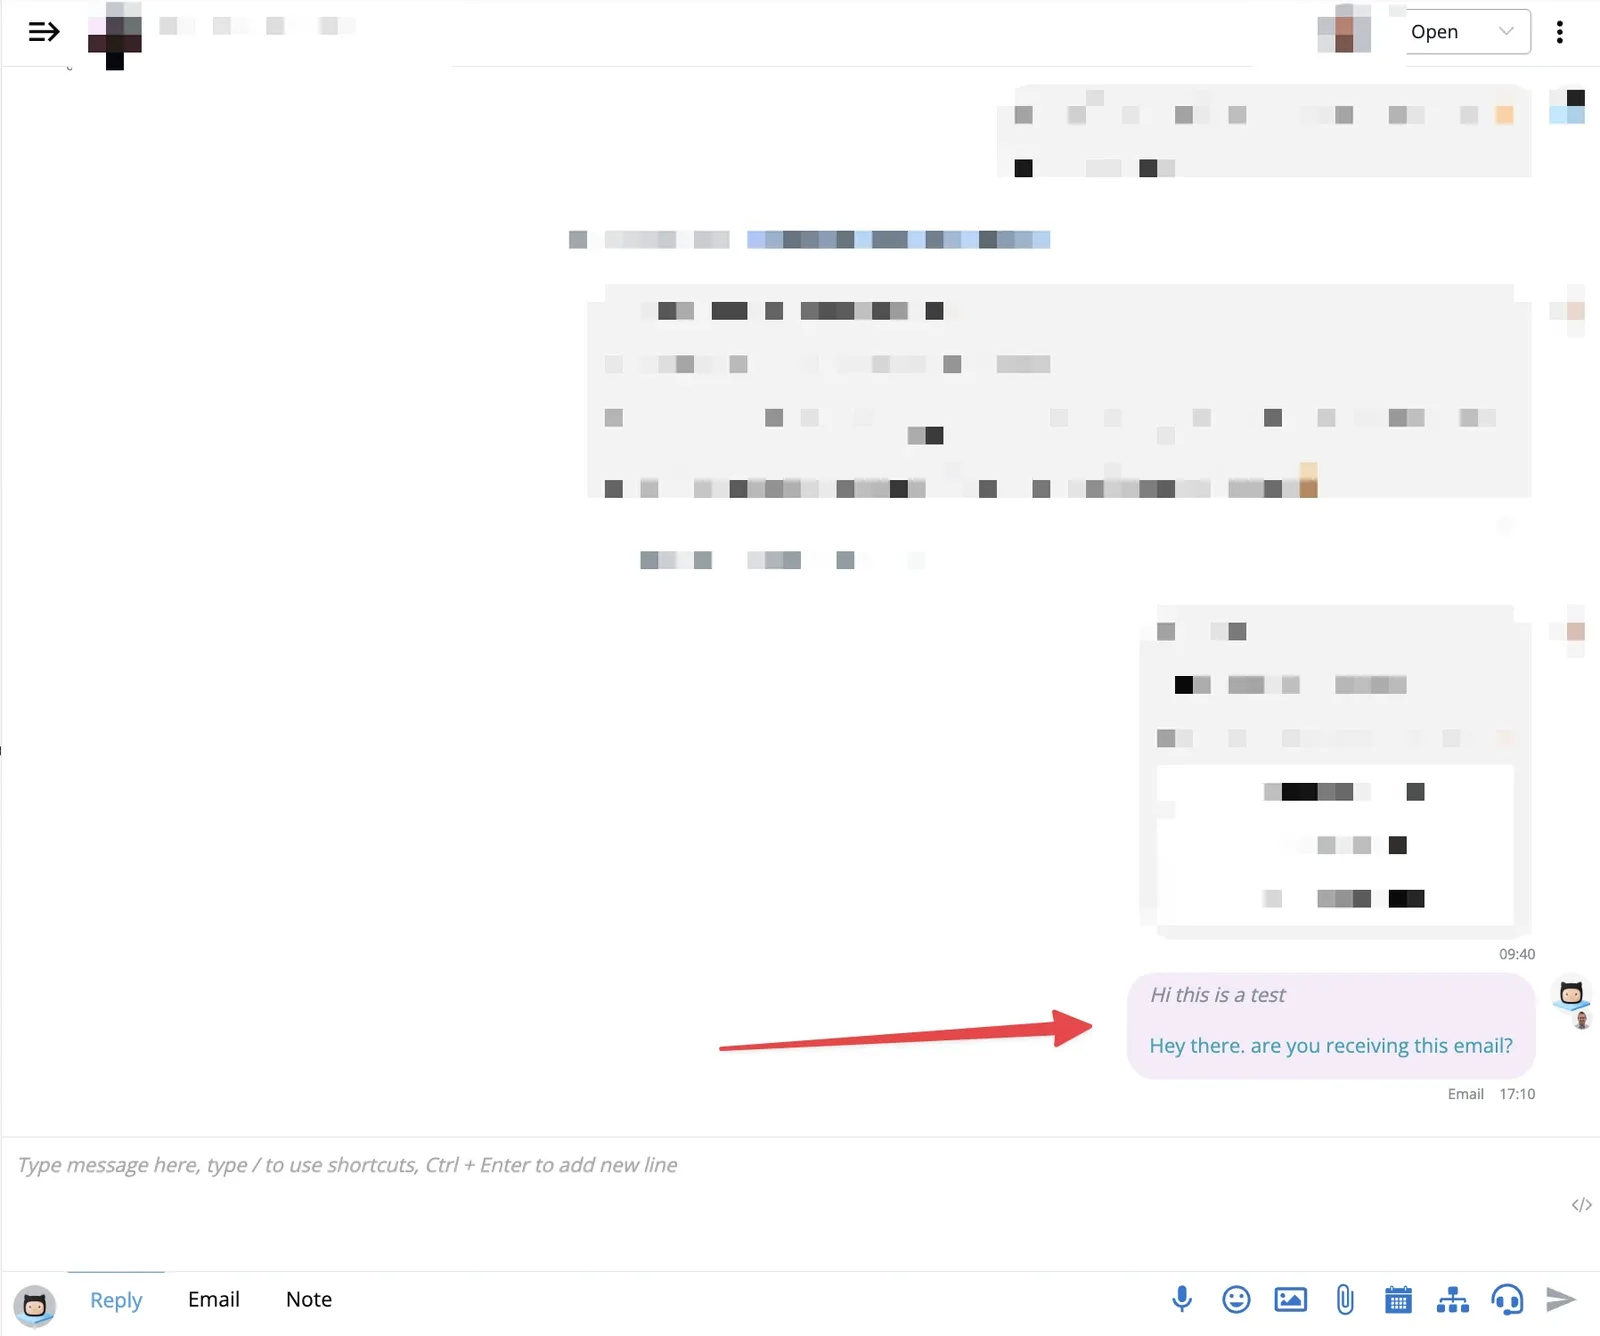
Let's check whether we received the email in our inbox and then reply to it.
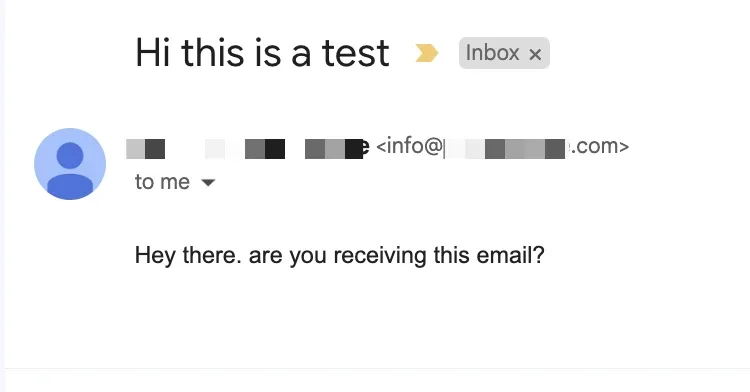
As you can see, we received the email in our inbox. The next step, then, is to check whether we can receive replies in our LiveChat inbox in NicoChat.
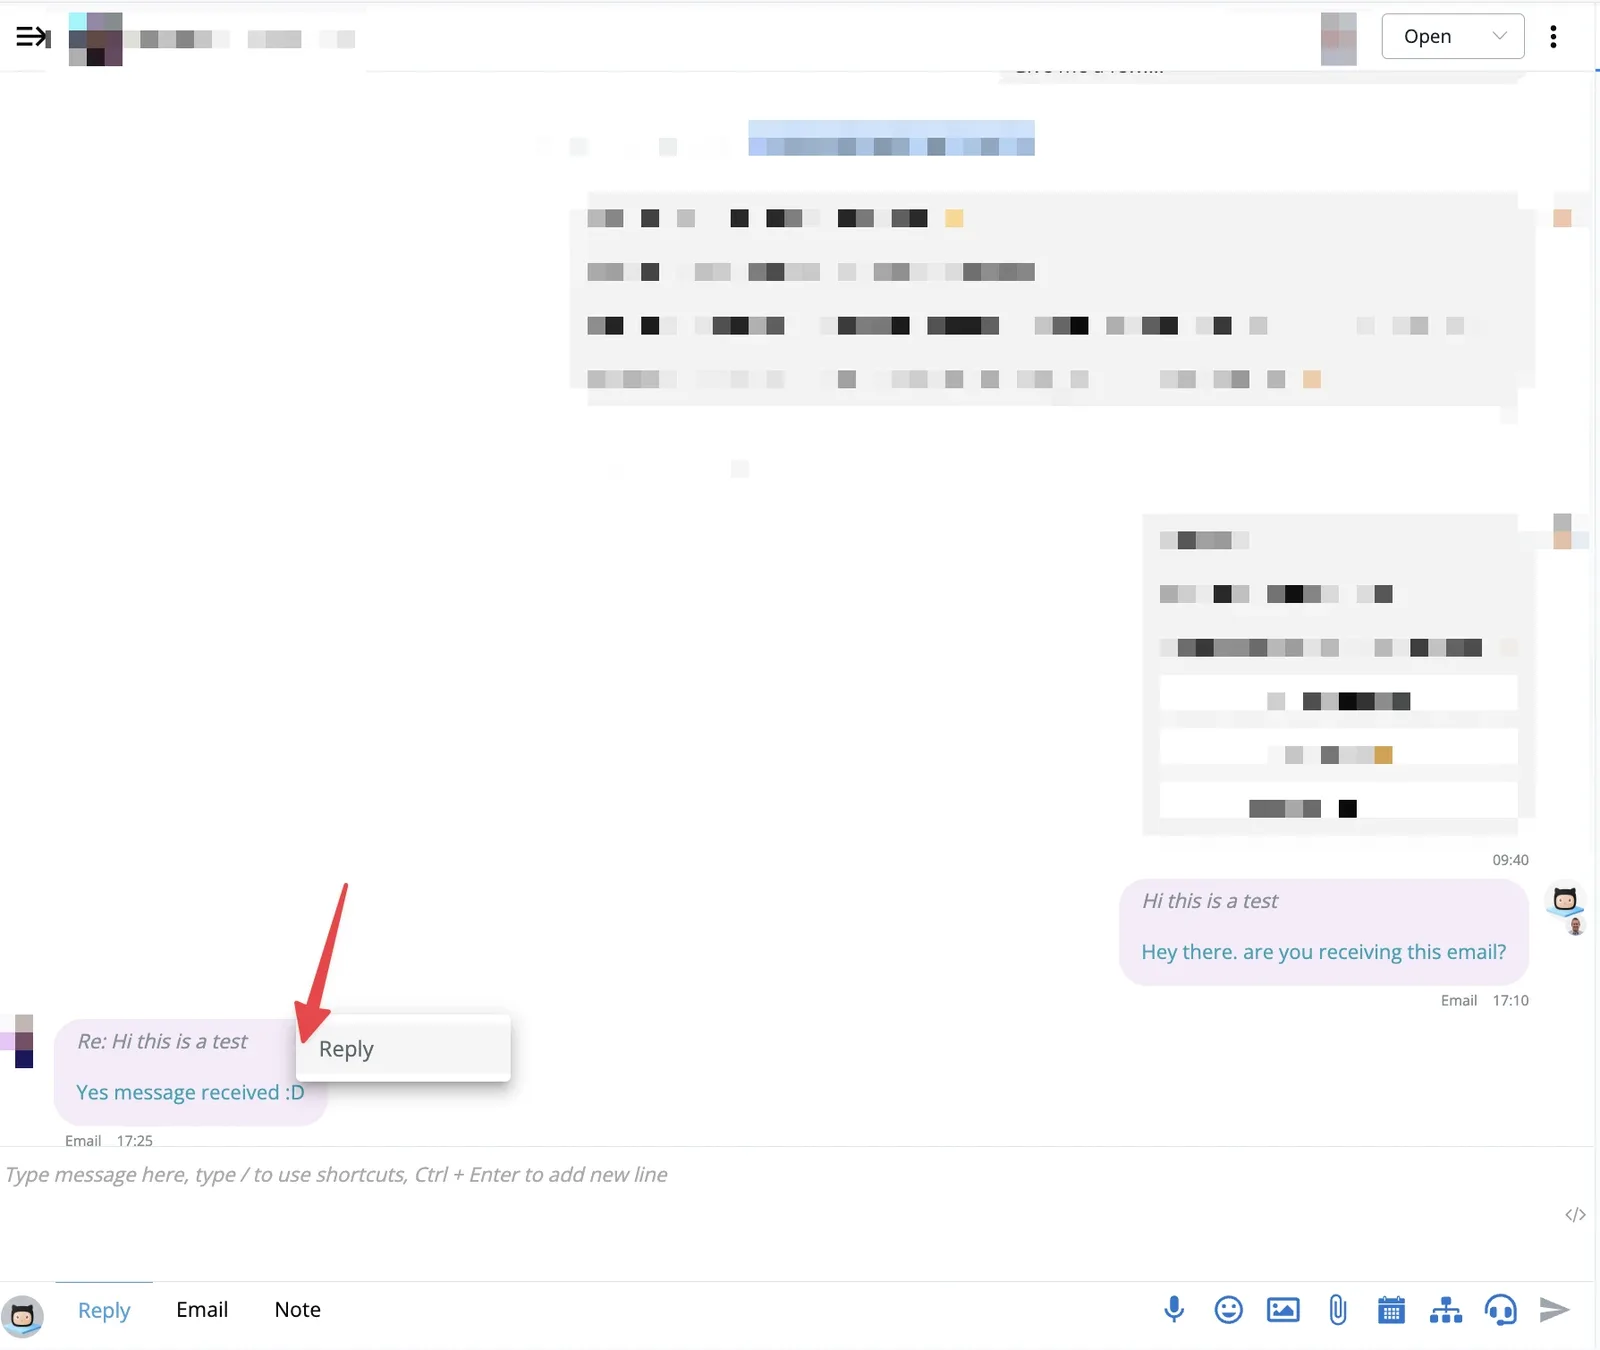
Perfect!
Here you can see that it is a reply, because the title is marked with Re:
Now you can reply easily: hover over the top right corner of the email and a dropdown arrow will appear. When you click it, you will see that you can now choose the “reply” option.
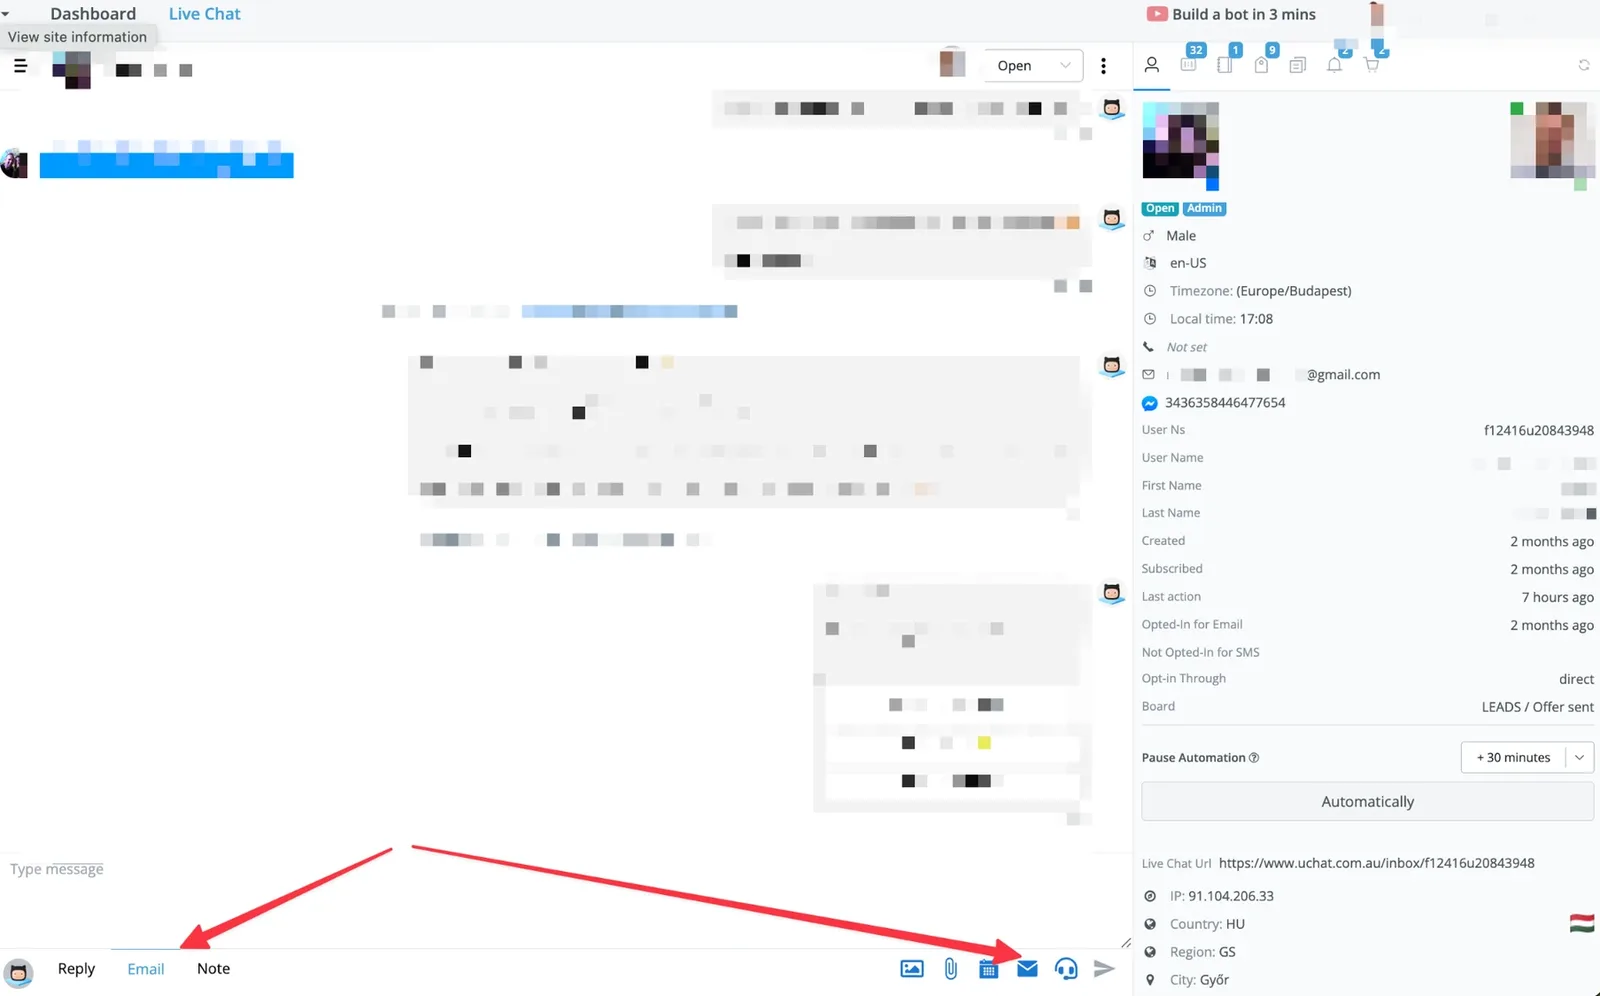
You can send an email by clicking “E-Mail”, between Reply and Note, at the bottom, or through the email icon on the right-hand side.
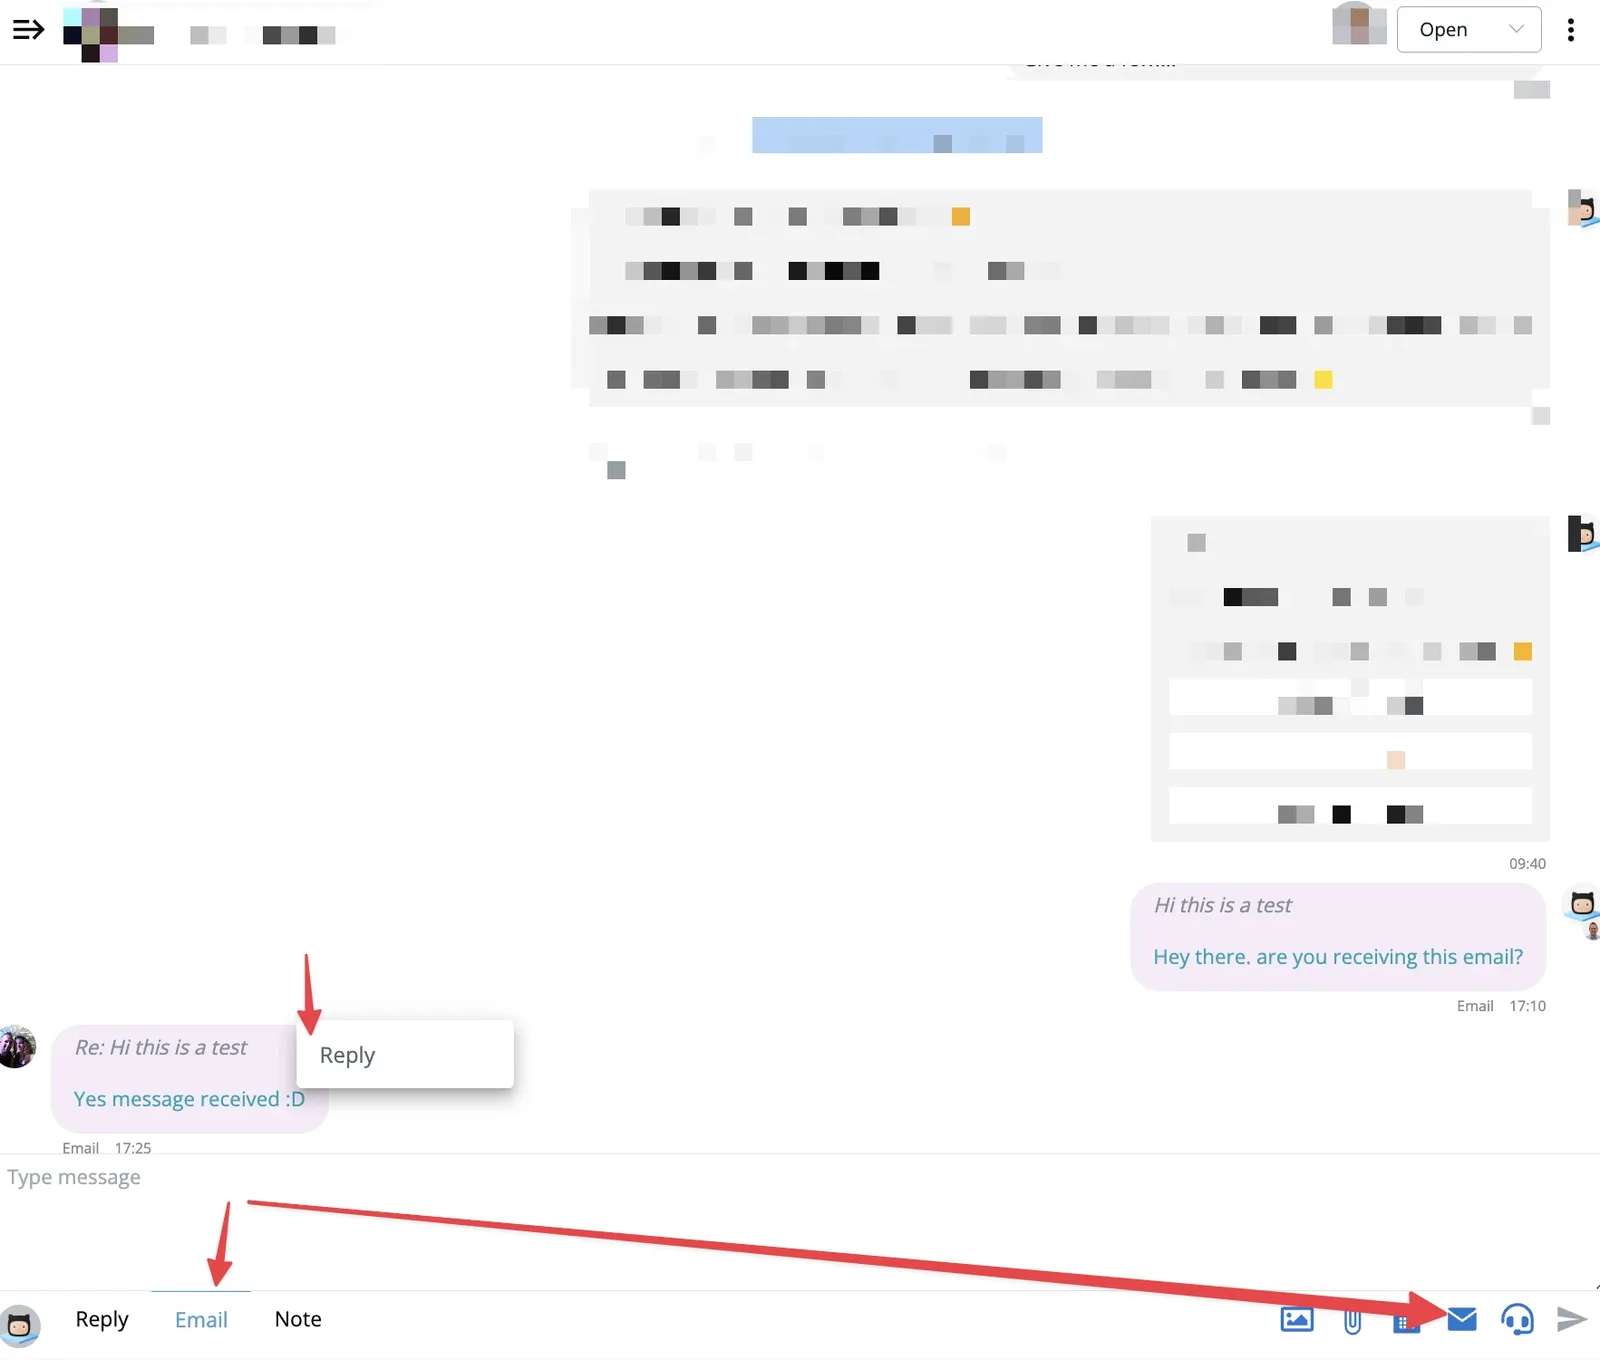
When your email has been sent, it is time to take a look at the contact's inbox to see whether we replied and started a thread.

And finally, as you can see in the contact's inbox, the message appears inside the current thread with that contact.
This is how you set up a two-way email sync system inside NicoChat using our native SendGrid integration!