

MailChimp
Follow steps 1 to 4 in the picture above and open MailChimp's website.
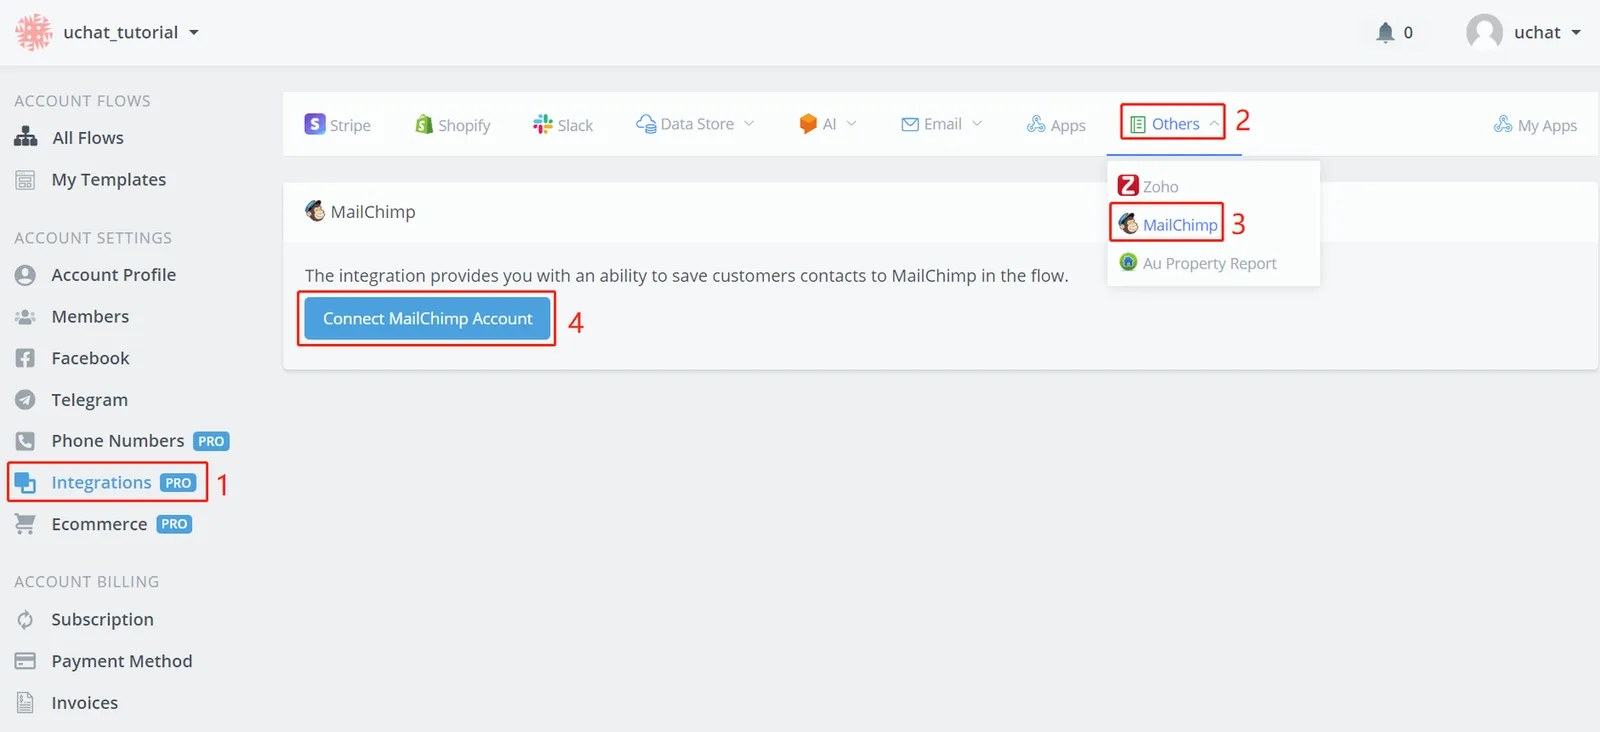
Follow steps 1 to 4 in the picture above and open MailChimp's website.
Log in and authorize NicoChat.
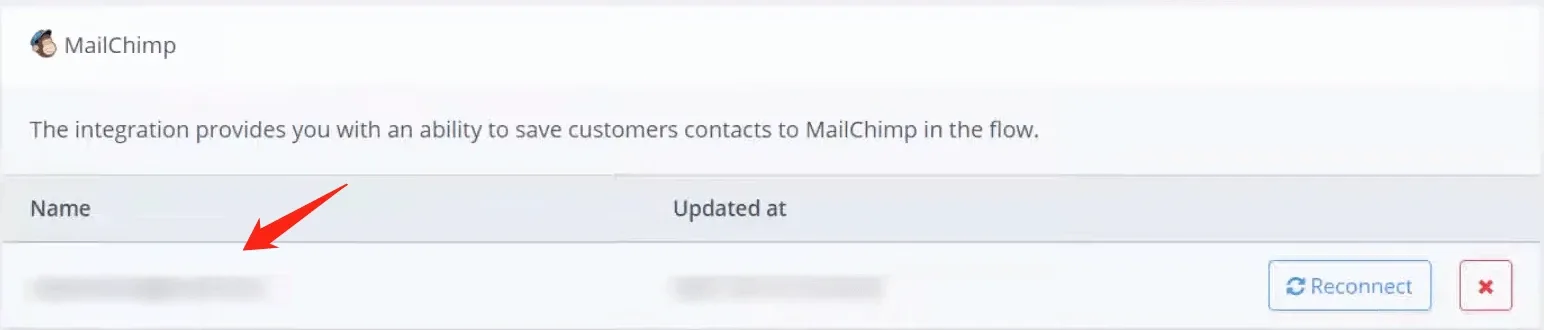
The page will bring you back to NicoChat. You can now see your account name.
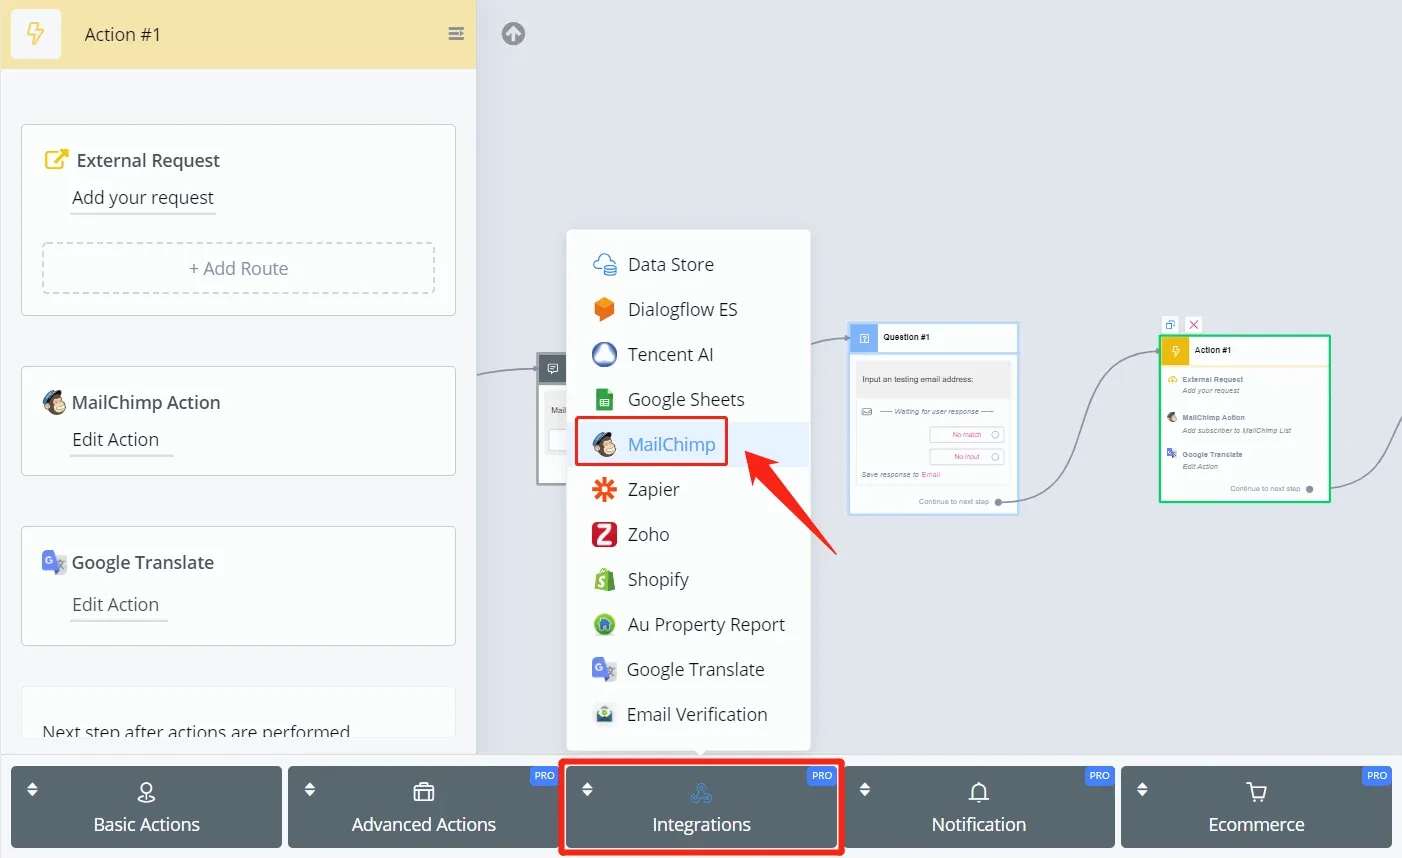
In the Action step, find "MailChimp" in the "Integrations" list.
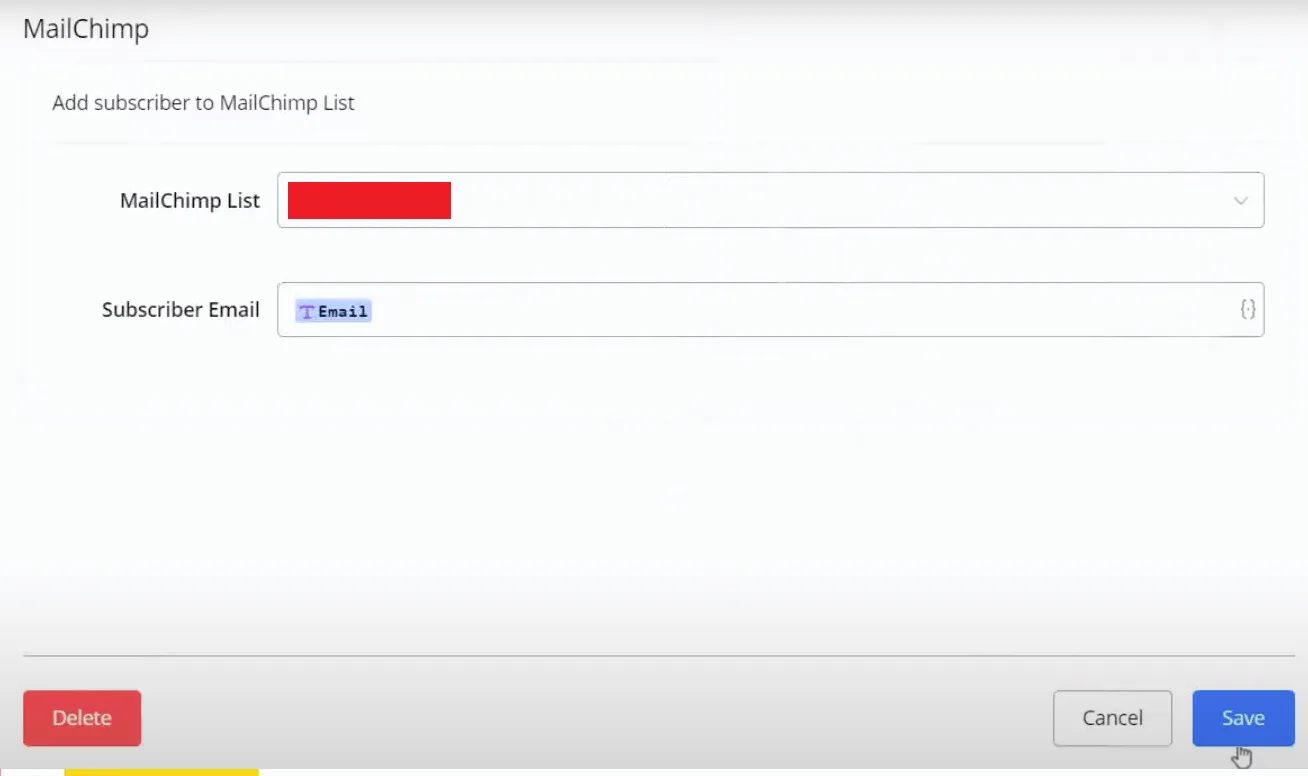
Just place this action after a question step. Pick a MailChimp list and provide the users' email address. That's all!
Let's see what happens in MailChimp:
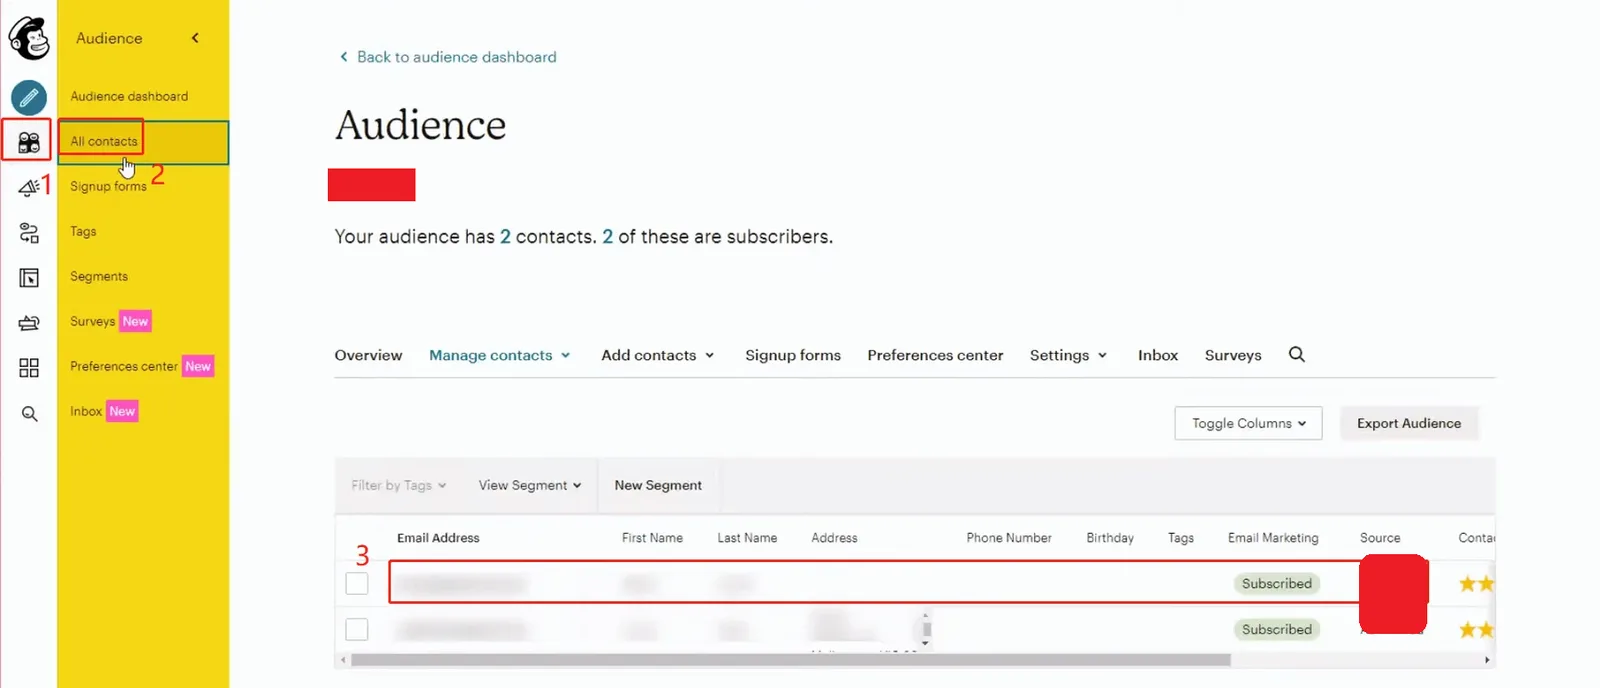
In the MailChimp dashboard, click areas 1 and 2 in the left sidebar. You will then see the audience added with NicoChat as the source.
Warning
Note that only a valid email address can be added to your MailChimp. If nothing happens after the Action step, the user's email address may be incorrect.
Note
TIP - So it is worth adding one more action to check whether the email provided by the user is correct. There are several third-party APIs for email verification, such as mailboxlayer (opens new window). You can call these APIs through the External Request - API or, more easily, through the NicoApp.
More details, click -> Mailchimp