

Hotmart
Welcome to the NicoChat integration guide for the Hotmart NicoApp. This documentation provides a detailed step-by-step on how to set up and take advantage of NicoChat features together with Hotmart.
Welcome to the NicoChat integration guide for the Hotmart NicoApp. This documentation provides a detailed step-by-step on how to set up and take advantage of NicoChat features together with Hotmart, one of the leading platforms for online course sales. The integration lets you automate interactions, process data and manage communications efficiently.
If you prefer to follow the video tutorial, watch it below:

On Hotmart, go to "Tools" and then "Hotmart Credentials".
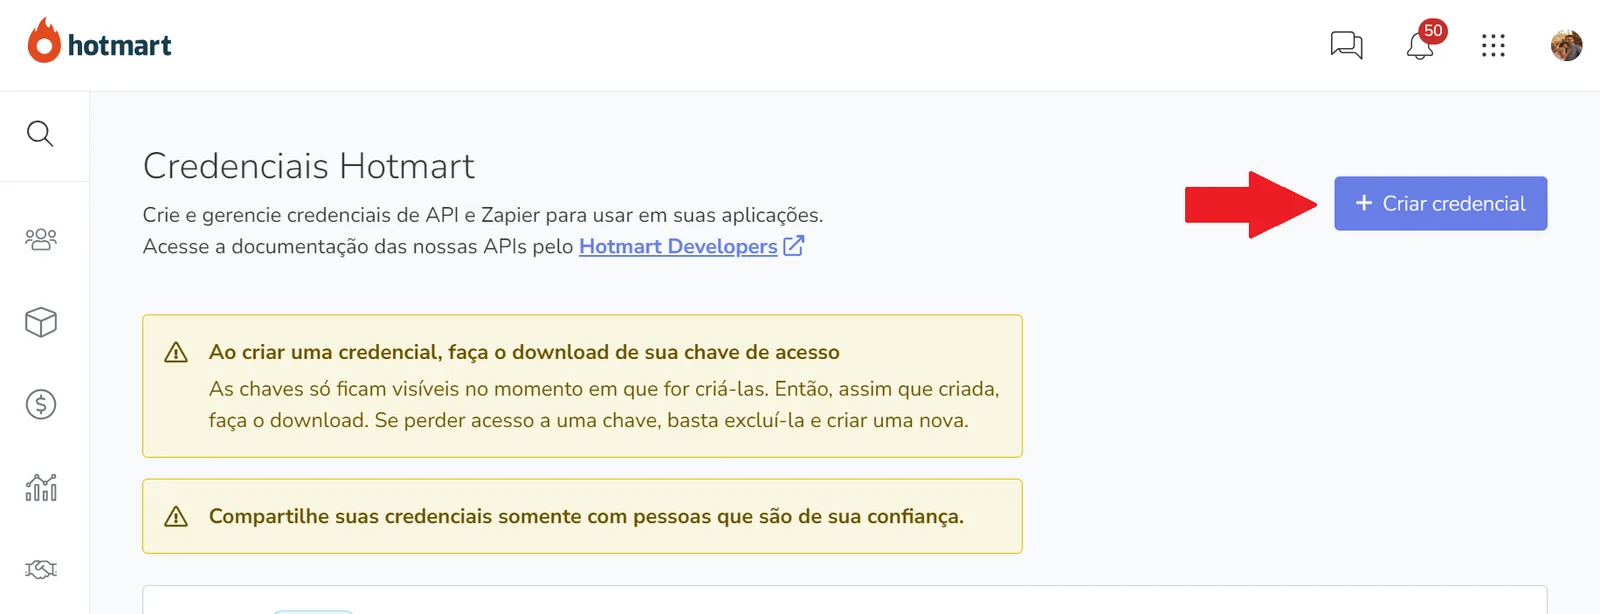
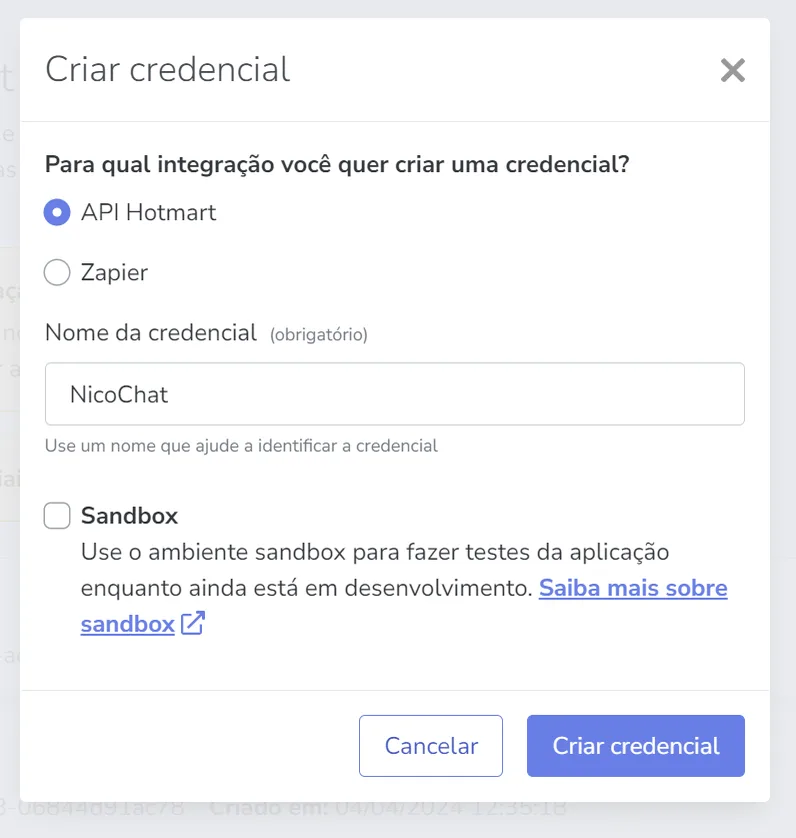
Create a new API credential by filling out the form with “API Hotmart”, enter a name for the credential and do not select “Sandbox”.
Copy the Client ID, Client Secret and the Basic token (with only one "Basic").
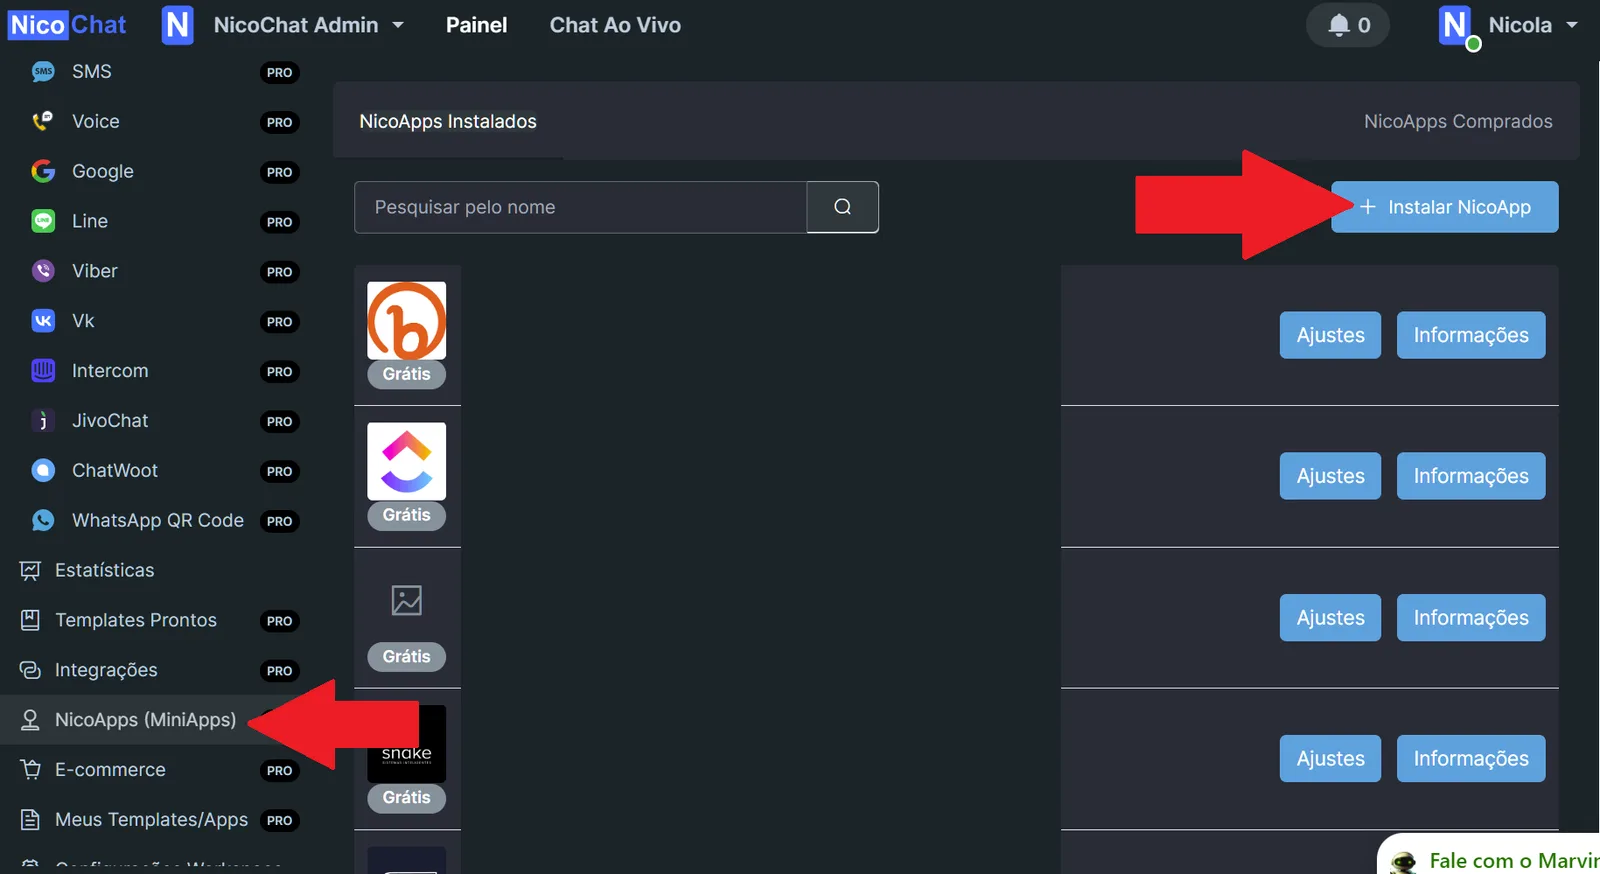
- Go to the "NicoApps" section in NicoChat.
- Select and install the latest version available for Hotmart (e.g.: 1.1, 1.2).
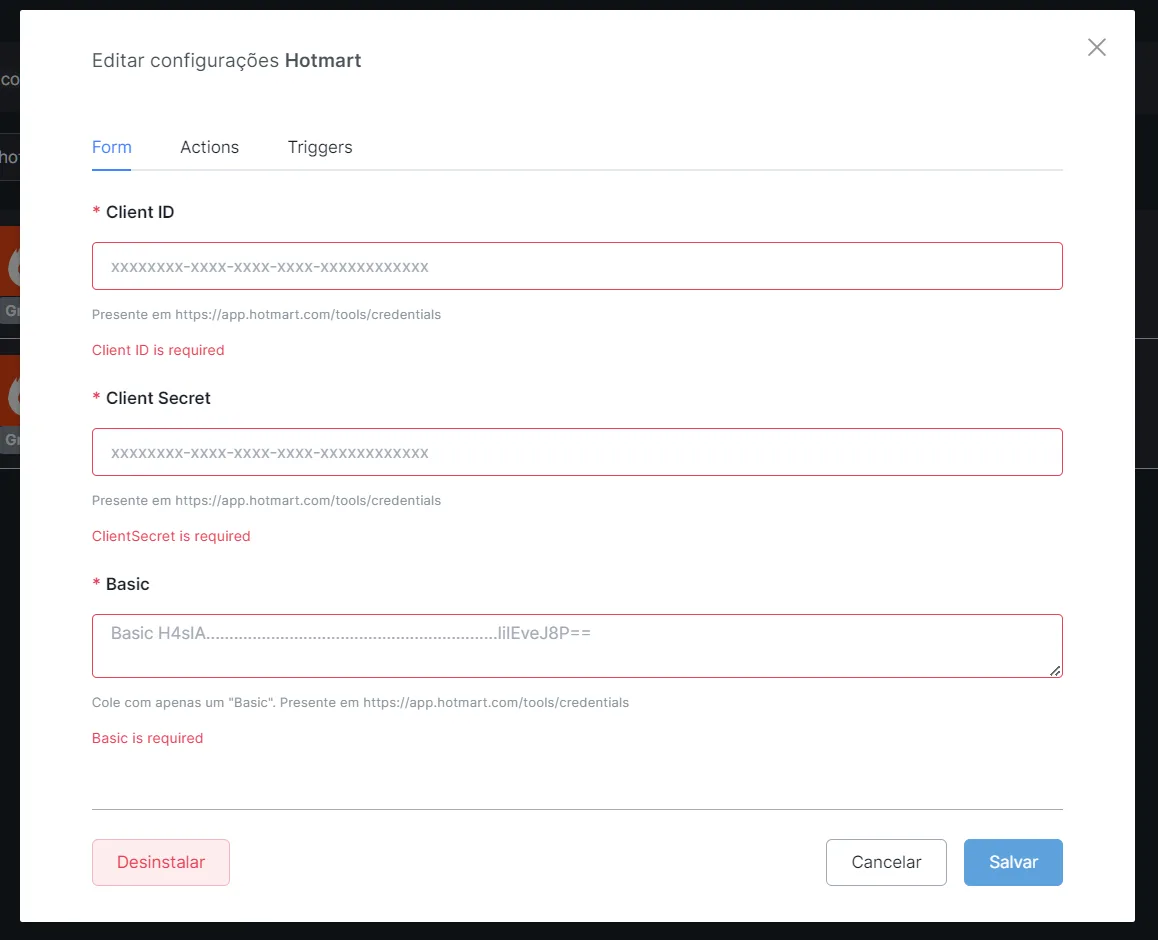
- Configure Credentials in NicoChat:
In NicoChat, paste the copied credentials into the appropriate fields and save.
In "Tools", go to "Webhooks".
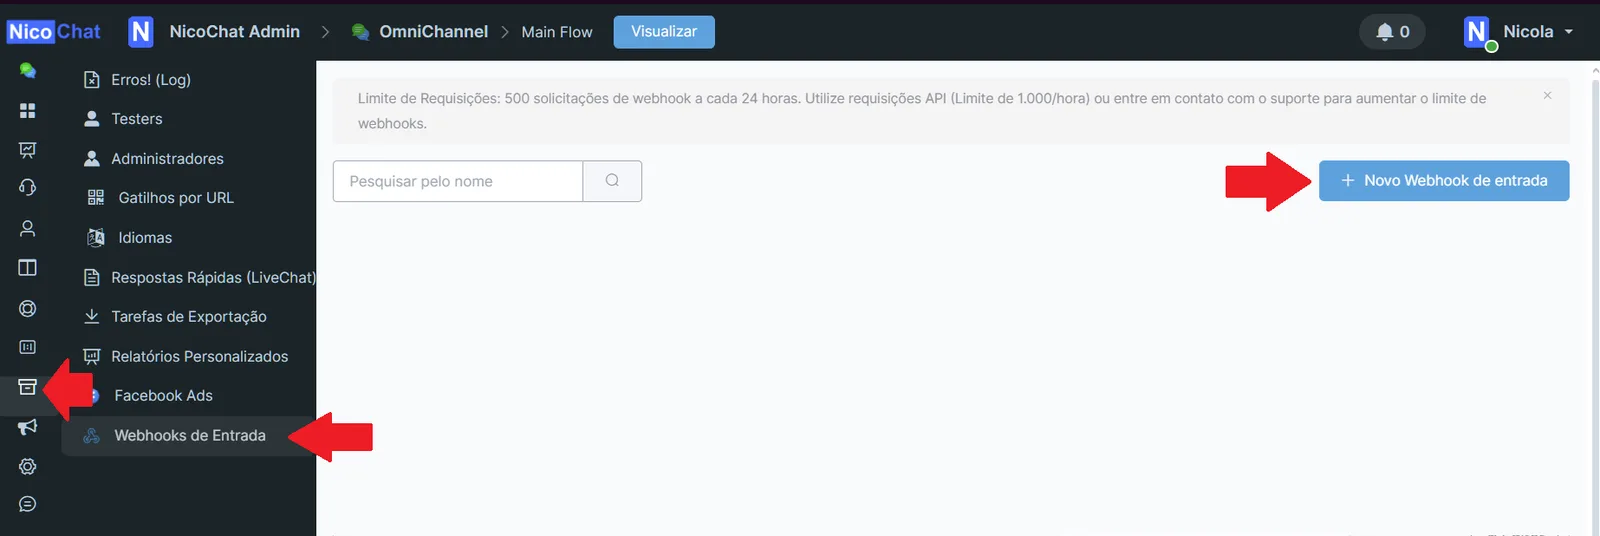
Create a new Webhook, name it "Hotmart" and copy the URL provided.

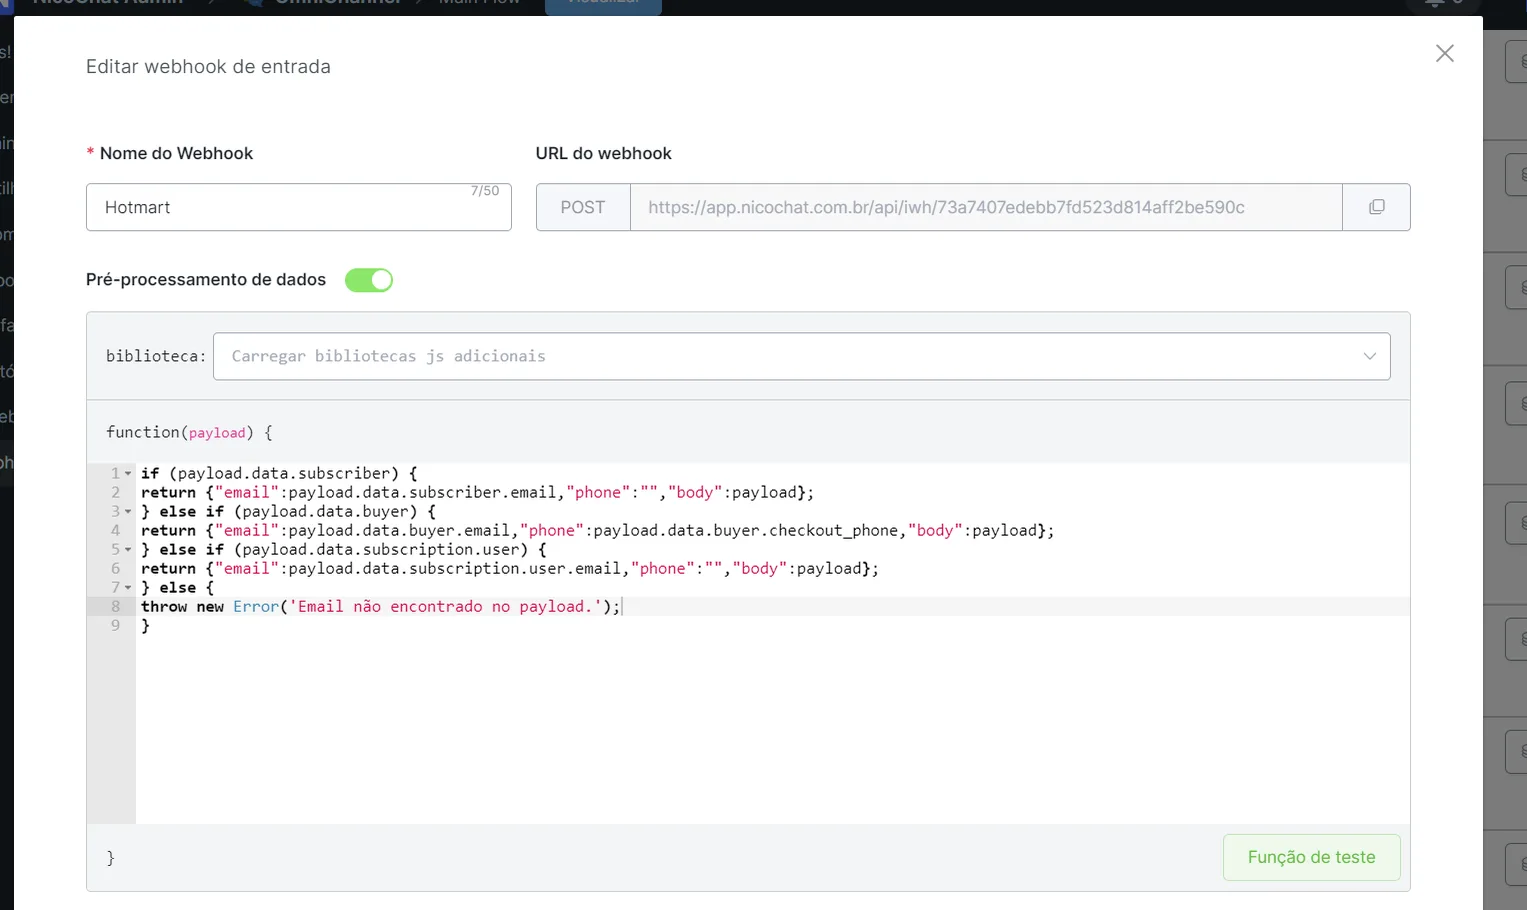
Click “Edit”, enable “Data Preprocessing” and insert the code below:
function formatarTelefone(telefone) {
    let whatsapp = telefone.replace(/\D/g, '');
    // Adicione aqui exceções de DDi que não devem receber o tratamento do Script
    if (telefone.startsWith('+55') || telefone.startsWith('55') || (telefone.startsWith('+') && !telefone.startsWith('+55'))) {
        return whatsapp;
    }

    const ddi = "+55";
    let ddd;

    if (whatsapp.length === 10 || whatsapp.length === 11) {
        ddd = whatsapp.slice(0, 2);
        whatsapp = whatsapp.slice(2);
        if (parseInt(ddd, 10) <= 28) {
            whatsapp = '9' + whatsapp.slice(-8);
        } else {
            whatsapp = whatsapp.slice(-8);
        }
        return ddi + ddd + whatsapp;
    }
    return whatsapp;
}

if (payload.data.subscriber) {
    return {"email": payload.data.subscriber.email, "phone": "", "body": payload};
} else if (payload.data.buyer) {
    const telefone = payload.data.buyer.checkout_phone || payload.data.buyer.phone;
    return {"email": payload.data.buyer.email, "phone": formatarTelefone(telefone), "body": payload};
} else if (payload.data.subscription.user) {
    return {"email": payload.data.subscription.user.email, "phone": "", "body": payload};
} else {
    throw new Error('Email não encontrado no payload.');
}
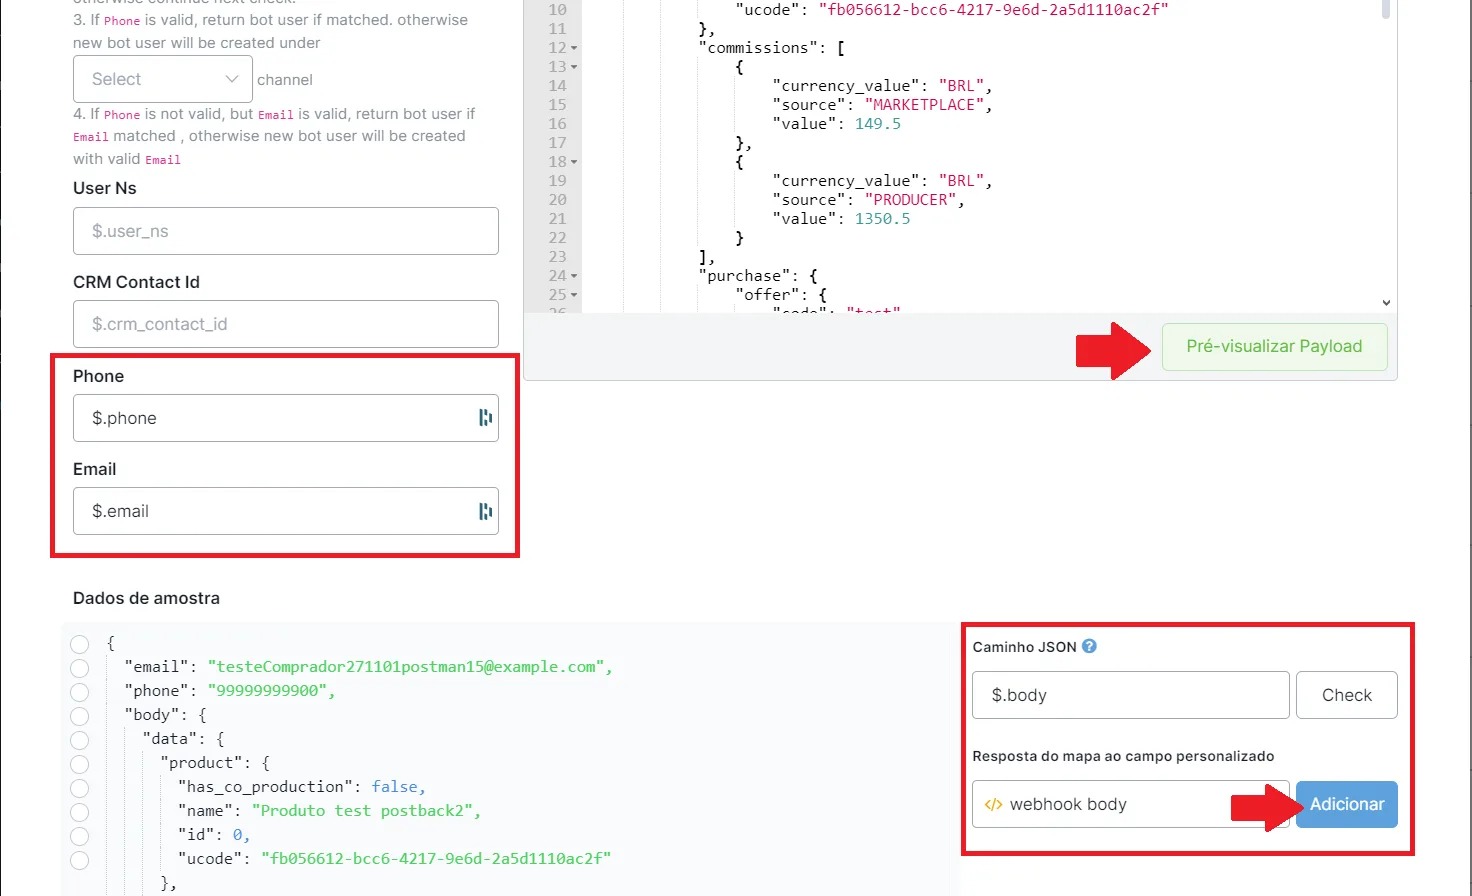
Then click “Preview Payload” and map the Email, Phone and Webhook Body fields as shown below:
Phone: $.phone
Email: $email
webhook body: $.body
(if you do not have it, you can create a variable of the JSON type)
(Click Add)
Create a subflow in NicoChat, insert an action block and select Integrações > Hotmart.
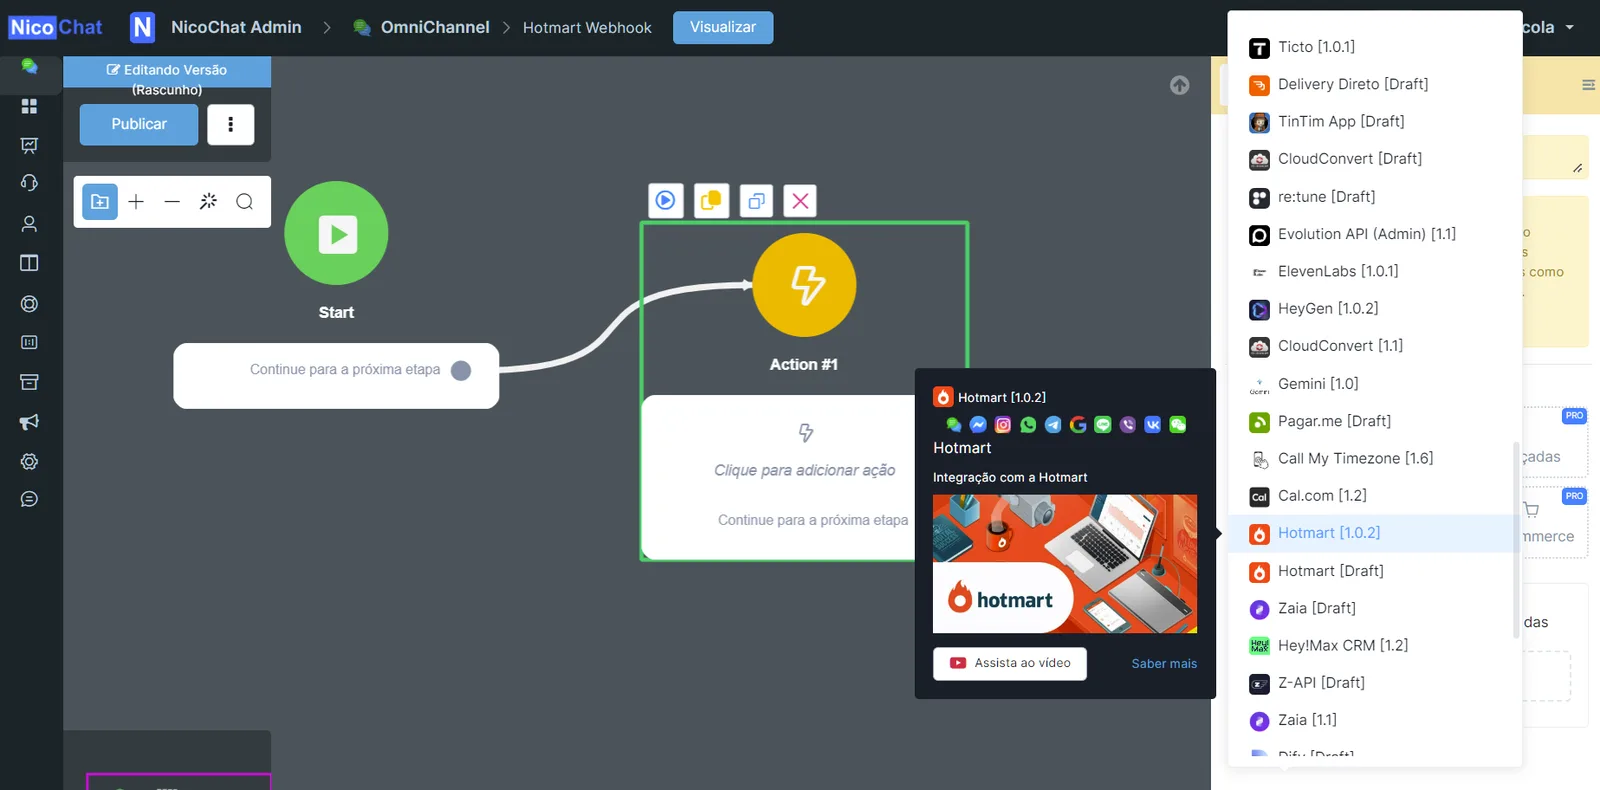
Then select “Webhook” and insert the JSON of the “webhook body” created earlier. Then save.
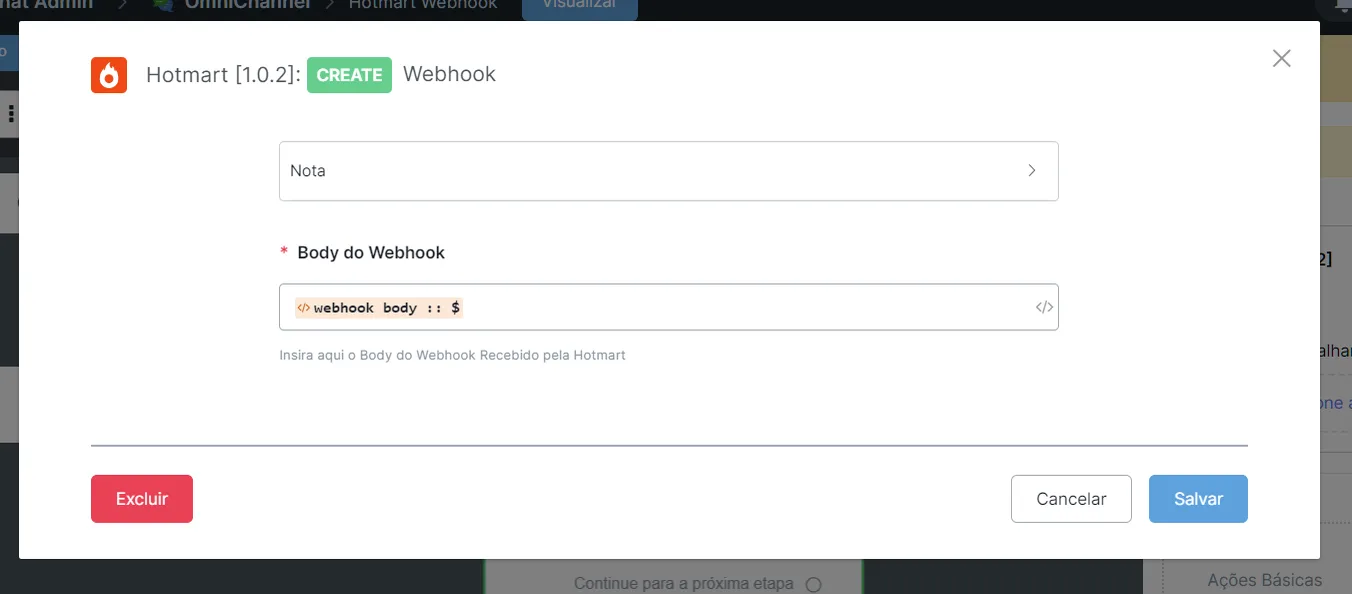
Then go back to Tools > Webhooks and select the flow you created:

On Hotmart, go to "Tools" and "Webhook".
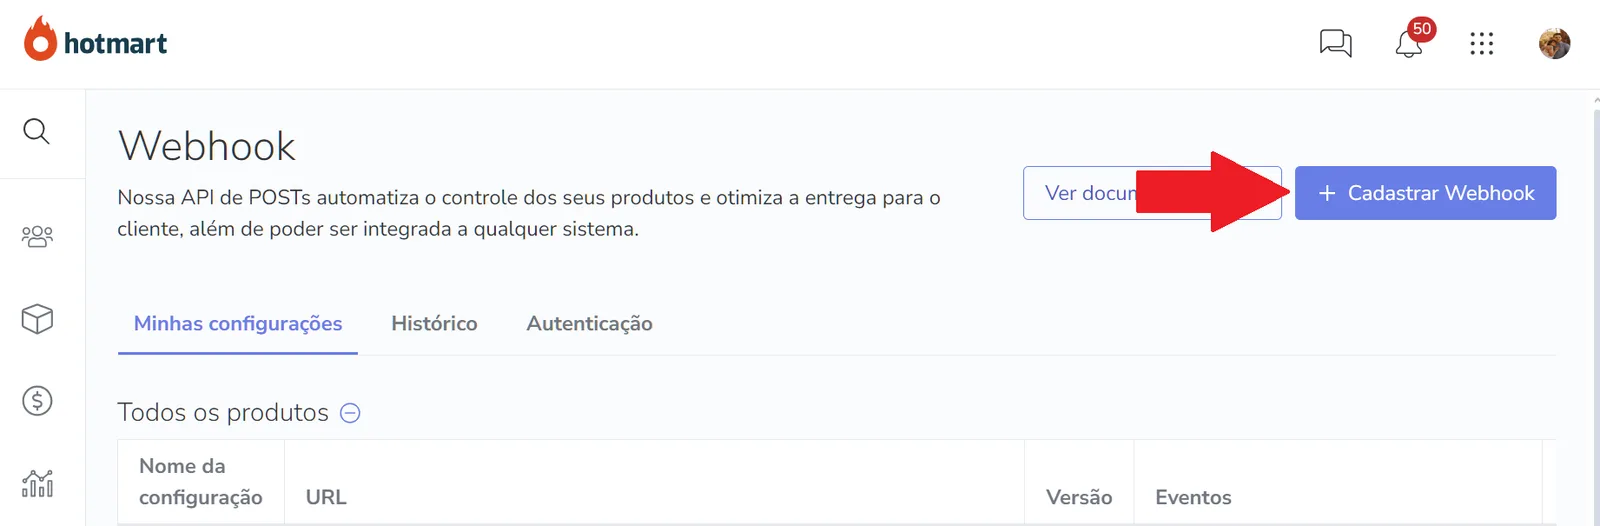
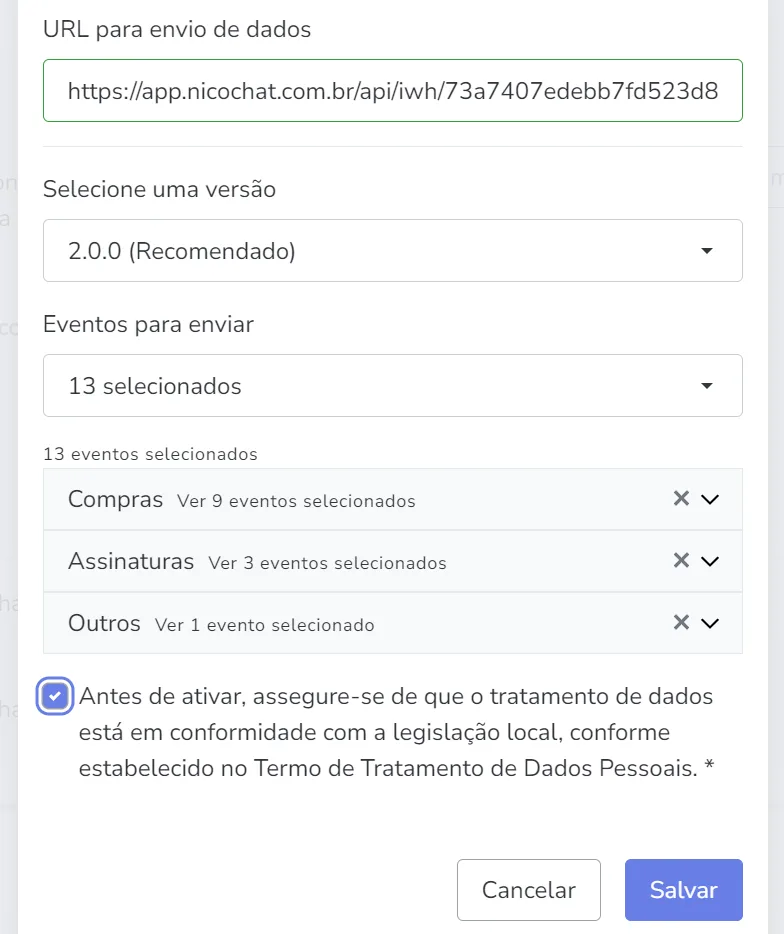
Register a new Webhook by entering the copied URL, select version 2.0.0 and the desired events.
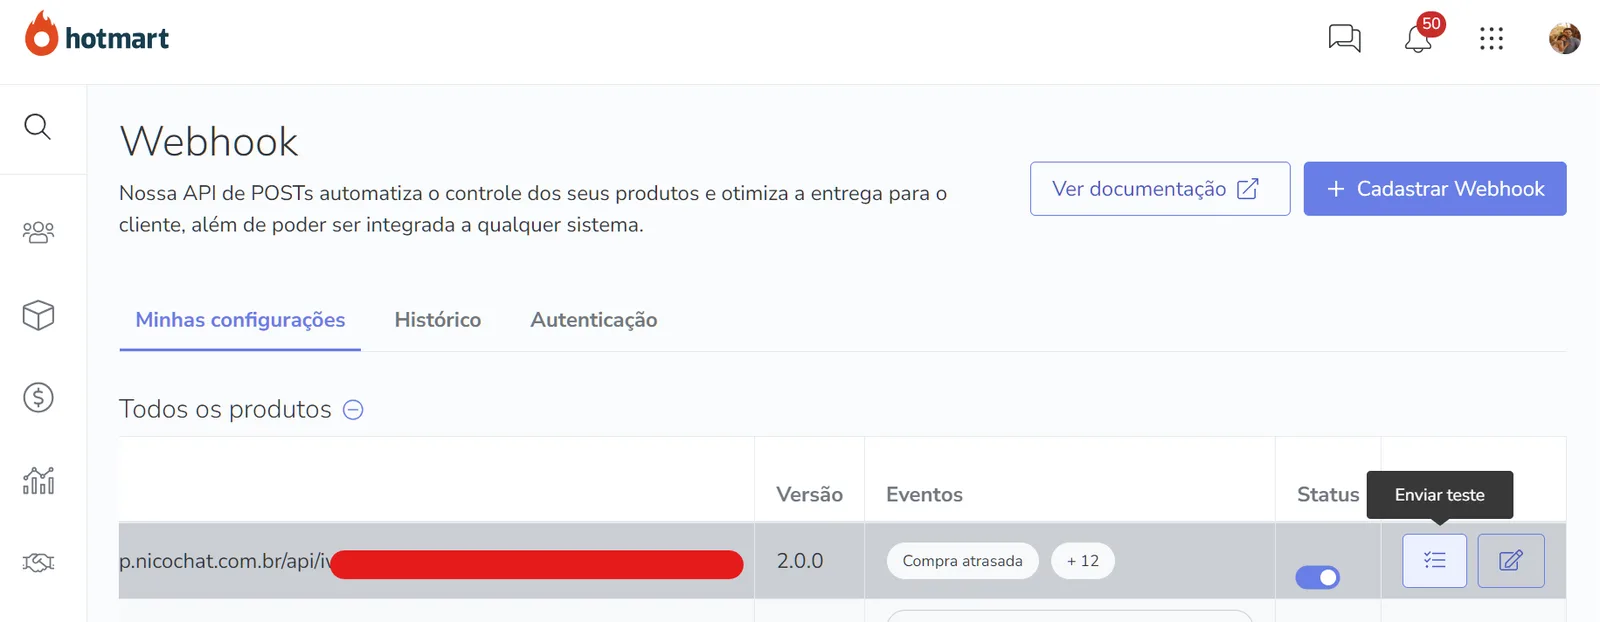
Test the Configuration:
Send a configuration test to make sure everything is working correctly.
- Hotmart Actions:
Create subflows in NicoChat to manage specific actions in the action block > Integrações > Hotmart:
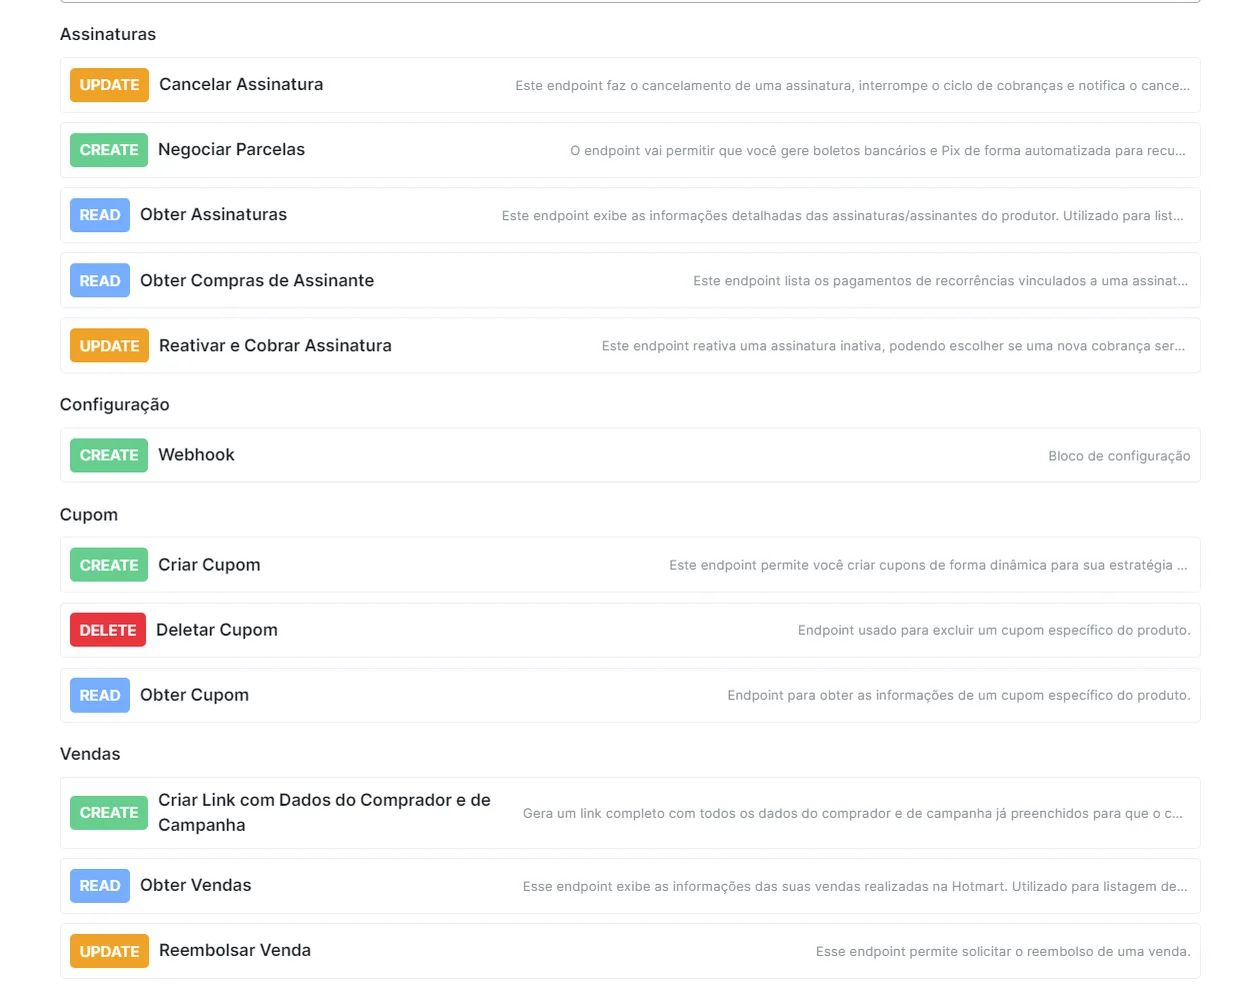
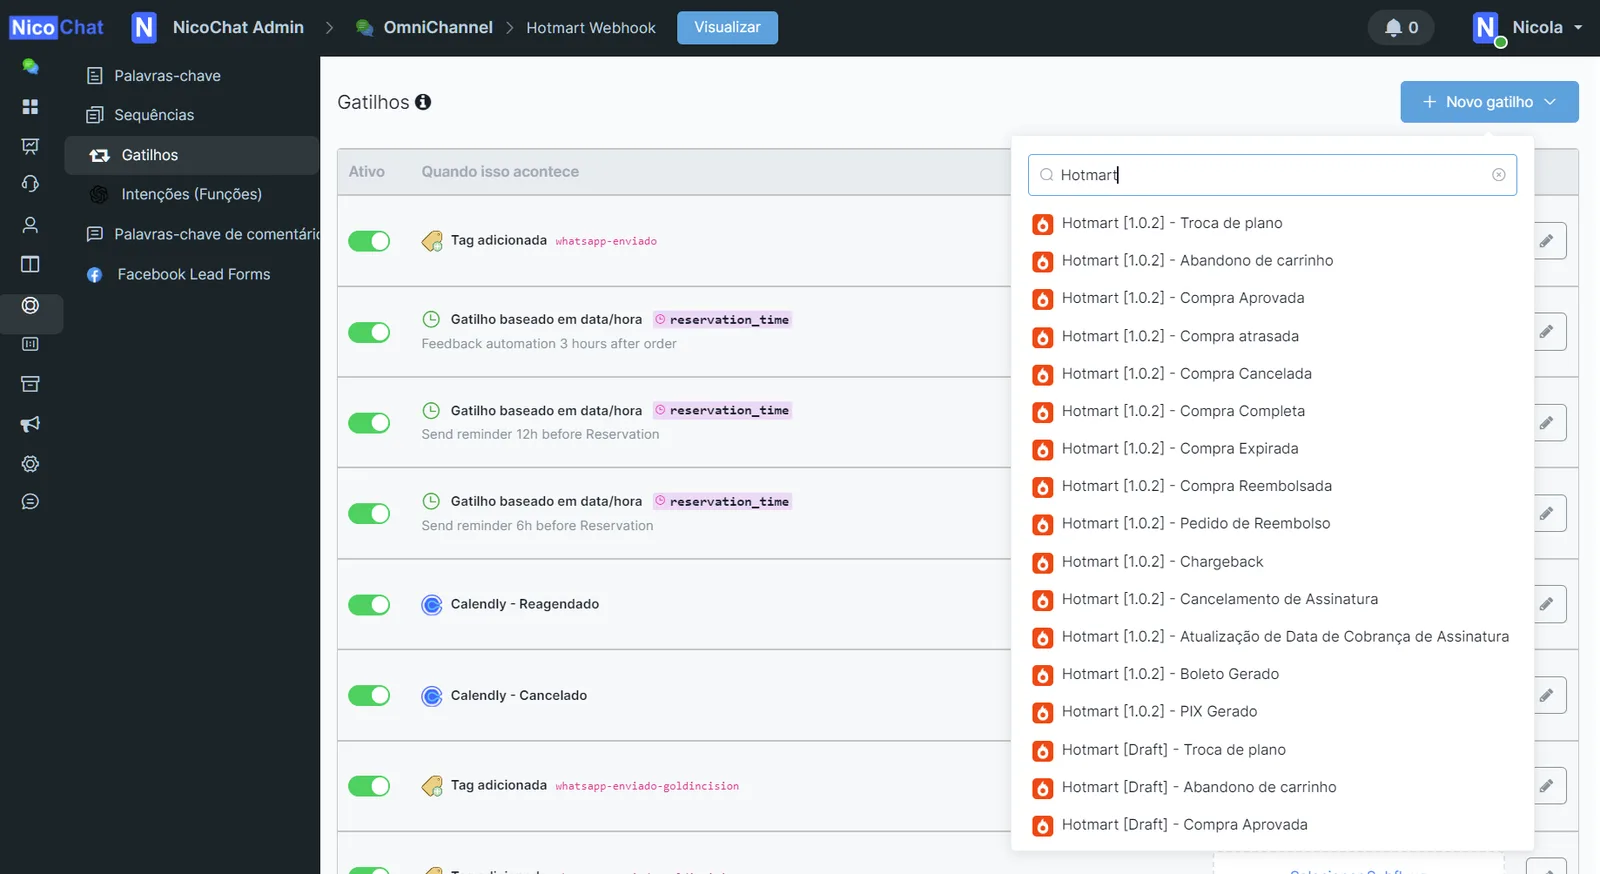
- Automations and Triggers:
Insert Hotmart event triggers:
Thank you for choosing NicoChat for the Hotmart integration, and we hope this guide makes setup easier and improves the efficiency of your operations. See you next time!