

HeroSpark
To automate receiving HeroSpark events in NicoChat, follow the step-by-step guide below
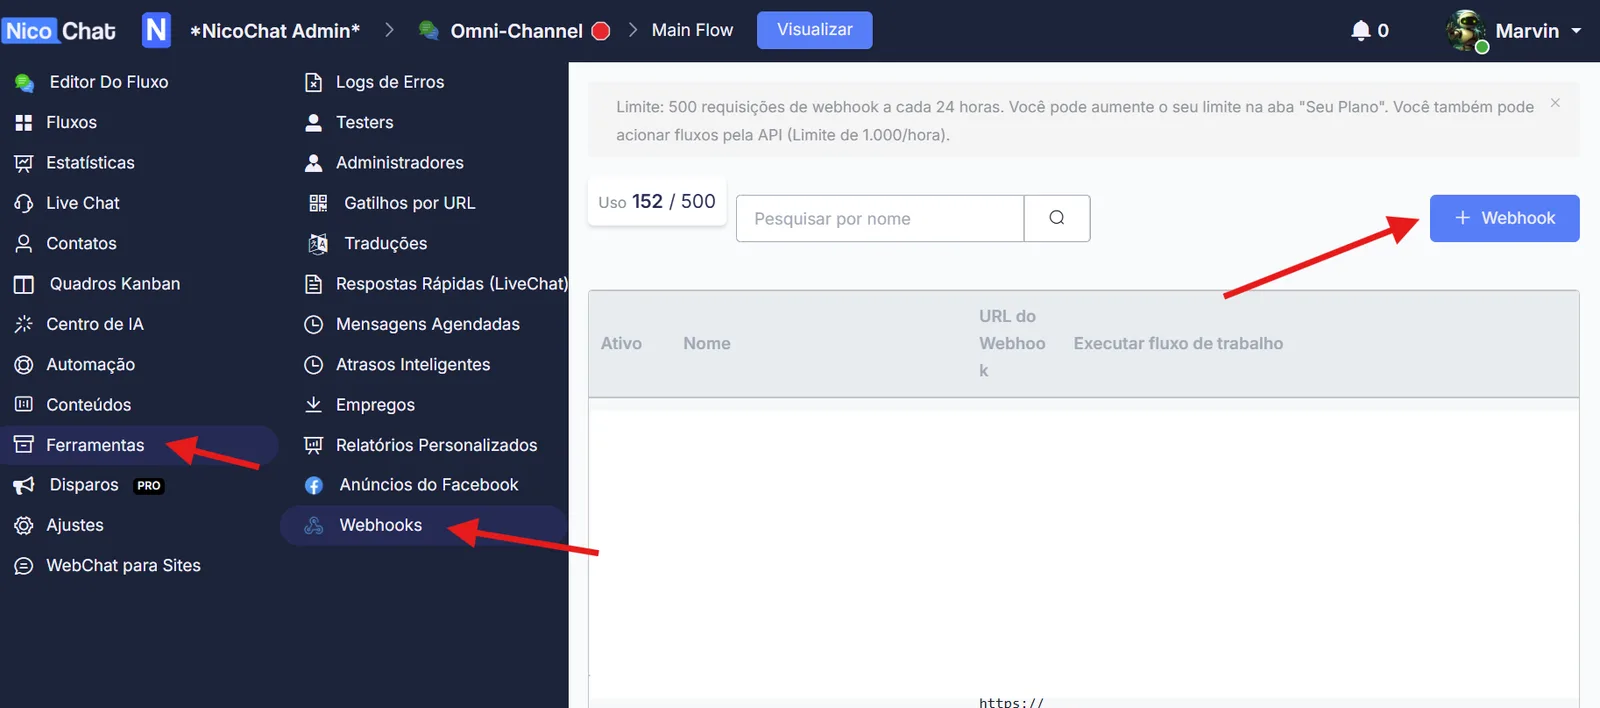
Open your channel. Go to Tools > Webhook > click the "+ Webhook" button to generate the NicoChat Webhook integration link.
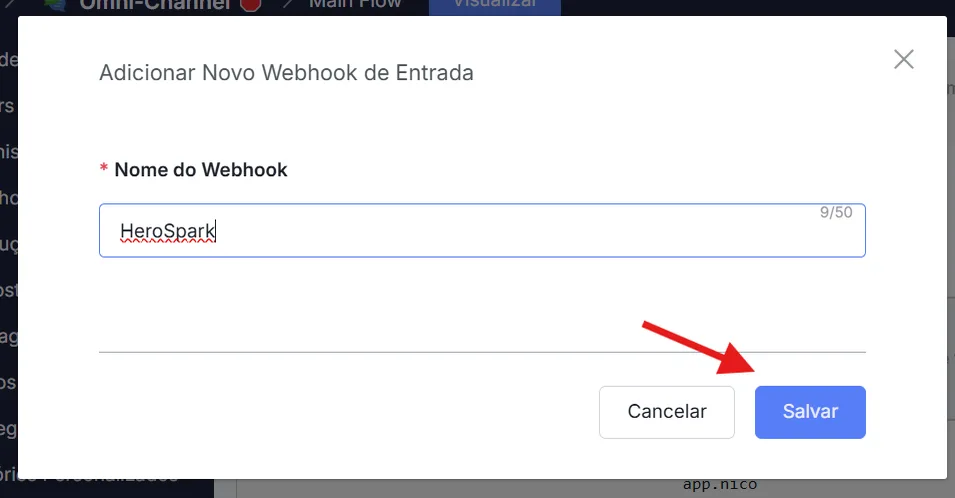
Enter “HeroSpark” and click save:
After creating your Webhook in NicoChat, enable the URL, copy the URL generated by the tool and save it to use in the next steps.

Go to Piloto Automático in HeroSpark and create the automation with the desired template, choosing the webhook option. In this example, the “Pagamento Confirmado” template was used, but any of them can be used.
Configure the automation fields as follows:
URL:
The webhook copied in NicoChat in Step 2
Method:
Do not change anything: keep the default value (POST)
Headers:
You can leave it blank
Body:
Copy and paste exactly the following code:
{
  "nome": "{{ buyer_name }}",
  "email": "{{ buyer_email }}",
  "phone": "{{ buyer_phone_ddi }}{{ buyer_phone }}",
  "cpf_cnpj": "{{ buyer_document_id }}",
  "boletourl": "{{ bank_slip_file_url }}",
  "pixqrcode": "{{ pix_qr_code_url }}",
  "id_produto": "{{ product_id }}",
  "id_pagamento": "{{ payment_id }}",
  "nome_produto": "{{ product_name }}",
  "pixcopiacola": "{{ pix_code }}",
  "data_pagamento": "{{ payment_date }}",
  "boletocodbarras": "{{ bank_slip_barcode }}",
  "valor_pagamento": "{{ offer_price | money }}",
  "datavencboleto": "{{ boleto_expiration_at }}",
  "dataexpirapix": "{{ pix_expiration_at }}",
  "motivorecuscartao": "{{ credit_card_refused_message }}",
  "statusassinatura": "{{ subscription_status }}",
  "terminocicloassinatura": "{{ subscription_available_until }}"
}
Warning: Don't forget to “Salvar” and “Ativar” your automation!
Click the “Testar Automação” button in HeroSpark, go back to the NicoChat automation and edit the webhook you created:

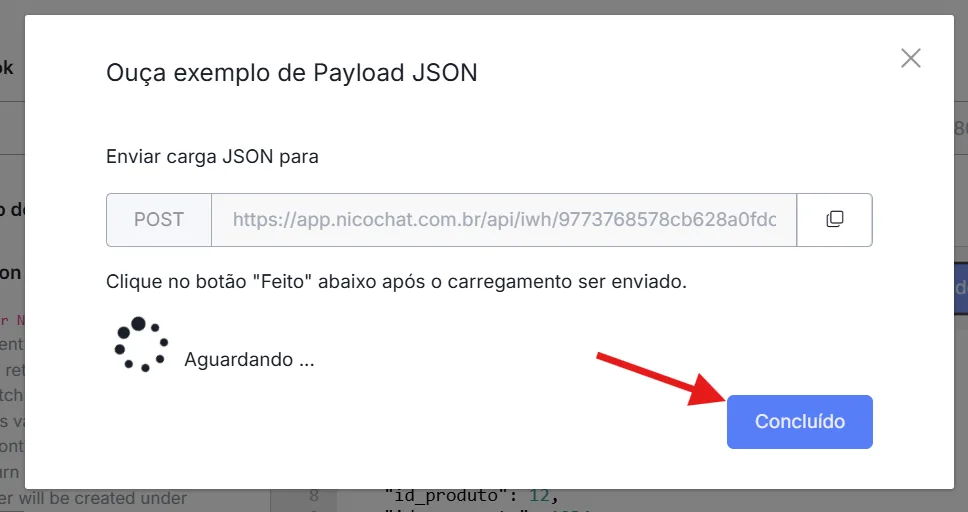
Then click the “Listen to the Payload Data” button and click “Done” to run the integration tests and check that all the data is arriving.
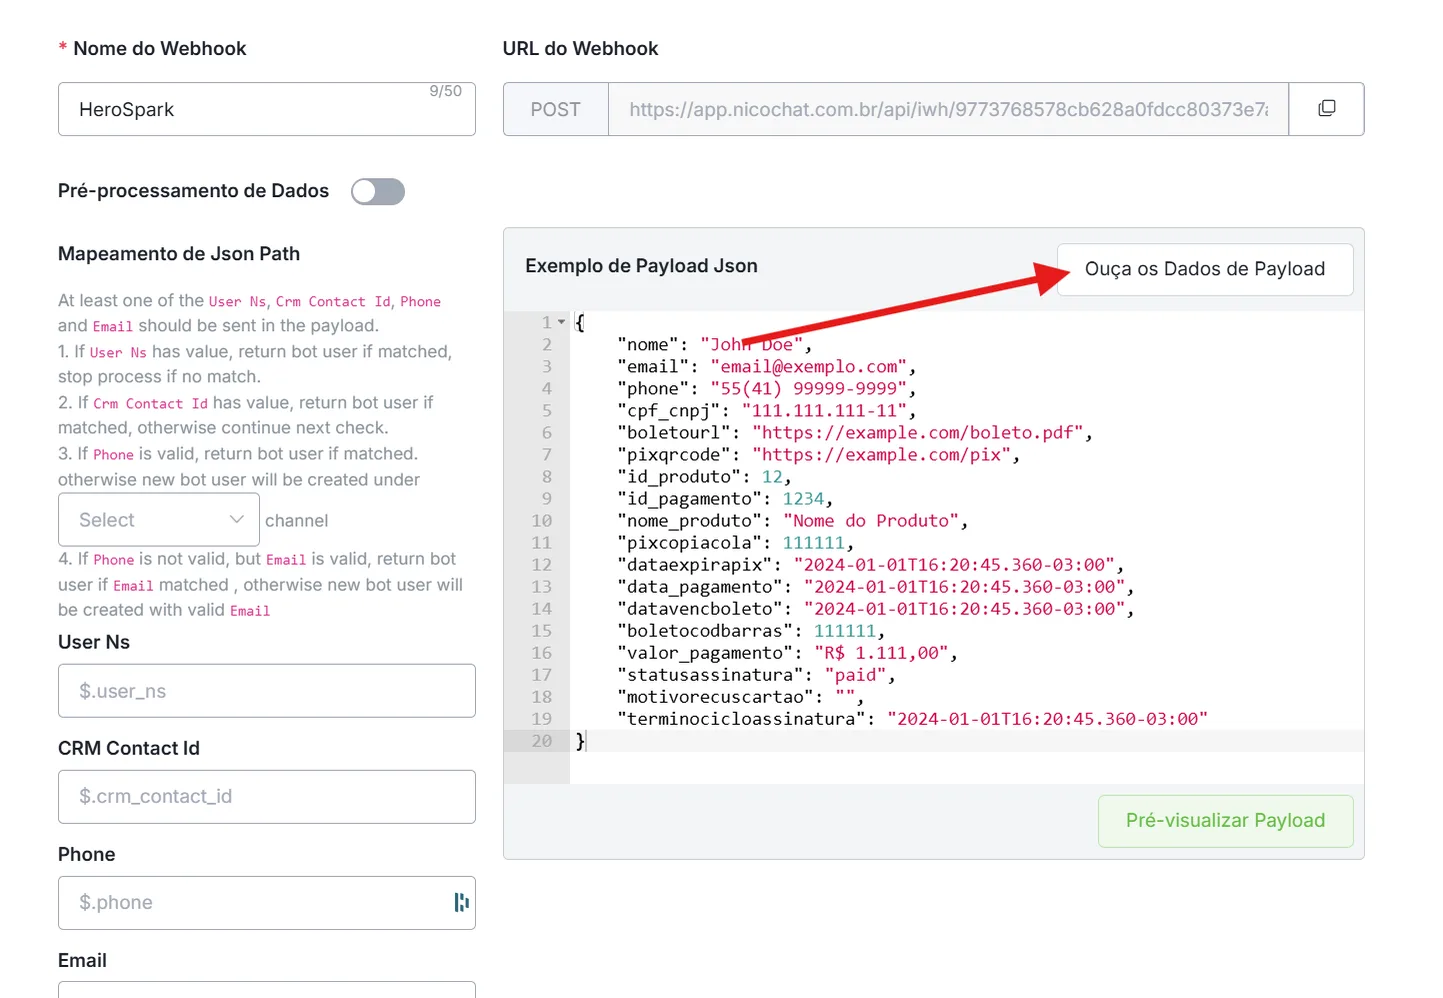
After receiving the data, go to “Json Path Mapping” and fill in the required fields:
Phone:
$.phoneEmail:
$.email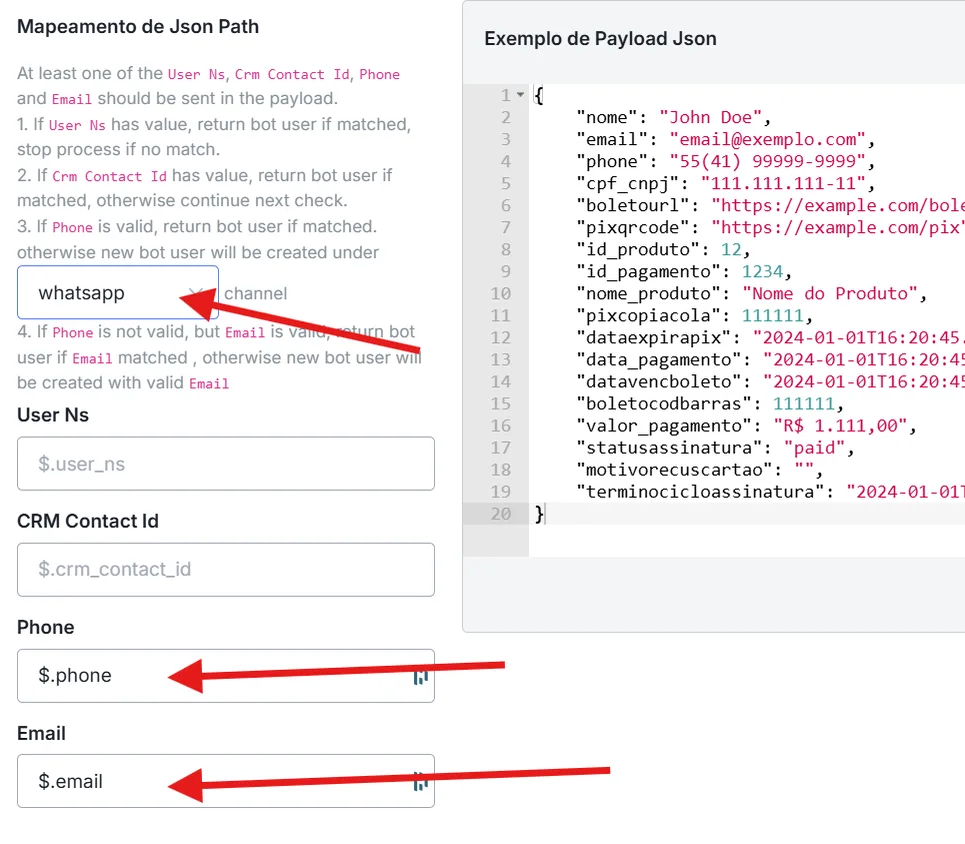
Then click the “Preview Payload” button to save the desired fields.
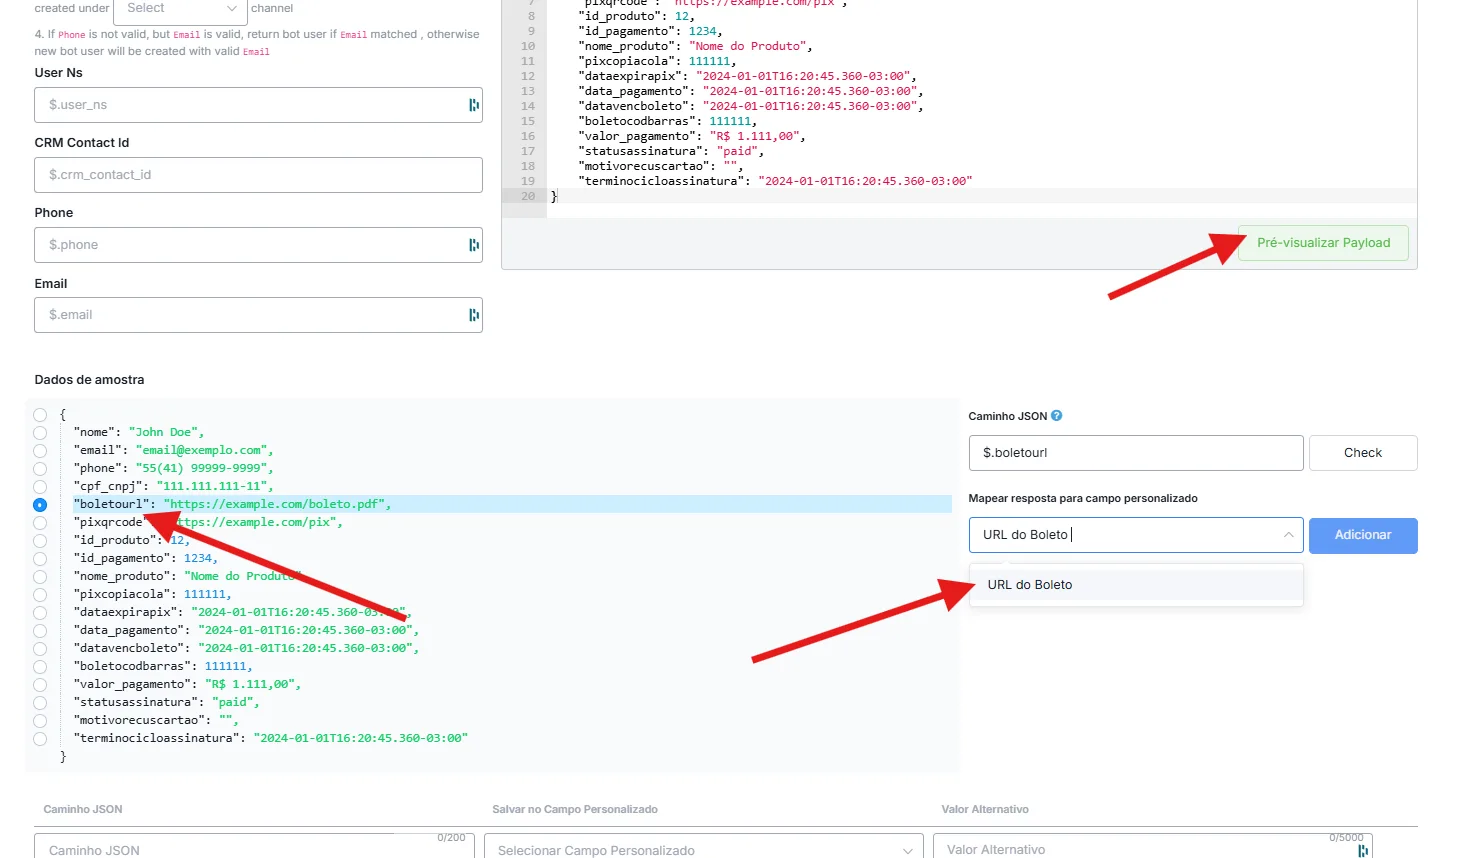
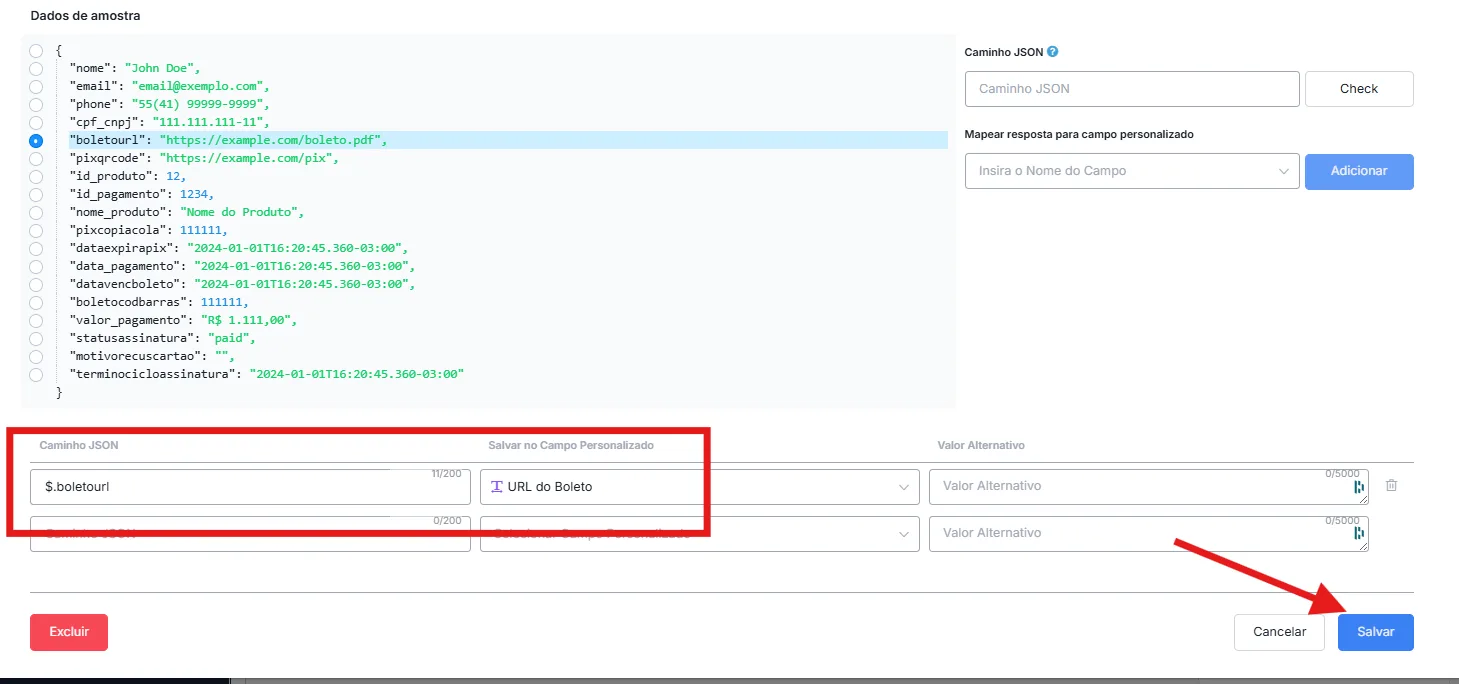
Once all the desired fields are mapped, click “Save”:
To finish, select the flow you want to start:
