

Greenn
Welcome to the guide for integrating NicoChat with the Greenn NicoApp. This documentation provides a detailed step-by-step on how to configure and use NicoChat's features.
Welcome to the guide for integrating NicoChat with the Greenn NicoApp. This documentation provides a detailed step-by-step on how to configure and use NicoChat's features together with Greenn. The integration automates interactions through Checkout actions via Webhook, processes data and manages communications efficiently.
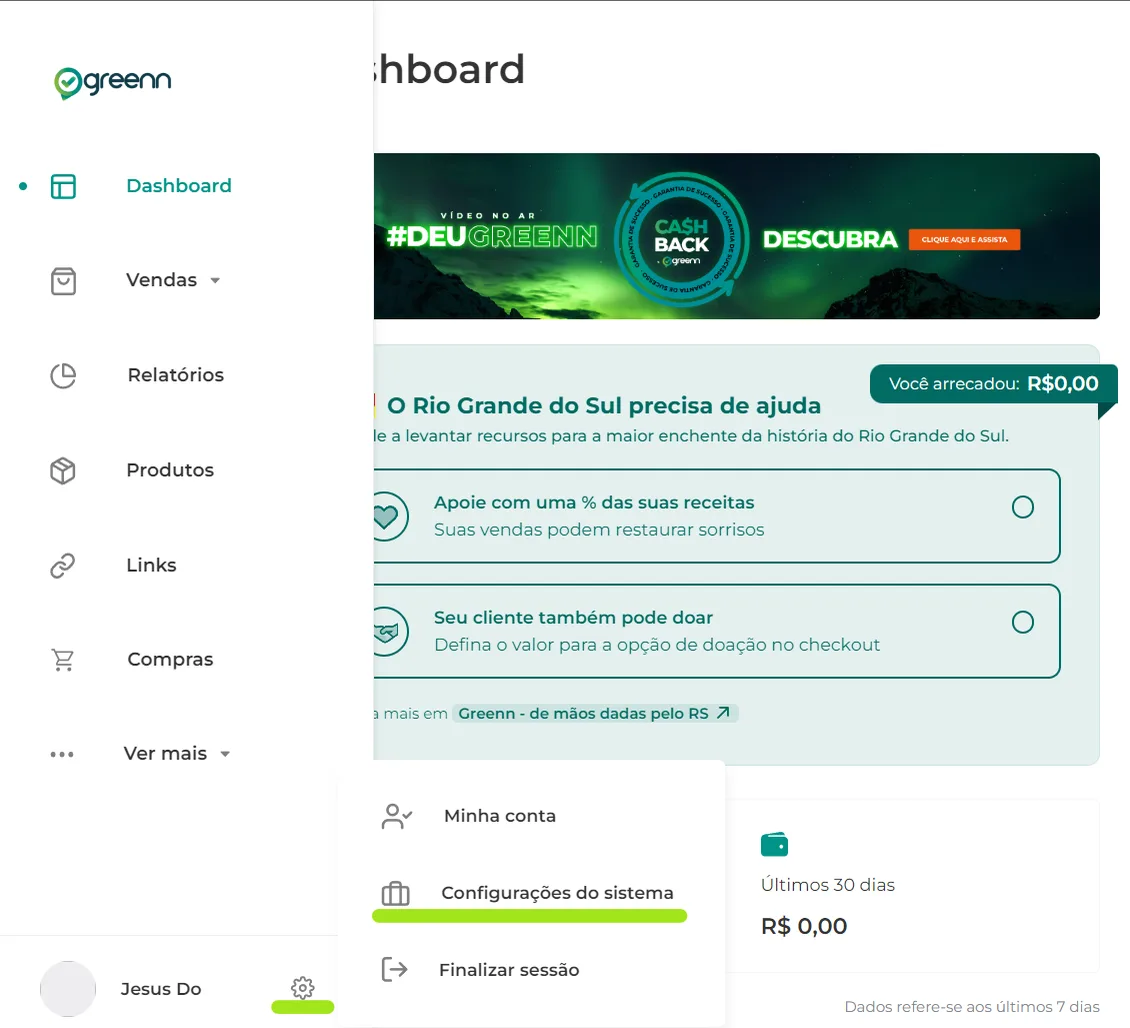
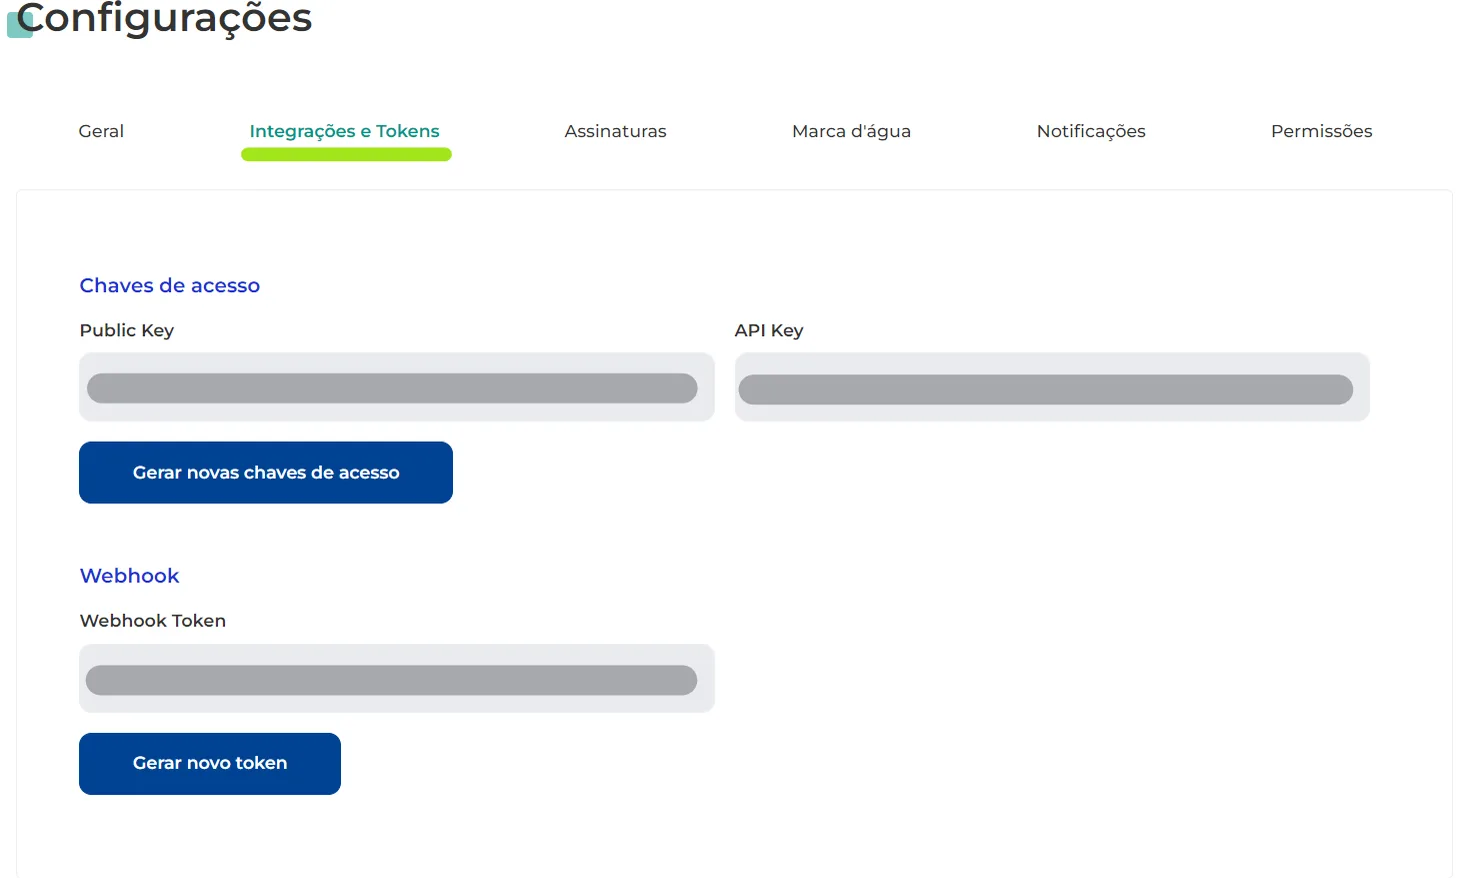
To make requests via Webhook, you first need your Webhook Token. To get it, go to: System Settings > Integrations and Tokens.
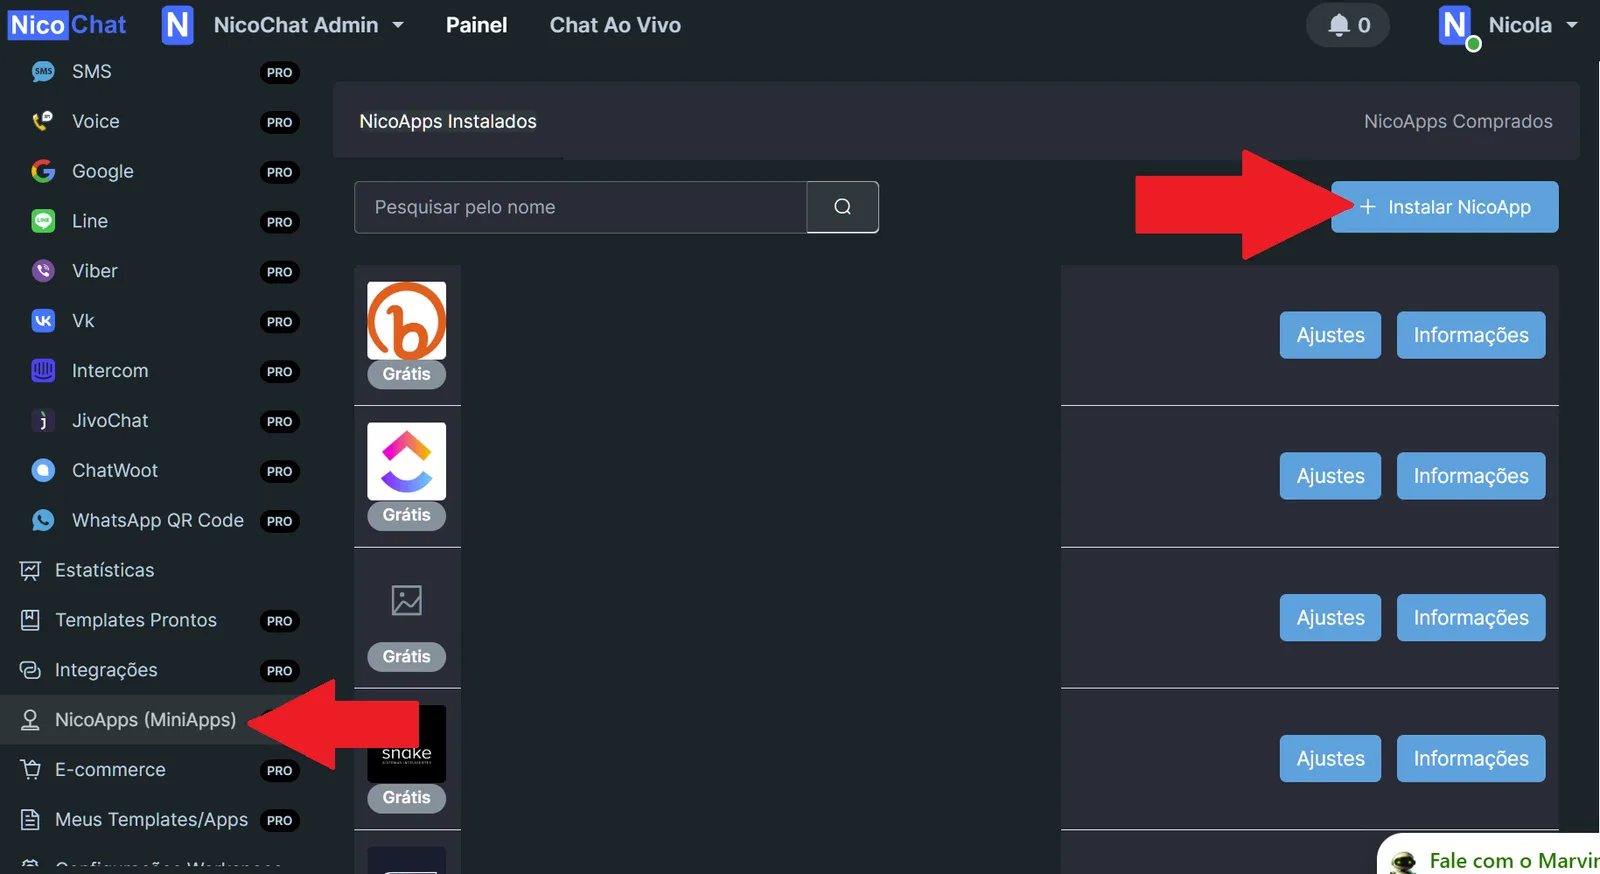
- Go to the "NicoApps" section in NicoChat.
- Select and install the latest version available for Greenn (e.g.: 1.1, 1.2).
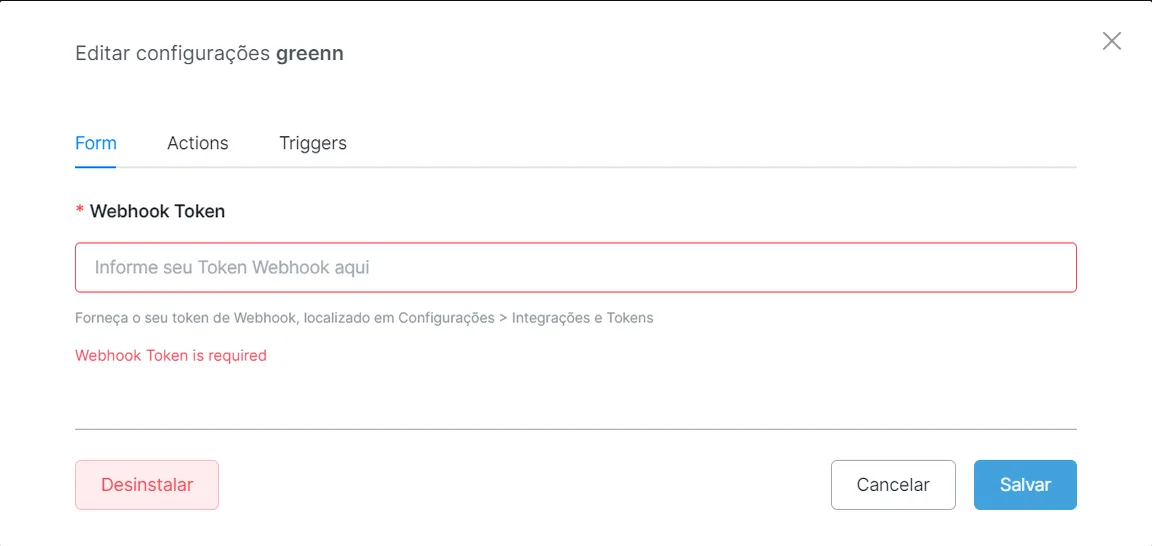
- Configure the Credentials in NicoChat:
In NicoChat, paste the copied credentials into the appropriate fields and save.
In "Tools", go to "Webhooks".
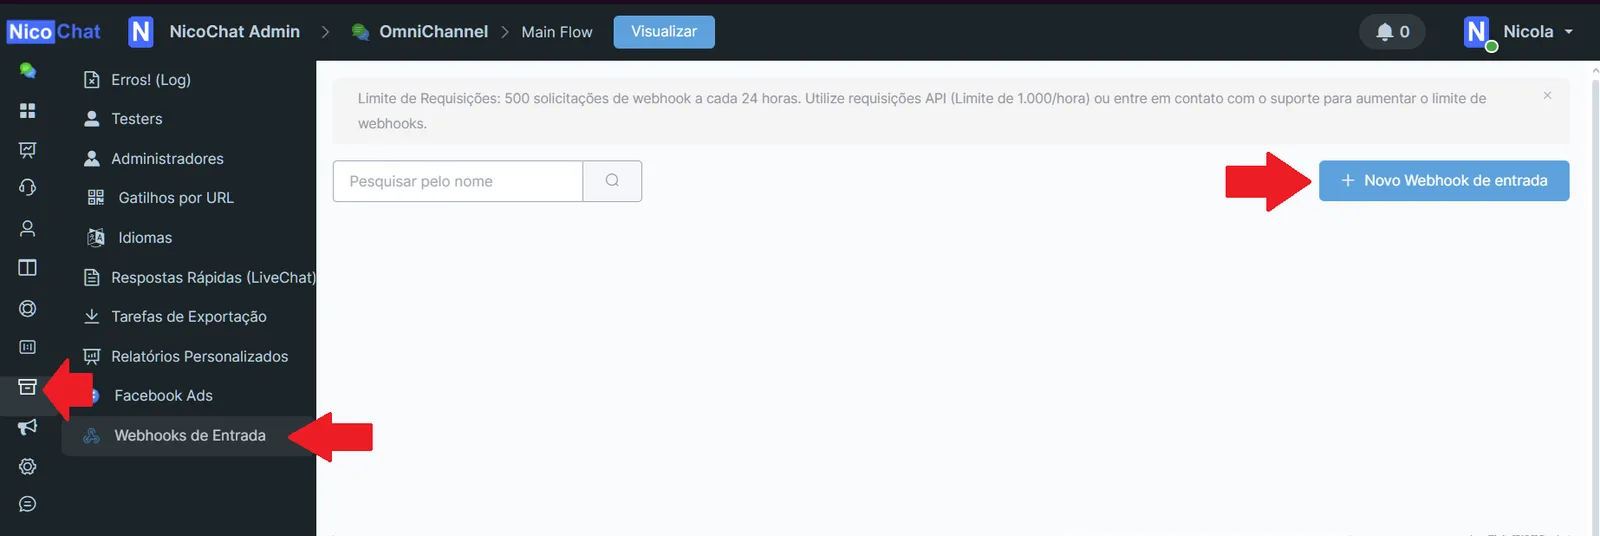
Create a new Webhook, naming it "Green", and copy the URL provided.

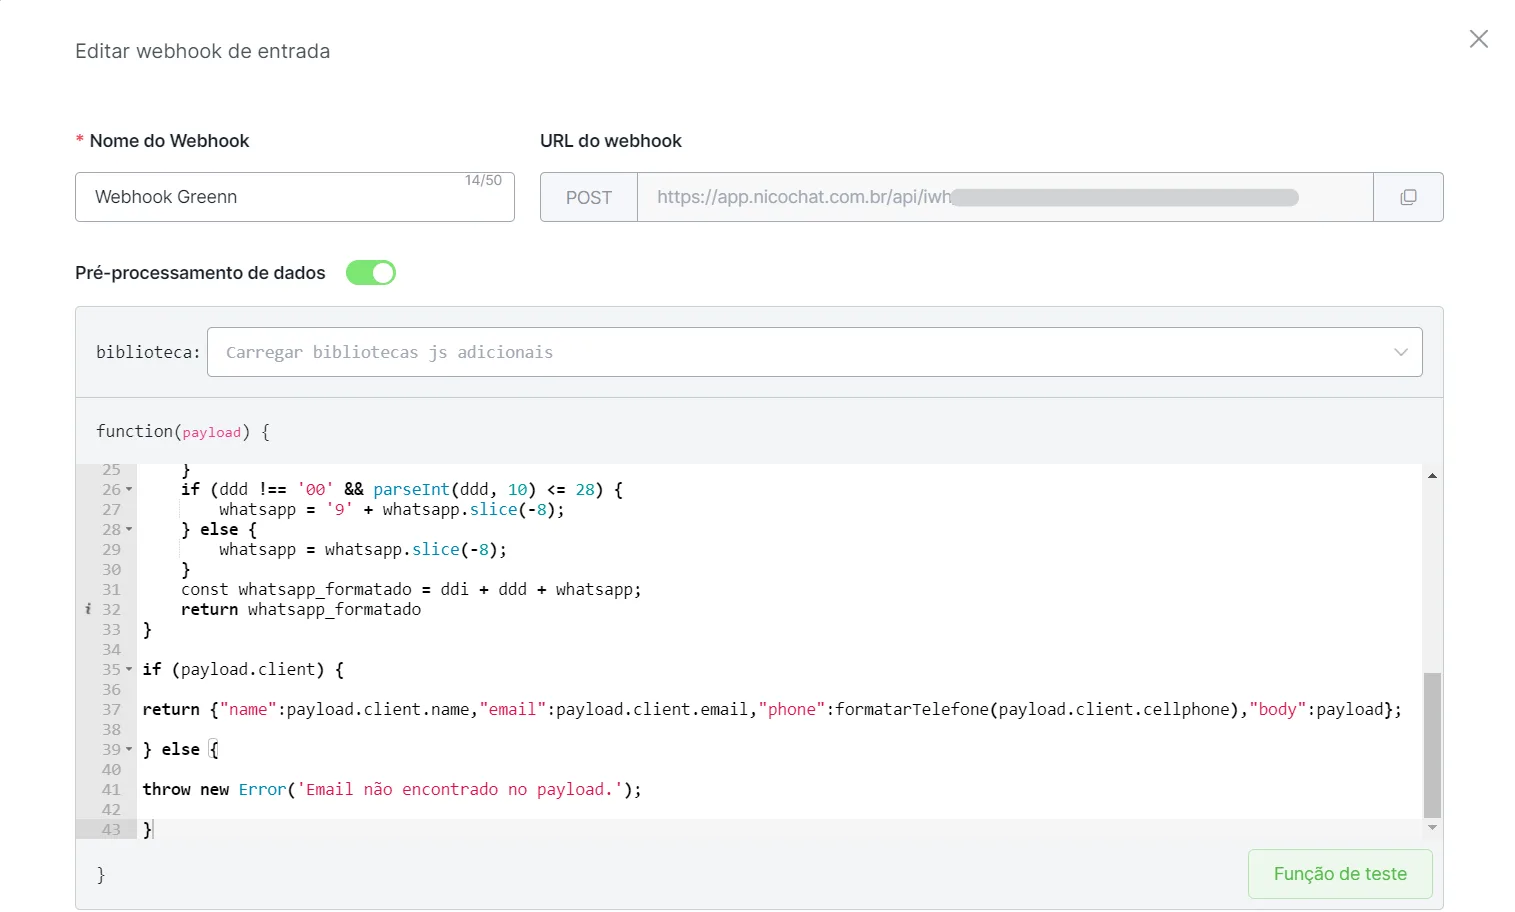
Click “Edit”, enable “Data Preprocessing” and insert the code below:
function firstName(nomeCompleto){
    const parts = nomeCompleto.split(' ');
    const first_name = parts[0];
    return first_name
}

function lastName(nomeCompleto){
    const parts = nomeCompleto.split(' ');
    let last_name = parts.slice(1).join(' ') || '';
    return last_name
}

function formatarTelefone(telefone){
    let whatsapp = telefone.replace(/\D/g, '');
    //Adicione aqui exceções de DDi que não devem receber o tratamento do Script
    if (telefone.startsWith('+55') || telefone.startsWith('55') || (telefone.startsWith('+') && !telefone.startsWith('+55'))) {
        return whatsapp;
    }
    const ddi = "+55";
    let ddd;
    if (whatsapp.length === 10 || whatsapp.length === 11) {
        ddd = whatsapp.slice(0, 2);
        whatsapp = whatsapp.slice(2);
        if (parseInt(ddd, 10) <= 28) {
            whatsapp = '9' + whatsapp.slice(-8);
        } else {
            whatsapp = whatsapp.slice(-8);
        }
        return ddi + ddd + whatsapp;
    }
    return whatsapp;
}

if (payload.client) {

return {"name":payload.client.name,"email":payload.client.email,"phone":formatarTelefone(payload.client.cellphone),"body":payload};

} else {

throw new Error('Email não encontrado no payload.');

}
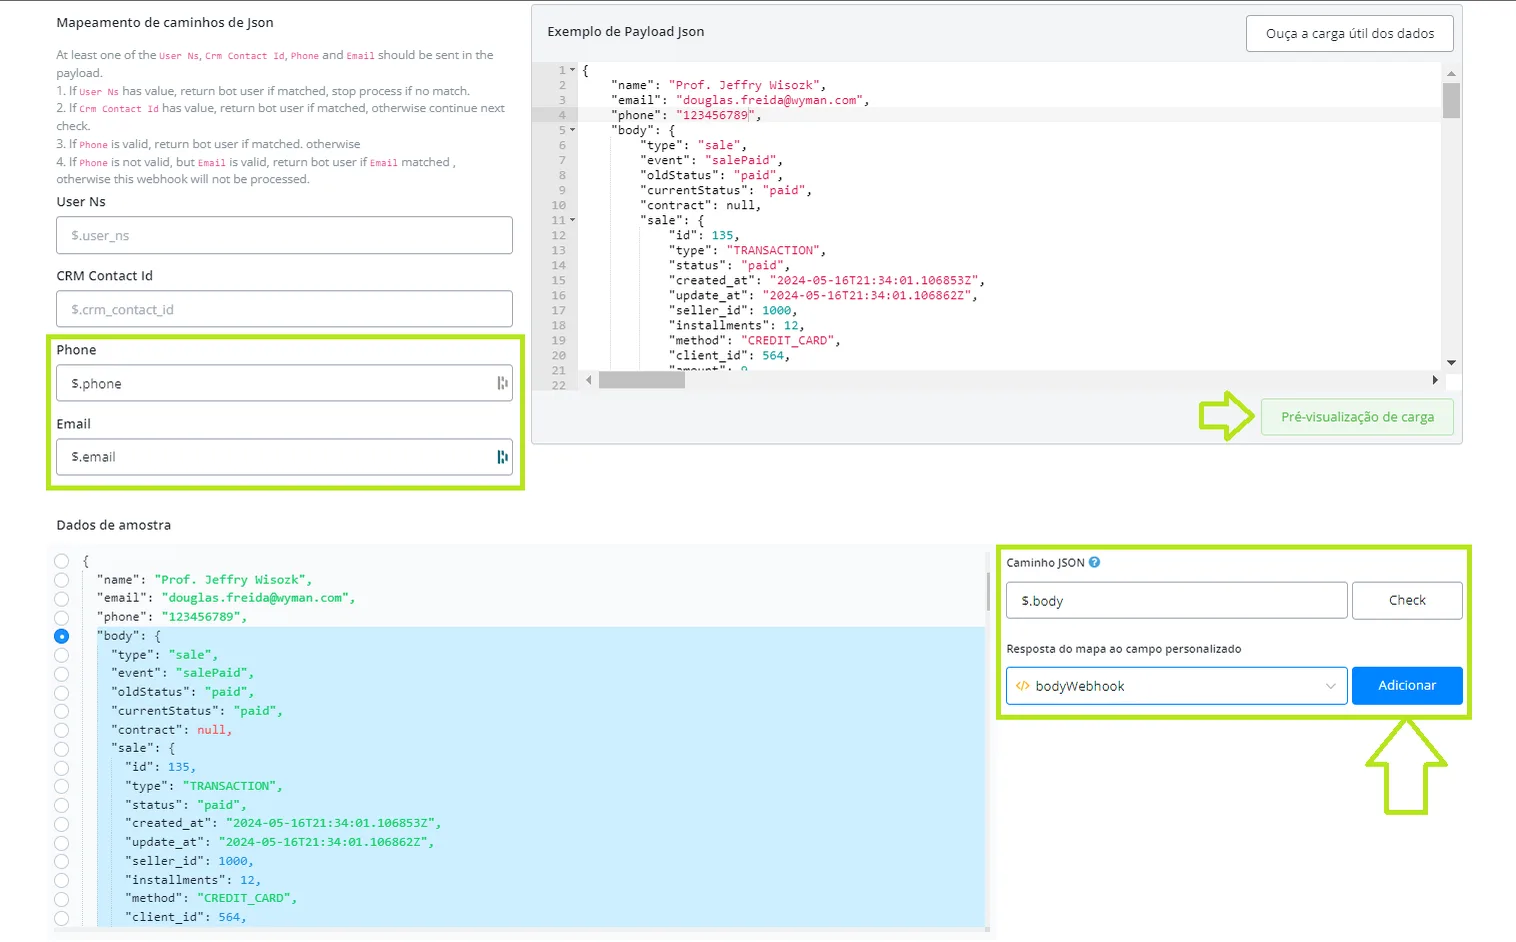
Then click “Preview Payload” and map the Email, Phone and Webhook Body fields as shown below:
JSON Path: $.phone => Map response to field: Phone (Click on Add)
JSON Path: $.email => Map response to field: Email (Click on Add)
JSON Path: $.name => Map response to field: First Name (Click on Add)
JSON Path: $.body => Map response to field: {{JSON variable to store the Webhook body}} (Click on Add)
Create a SubFlow in NicoChat, insert an action block and select Integrations > greenn.
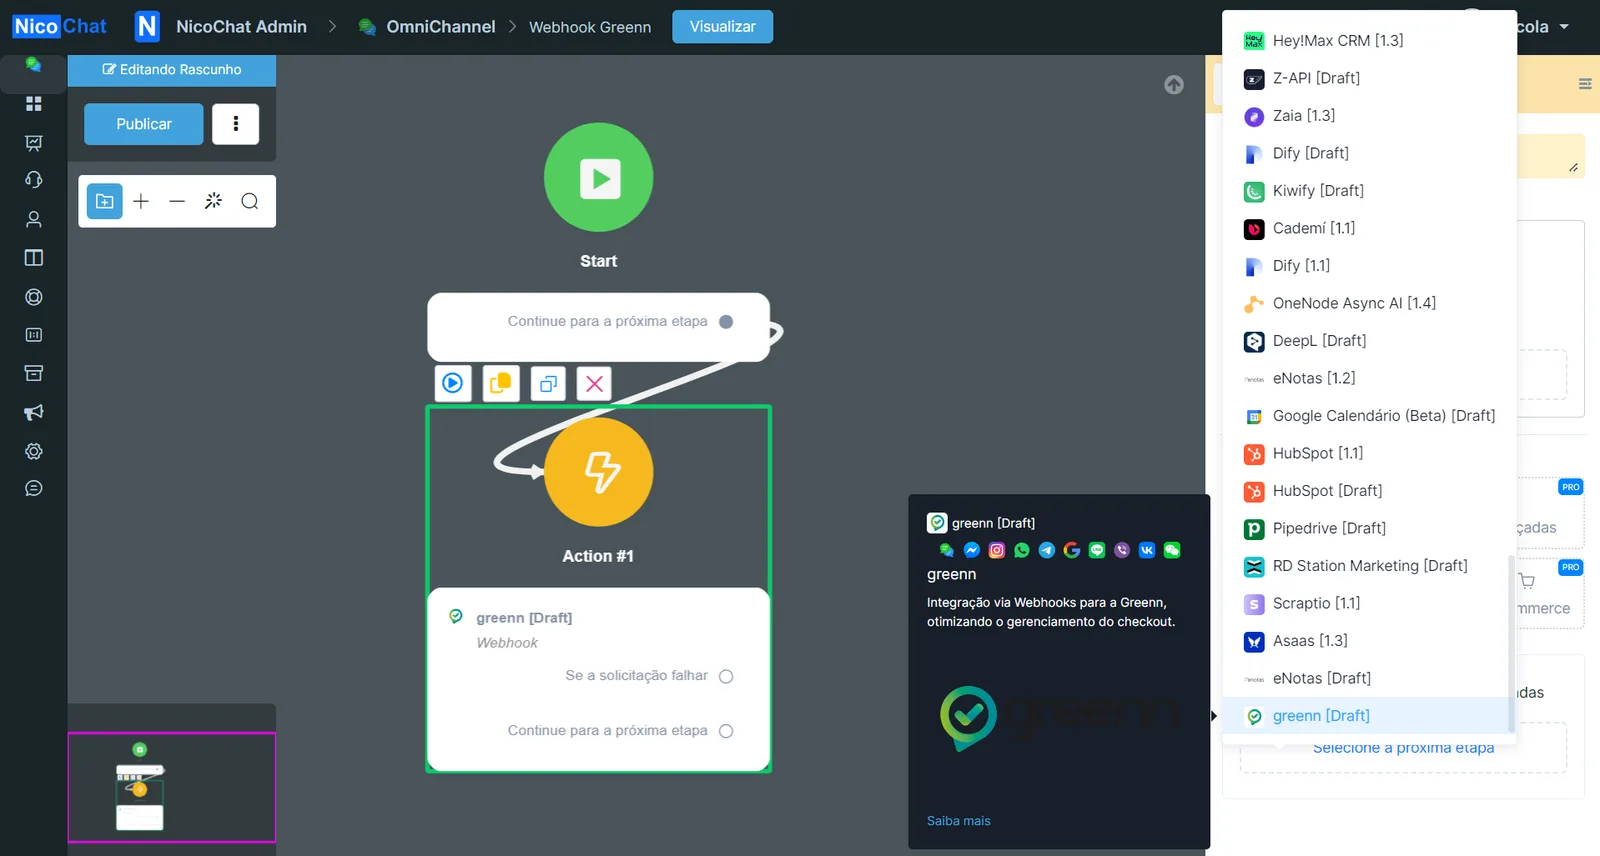
Then select “Webhook” and insert the JSON of the “webhook body” created earlier. Then save.
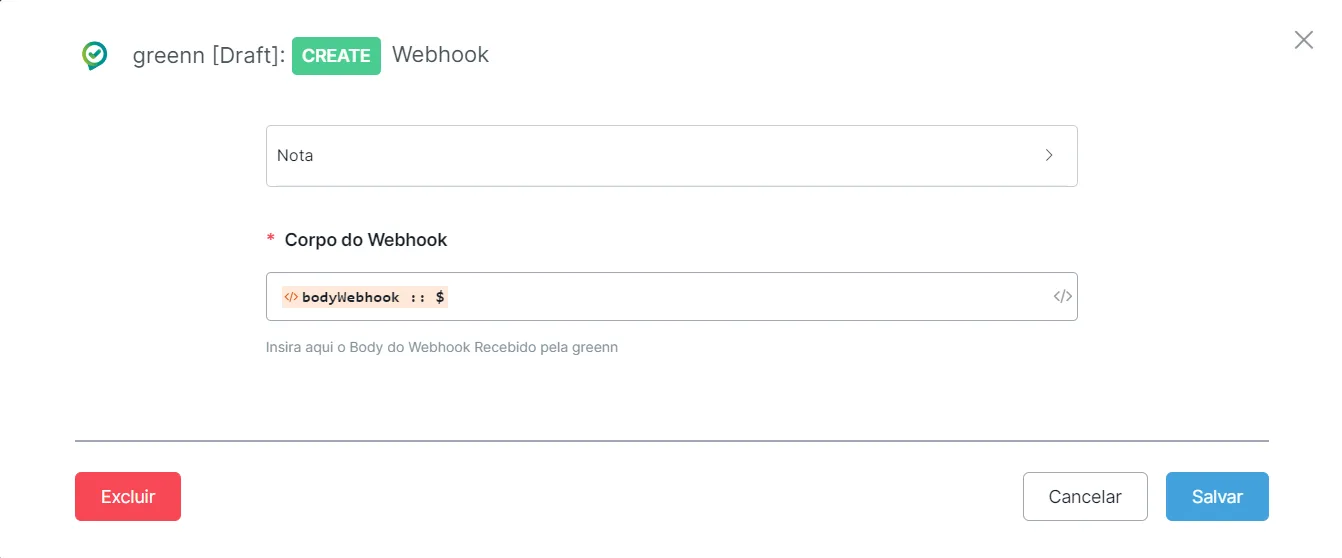
After that, go back to Tools > Webhooks and select the flow you created:

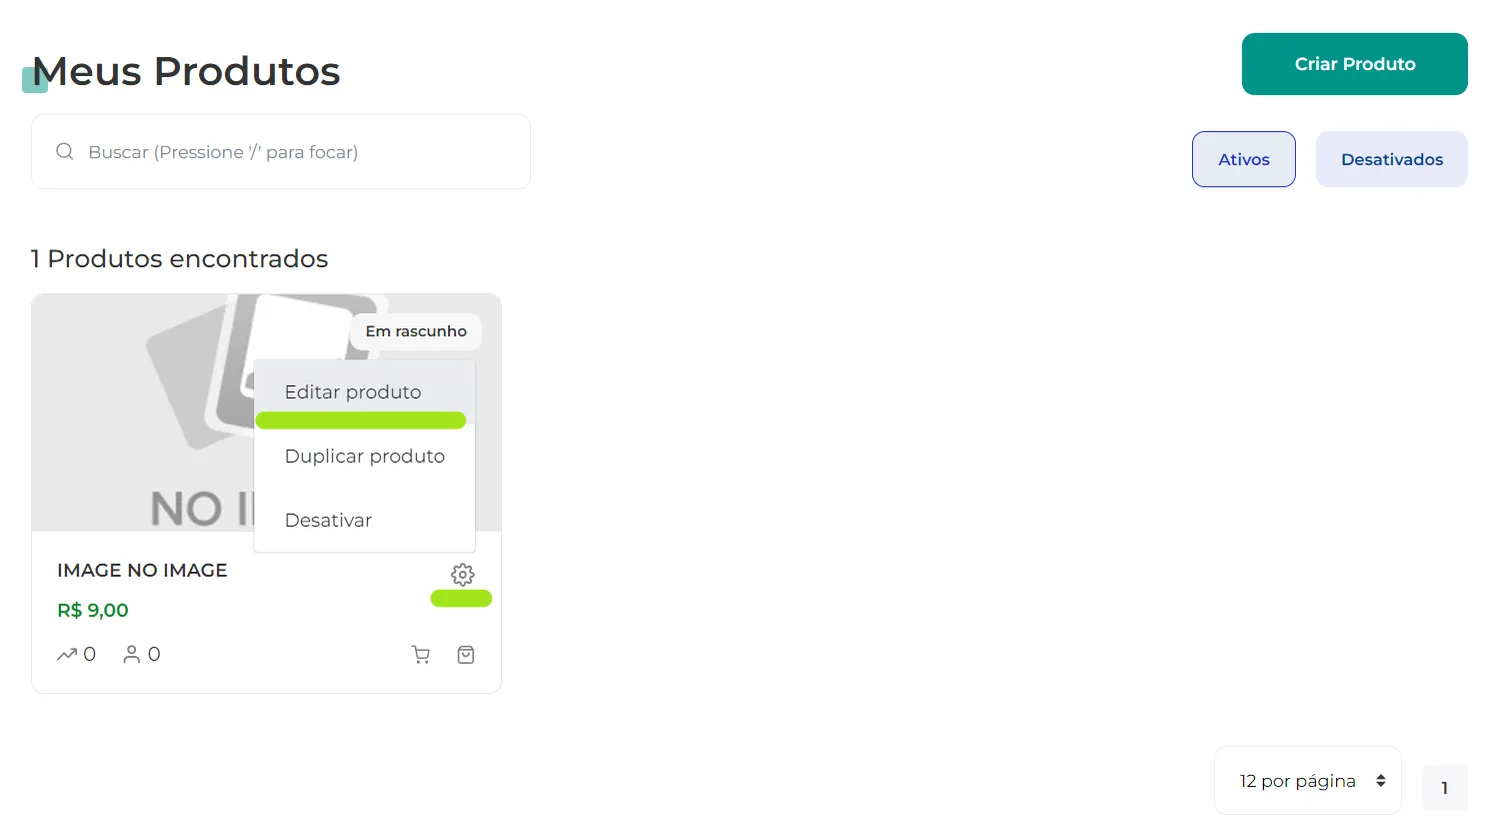
Webhooks are configured individually for each registered product. To configure a webhook for a specific product, follow these steps: Go to 'Products' > 'Edit Product' > 'Contents'.
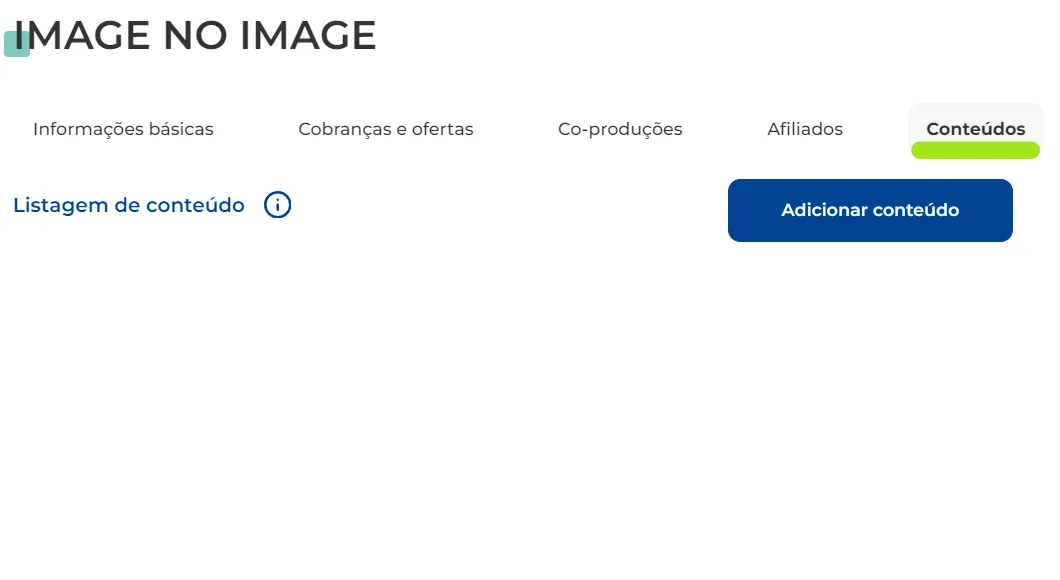
Click 'Add content' and then select 'External system', then 'Delivery via webhook'.
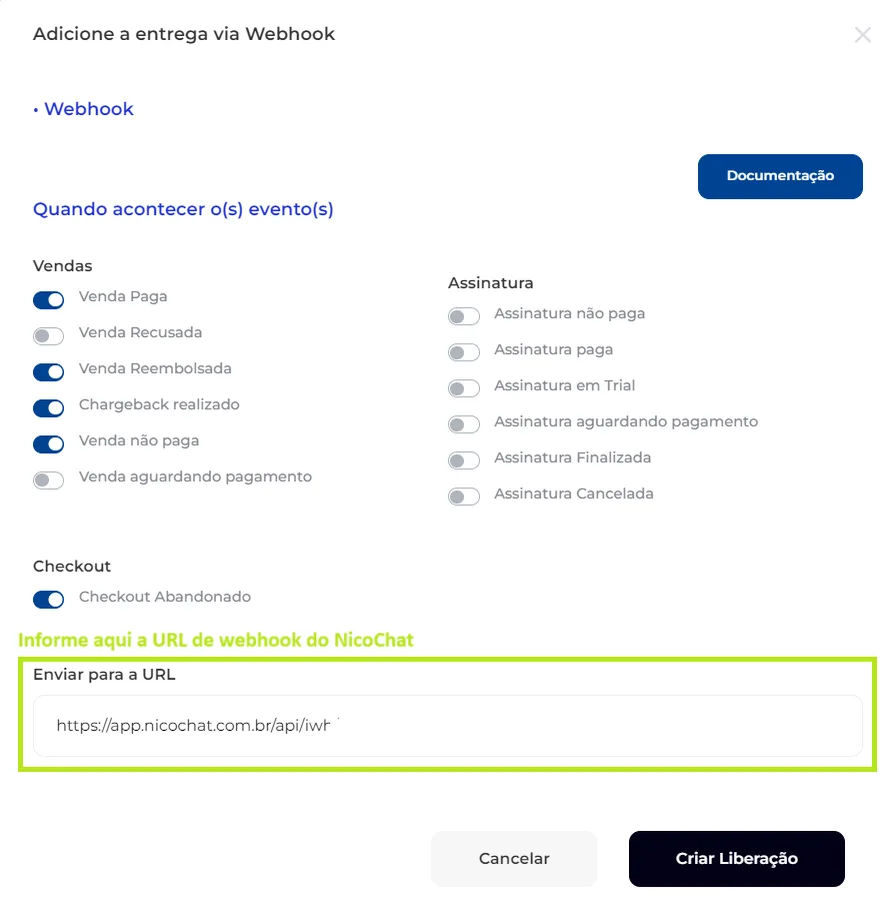
To enable capturing specific events via Webhook in NicoChat, follow these steps:
- Enabling Events: Enable the events you want to register for notification via Webhook.
- Webhook URL: Provide the NicoChat Webhook request URL, where the events will be sent.
- Creating the Release: After configuring the events and the Webhook URL, click the "Cria Liberação" (Create Release) button to activate the integration.
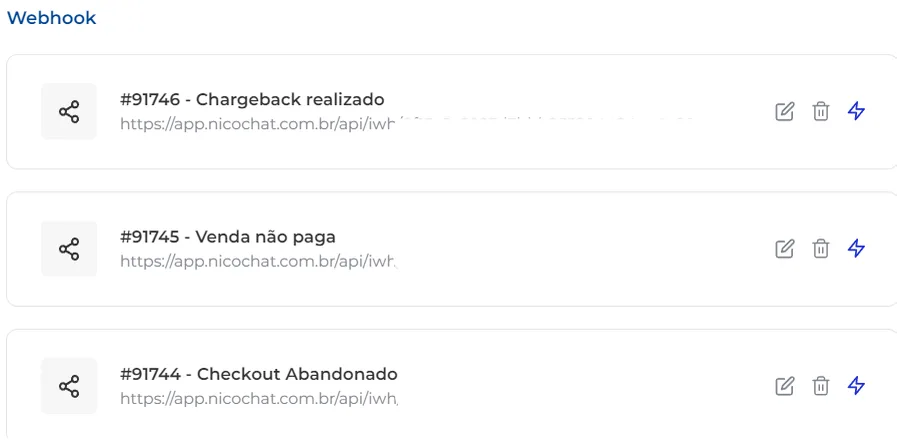
After creating the event release, the Webhooks will be configured individually, each one receiving a name that describes its specific function. The blue button with the (⚡) symbol corresponds to the option to test the event call.
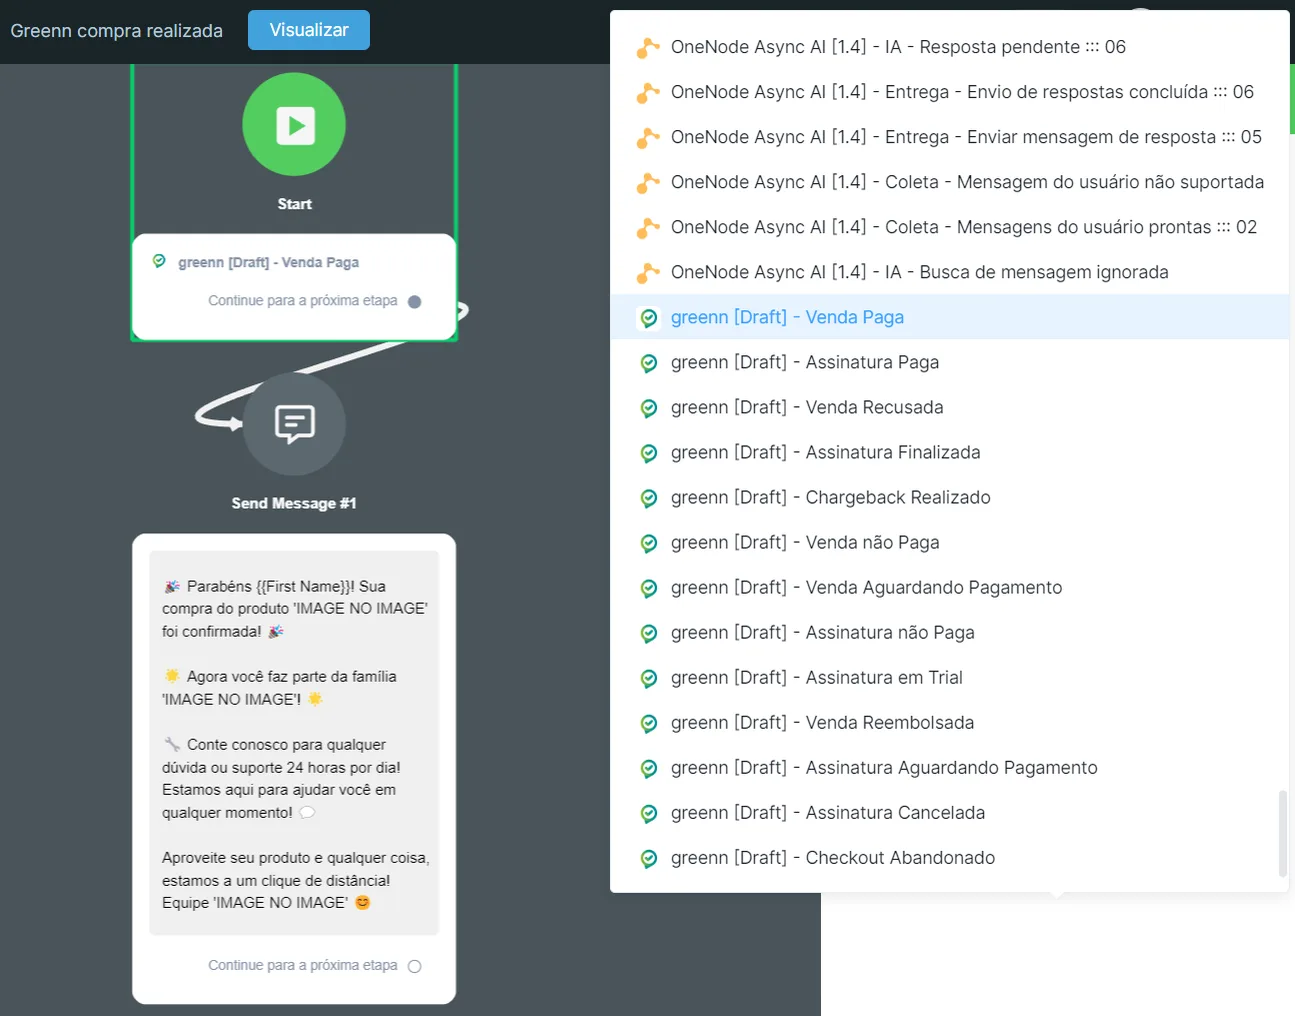
Create a flow in the channel where the Webhook was configured and select the flow activation triggers according to the events chosen in Greenn's Event Release.
Thank you for choosing NicoChat for the integration with Greenn. We hope this guide makes the setup easier and improves the efficiency of your operations. See you next time!