

Cloudinary
NicoChat integrates with Cloudinary so you can store data easily, in just a few steps.
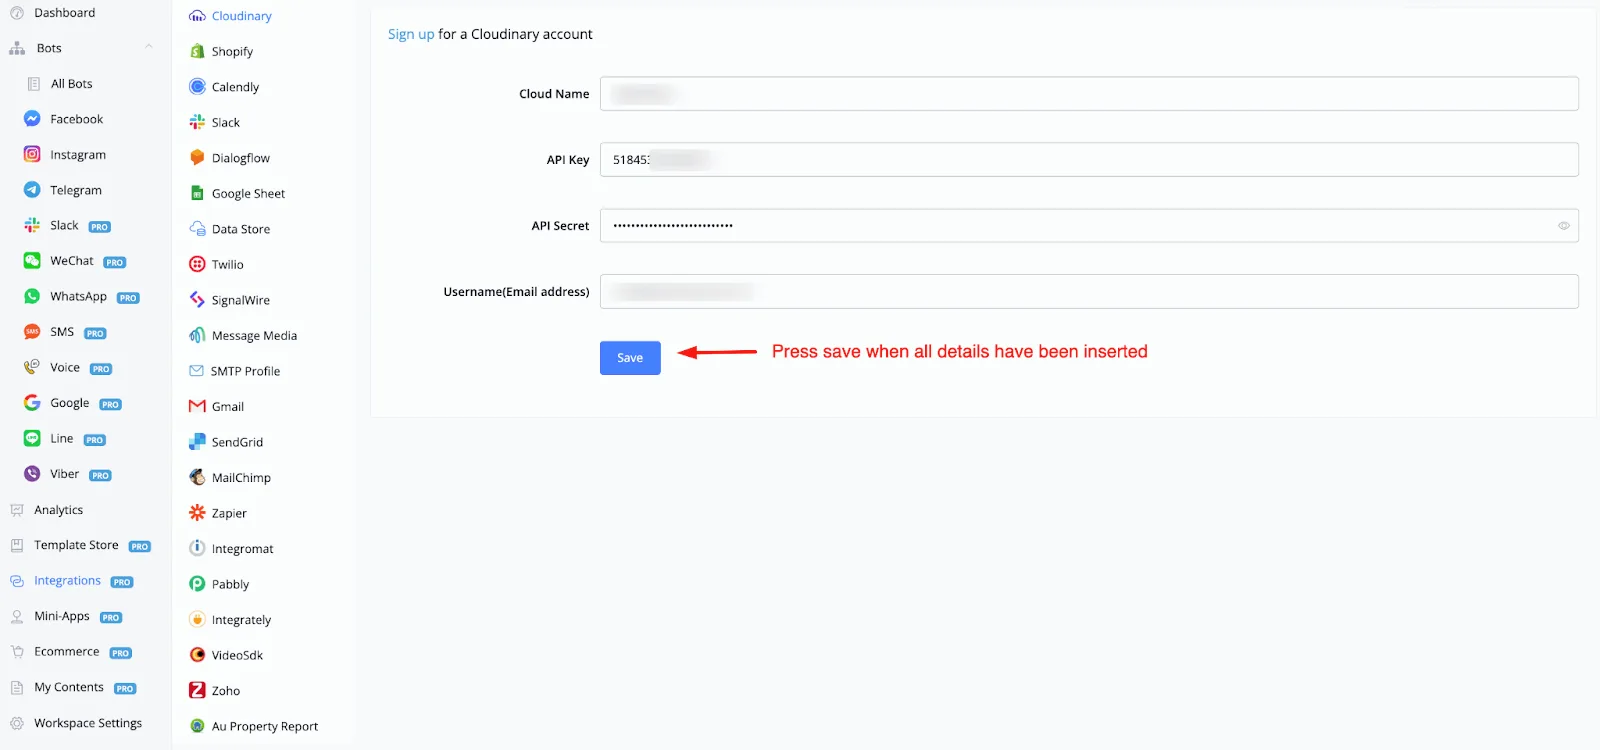
To connect your Cloudinary account, you will need a few things, as shown in the image below.
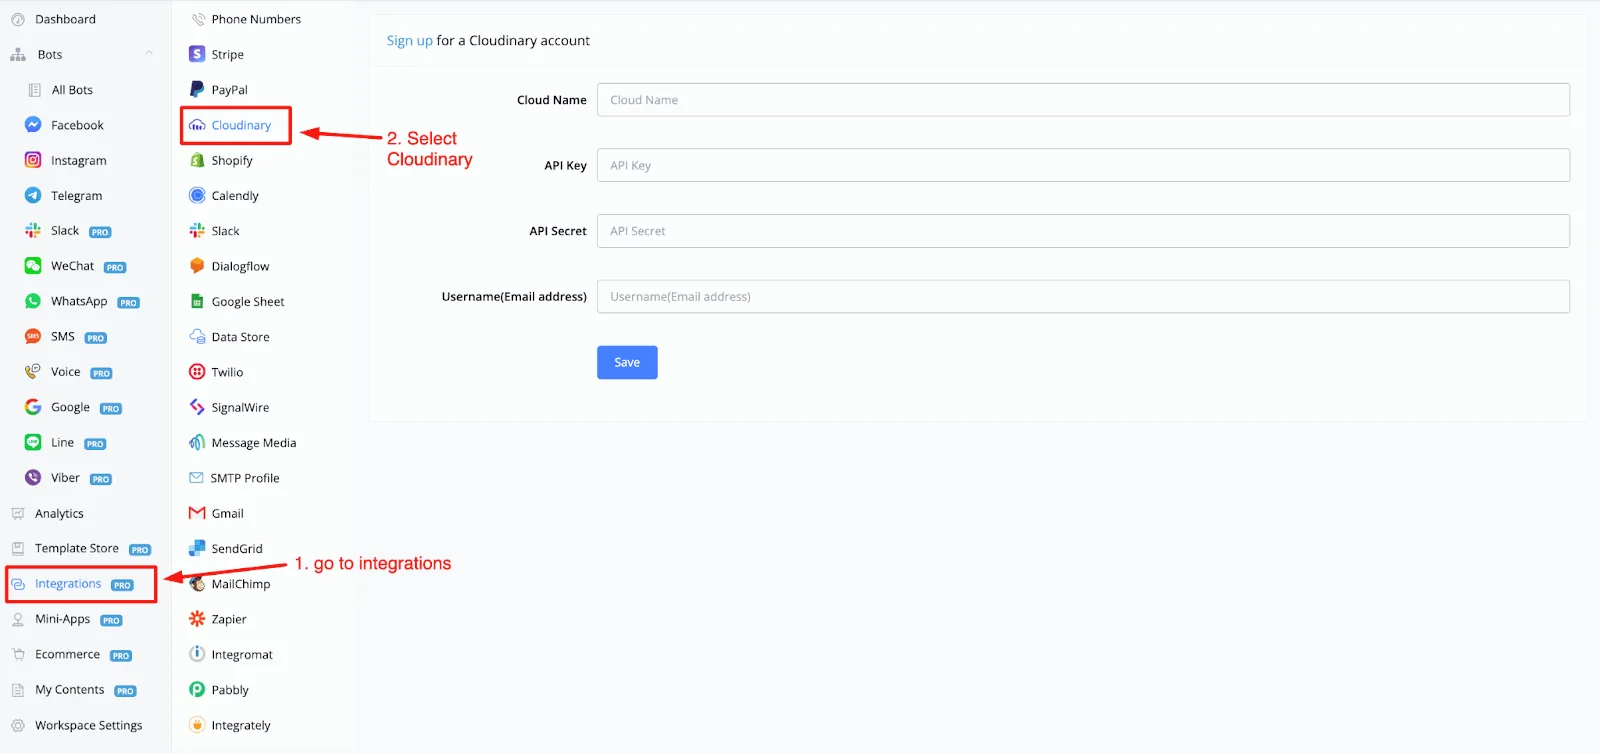
From your main dashboard, go to the Integrations section on the left-hand menu. Then select Cloudinary from the overview. From here on, you will only need 4 things, which you can get from your Cloudinary account.
Just log in. From the dashboard you will find all the information, if you have already created it beforehand.
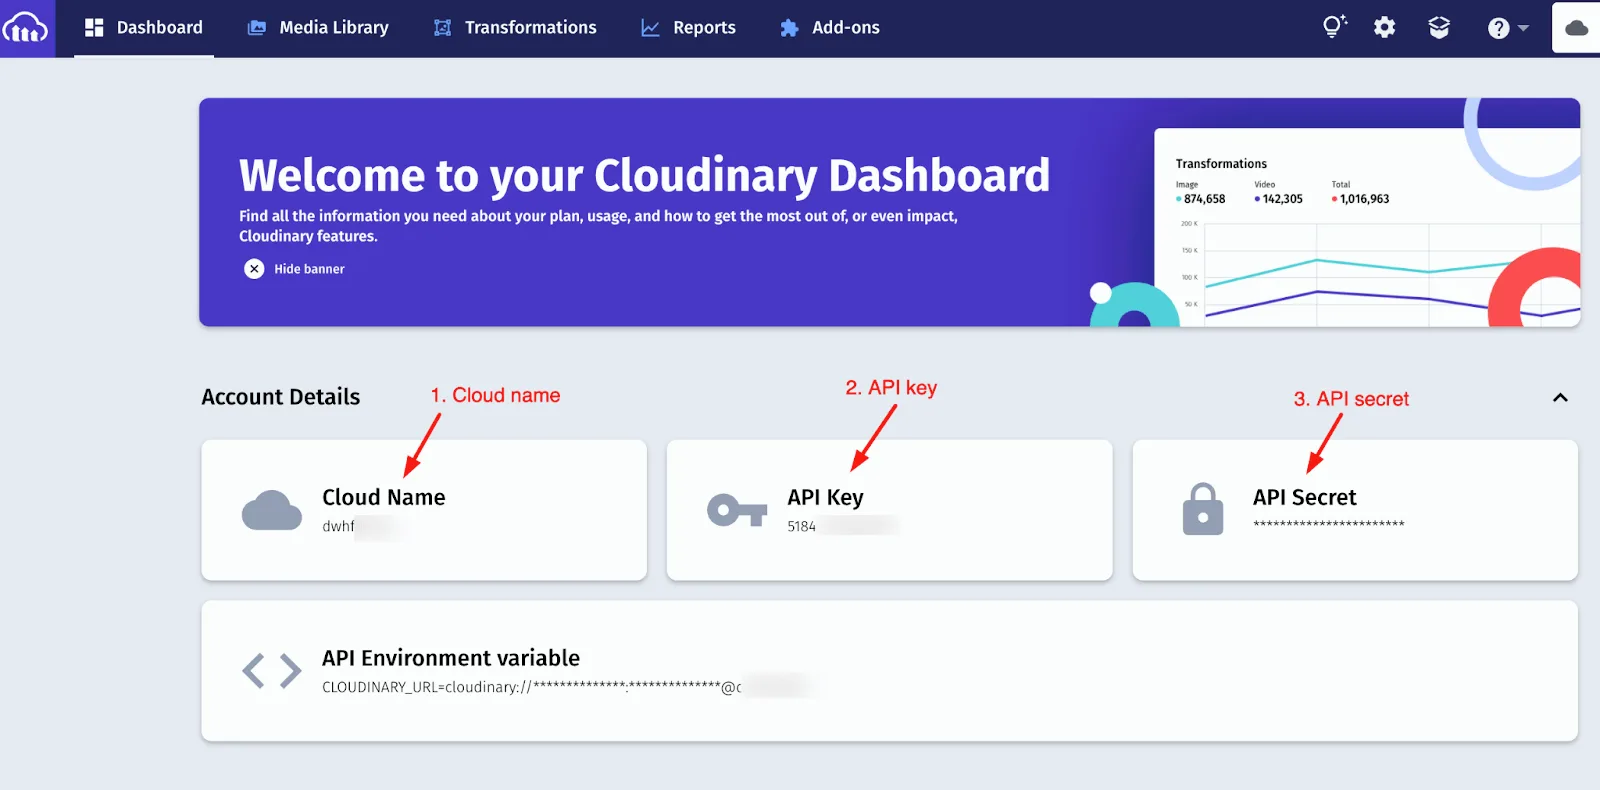
If you already have what is shown above, you are all set: just copy and paste that information into the integration overview in your workspace.
If you do not have an API Key and a secret yet, or if you want to create a new pair just for your chatbot, you will need to create one.
To create an API Key, go to settings and select the Security tab.
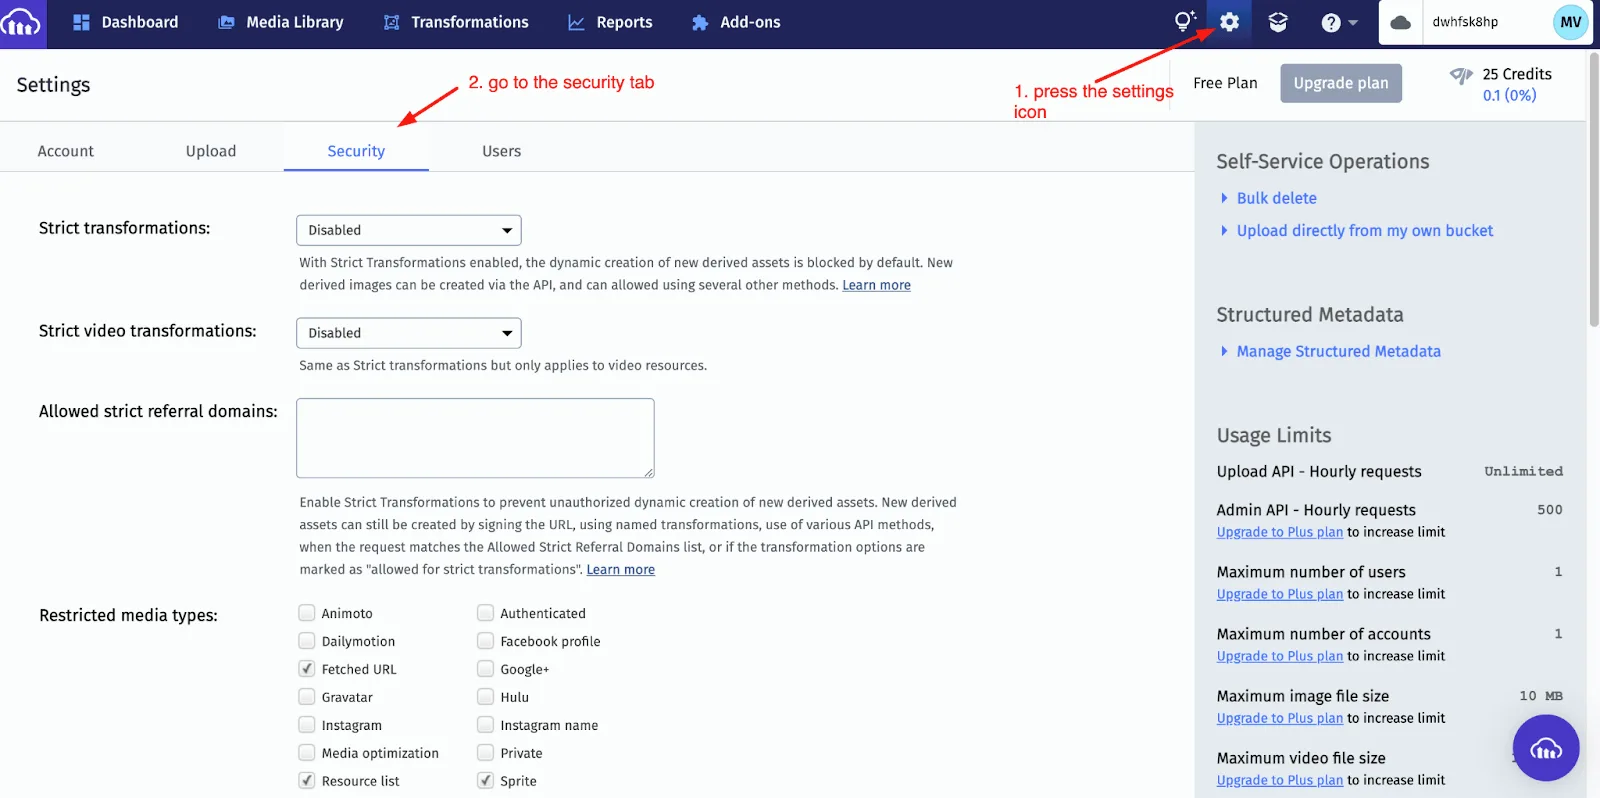
There, scroll all the way down until you see a section called Access Keys. In it, click the text “generate new pair”.
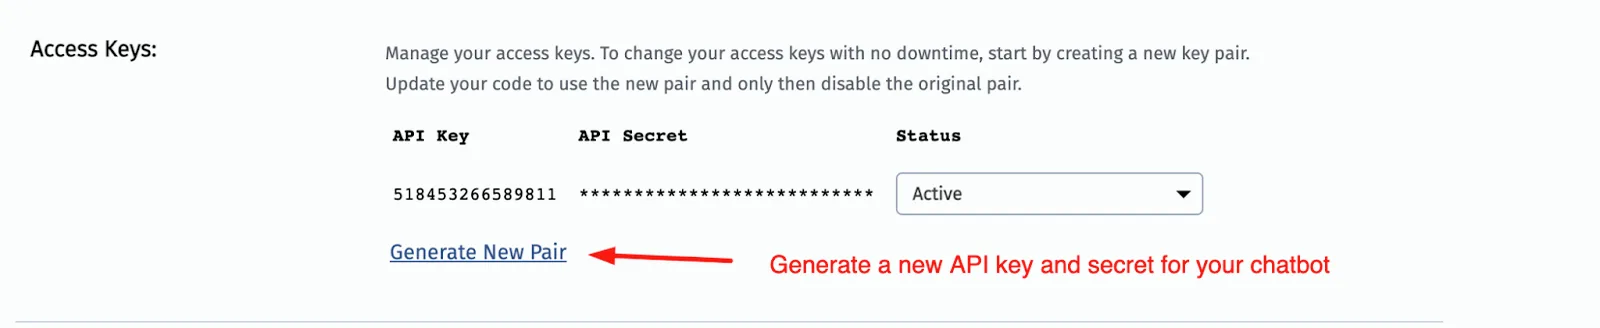
Once generated, copy the API Key and the secret and paste both into your workspace, along with the other details.
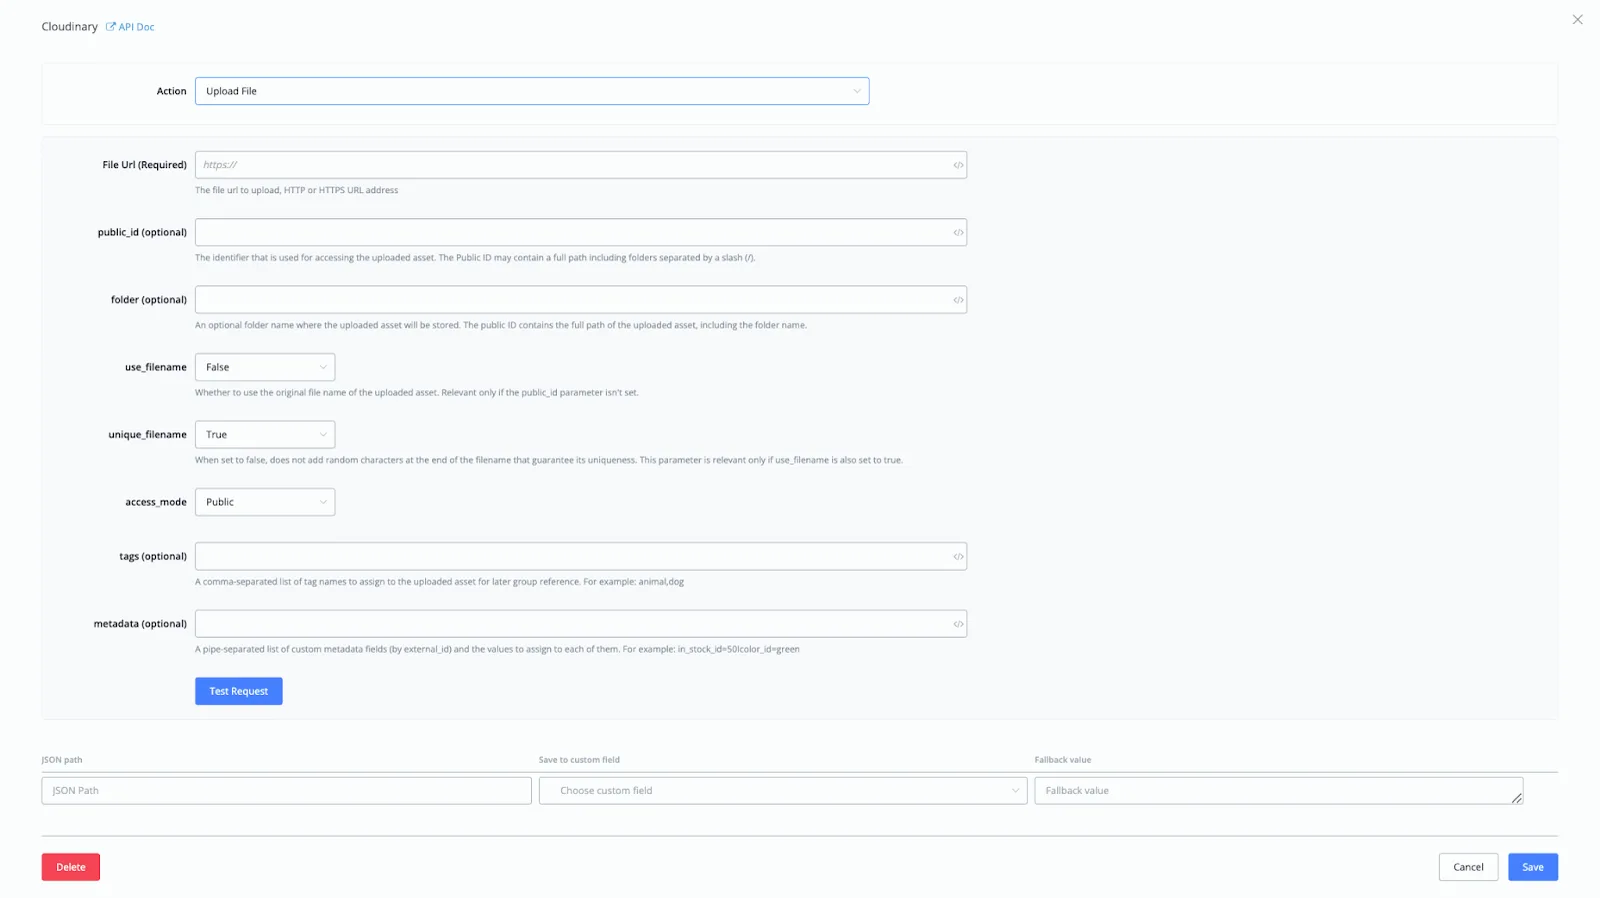
Once connected, you can use Cloudinary directly in your chatbot flows.
Just insert an Action -› Integrations -› Cloudinary block.
From there, you will be able to upload a file directly to your account and store it securely.
If you prefer, watch our video tutorial below:
NicoChat Basics Course New Series - 24. How to connect to your Cloudinary account