ClickSign
The NicoChat team thoroughly evaluated several tools for contract automation and decided to start by integrating with ClickSign for the following reasons:
The NicoChat team thoroughly evaluated several tools for contract automation and decided to start by integrating with ClickSign for the following reasons:
- Affordable price for the API Plan, starting at R$ 119
- Template system, in which you can create a contract with variables and fill them in via API
- Easy and Fast to Integrate
🔹 Automatic Document Sending: Send documents or data to a template already registered in ClickSign directly from the NicoChat flow. Automate document generation in a practical and efficient way.
🔹 Signer Registration: Automatically register the signers, their qualifications and how they must sign the documents, all within the NicoChat flow.
🔹 Real-Time Monitoring: Receive webhooks in real time to track the status of the documents. Know when a customer signs, declines, or when the contract is completed, directly in your NicoChat interface.
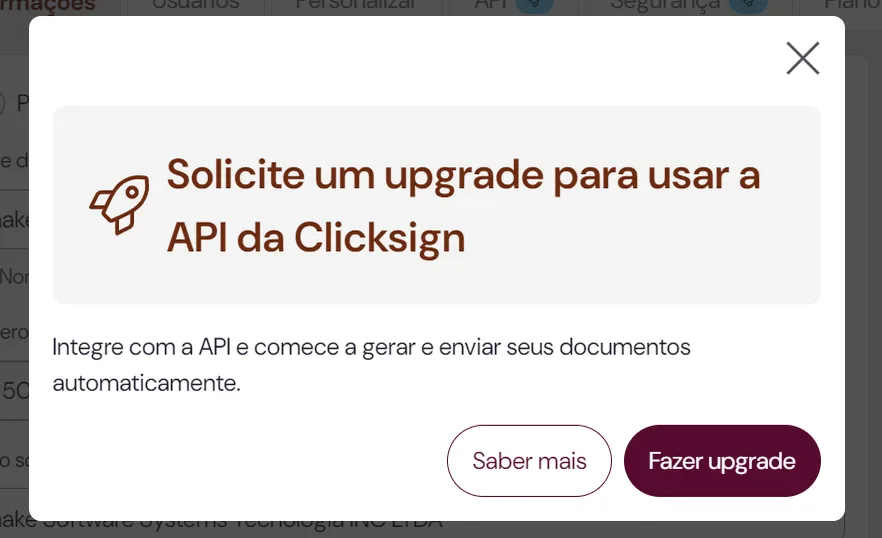
First, to connect ClickSign to NicoChat, you need an Advanced Plan in ClickSign to enable the integration via API and Webhook:
Go to Settings, then open the API tab and generate an Access Token.
To enable the use of the Access Token in the account, you must associate the user with the API.
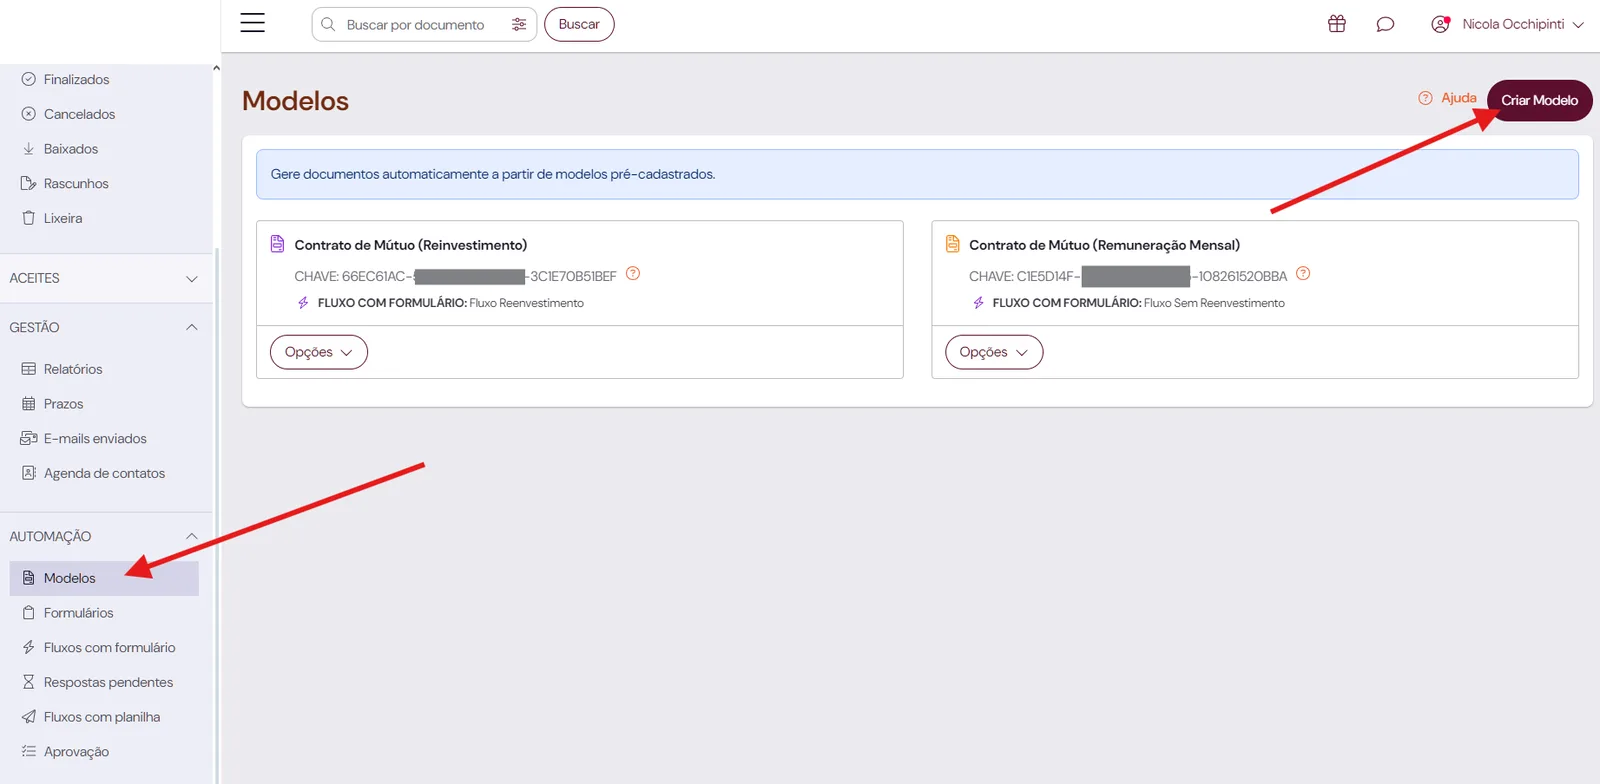
To handle signatures in NicoChat, the best path is to create a template in ClickSign. To do this, go to Automation > Templates > Create Template
ClickSign Sandbox
Then upload a template document. You can download an example here. You must add the variables as in the example below:
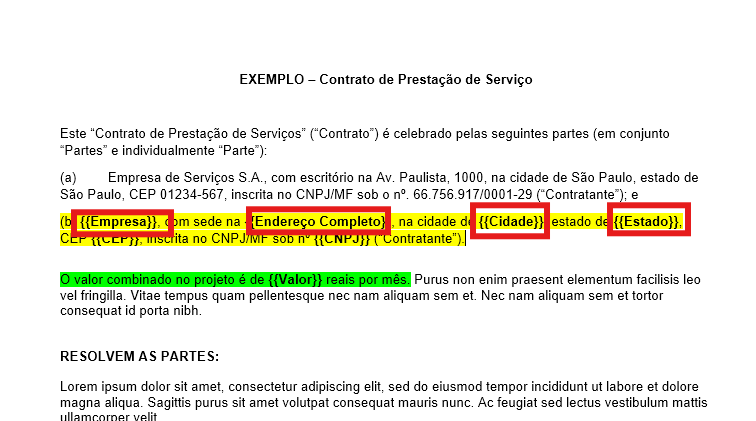
These variables are important for the NicoChat implementation. Write down the exact name of each one.
In NicoChat you must map all the variables into a JSON object. The easiest way is to write a JavaScript function and pass all the variables to build the JSON:
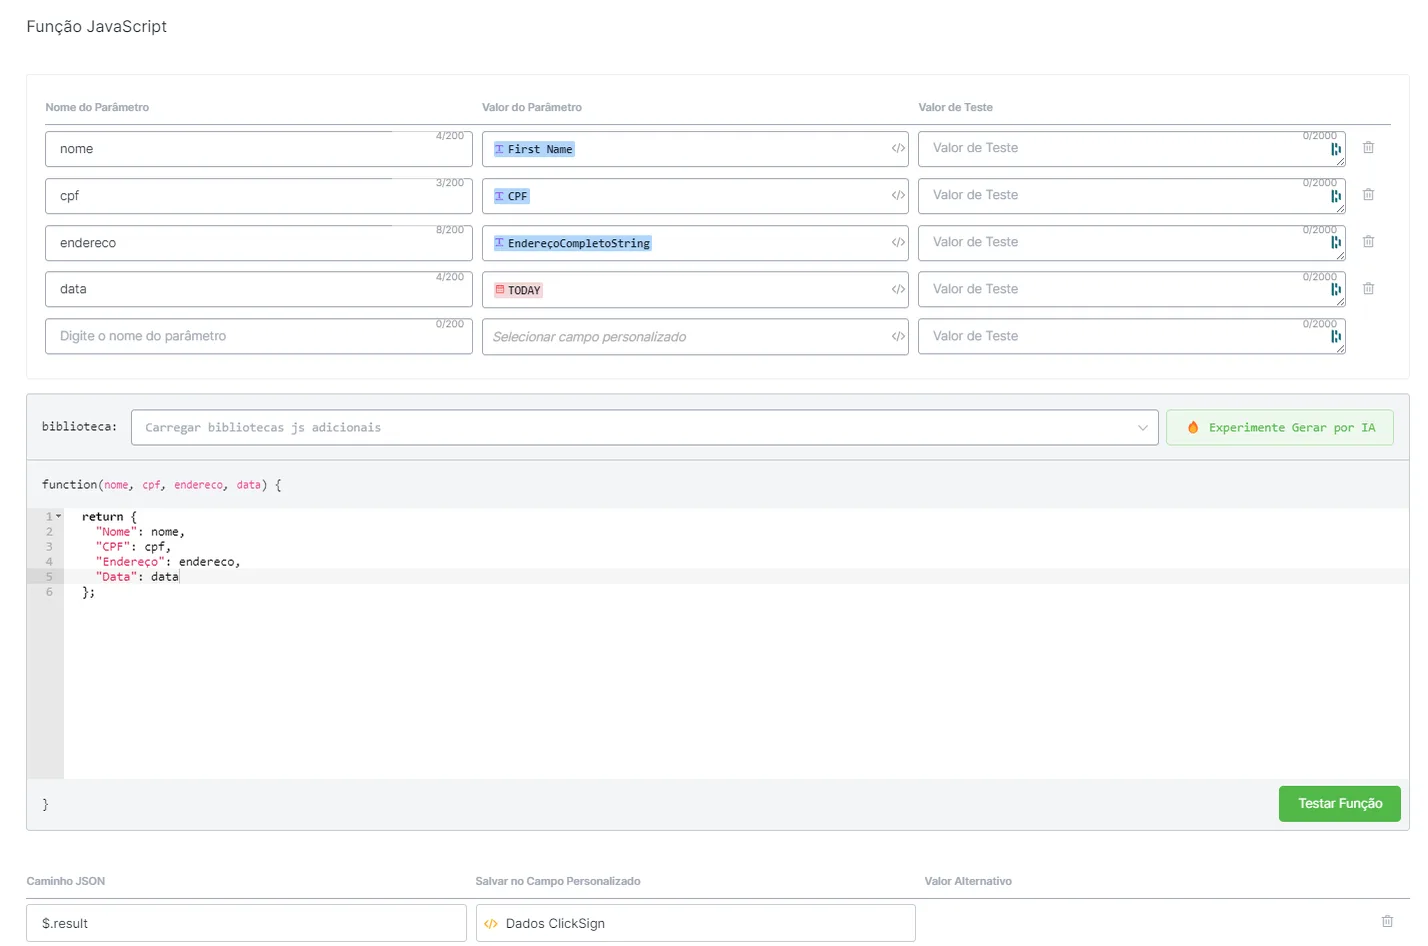
Save the data in a JSON and run the 3 steps below to create the document:
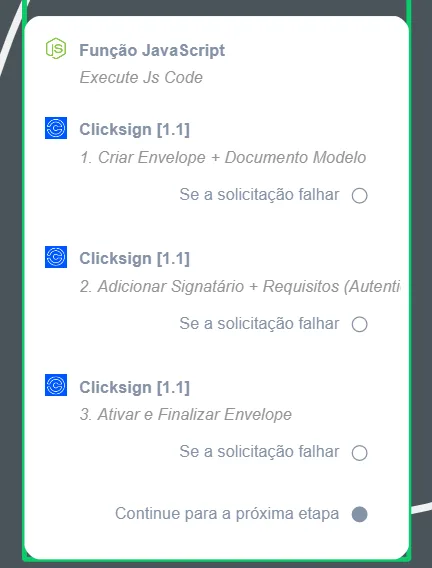
The JSON must be inserted in step 1:
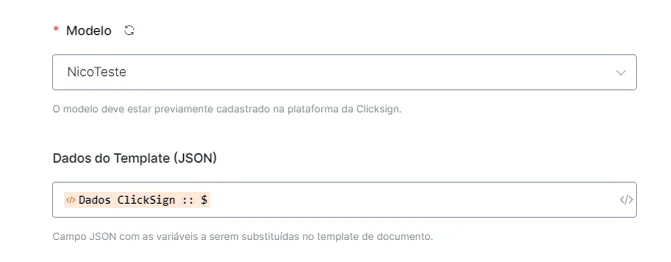
Step 2 can be repeated several times to add more than one signer.
Step 3 is used to finalize the document.
Install the NicoChat Example Template from the link below:
In "Tools", go to "Webhooks".
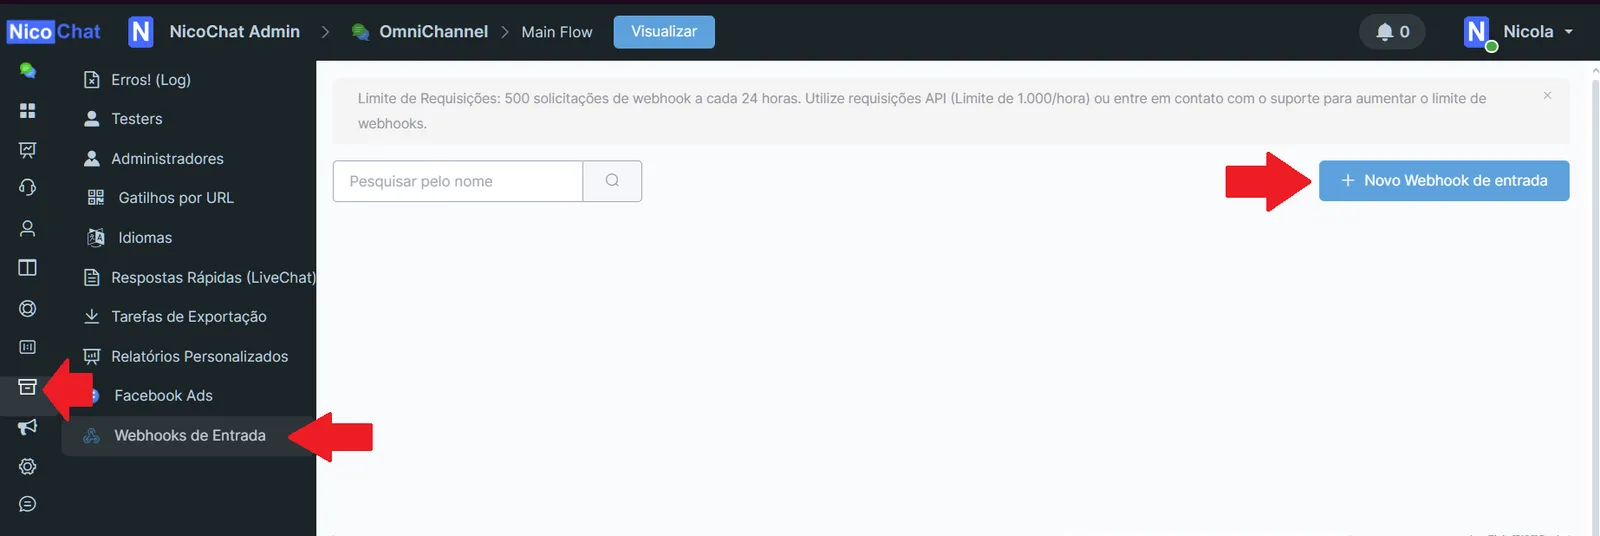
Create a new Webhook, naming it "ClickSign", and copy the URL provided.

Click “Edit”, enable “Data Preprocessing” and insert the code below:
function formatarTelefone(telefone){
    let whatsapp = telefone.replace(/\D/g, '');
    //Adicione aqui exceções de DDi que não devem receber o tratamento do Script
    if (telefone.startsWith('+55') || telefone.startsWith('55') || (telefone.startsWith('+') && !telefone.startsWith('+55'))) {
        return whatsapp;
    }
    const ddi = "+55";
    let ddd;
    if (whatsapp.length === 10 || whatsapp.length === 11) {
        ddd = whatsapp.slice(0, 2);
        whatsapp = whatsapp.slice(2);
        if (parseInt(ddd, 10) <= 28) {
            whatsapp = '9' + whatsapp.slice(-8);
        } else {
            whatsapp = whatsapp.slice(-8);
        }
        return ddi + ddd + whatsapp;
    }
    return whatsapp;
}
let email = null, phone = null;
  let signer = (payload.event?.data?.signer ||payload.event?.data?.signers?.[0] || payload.document?.signers?.[0] || {});
  email = signer.email || payload.event?.data?.user?.email || payload.acceptance?.sender_name;
  phone = signer.phone_number || payload.event?.data?.user?.phone_number || payload.acceptance?.signer_phone;
  phone = formatarTelefone(phone);
  return { email, phone, payload };
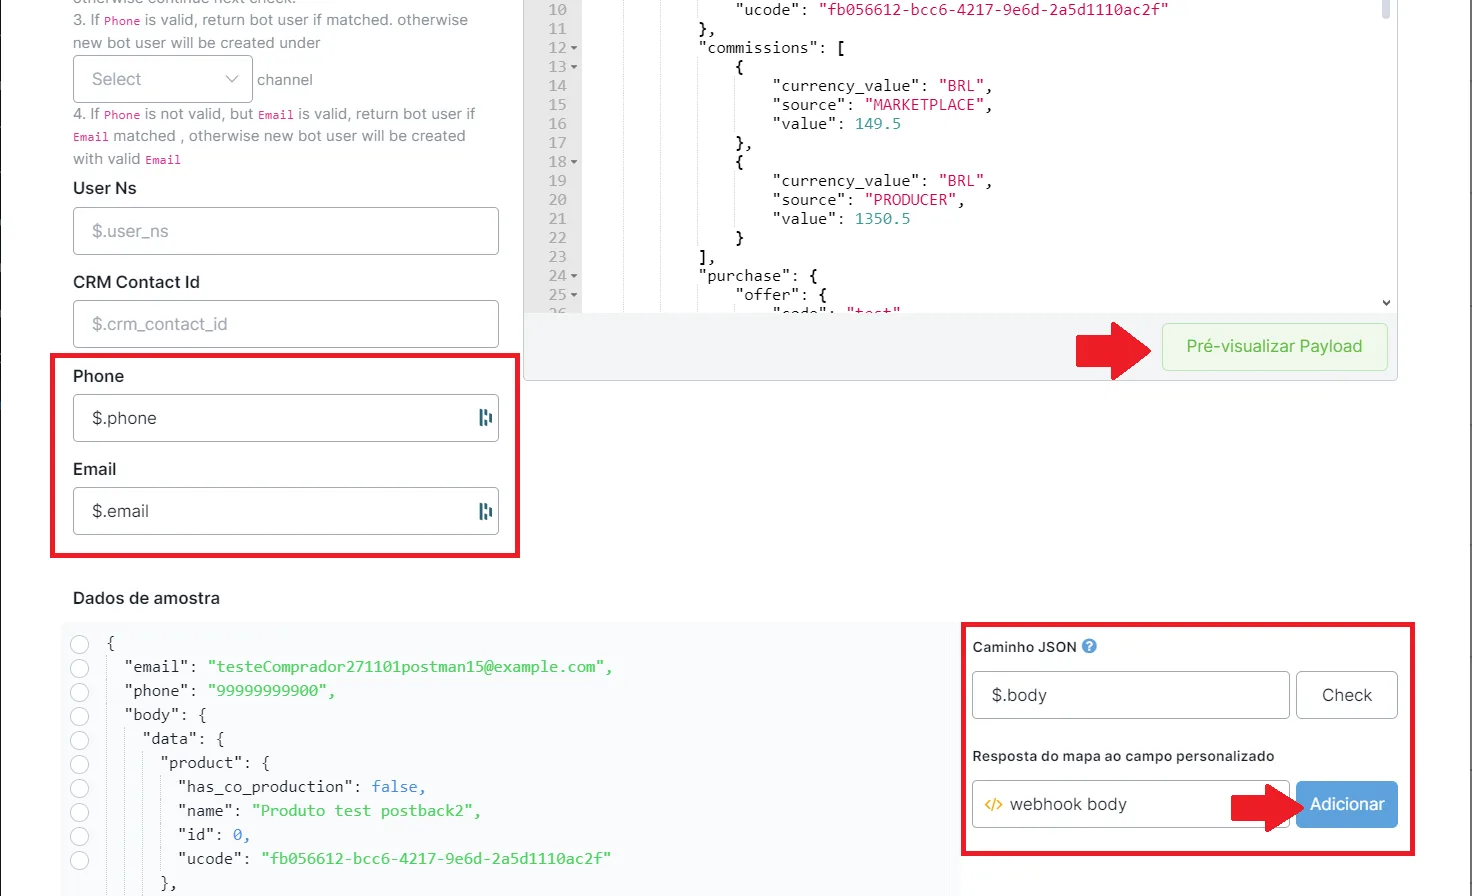
Then click “Preview Payload” and map the Email, Phone and Webhook Body fields as shown below:
Phone: $.phone
Email: $email
Webhook Body: $.payload
(if you do not have one, you can create a JSON-type variable)
(Click Add)
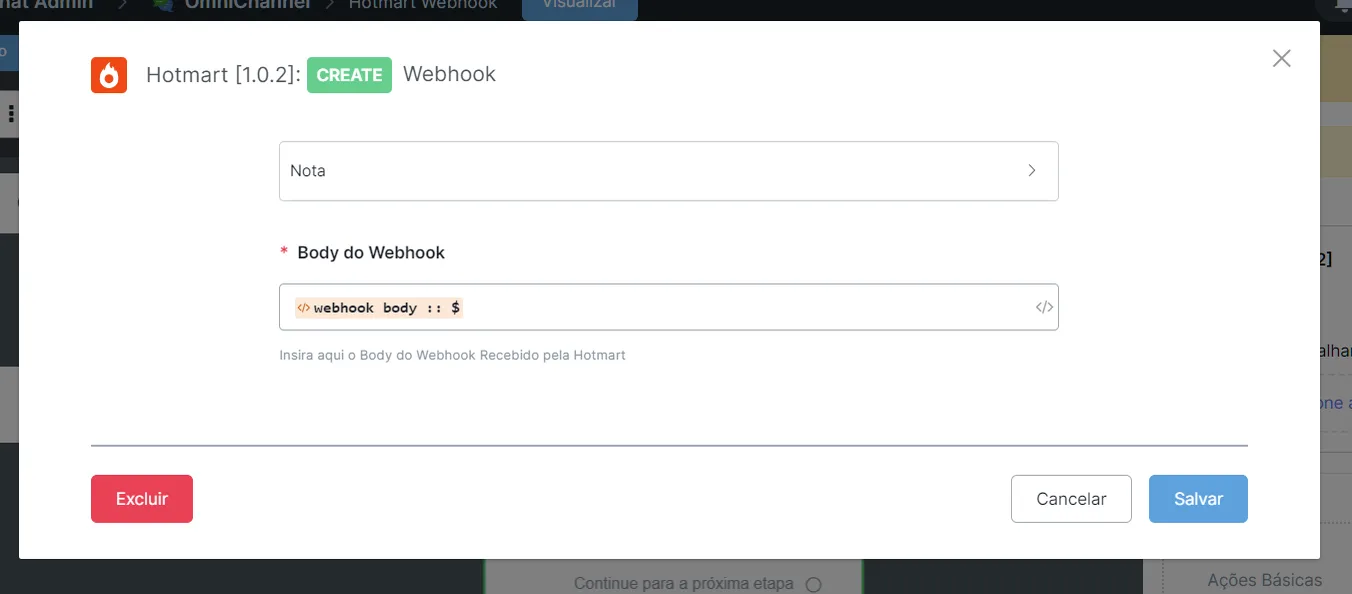
Create a SubFlow in NicoChat, insert an action block and select Integrations > ClickSign
Then select “Webhook” and insert the JSON of the “Webhook Body” created earlier. Then save.
Then go back to Tools > Webhooks and select the flow you created:

Get the Webhook link, go to ClickSign > Settings > API > Webhook and insert the link when creating a new webhook. Select ONLY the events you want in order to avoid unnecessary consumption of Webhook Limits.