

Asaas
The integration of the Asaas system with NicoChat represents a new era in billing automation and financial management for businesses of all sizes. With the Asaas API Key, NicoChat turns the complex landscape of payments and receivables into a smooth and efficient process.
The integration of the Asaas system with NicoChat represents a new era in billing automation and financial management for businesses of all sizes. With the Asaas API Key, NicoChat turns the complex landscape of payments and receivables into a smooth and efficient process. This integration enables companies to charge via bank slip, Pix, credit, debit, payment link and on a recurring basis, when needed, directly through the chat. Asaas is not just a payment platform, but a true digital financial assistant, offering subscription management, credit card vault, receivables anticipation and much more.
Video on YouTube (unavailable for embedding)
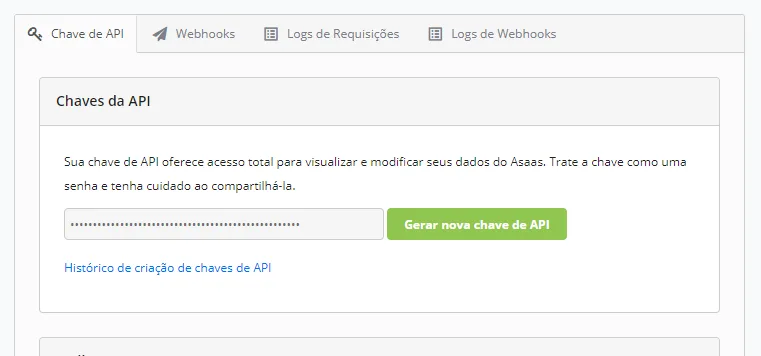
- Accounts:
Create a bill payment (CREATE): Automate the payment of your company's bills. Transfer to an account at another Institution (CREATE): Send funds to accounts at other financial institutions. Transfer via PIX (CREATE): Make instant transfers using the PIX system.
- PIX Keys:
Create a key (CREATE): Register a new PIX key for your account. List keys (READ): Get a list of your PIX keys. Remove key (DELETE): Delete a PIX key that will no longer be used.
- Customer Management:
Create new customer (CREATE): Add customers to your Asaas database. List customers (READ): View customers based on CPF/CNPJ or name. Update existing customer (CREATE): Update information for customers already registered. Remove customer (DELETE), Restore removed customer (READ): Manage the life cycle of customer records.
- Charging Process:
Create, update, delete and restore charges. Confirm payments received in cash and refund charges when necessary. Filter charges by different criteria, such as date, payment method and status. Retrieve detailed information about specific charges.
- Financial Information:
Retrieve statement (READ): Access your account's transaction history. Retrieve account balance (READ): Check the current available balance.
By following these guidelines and examples, you will be able to use the Asaas integration in NicoChat to manage every financial nuance of your business in an automated and secure way. This integration promises not only to simplify complex procedures, but also to help reduce default rates and strengthen the company's cash flow.
In "Tools", go to "Webhooks".
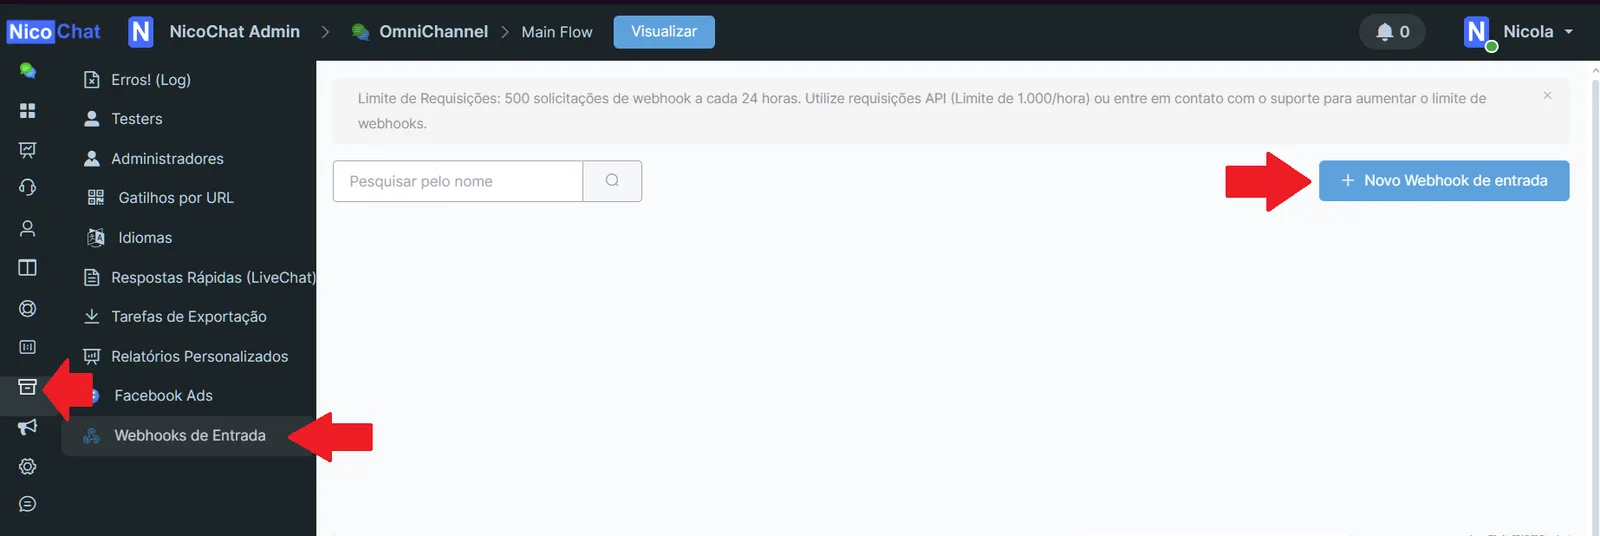
Create a new Webhook, naming it "Green", and copy the URL provided.

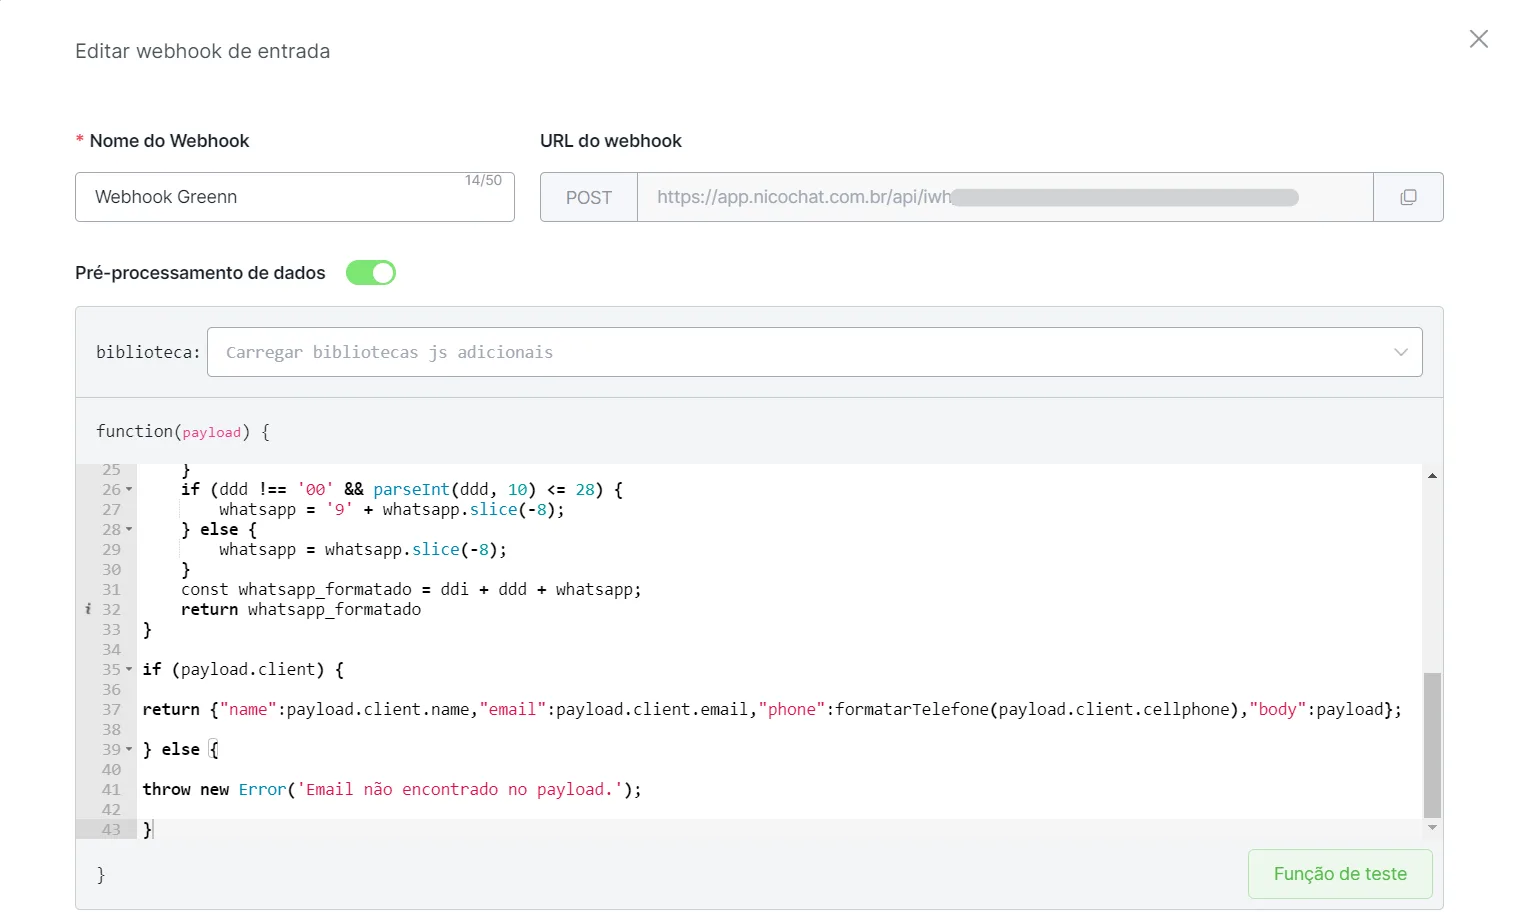
Click “Edit”, enable “Data Preprocessing” and enter the code below:
function firstName(nomeCompleto){
    const parts = nomeCompleto.split(' ');
    const first_name = parts[0];
    return first_name
}

function lastName(nomeCompleto){
    const parts = nomeCompleto.split(' ');
    let last_name = parts.slice(1).join(' ') || '';
    return last_name
}

function formatarTelefone(telefone){
    let whatsapp = telefone.replace(/\D/g, '');
    //Adicione aqui exceções de DDi que não devem receber o tratamento do Script
    if (telefone.startsWith('+55') || telefone.startsWith('55') || (telefone.startsWith('+') && !telefone.startsWith('+55'))) {
        return whatsapp;
    }
    const ddi = "+55";
    let ddd;
    if (whatsapp.length === 10 || whatsapp.length === 11) {
        ddd = whatsapp.slice(0, 2);
        whatsapp = whatsapp.slice(2);
        if (parseInt(ddd, 10) <= 28) {
            whatsapp = '9' + whatsapp.slice(-8);
        } else {
            whatsapp = whatsapp.slice(-8);
        }
        return ddi + ddd + whatsapp;
    }
    return whatsapp;
}

if (payload.client) {

return {"name":payload.client.name,"email":payload.client.email,"phone":formatarTelefone(payload.client.cellphone),"body":payload};

} else {

throw new Error('Email não encontrado no payload.');

}
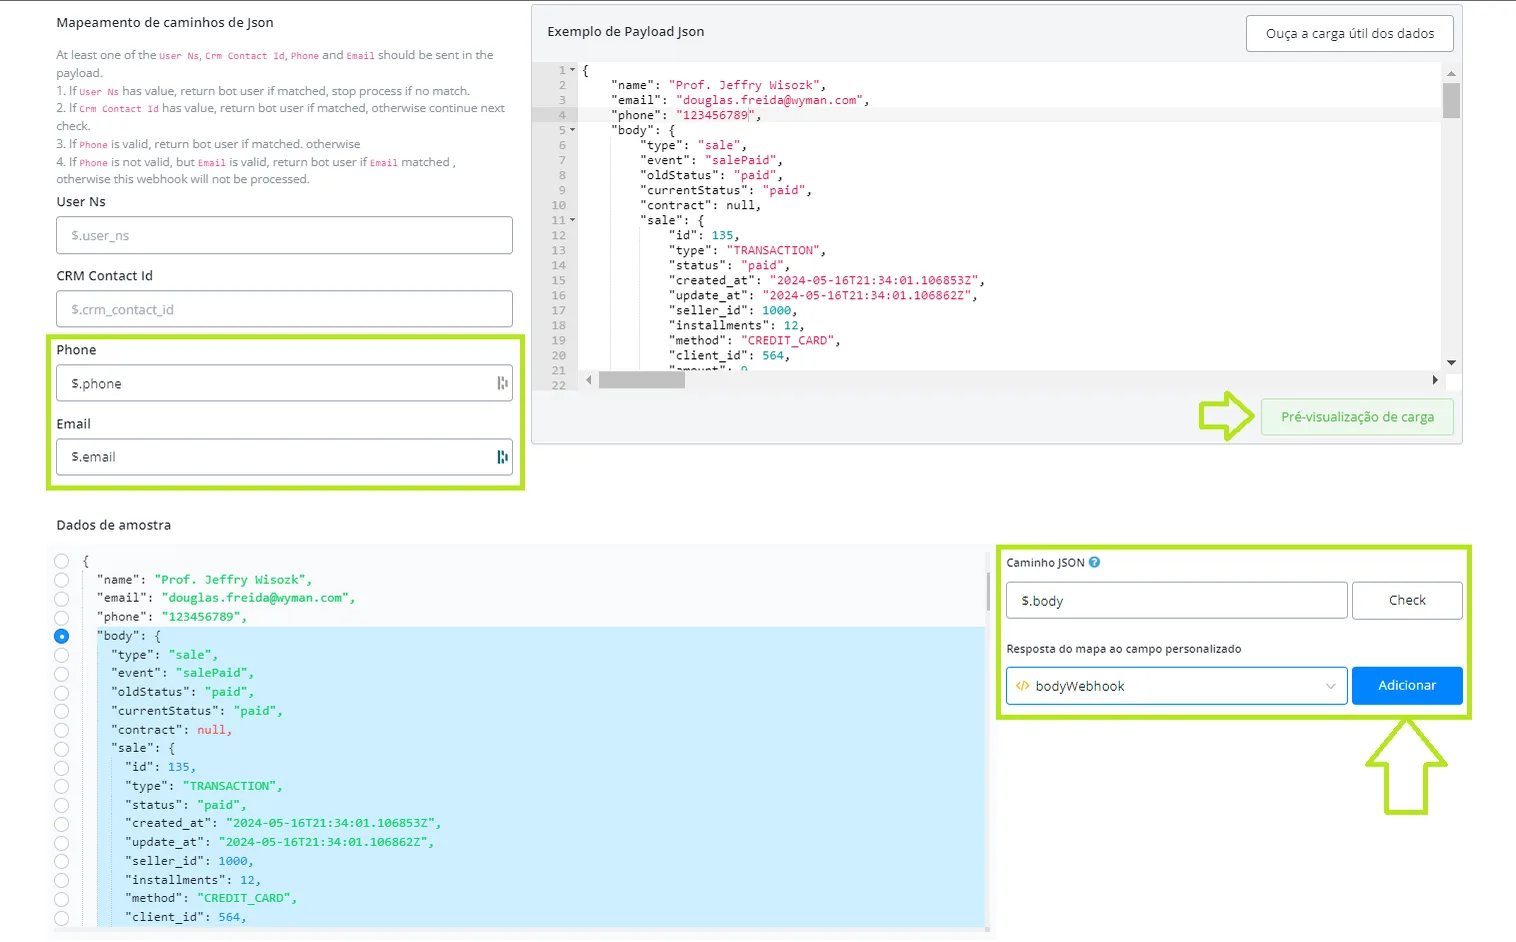
Then click “Preview Payload” and map the Email, Phone and Webhook Body fields as shown below:
JSON Path: $.phone => Map response to field: Phone (Click add)
JSON Path: $.email => Map response to field: Email (Click add)
JSON Path: $.name => Map response to field: First Name (Click add)
JSON Path: $.body => Map response to field: {{JSON variable to store the Webhook body}} (Click add)
Create a SubFlow in NicoChat, insert an action block and select Integrations > greenn
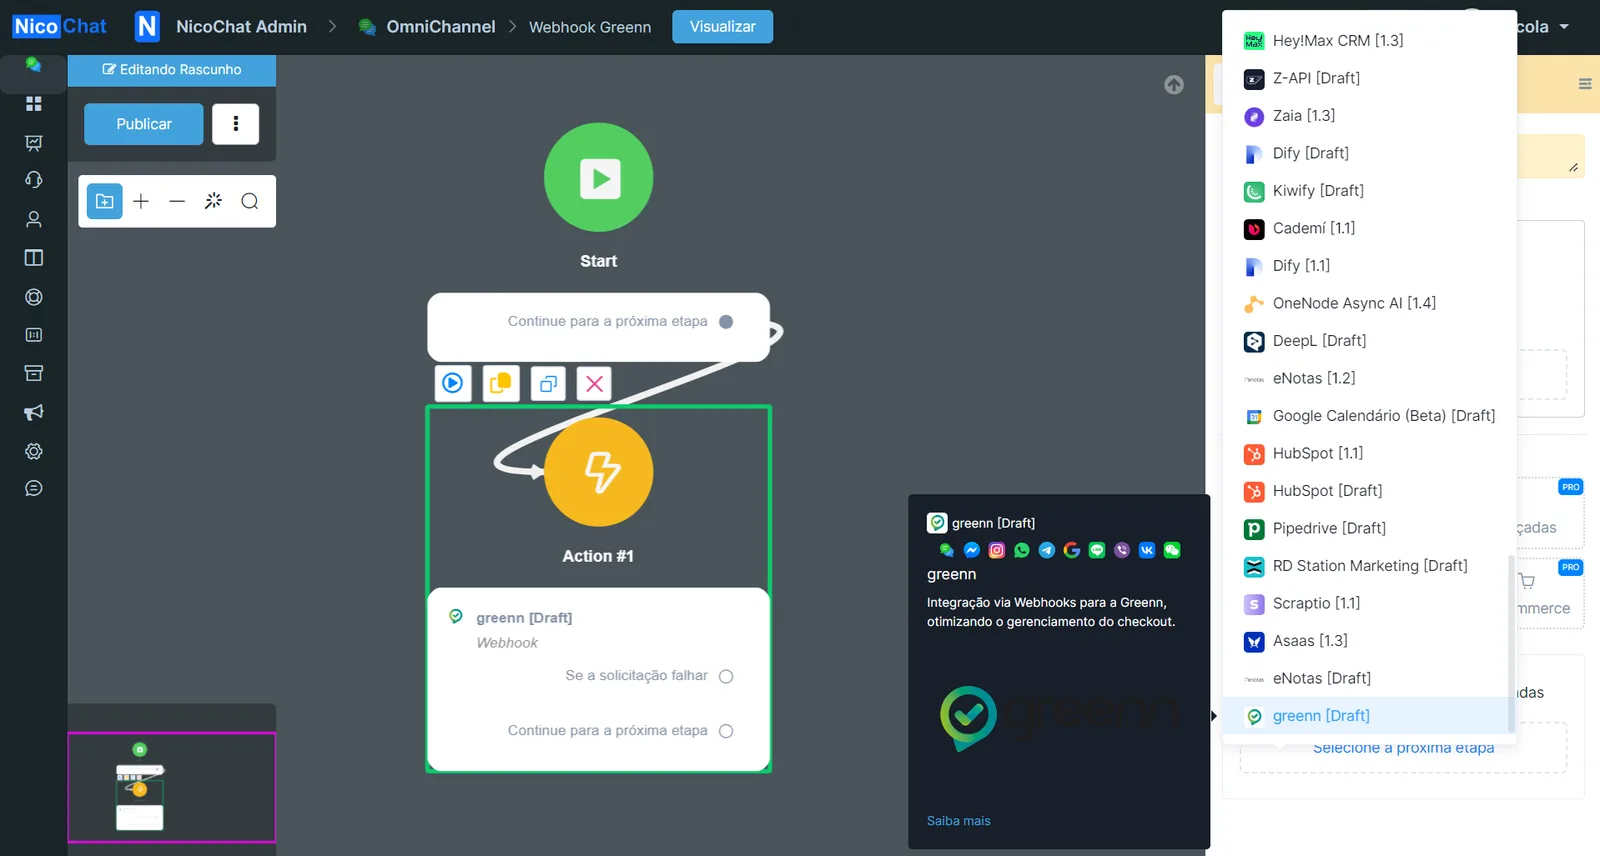
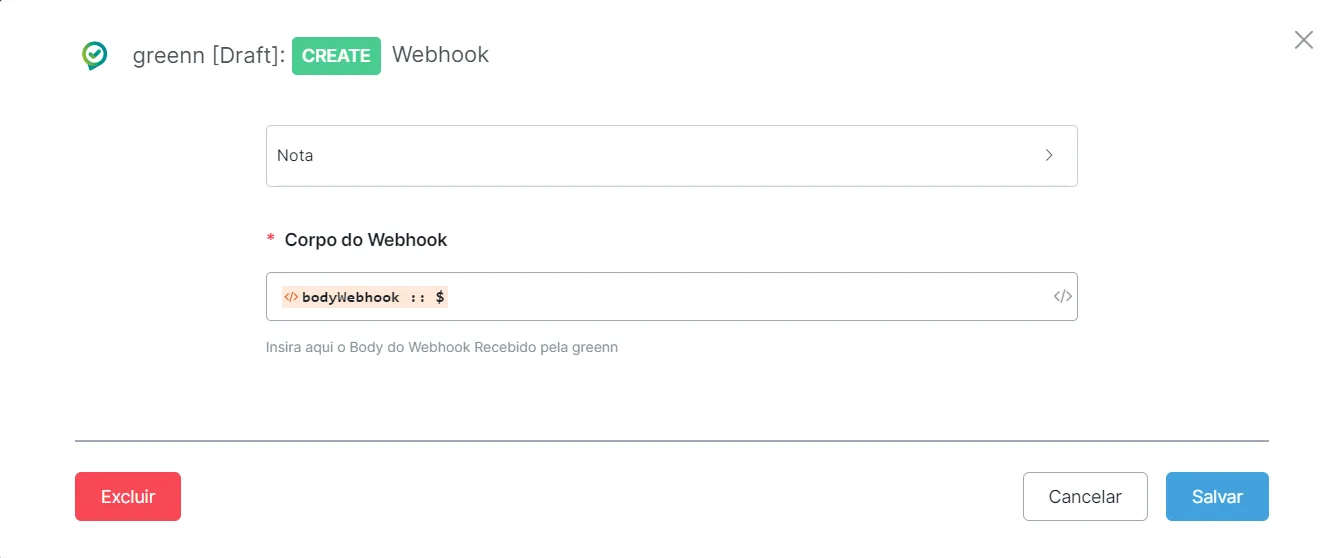
Then select “Webhook” and enter the JSON of the “webhook body” created earlier. Then save.
Then go back to Tools > Webhooks and select the flow you created:

Webhooks are configured individually for each registered product. To configure a webhook for a specific product, follow these steps: Go to 'Products' > 'Edit Product' > 'Contents'.
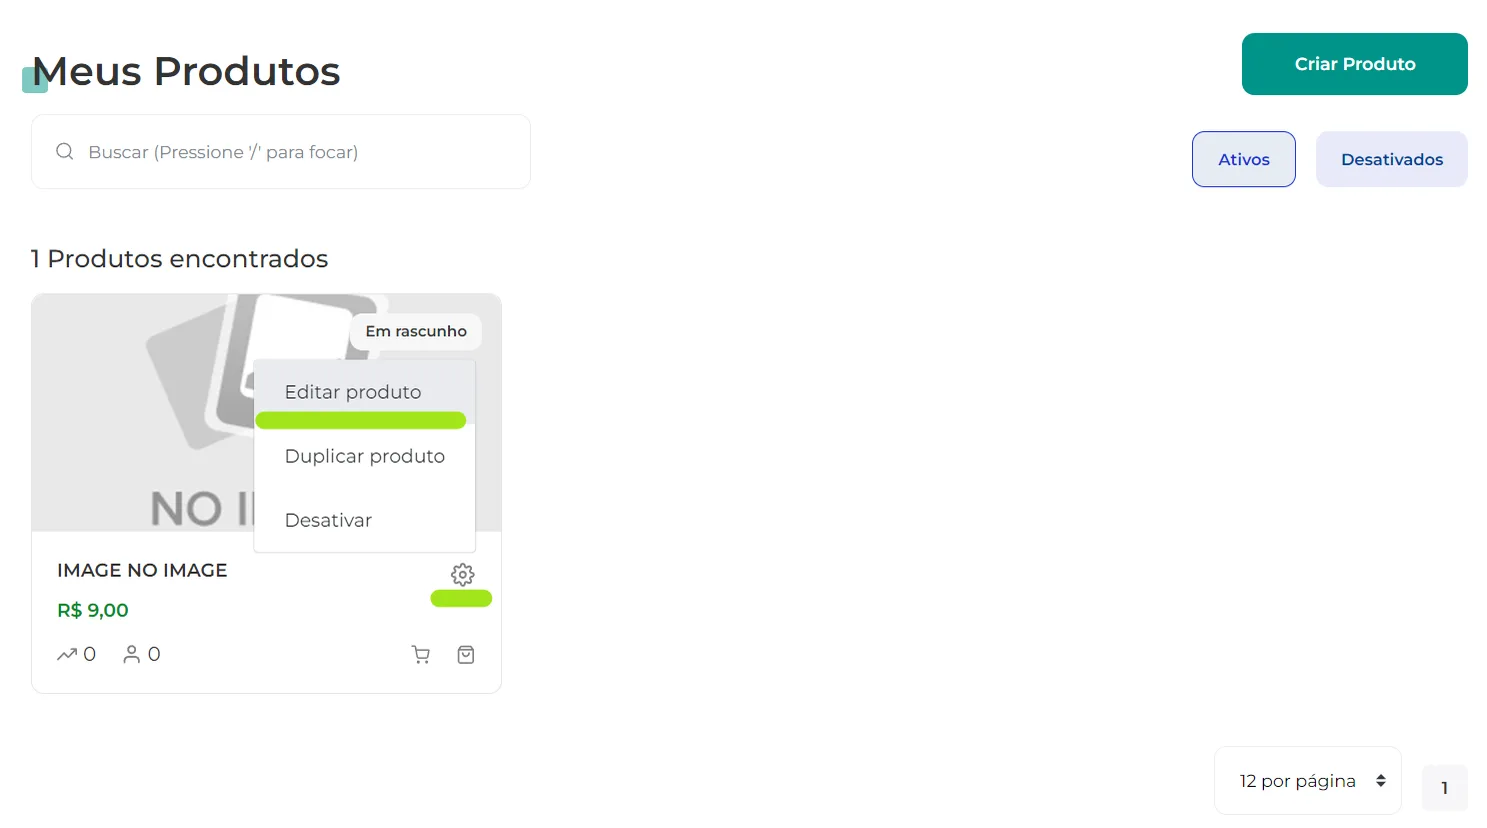
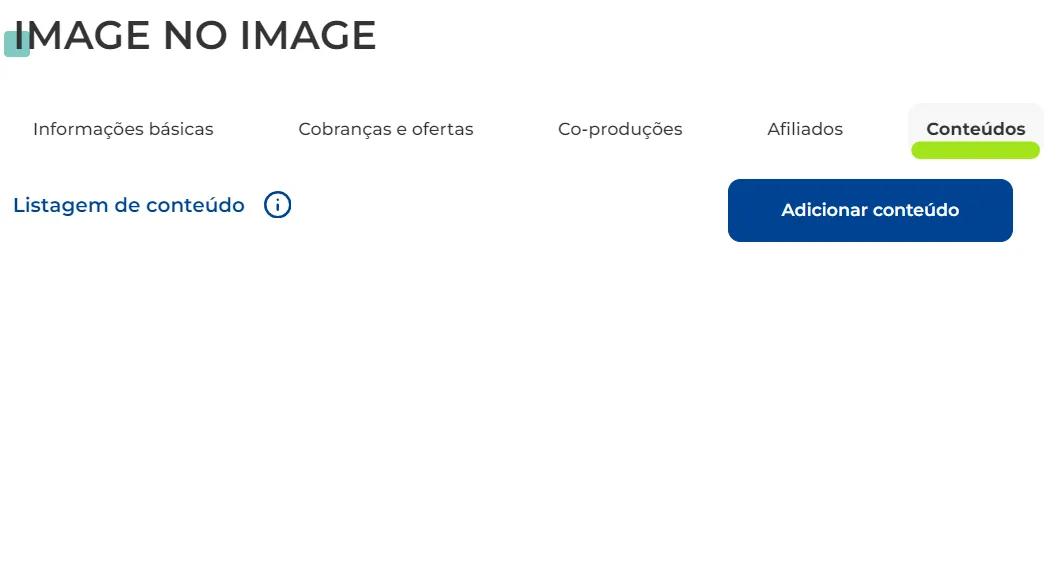
Click 'Add content' and then select 'External system', then 'Delivery via webhook'.
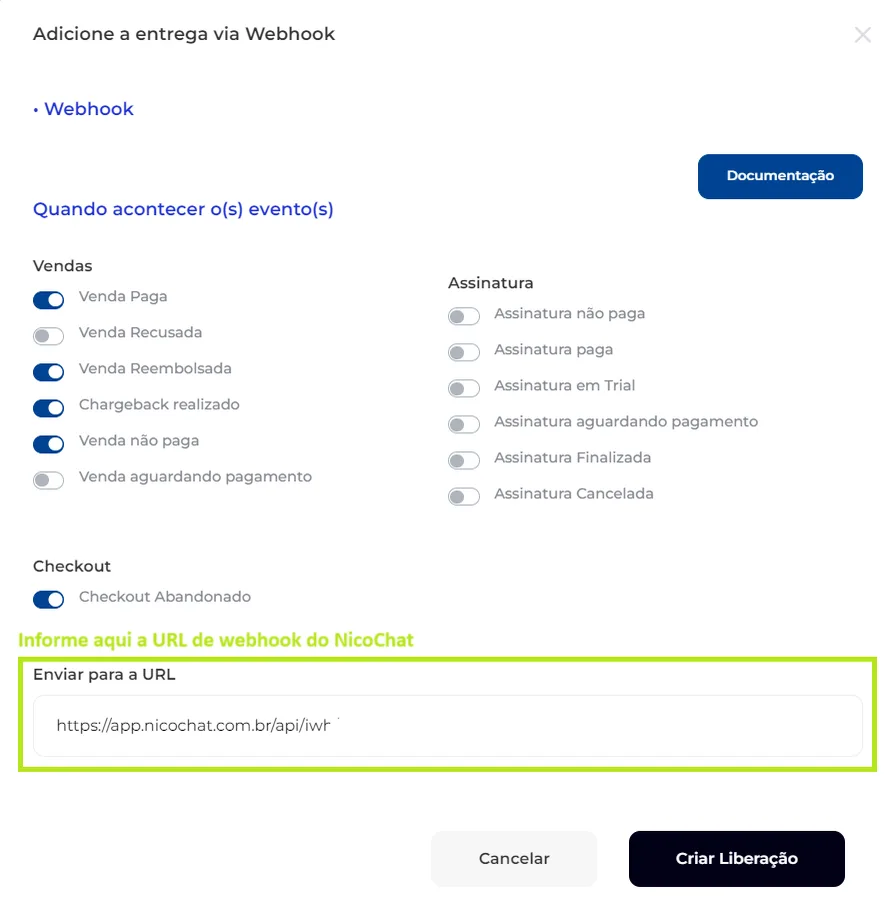
To enable the capture of specific events via Webhook in NicoChat, follow these steps:
- Event Enablement: Enable the events you want to record for notification via Webhook.
- Webhook URL: Provide the NicoChat Webhook request URL, where the events will be sent.
- Release Creation: After configuring the events and the Webhook URL, click the "Cria Liberação" button to activate the integration.
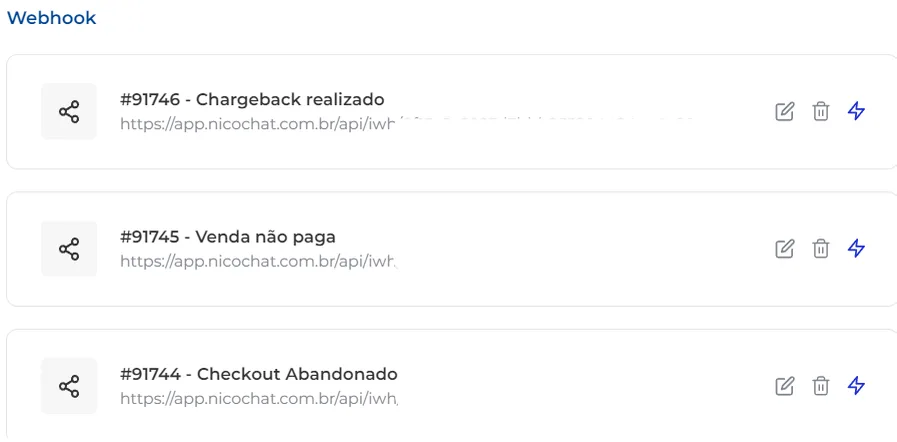
After creating the event release, the Webhooks will be configured individually, each receiving a name that describes its specific function. The blue button with the (⚡) symbol corresponds to the option for testing the event call.