Inbound Webhooks
The inbound webhook is a powerful tool for receiving data from any source into the chatbot through a POST request.
With inbound webhooks, your channel can even start a conversation with a contact who has never talked to it before.
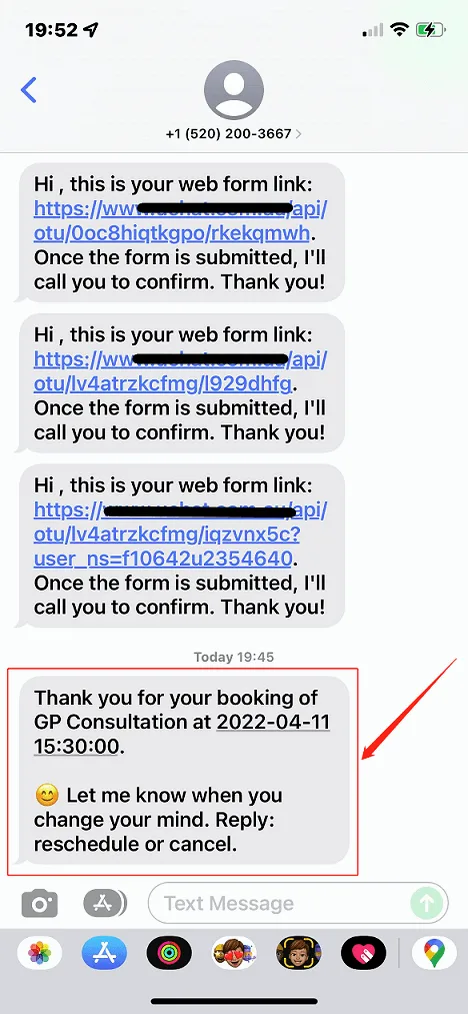
For example, when a customer fills in their contact information on your website, you send the data to the inbound webhook of a chatbot — say, an SMS Bot. The SMS Bot can then send a confirmation message to the customer's phone number.
If that webhook is inside a Voice Bot, the bot can even call the customer right away!
It is available in almost all channels. In the flow builder, go to Tools - Webhooks:
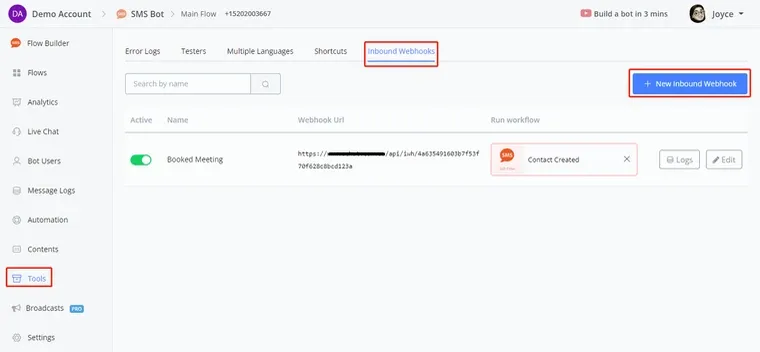
Click New Inbound Webhook, give it a name and click Save:
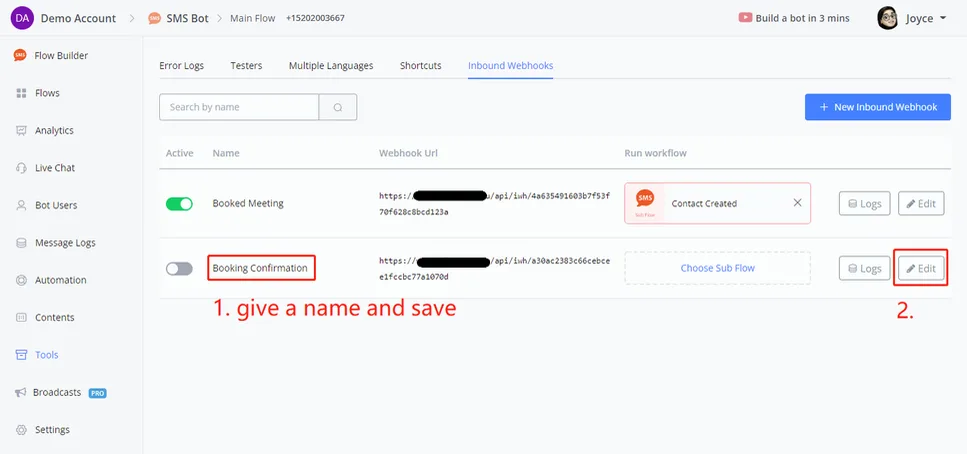
You will see the editing interface like this:
.webp)
This area shows where to send the data and the method, which is POST. Each inbound webhook has a unique URL across the whole NicoChat system.
This area shows an example JSON for reference. It describes the structure of the JSON data we will receive later. We need it to find both the user identification values and the data to be saved.
There are 2 ways to get an example JSON:
- type or paste it here manually
- receive real-time data from a live test
Whenever the webhook receives data, it first checks the paths specified here to see whether it can find an existing user in the chatbot.
If the user is not in the system, the chatbot will create a new profile. That is how the chatbot starts a conversation without having talked to the user before.
However, some channels do not allow the chatbot to start the conversation first due to privacy and spam issues.
For example, your SMS Bot can send messages as long as you have the recipient's phone number, while your Facebook Messenger chatbot cannot send messages to a Facebook user who has never talked to your channel before.
This is the process of how the system identifies a user:
user_nsuser_ns, user found; if not, next stepphone/emailphone or email, user found; if not, next stepphonephone valid? If yes, user profile created; otherwise, the webhook will not be processedThe mapping list shows which value should be stored in which custom field. Once you have an example JSON in the area above, click Preview Payload to open the mapping tool.
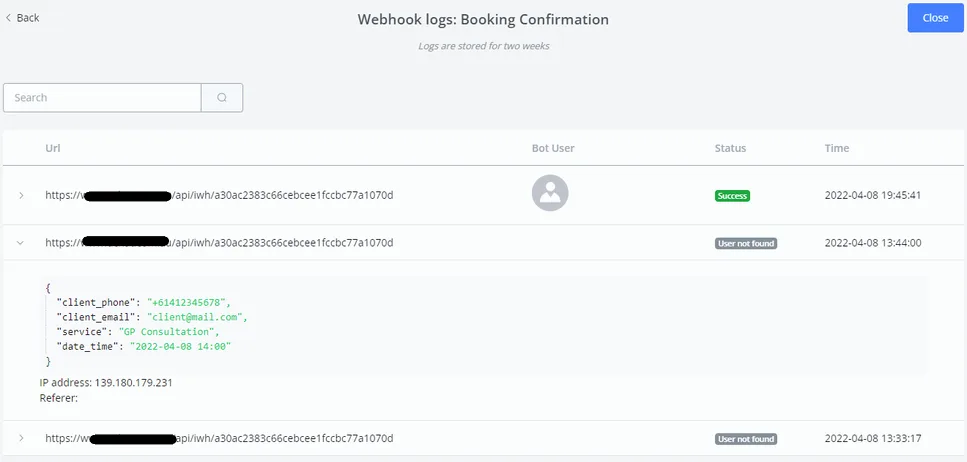
Every single request is saved in Logs. Click a record to see the received JSON data.
By default, the inbound webhook limit is 500 requests per 24 hours. You can see the limits in the image below:
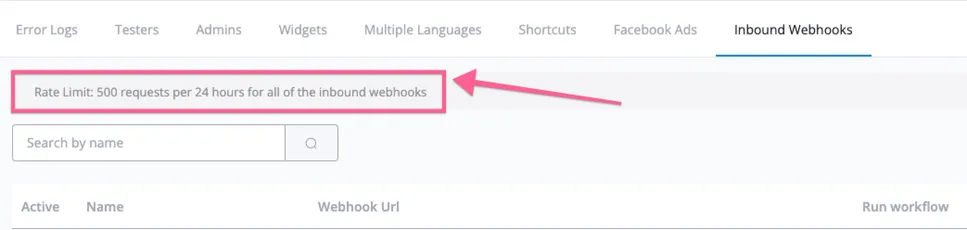
If you have exceeded the limits, you can upgrade to get more requests per day. These are the available options:
- 500/day - Included ~~ 15K requests per month
- 1,000/day - 30 credits per month ~~ 30K requests per month
- 2,000/day - 60 credits per month ~~ 60K requests per month
- 3,000/day - 90 credits per month ~~ 90K requests per month
- 4,000/day - 120 credits per month ~~ 120K requests per month
- 5,000/day - 150 credits per month ~~ 150K requests per month
- 10,000/day - 300 credits per month ~~ 300K requests per month
The add-on is per channel and to purchase it you must contact the NicoChat team.
First of all, if you are not receiving the data in the inbound webhook or cannot find it in the logs, it is very likely that you have reached the maximum daily request limit.
Here is how to test it.
You can send the request to the inbound webhook through Postman or through the NicoChat external request, and then find the information below in the header:
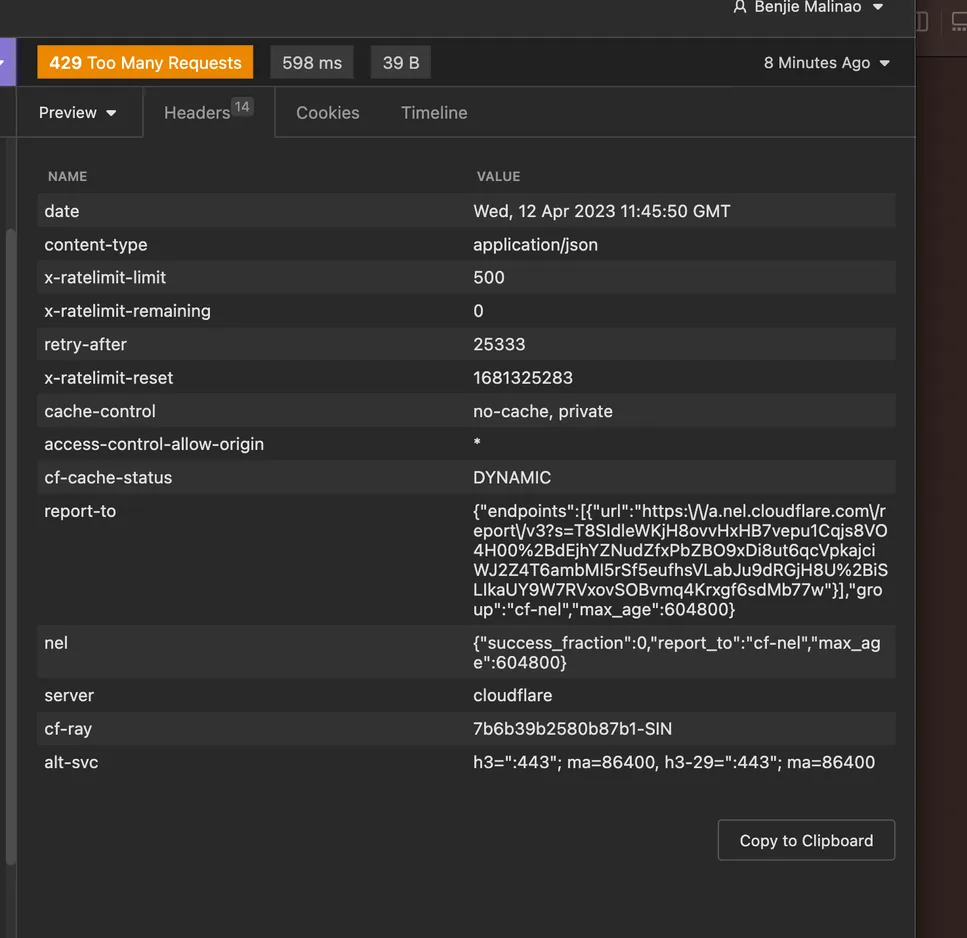
As you can see, there is a rate limit remaining; if it is 0, it means you have already reached the limit and need to upgrade to get more.
The perfect tool to test your inbound webhook is already built in everywhere! Just take a chatbot (from any channel) and test it in an Action Step.
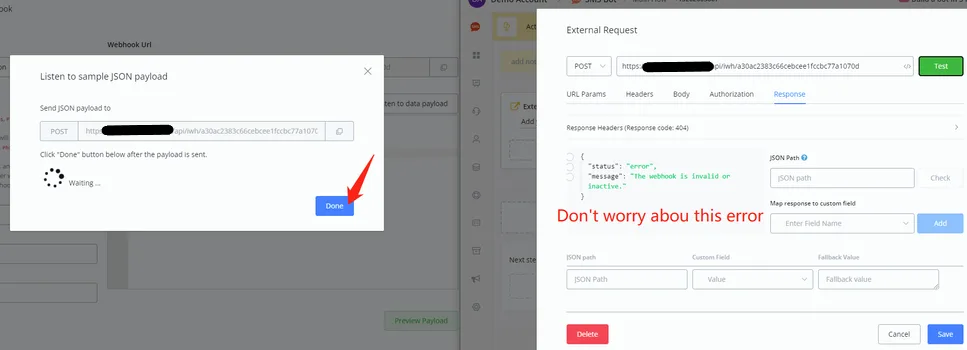
Open another NicoChat page side by side, keep the inbound webhook editing on page 1 and select an external request on page 2:
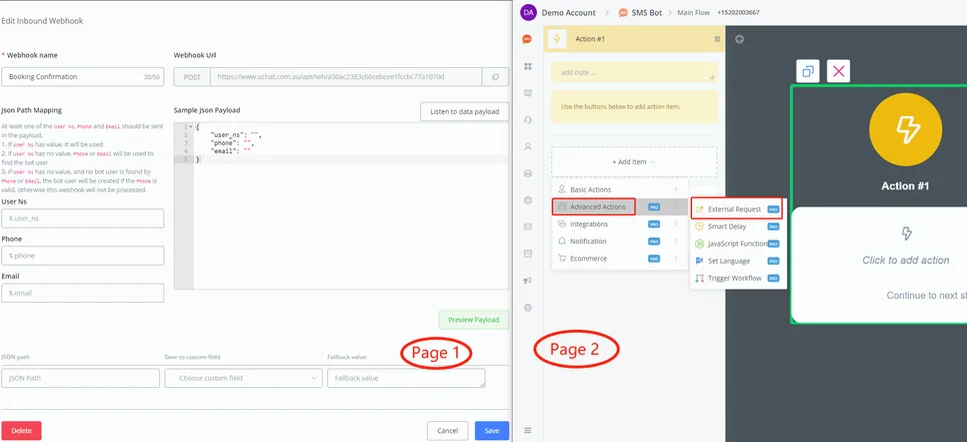
Follow steps 1 to 8 in the following screenshot:
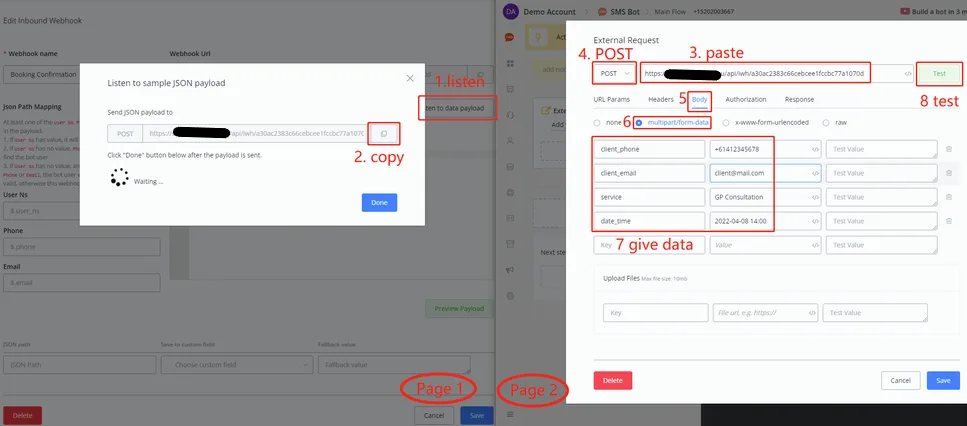
Provide the data that needs to be sent to the chatbot and click Test. You should get a "webhook inactive" error, since we have not activated it yet. That is fine: click Done on page 1 and you will see the data saved:
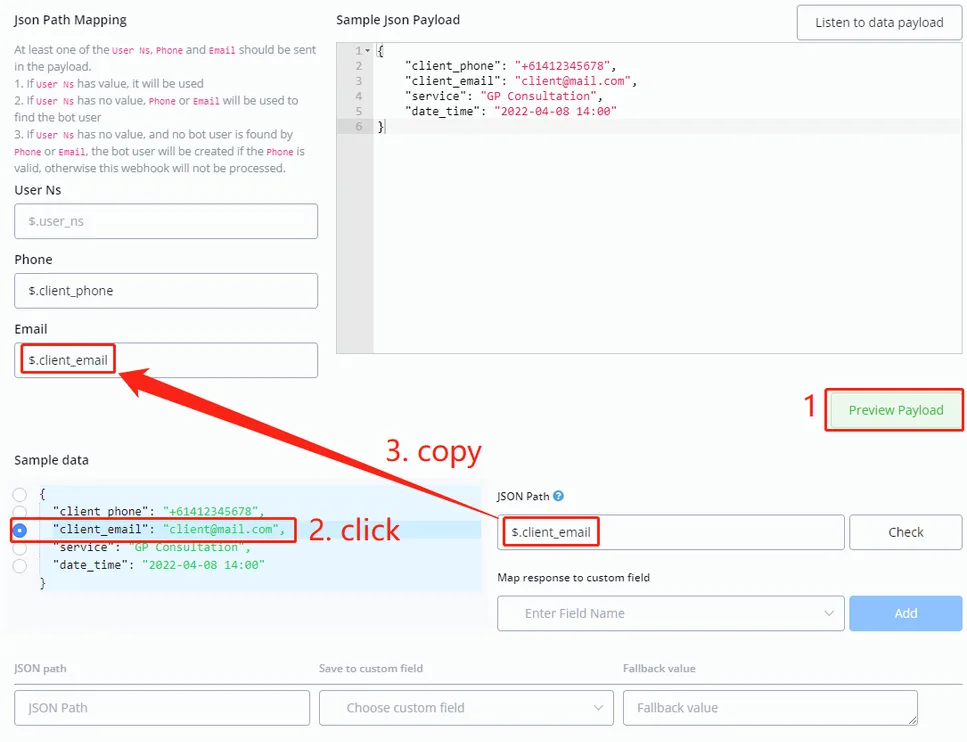
Scroll down a bit and follow steps 1, 2 and 3 to tell the system where the phone and email values are in the JSON:
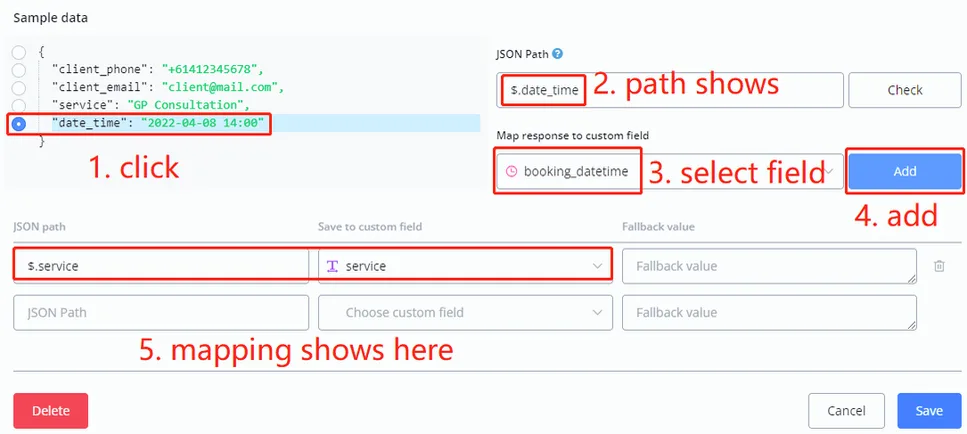
Finally, map the rest of the data to the chatbot:
Save your inbound webhook editing:
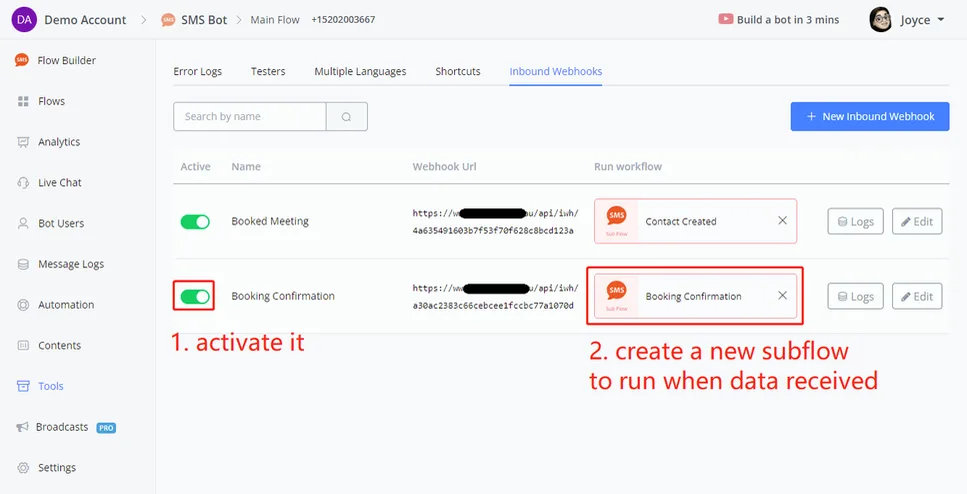
Enter the SubFlow and let's send a message to the contact:
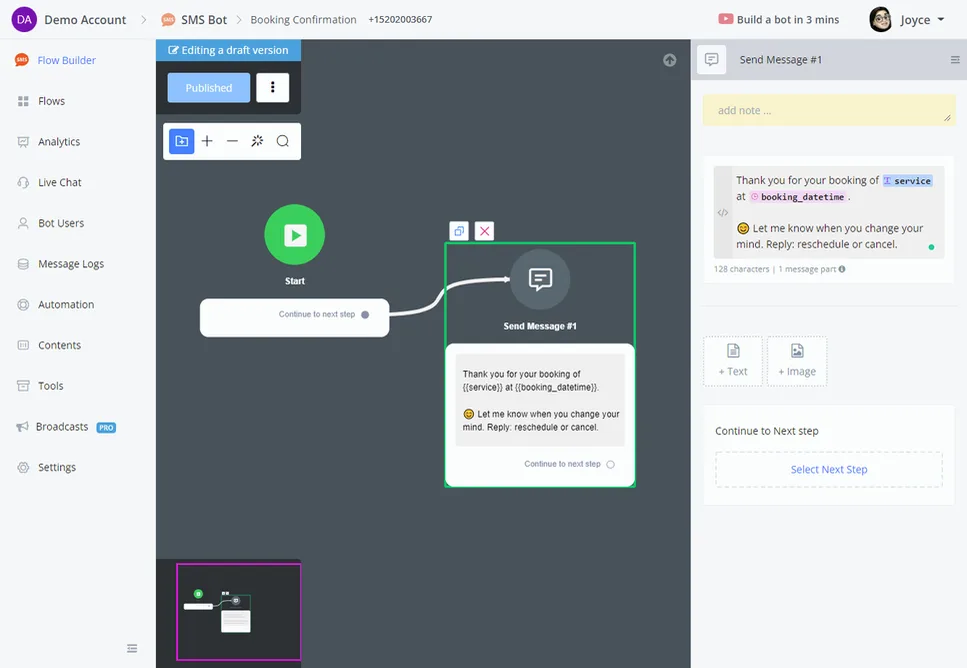
Publish the flow and let's run a live test on the external request again:
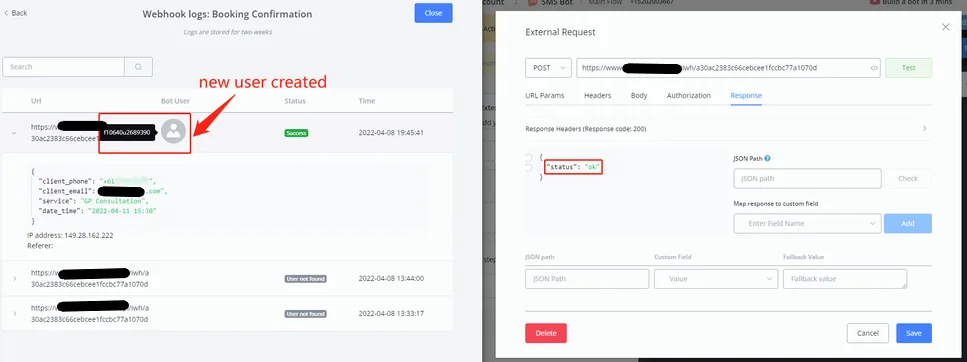
We can see that this time it worked without errors, because we activated the webhook and used a real phone number. Go to Logs and we will see that a new user profile was created successfully.
On the user side: