

Notification Topics (Facebook)
OTN(R) stands for One Time Notification (Request) and lets you send a follow-up message to a user as soon as they agree to receive it. This applies to Facebook only.
You can create OTNRs in two ways.
The first way to create OTN topics is to go to the Content tab in the left-hand menu and then to the OTN Topics tab.
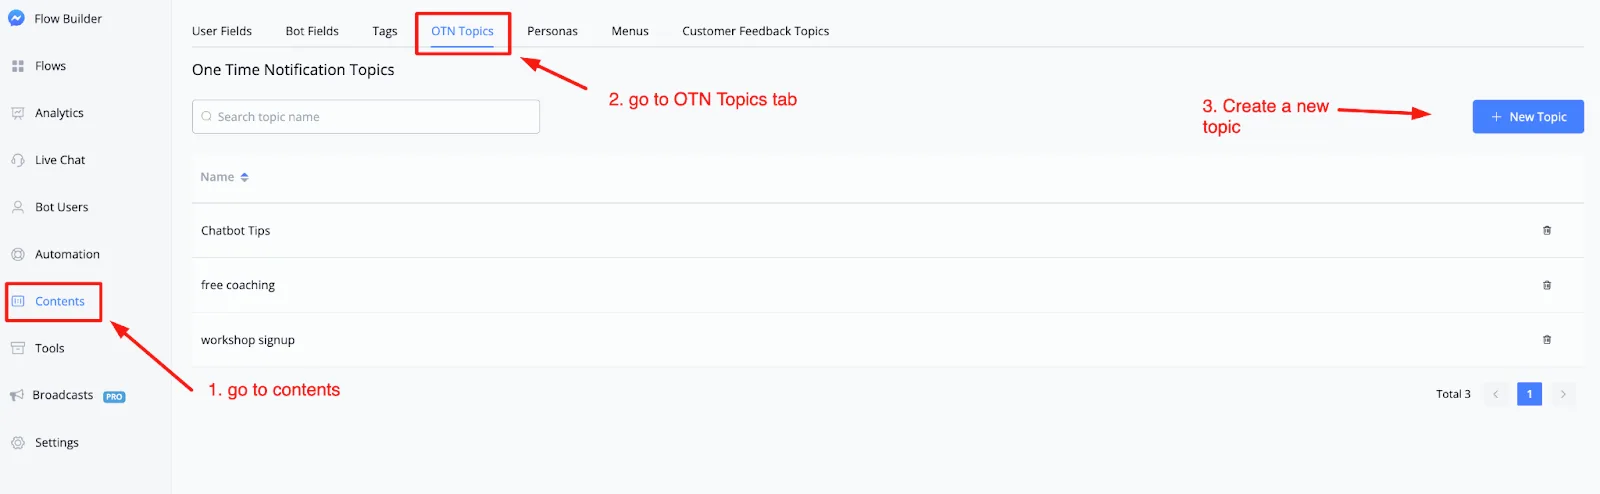
On this screen you find all the OTN topics created so far and can manage them.
To create a new topic, click the + New Topic button in the top right corner. A pop-up window will open.
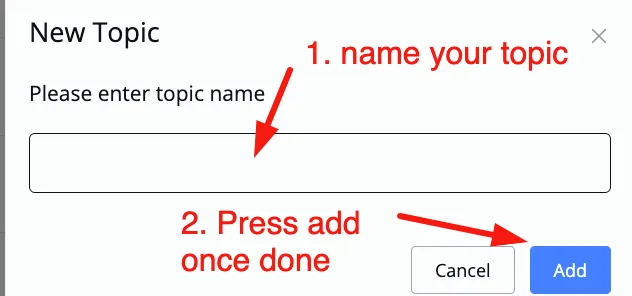
There you give the topic a name and add it. After clicking the Add button, you go back to the main overview, where the newly created topic appears.
You can also rename a topic: just click it and type the new name. To delete it, click the trash icon to the right of the topic.
.webp)
The other way, more direct and easier, is to create the OTN topic inside the flow builder itself.
Open your flow, insert a Send Message block and go to One Time Notification → OTN Request.
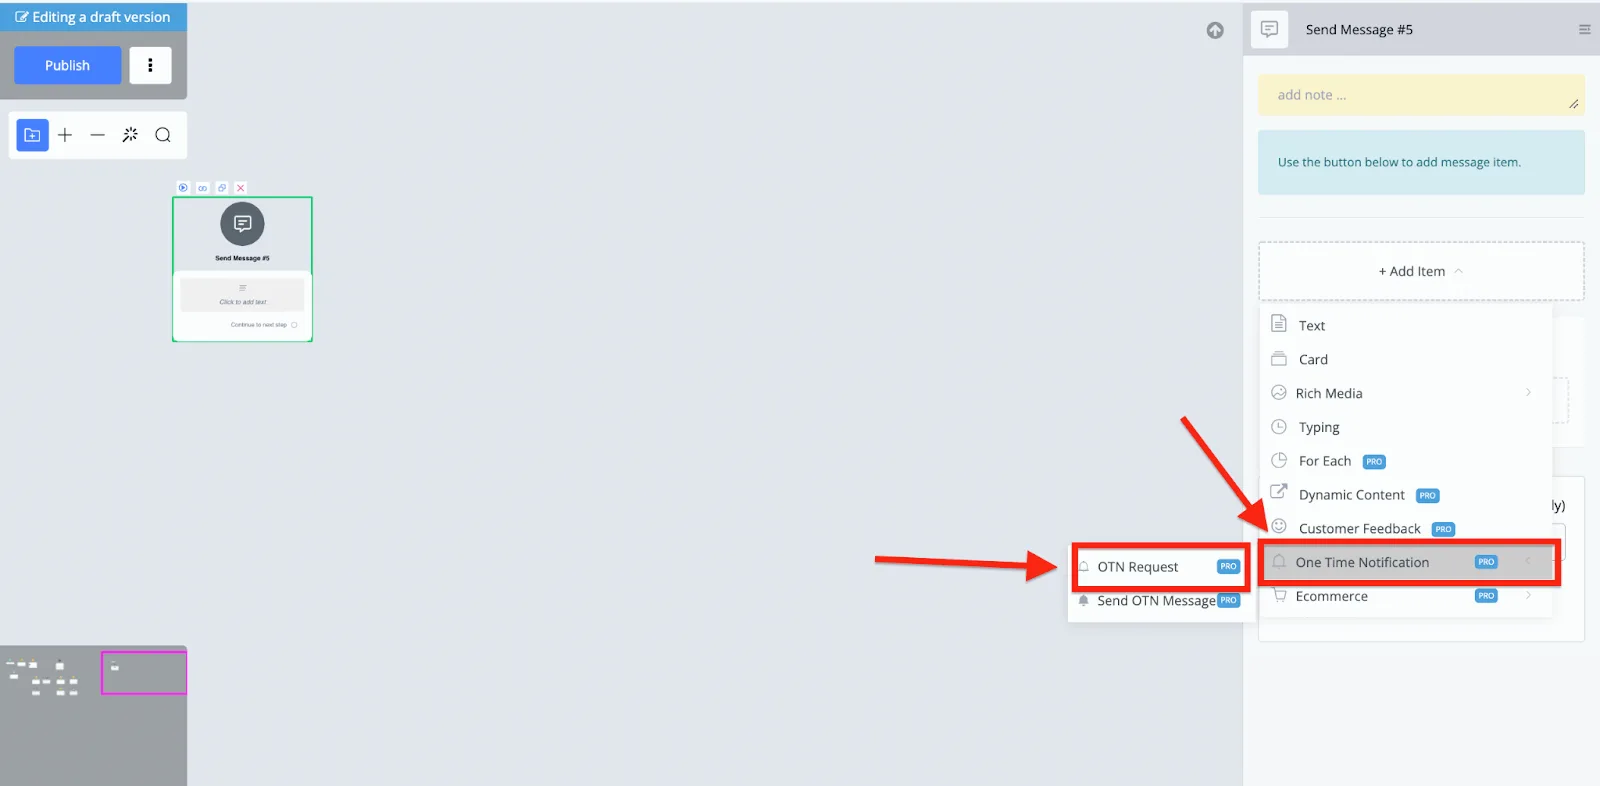
This takes you to the OTN request opt-in message. There you can select one of the topics already created or create a new one right there.
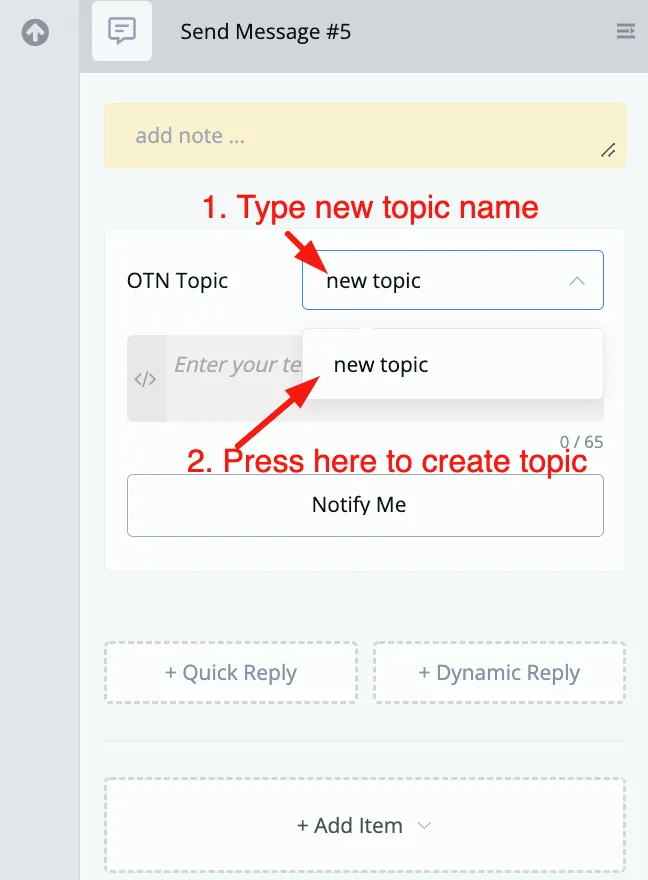
After you click, the topic is created and you can use it to request your subscriber's opt-in.
After creating or selecting the topic inside the flow builder, you can write your own message.
As soon as the user clicks the Notify Me button, they opt in to receive a message about that specific topic.
With that, you can send the user a message about that topic outside the 24-hour window counted from the last interaction.