Live Chat
Besides creating chatbot automations, you can also follow up with your subscribers through our Live Chat inbox. There is one available for every channel.
Besides creating chatbot automations, you can also follow up with your subscribers through our Live Chat inbox. There is one available for every channel.
You can access Live Chat in two ways:
- Through the main dashboard overview
- Through each chatbot channel, individually
In the main dashboard overview, there is a tab at the top named Live Chat.
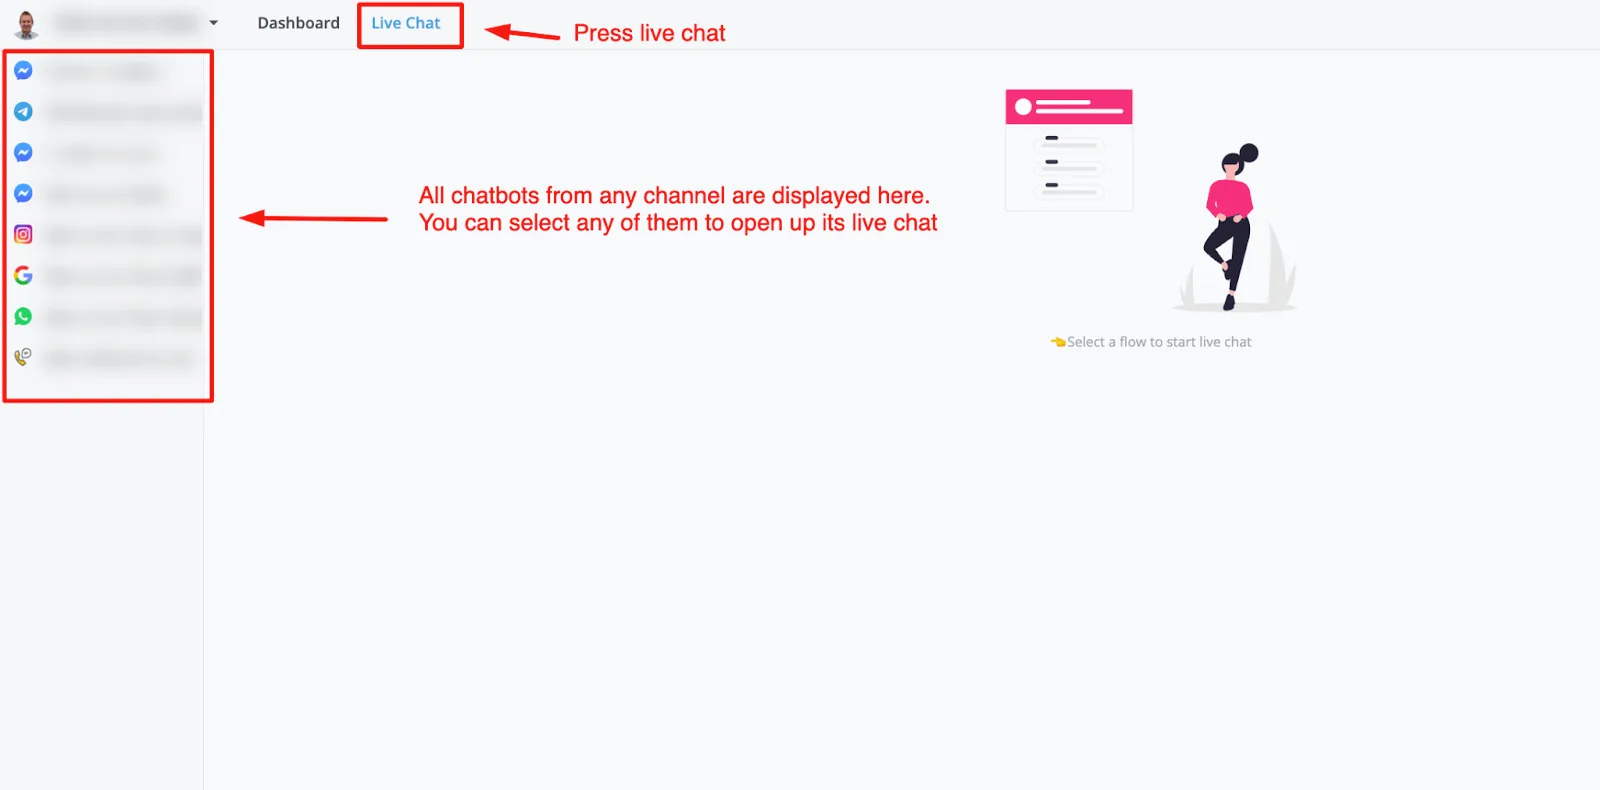
The biggest advantage of this overview is that you see all the channels where you have built chatbots. That is why opening Live Chat from the main dashboard is very easy: just select the chatbot and Live Chat appears.
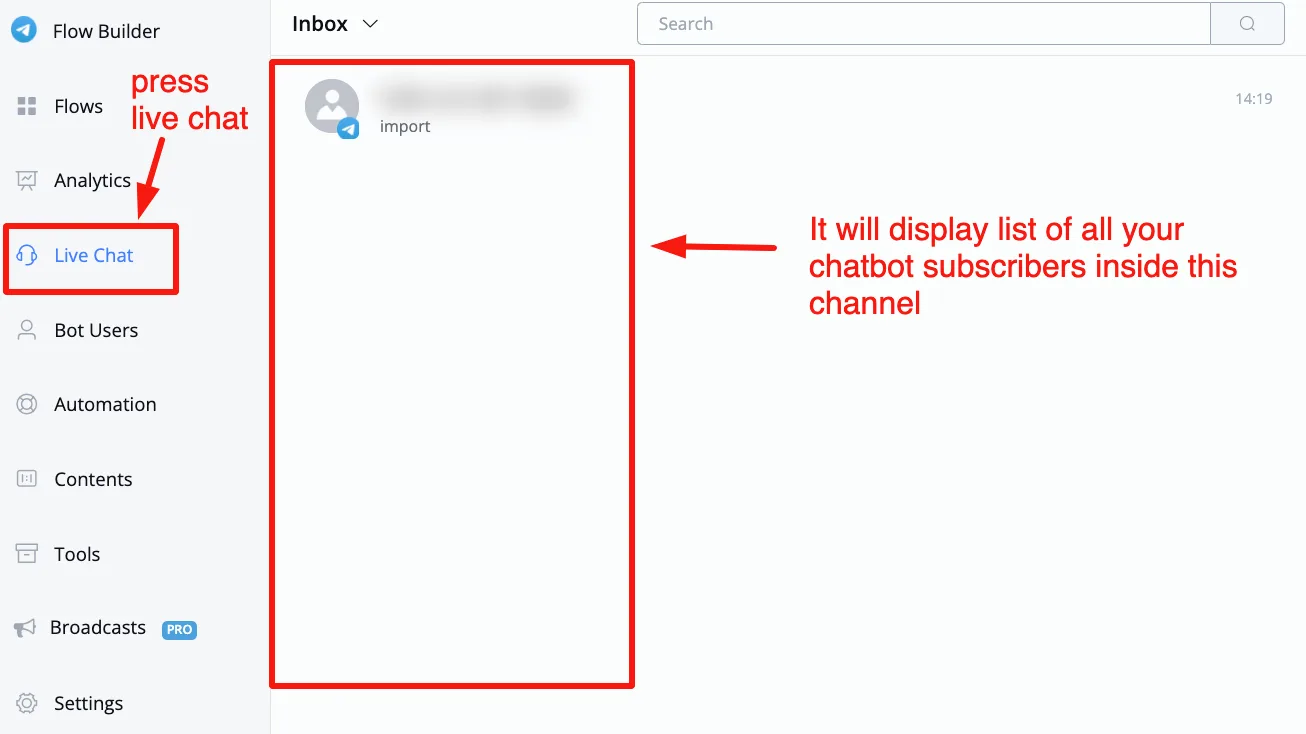
If you are in any of your channels, you can also access the Live Chat of that channel. Just choose Live Chat and it opens displaying all the subscribers of that chatbot channel.
Once you select one of your subscribers, you see Live Chat in action. There are many options and much information on the screen, so we will walk you through each one.
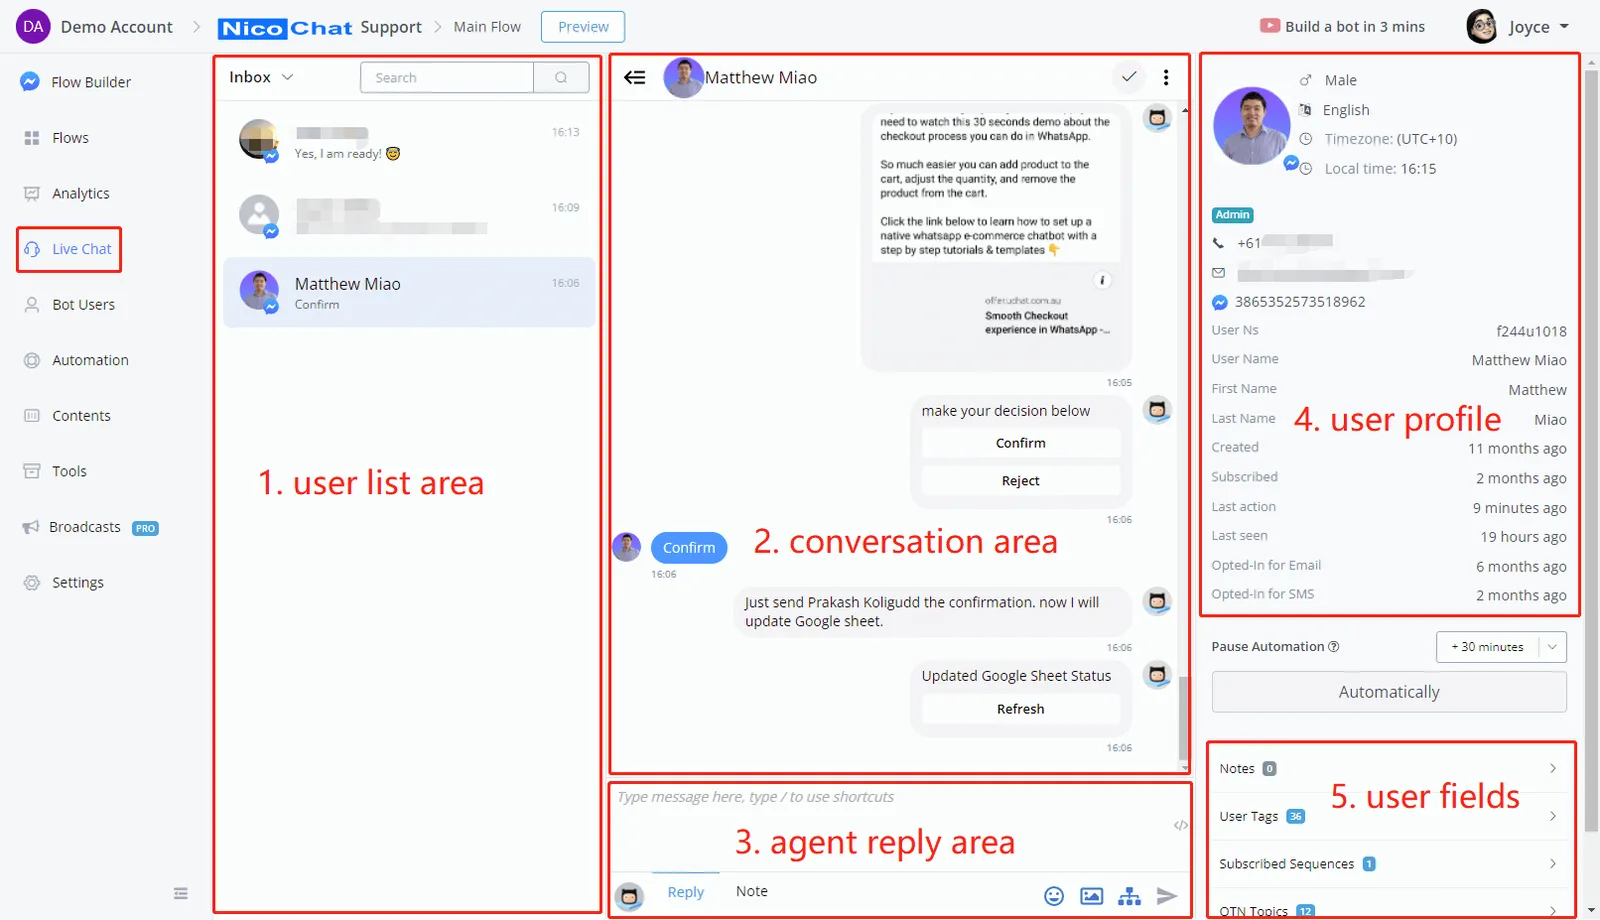
- Click Inbox to switch between Inbox and Done. When you finish a conversation, move the users to Done.
- Use the search bar to look for a conversation by the user's name.
- Click a user to view the conversation details and the user profile.
- At the top, click the
<=icon to hide Section 1, the area with the user list. - Next to it are the subscriber's profile photo and full name.
- In the upper-right corner, click the tick icon to move the subscriber to Done.
- The 3-dots icon, in turn, offers the options Hide message from bot and Manage Shortcuts.
Hide message from bot lists only the messages sent by the user and by the agent, which gives a clearer view of the conversation and prevents agents from having to read too many messages.
Shortcuts help agents answer the user's questions faster. You can also manage your shortcuts in Tools - Shortcuts.
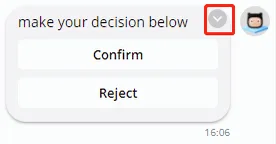
- Hover your mouse over a message sent by the bot and click the little v icon to resend it or to jump to that step in the flow, in case you want to edit anything.
- Write a reply in the blank area.
- Type a slash and a keyword to look for a shortcut. Use the up and down arrow keys to go through the shortcuts and press Enter to insert the pre-written content.
- On the right side, the </> icon is used to call a variable — for example, the user's
First Name. You can also call it faster by typing the opening curly braces{{and searching for a field name. - At the bottom, the leftmost icon is used to switch persona. The default icon corresponds to the default persona, the chatbot itself. Add personas in Content - Personas.
- Switch between Reply and Note to change the reply mode. In Reply mode, the reply area is white and the content is sent directly to your subscriber. In Note mode, the reply area is yellow: the content appears in the conversation area, also in yellow, but these notes are not sent to your users. They serve only as internal reference.
- The last 4 icons, in the bottom-right corner, are for sending emojis, media (image, gif, audio, video and file) and subflows. The last icon sends the message/note. You can also press the Enter key.
- Add or remove tags directly from this overview. It is very useful for moving subscribers into lead funnels and the like.
- OTN topics and sequences can only be removed from the user.
- The same goes for the contact fields: you can view them, adjust the values or delete them entirely.
After you finish a conversation with a subscriber, you may want to send them to a subflow. Just click the icon: a window will open for you to select or search for your flow.
After selecting the flow, click the blue Send Sub Flow button and the flow will be sent.
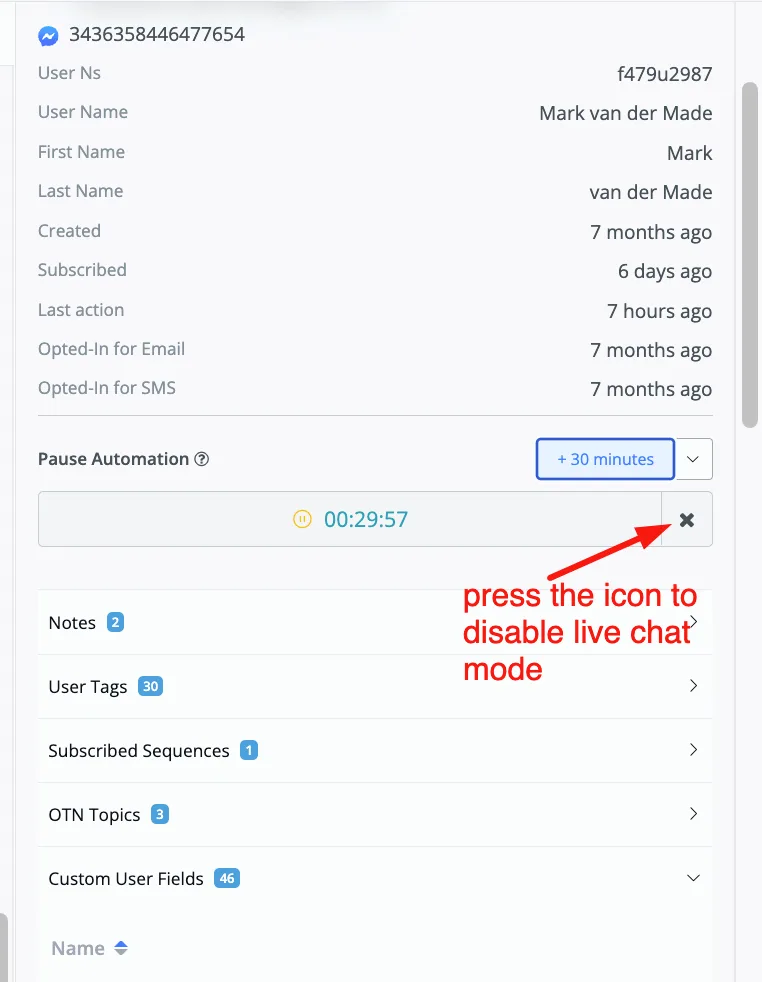
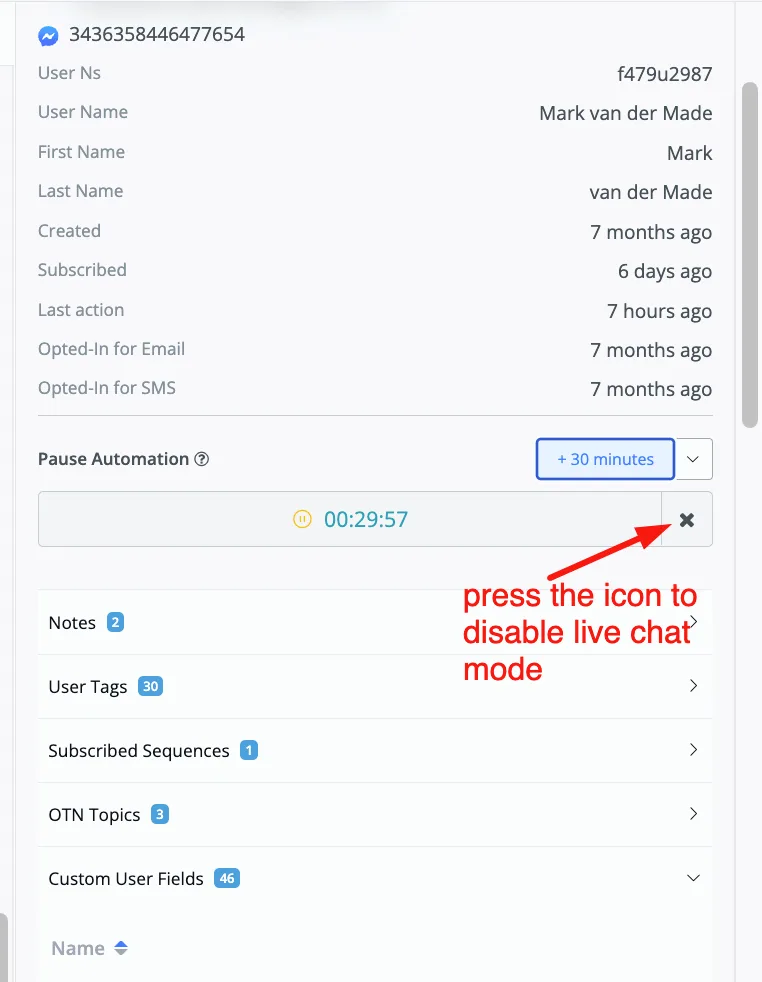
NOTE: make sure you have disabled Live Chat mode before sending the subflow. Otherwise, the chatbot will not be able to send the messages of the flow.