URL triggers
For Facebook bots, you can set up some triggers to quickly start talking to the bot. To set up:
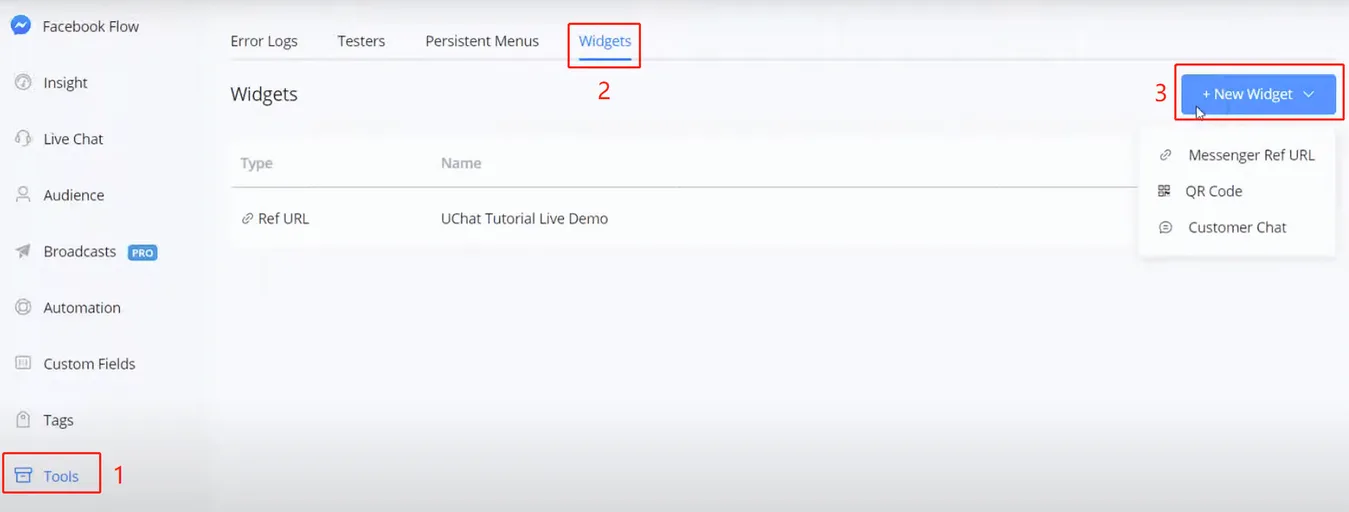
For Facebook bots, you can set up some triggers to quickly start talking to the bot. To set up:
- go to "Tools" in the left sidebar
- click "URL triggers"
- "+ New Trigger"
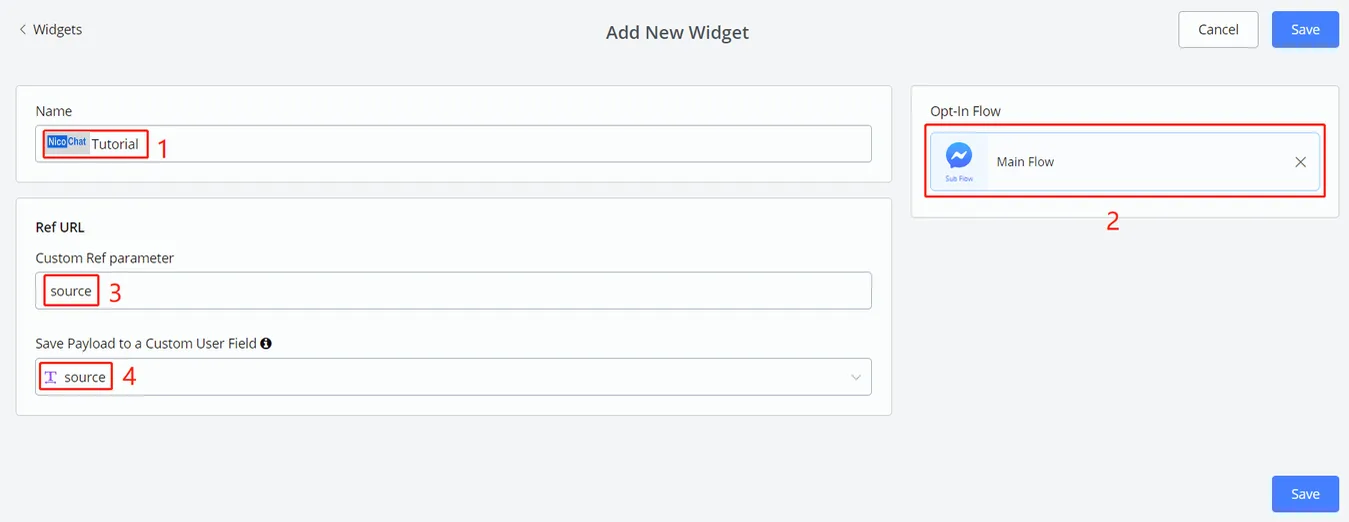
- give the trigger a name
- choose the SubFlow the link goes to
(leave 3 and 4 blank if no reference is needed)
- enter a parameter name
- assign a custom user field
What does the Ref parameter do?
For instance, you create a Messenger Ref URL to your main flow, so that by visiting this URL your users can start talking to your bot.
And what if you want to gather more information from the link, such as knowing where your users found it? In that case, put “source” in area 3 and, in area 4 of the picture above, a variable to store the source.
Then add a source name to your link according to where you placed it. This is how you get extra information from the link.
After filling in all the information, click “Save”. Then click the pencil to edit this trigger and you will see the unique URL generated for it:
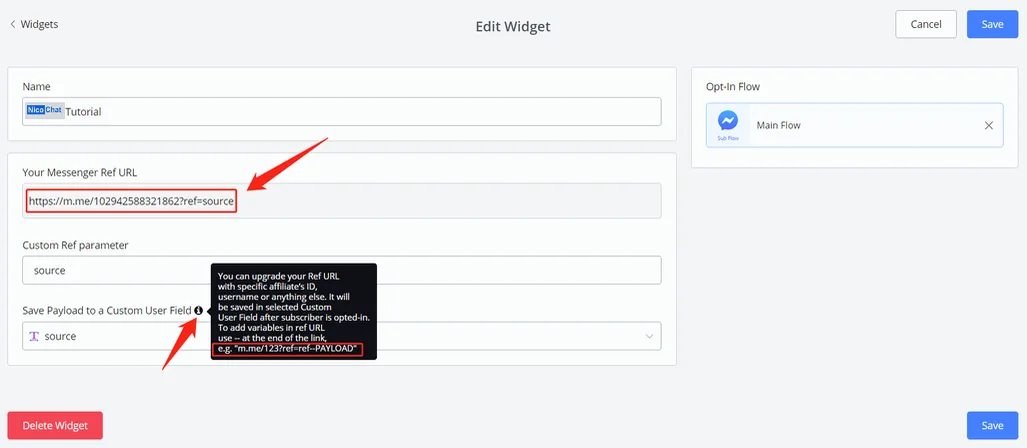
So, by visiting any of the following links, your users can start talking to your bot:
As you may have noticed, by adding “--xxx” after the link, the value “xxx” is transferred to the bot.
URL links are handy to click on electronic media, while QR codes are more suitable for on-site use. By scanning a QR code, your users can start talking to your bot.
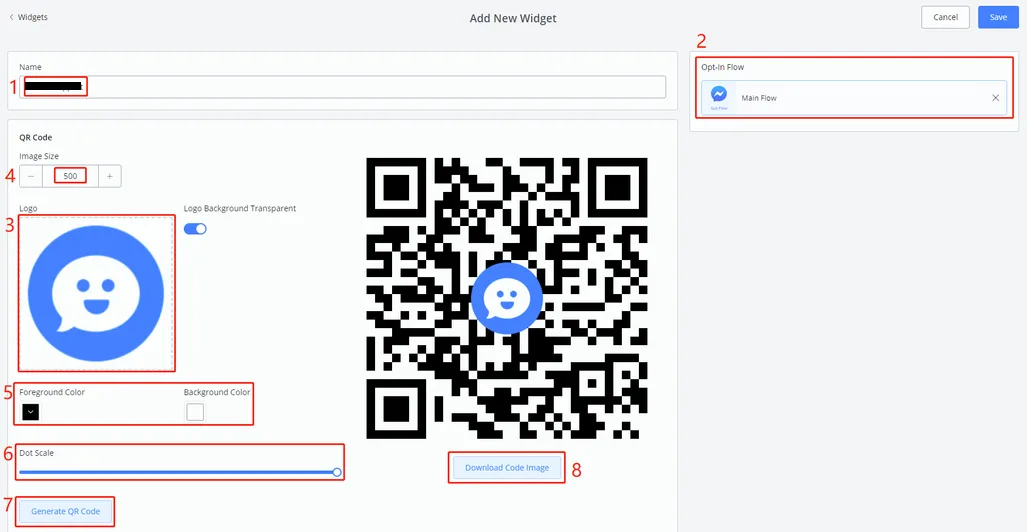
To set up:
- give the trigger a name
- select a SubFlow
- upload your logo image
- adjust the image size if needed
- adjust the color if needed
- adjust the dot scale if needed
- click "Generate" to get an image on the right. Repeat steps 4, 5 and 6 to get the final image
- download your QR code, print it and put it in your store, restaurant, office, etc.
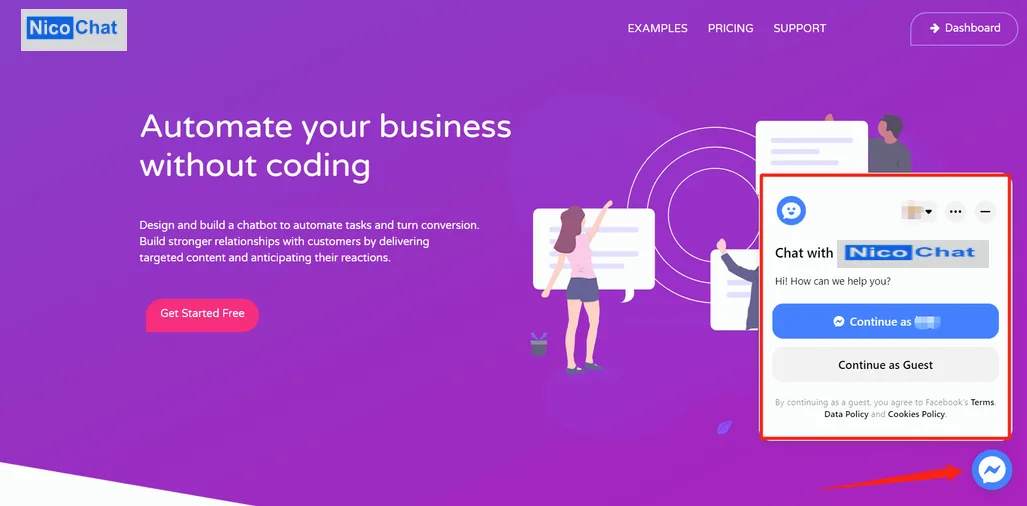
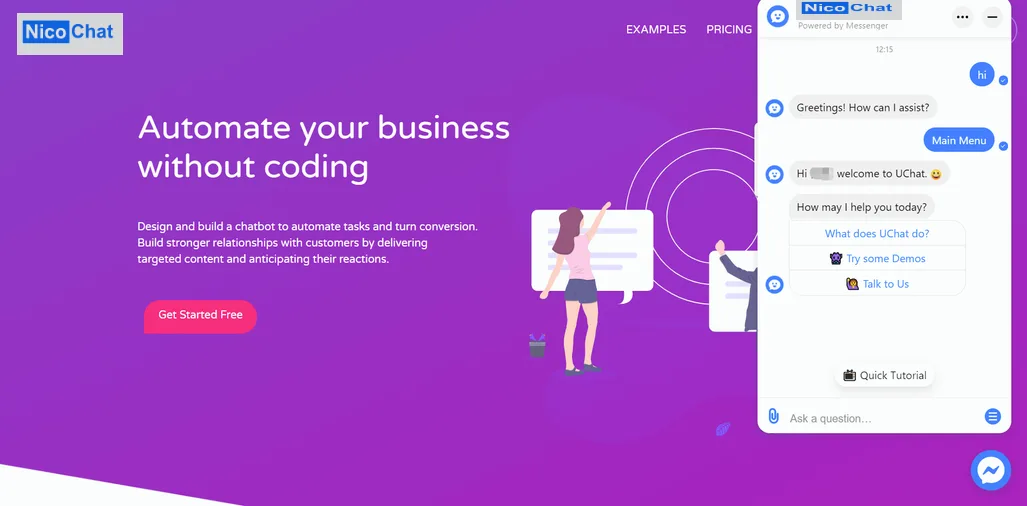
This trigger is to be embedded on your website, so that it has a bot serving users, as on the NicoChat website:
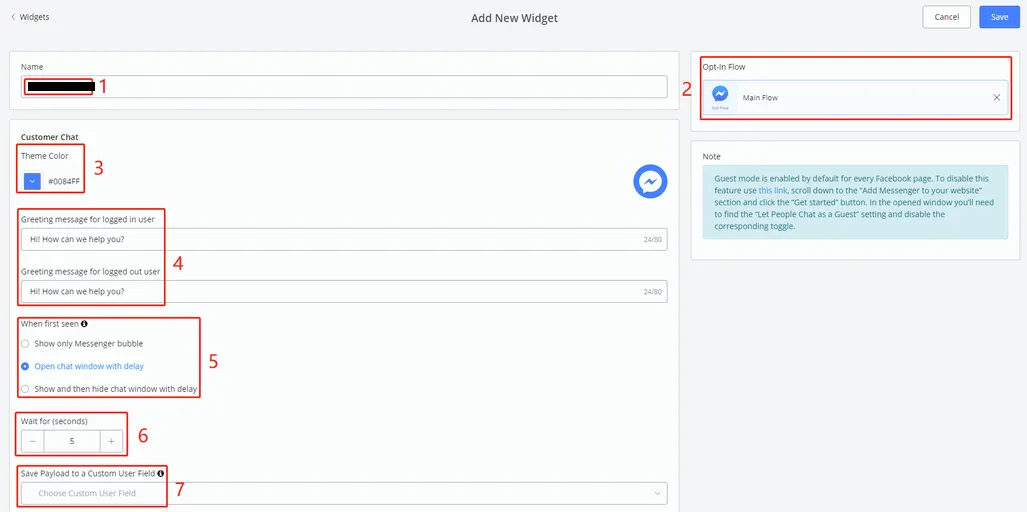
To set up:
- give the trigger a name
- select a SubFlow
- adjust the theme color if needed
- adjust the greeting message that will be shown above the "Continue as xx" button (see the previous picture).
- select a display type
- adjust the delay if you select the second or the third display type
- for the payload, see the explanation in Messenger Ref URL, above.
Click “Save” after finishing all the settings. Again, click the pencil to edit this trigger and you will see this button:
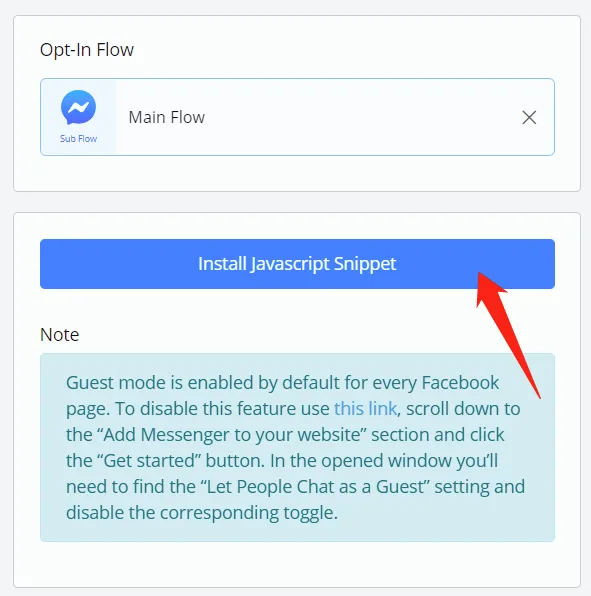
Click it.
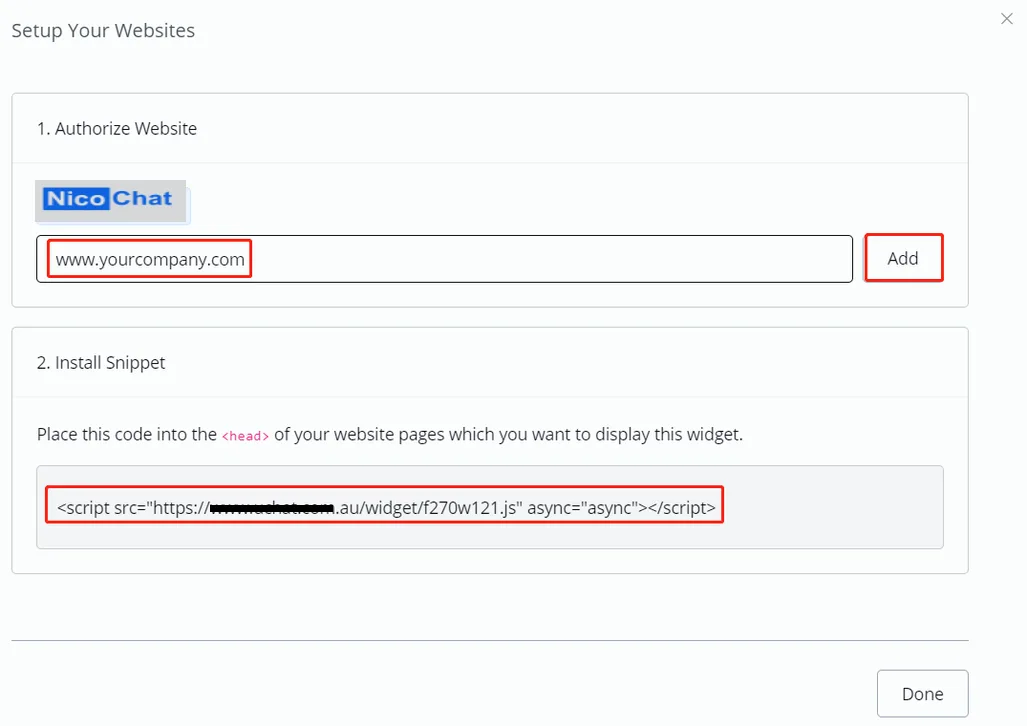
Add the websites where you want to place this bot. Then install the snippet by copying and pasting the code.
Perfect! 😎 Now you have a bot on your website.