

Web Chat (Omnichannel)
With the Web Chat widget, you can add a chatbot to any website without depending on any other channel. This helps you unlock the power of conversational marketing without the downsides or restrictions other channels might have.
To access the Web Chat Widget, you need to create an Omni-Channel chatbot. Note that Web Chat is only available in Omni-Channel.
If you have not created the Omni-Channel yet, use the “Setup Omni Channel” button to create it, as shown in the image below:
When creating the Omni-Channel, give it a name; then you will see the screen below:
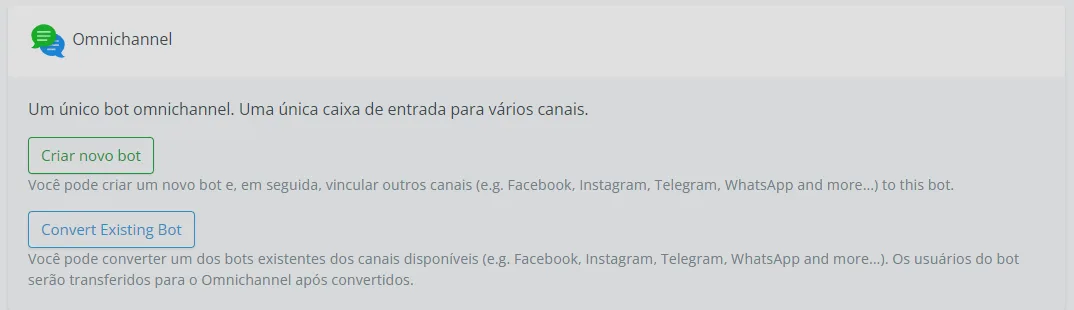
You can create a new channel or convert an existing channel into Omni-Channel.
After creating the Omni-Channel, you will find the Web Chat Widget in the left sidebar.
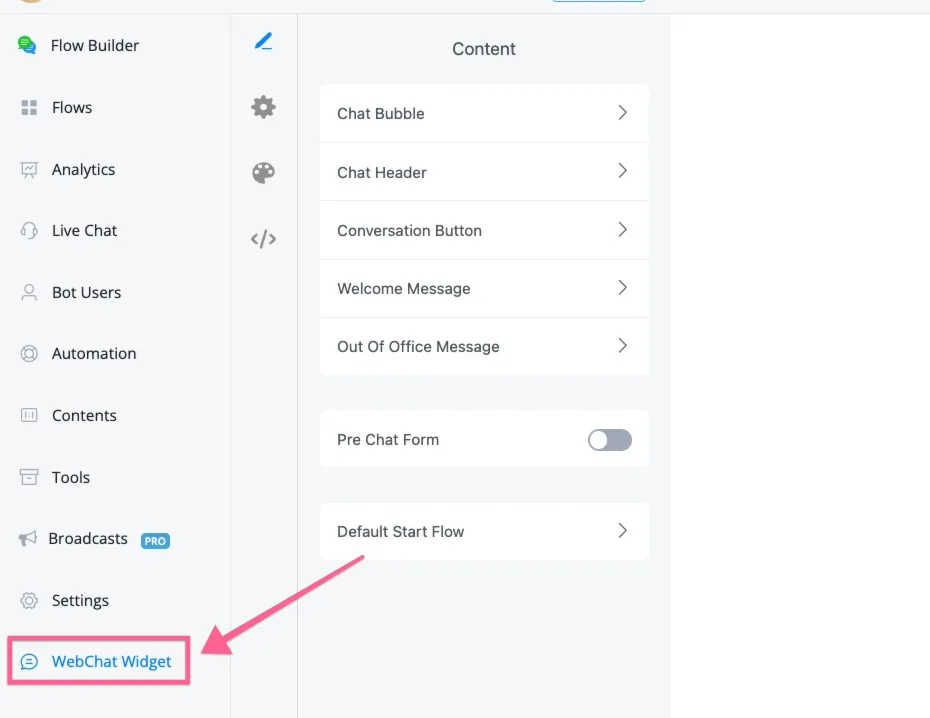
Once you have located your widget, press the pencil icon to its right to edit and customize the Web Chat Widget to your liking.
Once pressed, you enter the overview of the available settings;
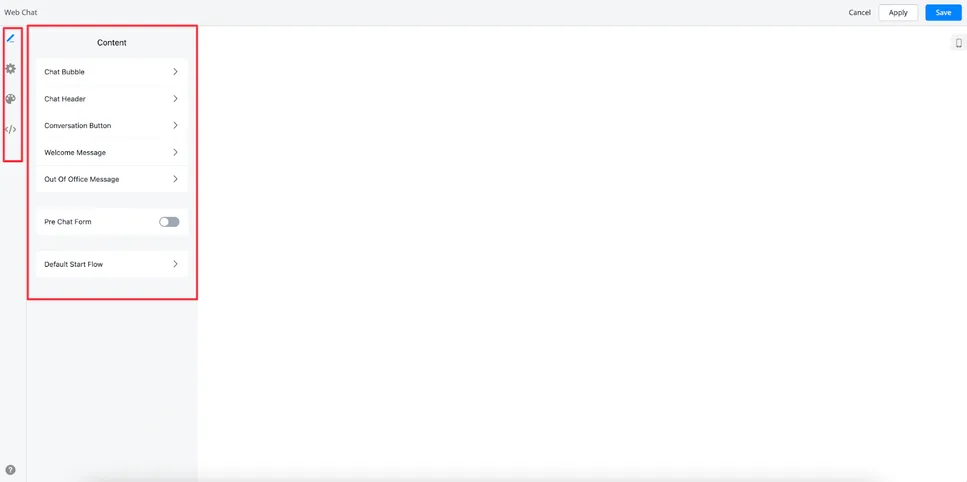
The first section of the widget is the Content tab. There you will find the following options;
- Floating Chat
- Chat Header
- Conversation Button
- Welcome Message
- Out of Office Message
- Pre Chat Form
- Default Initial Flow
Let us go over them 1 by 1.
In the Floating Chat, you select the bubble icon you prefer. Your choice appears immediately in the preview in the bottom right corner;
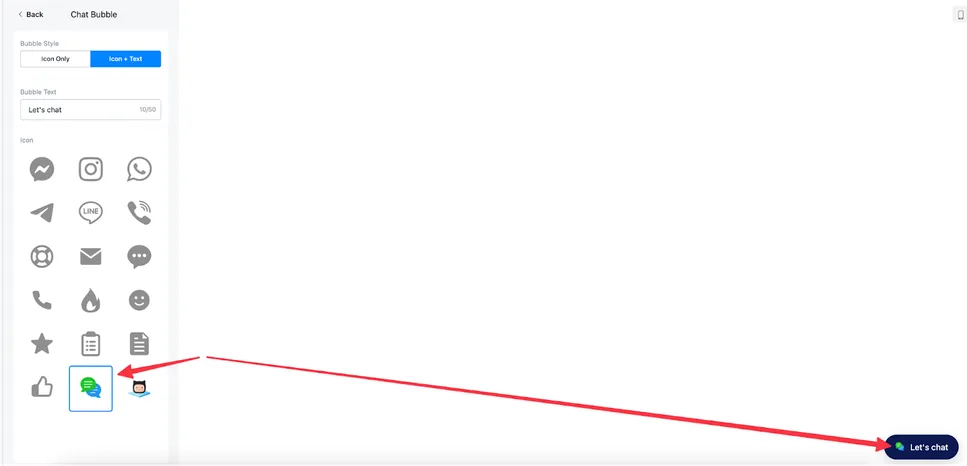
In the options at the top of this screen, you can also choose between displaying only the icon or combining it with text.
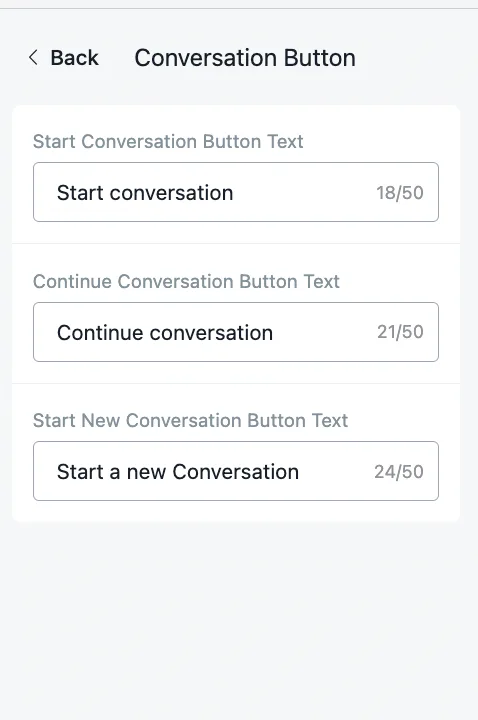
With the Conversation Button, you create your own call to action (CTA) buttons to let users start, continue or begin a new conversation;
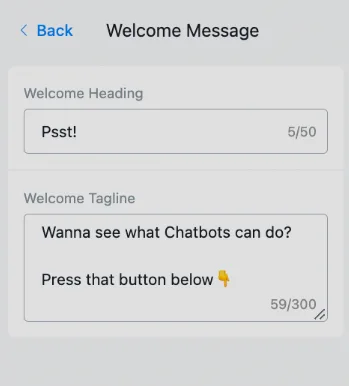
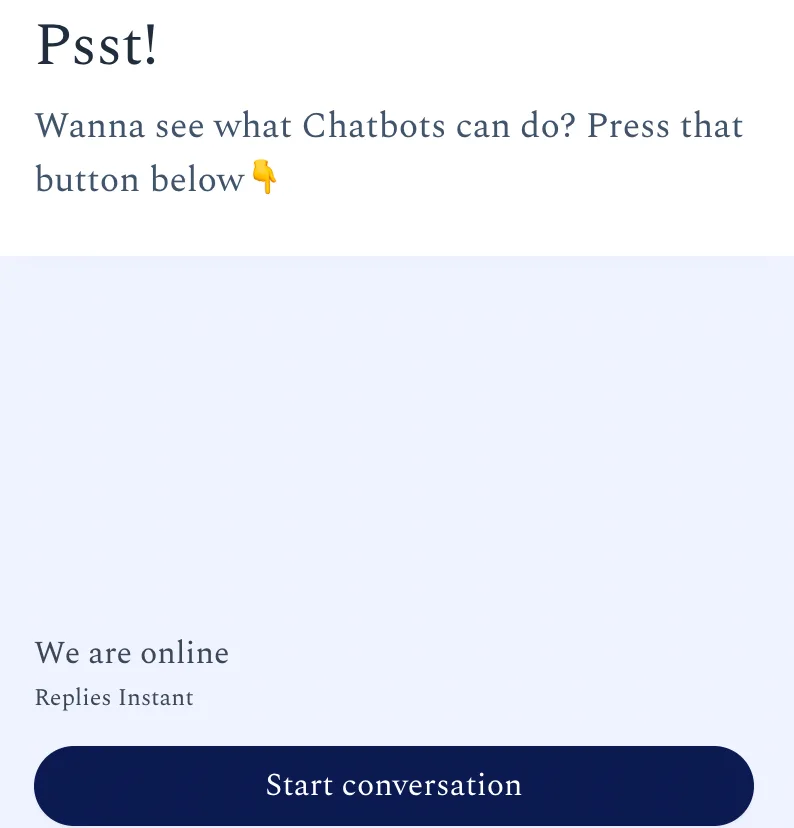
You can add a welcome title and slogan to encourage people to click on your Web Chat Widget.
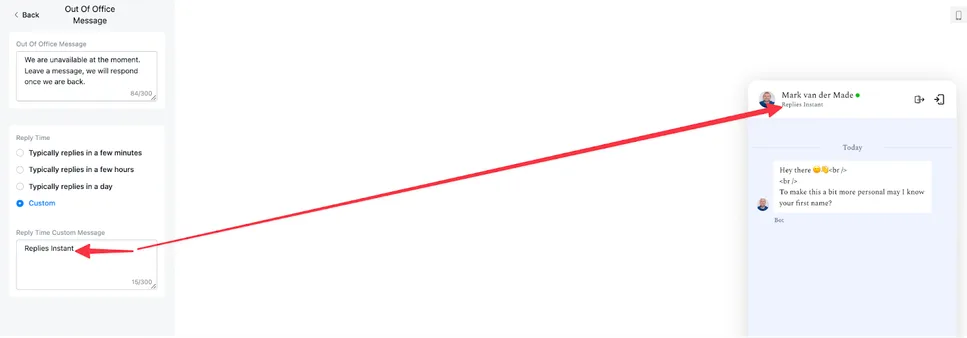
With the out of office message, you add a notice to your widget. You can also set the reply message;
With this setting, you capture essential data before the chat even starts and save it to any available system field or custom contact field.
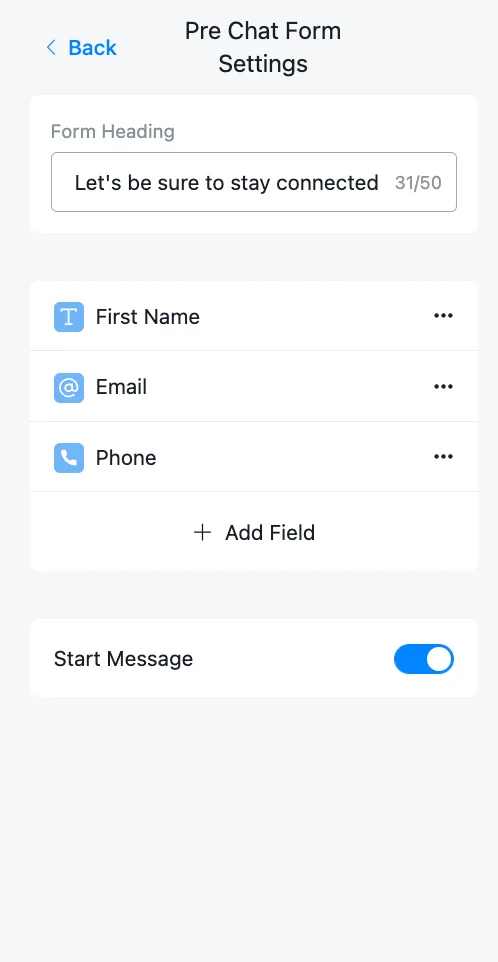
First you have the form header, where you can state its purpose. Then insert a field by pressing the + Add Field button.
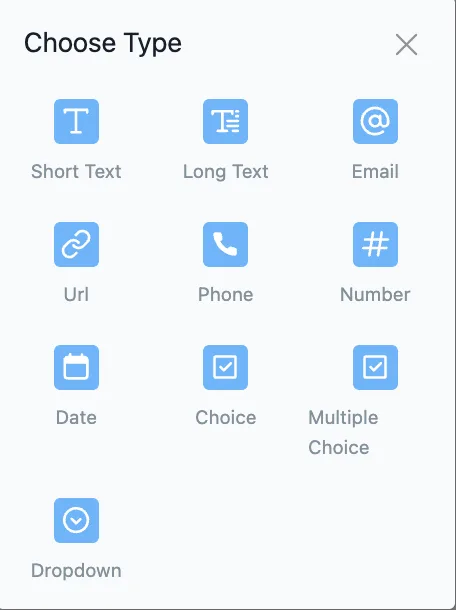
You will then be able to select any of the following field types;
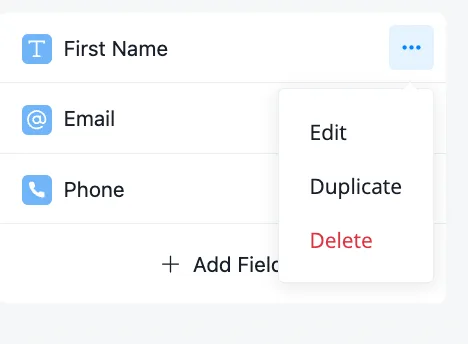
After selecting the type, you can edit it by pressing the edit button;
When editing any of the fields, you will have several options to choose from. Let us use an email type field as an example;
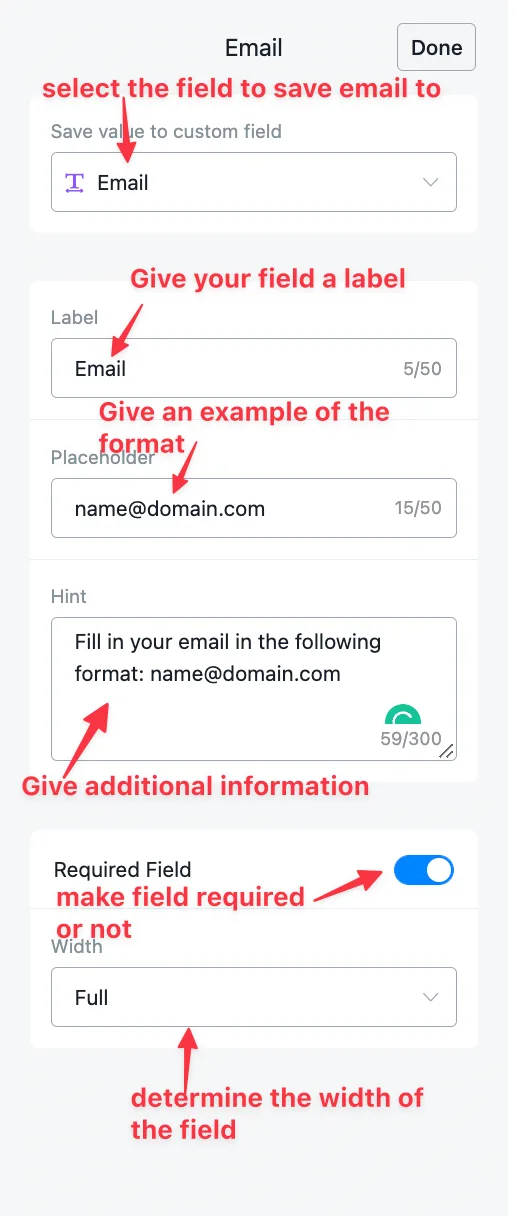
First, you select the system field or the custom contact field where you want to save the value entered by the user. Then you set the name of the form field label. In the example text, you give an example of the format in which you would like to receive the email. The tips section lets you provide additional information about this field type.
The last two options determine whether the field is required and how wide it will be. The result looks like this;
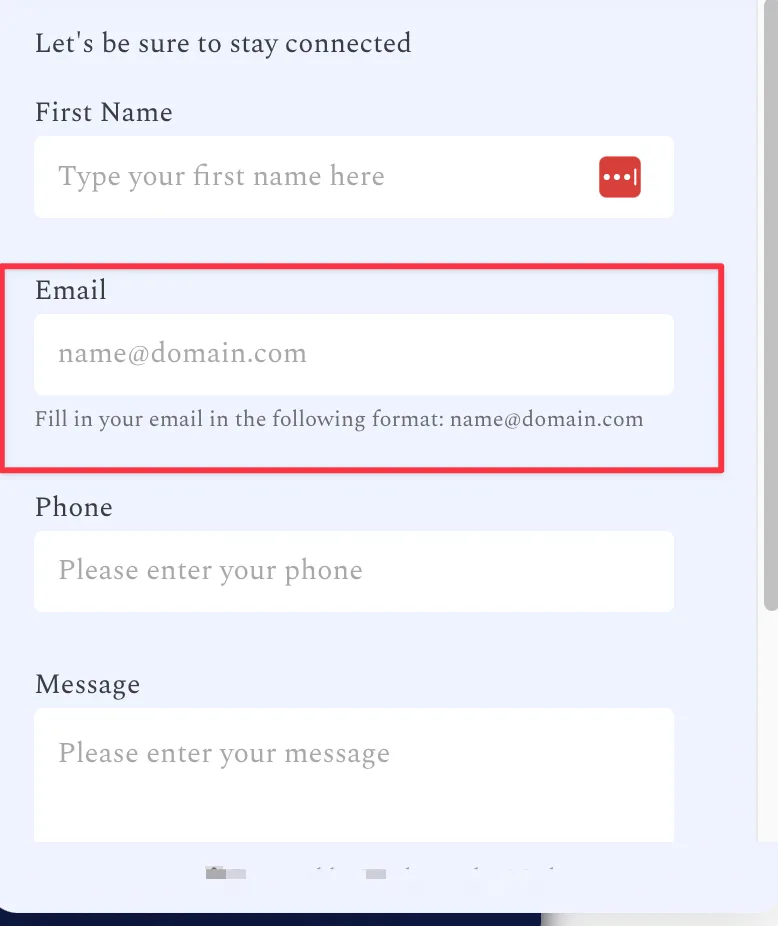
Once you have edited the field the way you want, press the Done button at the top of it to save the changes.
Lastly, below the fields, you have an additional option to allow the user to write a message before entering the chatbot;
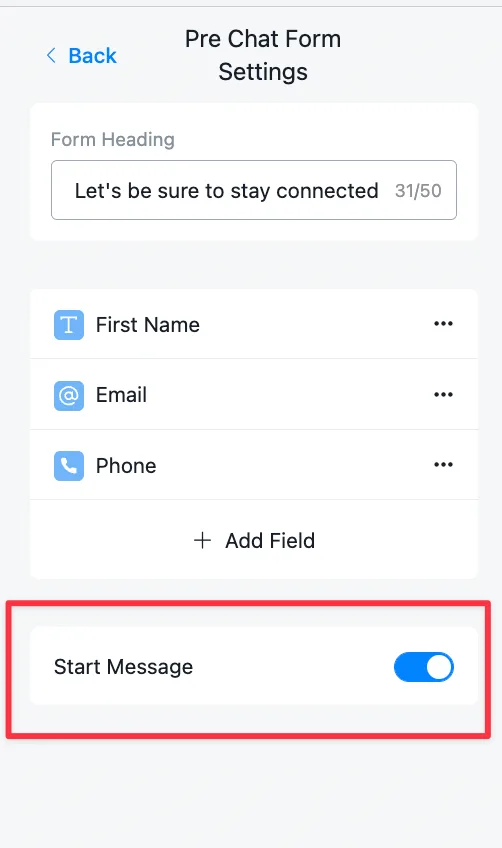
For the user, the live preview looks like this;
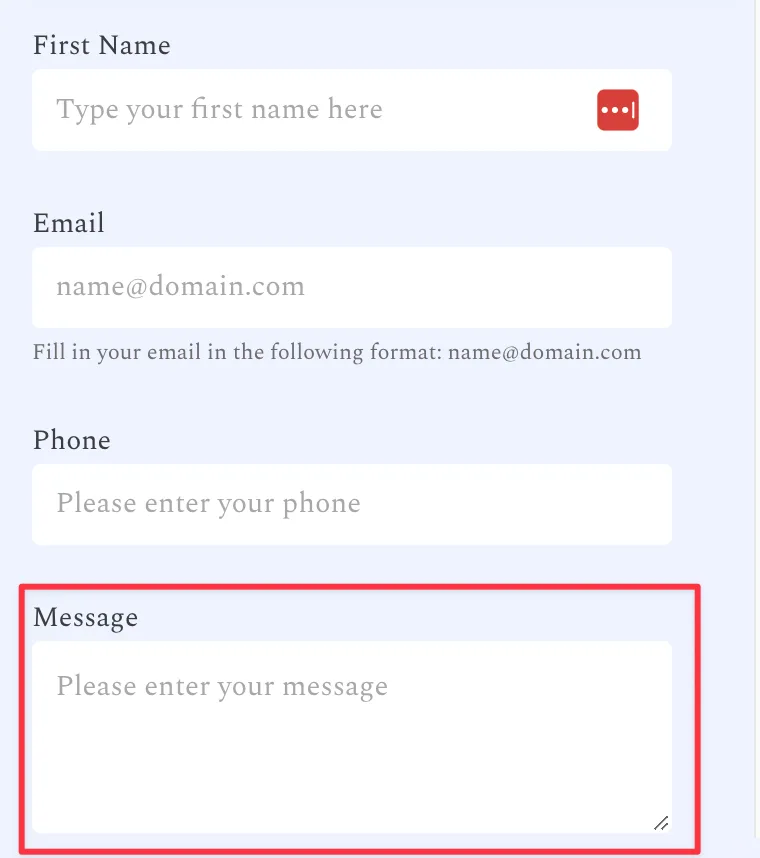
This message is saved in the system field called {{last text input}}.
If the Pre Chat Form is not enabled, you must set a default initial flow of your choice;
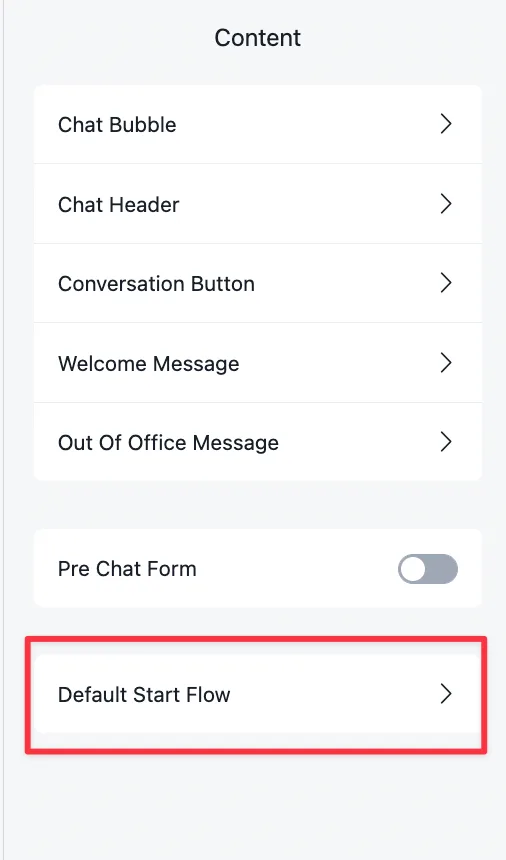
Once pressed, you will be able to select any of the flows you created previously;
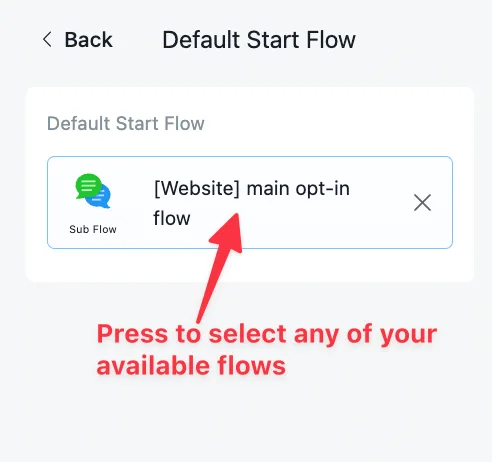
In Web Chat, you can set up the widget to remove the need to click the button that starts the conversation.
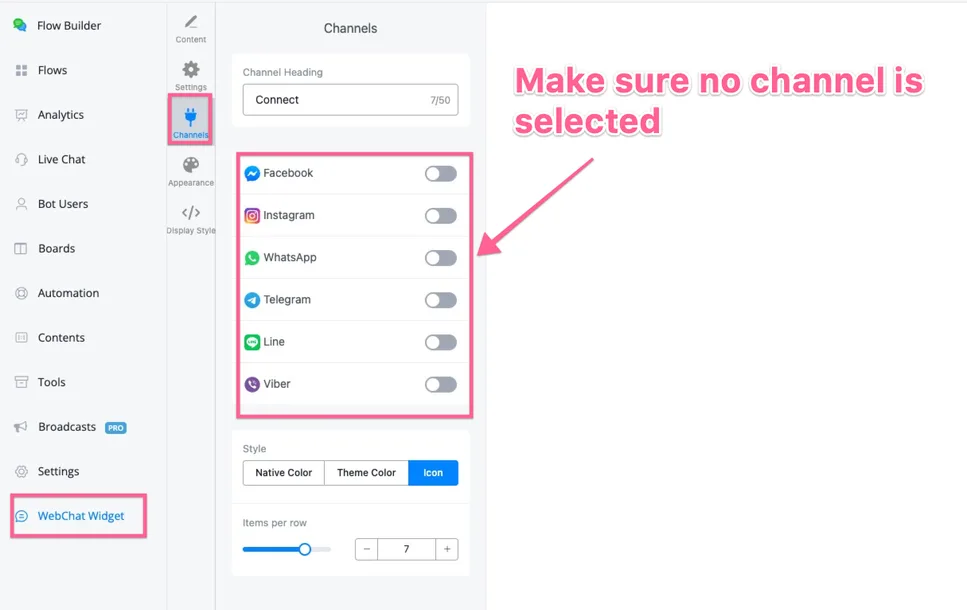
To do this, you need to:
- Make sure you do not select other channels in the Web Chat Widget.
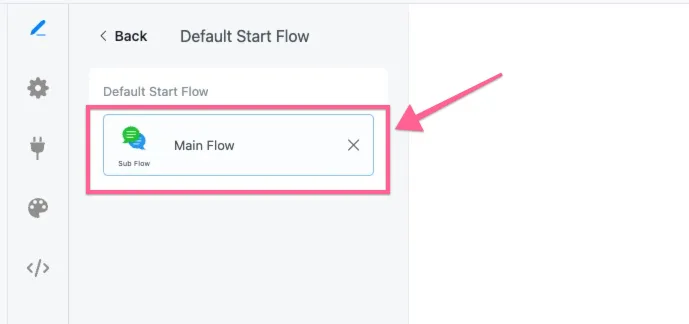
- Make sure the Default Initial Flow is connected.
You can find your connected channel settings here:
Also make sure the initial flow is connected to one of your flows.
After making the changes, apply them, install the code and test on your website.
Now you no longer need to click the button to start the conversation.
You can set up different greeting messages on different pages of your website.
It appears for the user visiting for the first time,
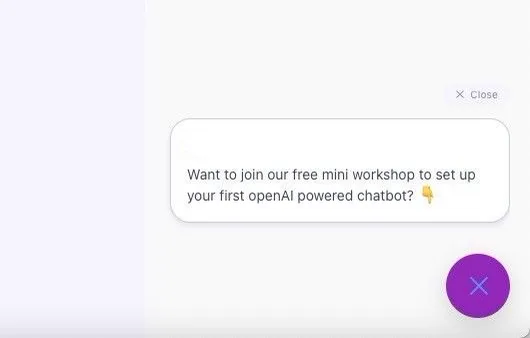
And the greeting message settings are here:
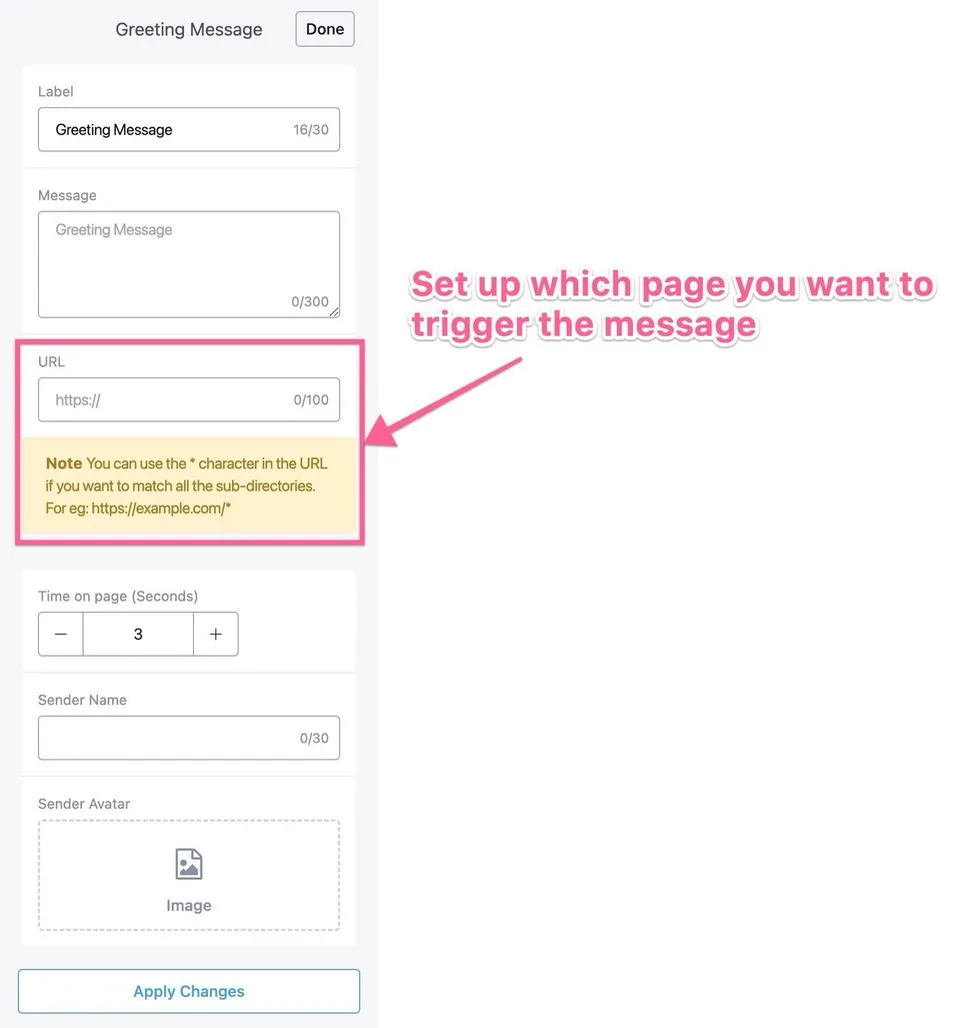
You can set which page or pages you want to trigger the greeting message on, and also configure the sender name and profile.
Watch the video below for more details:
In the settings tab, you have the following options to customize;
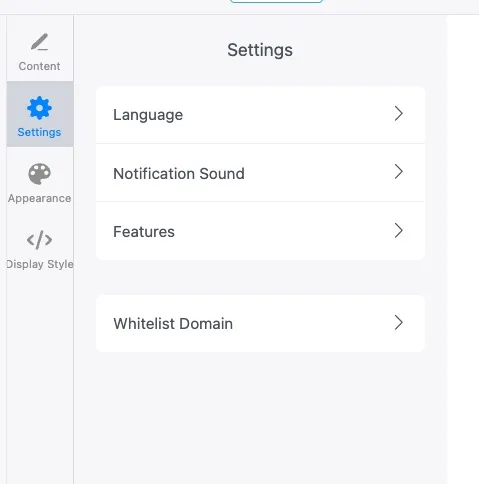
- Language
- Notification Sound
- Resources
- Whitelist Domain
Let us examine each setting in detail.
With the language setting, you change the display language of some sections of the widget;
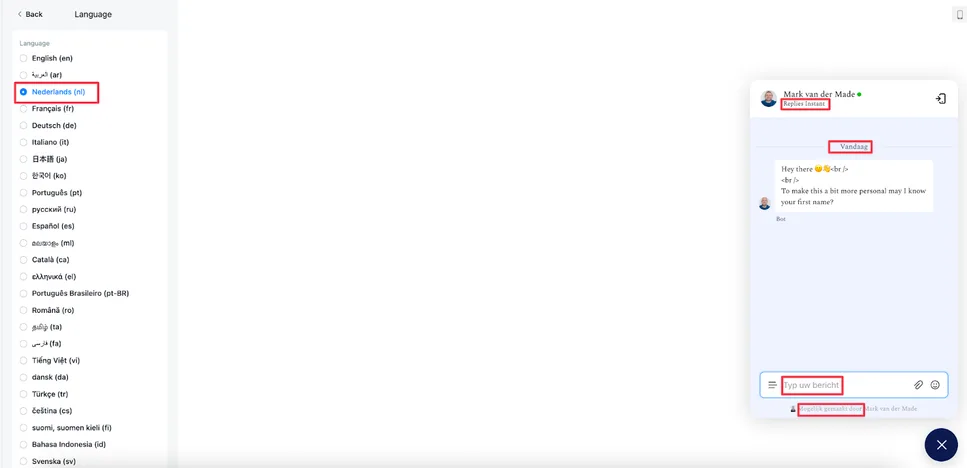
Just select the language on the left side to see the changes reflected in the preview on the right, instantly.
With this option, you set the sound of the new message notifications your users will hear while chatting with your Web Chat Widget.
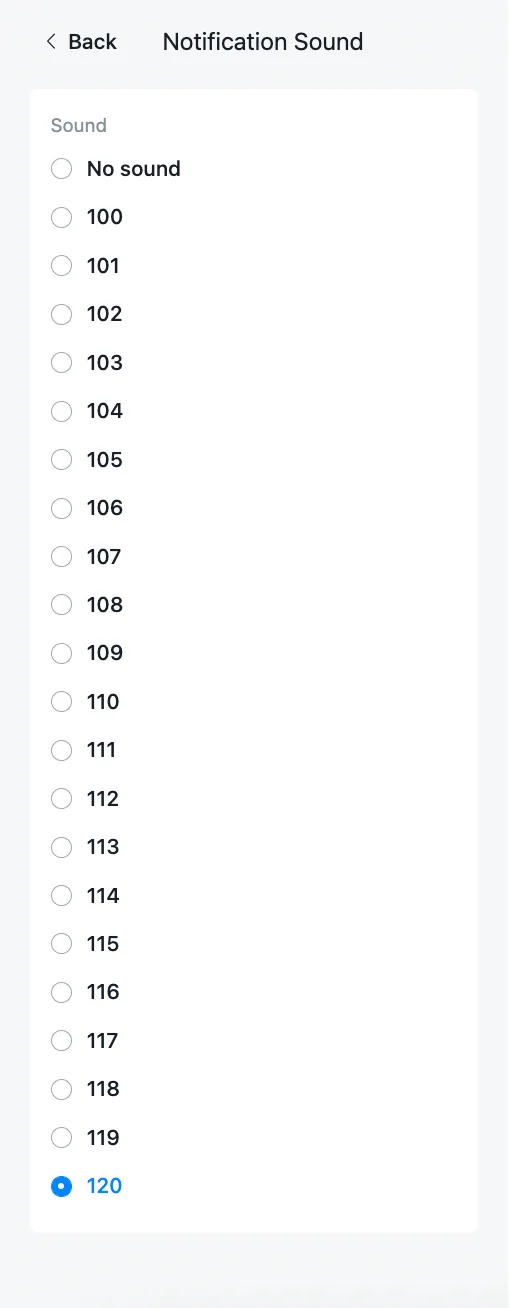
You can choose from 21 sounds or opt for no sound, if you prefer.
With this option, you enable or disable certain features inside your widget;
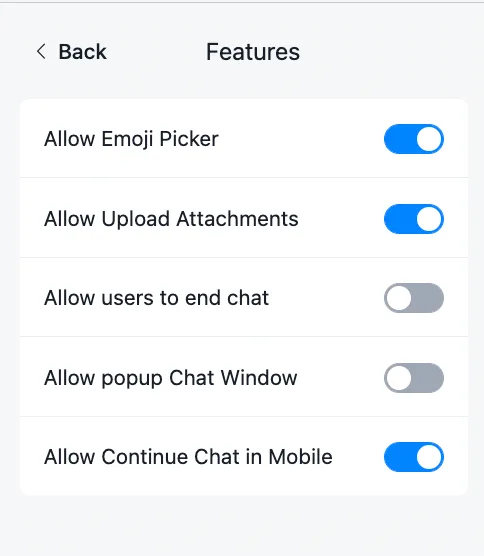
You have access to the following options;
- Allow Emoji Picker -› lets users choose from preset emojis
- Allow Attachment Sending -› lets users send documents, images and/or videos
- Allow users to end the chat -› this option lets the user close the conversation
- Allow Chat Window in Pop-up -› lets users turn the chat widget into a pop-up, which results in a larger display of the chat
- Allow Continue Chat on Mobile -› users can scan a QR code to continue the conversation on their phone. It is a smooth experience for those who start on the computer and want to continue the conversation with your business on the go
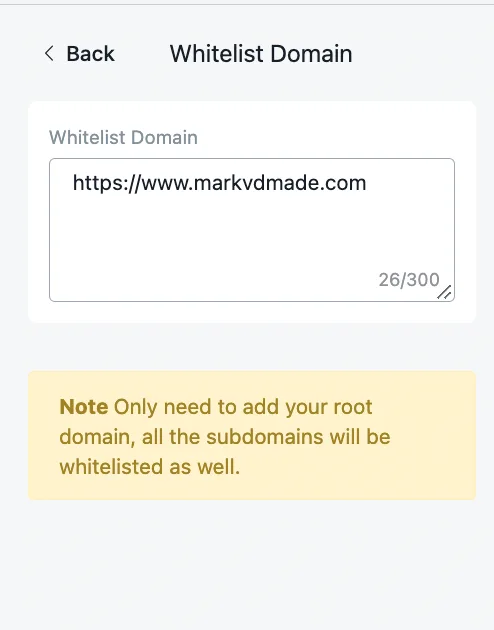
To display the widget on your website, you need to add your domain to the whitelist. Just add the root domain: all the subdomains you have will be recognized automatically;
With these options, you customize your Web Chat to match your brand colors and preferences;
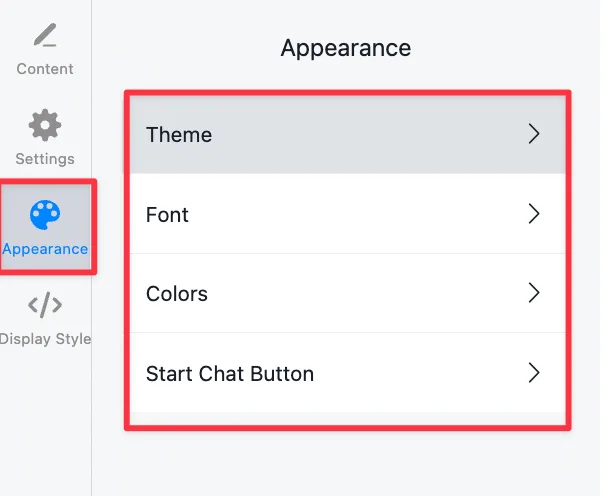
You have the following options to choose from;
- Theme
- Font
- Colors
- Start Chat Button
With themes, you customize the appearance of your Web Chat Widget with preset values;
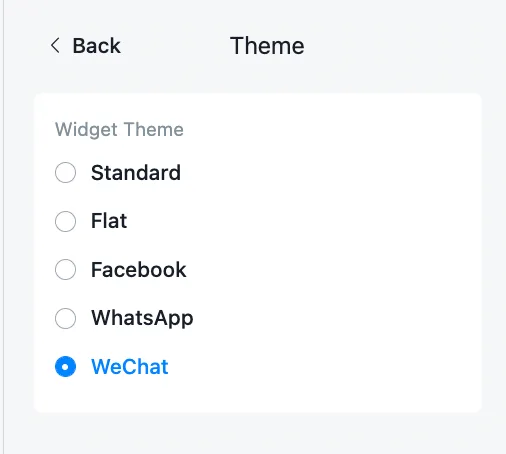
You have the following themes at your disposal:
- Default
- Plan
The best thing about these themes is that they give a look users are already familiar with, like Messenger or WhatsApp. These themes create a similar chat experience within your own website.
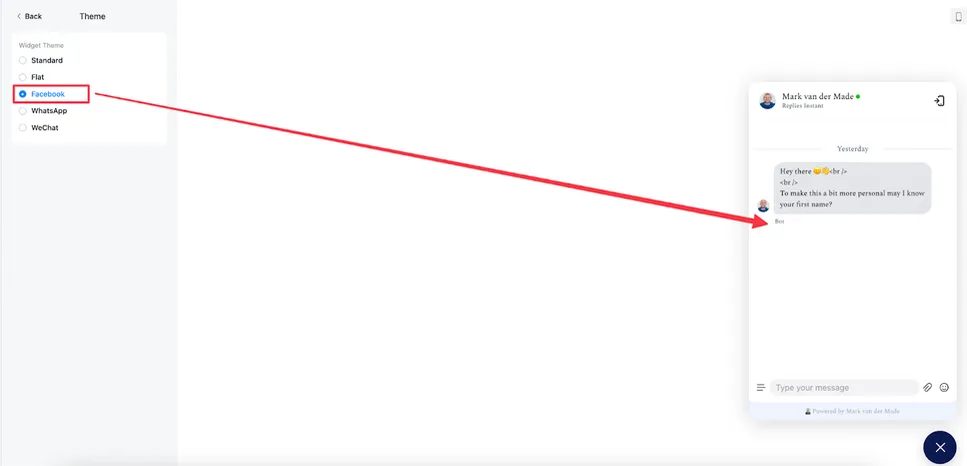
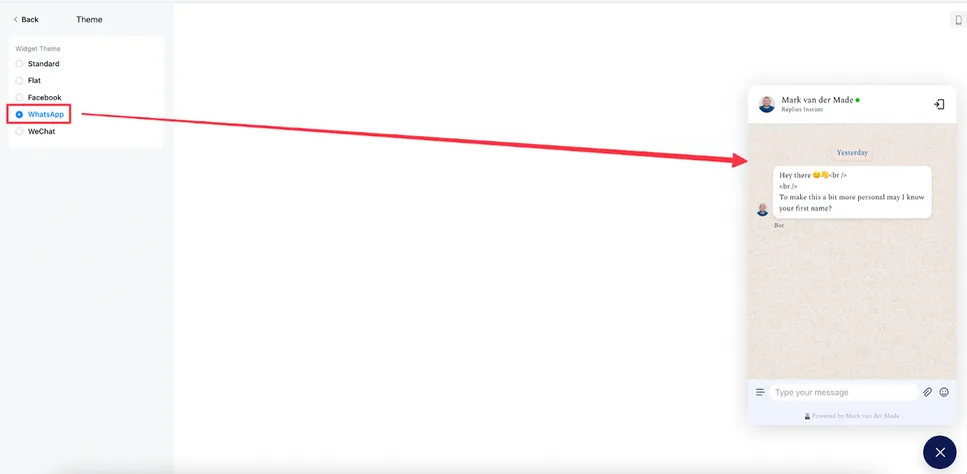
As you can see, the experience makes the user feel at home when starting a conversation with your business, because it is very similar to what they already know.
With fonts, you completely change the appearance of the Web Chat Widget, matching it to your own brand or creating a truly unique experience.
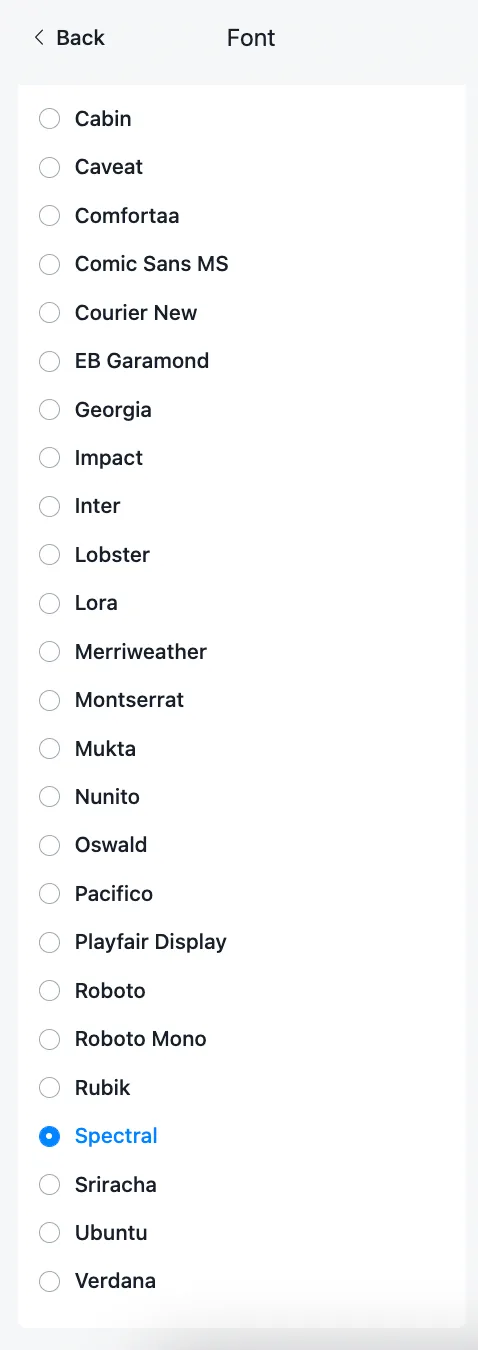
Currently you can choose from 25 fonts to give the Web Chat Widget your own look.
With this option, you change the color palette of your Web Chat Widget
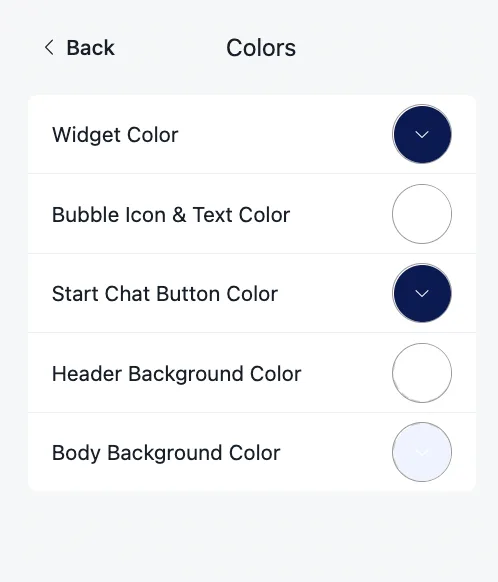
You can customize the following sections:
- Widget Color
- Color of Icon & Text of Bubble
- Color of Start Chat Button
- Header Background Color
- Body Background Color
With this option, you change the border radius of the “start conversation” button;
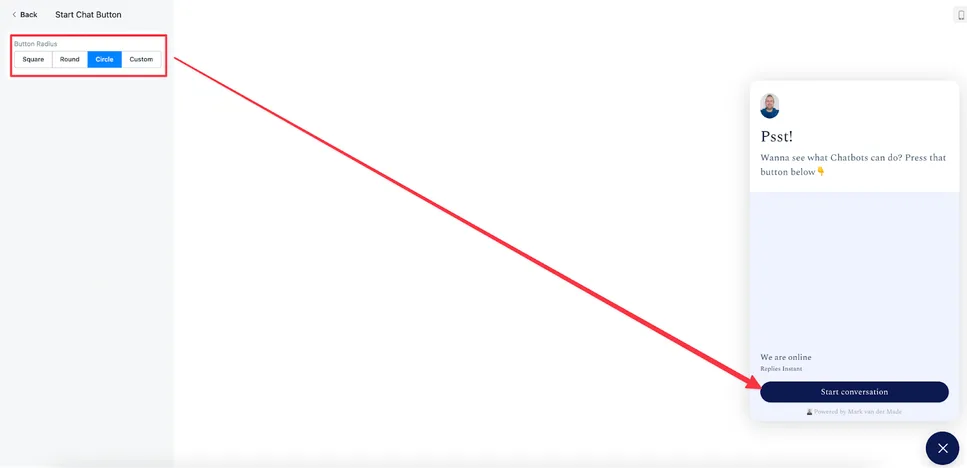
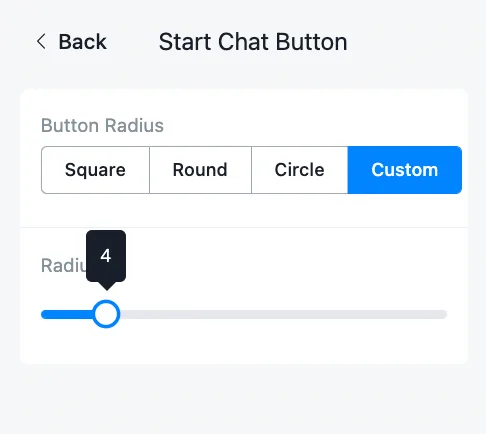
You can also choose the custom option to set your own radius. This helps keep everything in sync with your website buttons, for example.
The display style option offers several ways to use Web Chat on your website. Let us look at the different options;
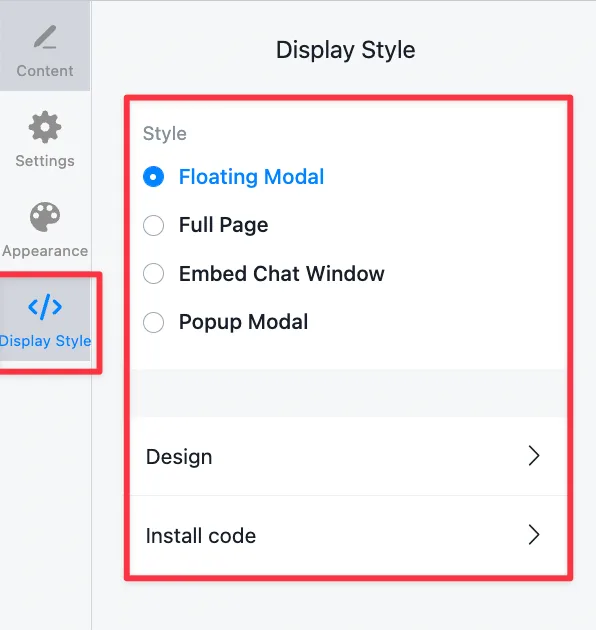
We have 3 main sections you can customize:
- Style
- Design
- Installation Code
You have 4 different styles to choose how you want to use the Web Chat channel on your website.
- Floating Modal -› displays the live chat icon at the bottom of your page
- Full Page -› lets you embed the chat widget as a full page
- Embedded Chat Window -› lets you display the chat window anywhere on your page
- Popup Modal -› lets you open a pop-up window with the conversation with your chatbot. Any element on your page can be the trigger, as long as you apply a class to it.
The best part is that, on the same website, you can install different Web Chat styles on different pages.
Check this video for more details:
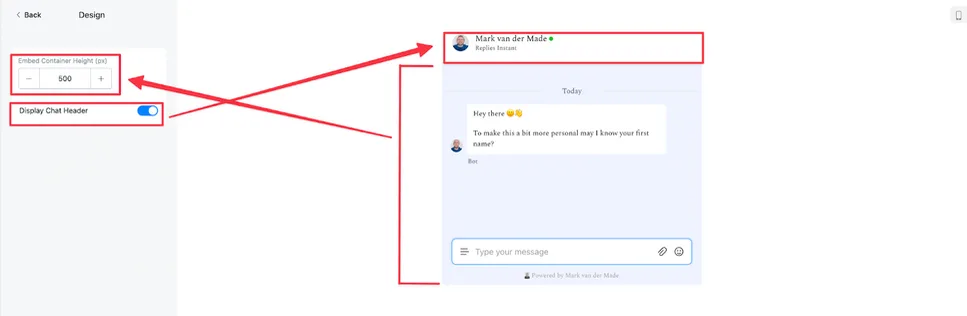
In the Design tab, you set the conversation widget settings for the selected widget style. Below is an example of the embedded chat window option;
The Installation Code generates the script for the chat widget style you want to place on your page;
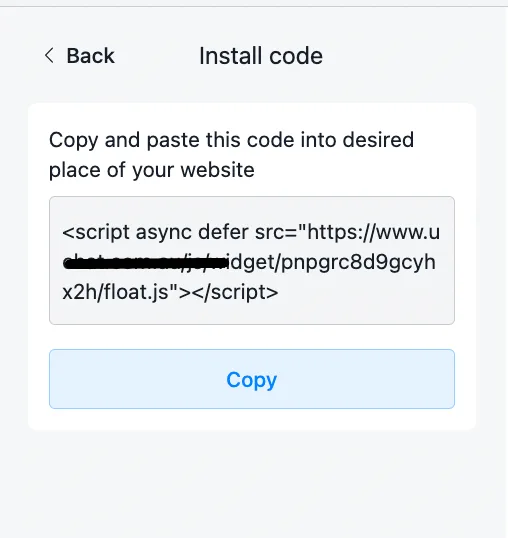
The Installation Code changes according to the selected widget style.
Below is an example of the embedded chat window;
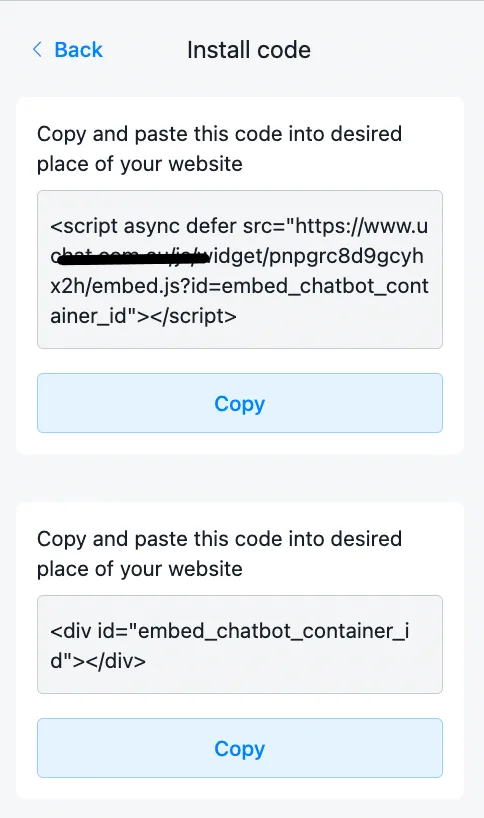
There are many customizations you can make to the Web Chat button. Some are a bit more advanced, so we are going to gather them in this section.
With the Web Chat Widget, you can install as many types as you want on any page within your domain.
Once you have generated the desired widget type, you can add a ref parameter to it. This lets you easily start any flow you prefer.
To do this, create any kind of Ref URL in the Tools section;
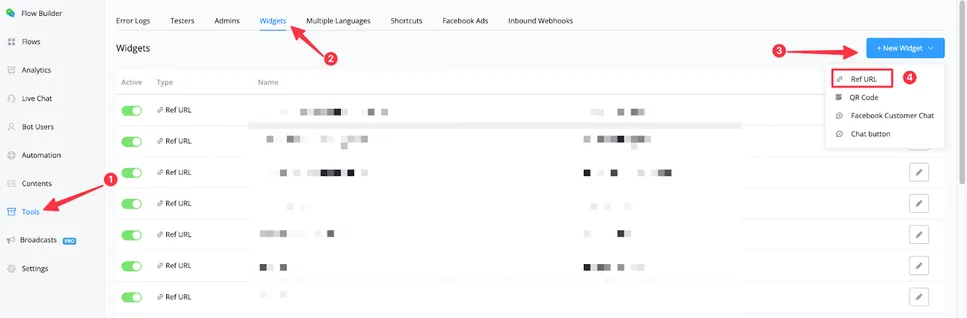
When creating your Ref URL, you will also have already connected it to the flow you prefer. Now you can use this Ref URL by copying the ref parameter;
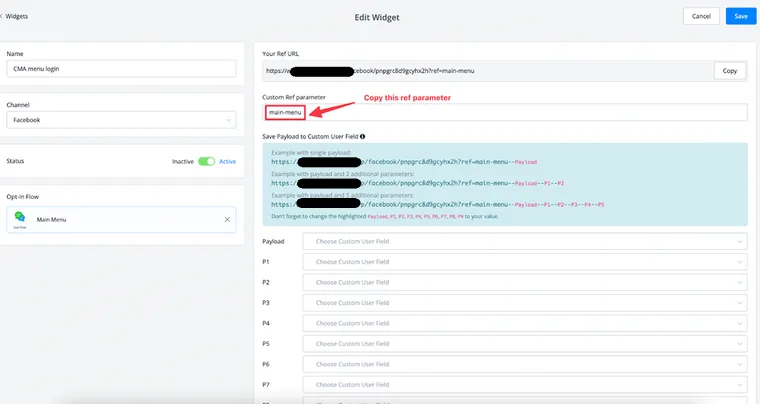
Now that you have created your Ref URL and copied the ref parameter, it is time to add it to the Web Chat installation script.
It is very easy to do this;
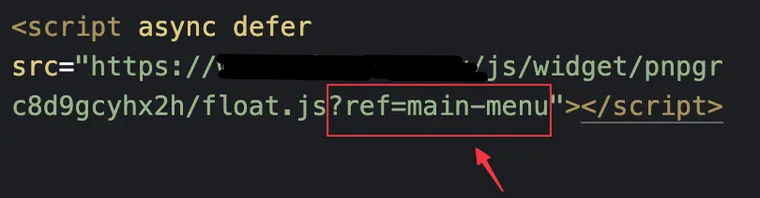
If you have already pasted the Web Chat installation script, just add a question mark after .js, add ref= and then paste the ref parameter copied from the Ref URL you created.
This overrides the existing default initial flow and lets you start the flow you prefer.
This opens the way to using the same widget on different pages, but with different initial flows.
Some use cases;
- A landing page requires a specific sales flow
- Customer support starts with a support flow
But it gets even better!
Since you are using the URL ref parameter, you can also add payloads to the widget.
Payloads help you record specific data directly in the contact custom fields, without the user having to provide it. An example: you want to know which section of the website the user came from. If they came from a landing page, you can record this in the widget as a payload to be saved in the contact profile.
To add a payload, we need to return to the Ref URL we used inside the Web Chat Widget.
There, you can add up to 10 payloads to use directly in the contact profile;
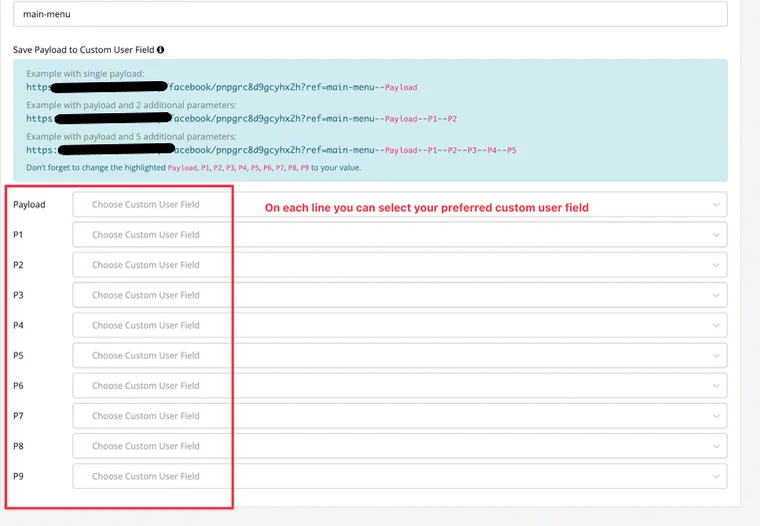
Let us look at the example of recording where the user came from, that is, the page of your website they arrived from.
On the first payload line, let us add the custom contact field “traffic_source”
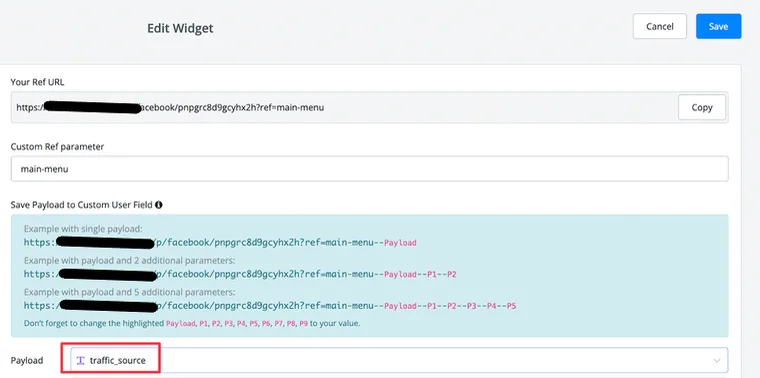
Once this is done, do not forget to press the Save button in the top right corner.
Back in the Web Chat installation script, you can now add whatever data you want to the ref parameter.
Let us say you added this widget to your landing page. The traffic source can be the name of that landing page or whatever makes sense to you. It would look like this;
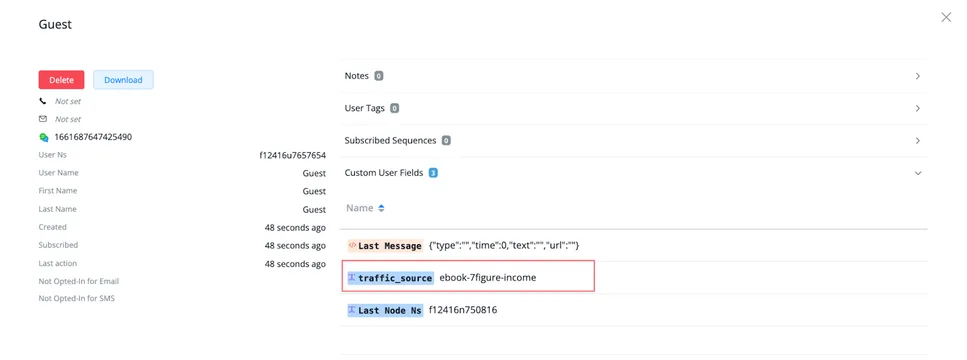
To add a payload, use 2 hyphens followed by the value; in this case, “--ebook-7figure-income”
As soon as a visitor interacts with this Web Chat Widget on that page, you will see that value added to their profile;
As mentioned, you can save up to 10 different types of payloads this way.