Agent Group Chat
To enable NicoChat's Additional Channels, go to “Workspace Settings” > “Channels”, enable the desired channel and click “Update”, as shown in the image:
To enable NicoChat's Additional Channels, go to “Workspace Settings” > “Channels”, enable the desired channel and click “Update”, as shown in the image:
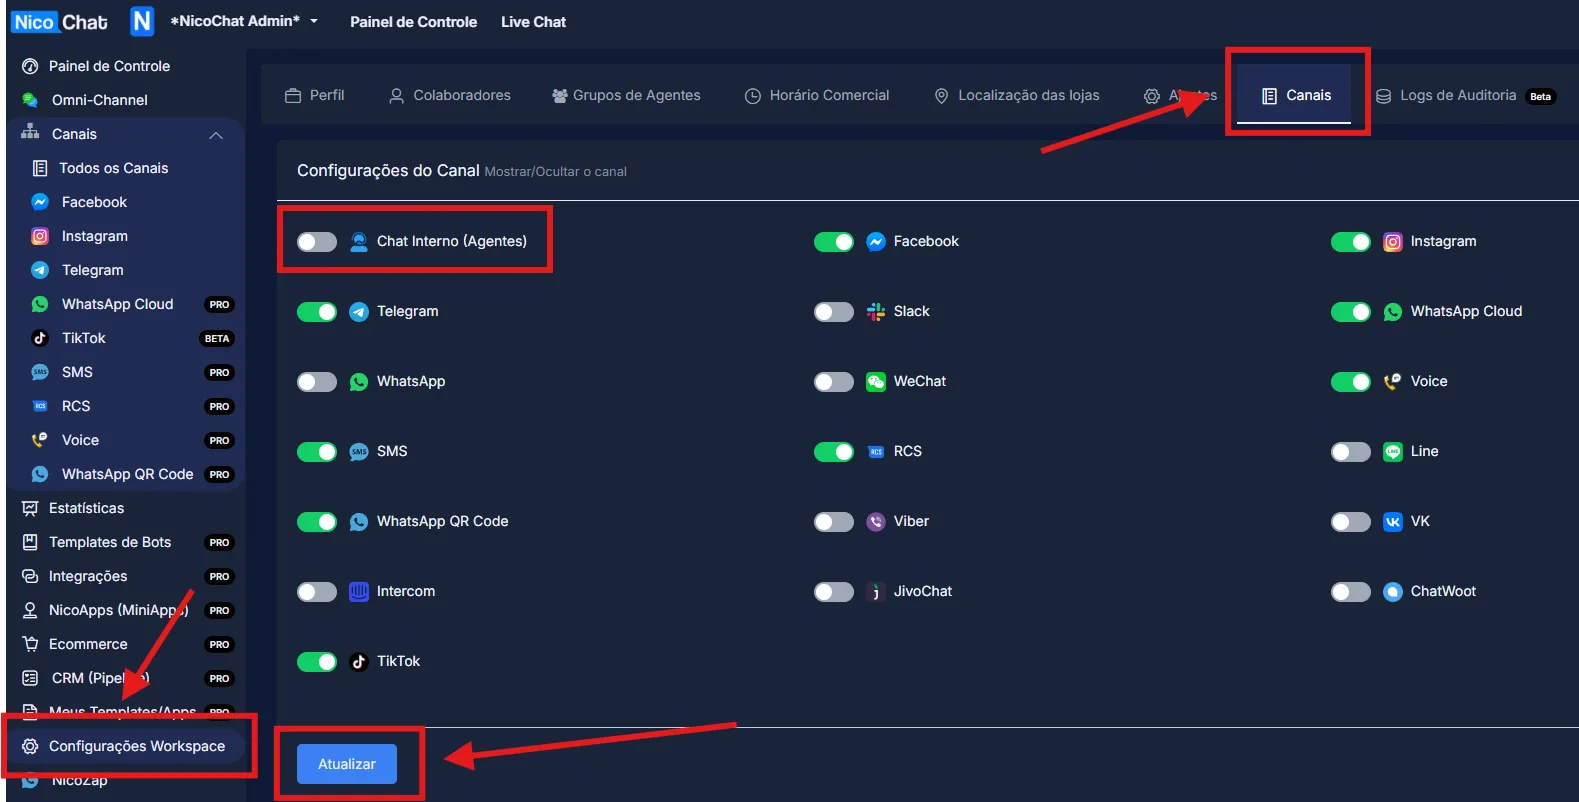
NicoChat now lets users have their agents handle conversations in groups of their own. It is a great feature for businesses with many active agents, where it is hard for a supervisor to keep track of the work or to discuss issues with the team.
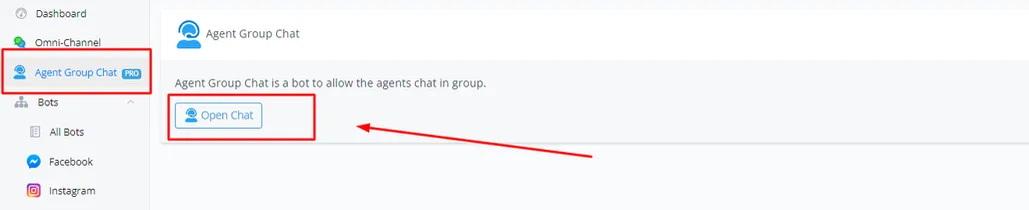
On the NicoChat dashboard, click the “Agent Group Chat” tab and then “Open Chat” to start seeing the channels/groups.
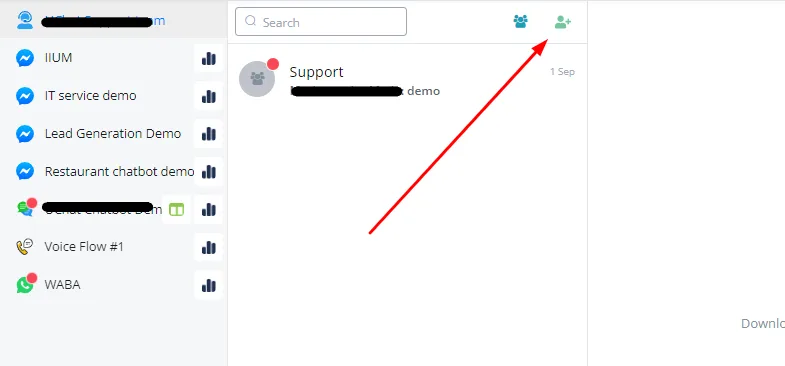
Click the icon to start a new group.
Edit the group details and click “Create”.
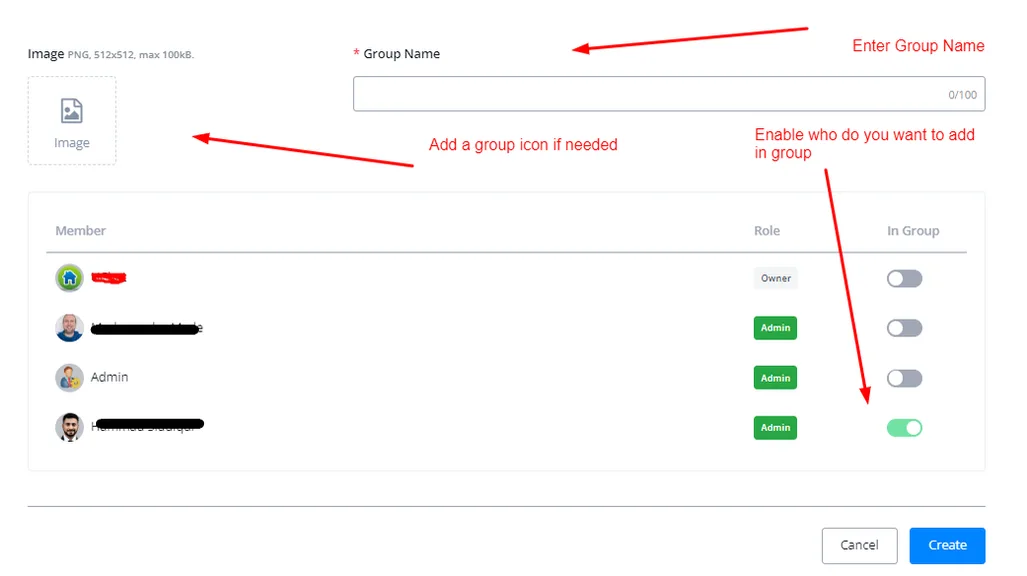
The group chat works much like the regular LiveChat, but with additional features. Some of them are described below:
Click the variable icon and select, from the pop-up menu, the agent you want to tag inside the chat.
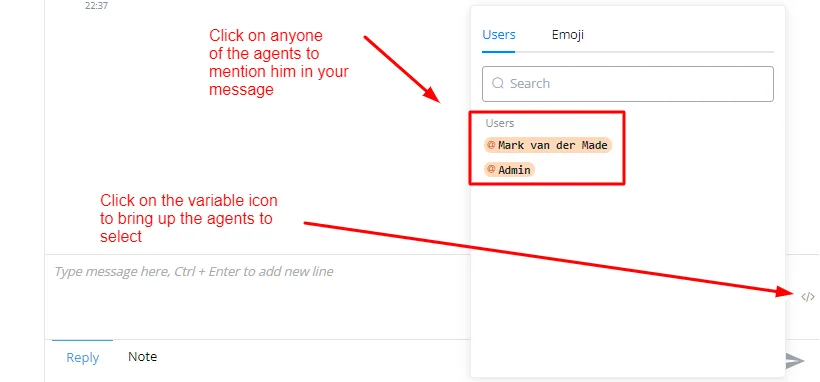
To send a reply, click the “Reply” window and click the send icon to send the message.

To send a note, click the “Note” window and click the send icon to send the note.

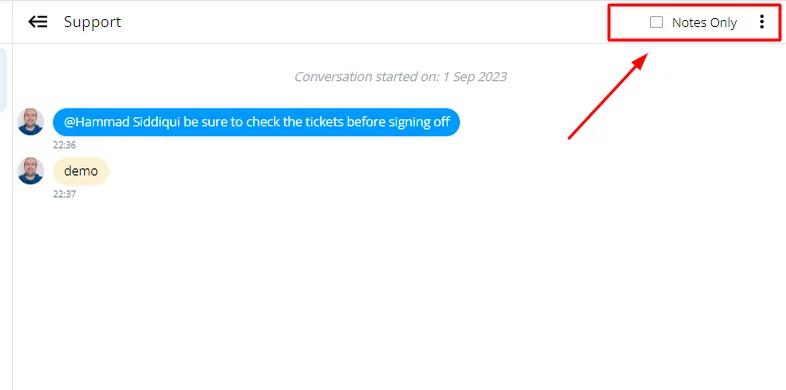
You can also filter the conversation to see only the notes, by checking the checkbox above.
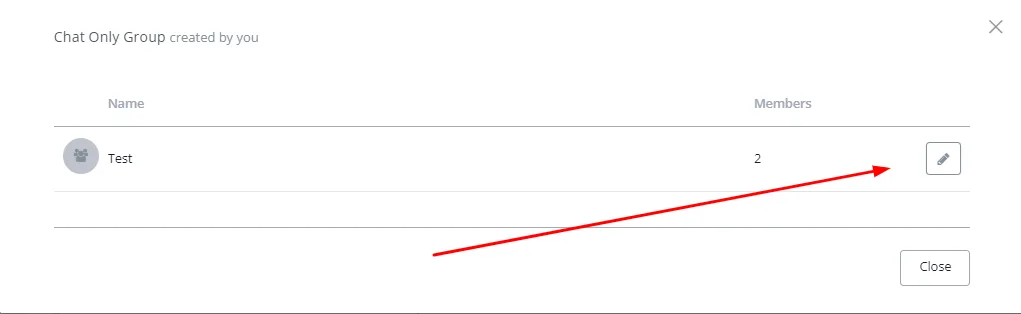
You can manage multiple groups by clicking the group icon and selecting the group you want to edit (you can only edit the groups created by you).
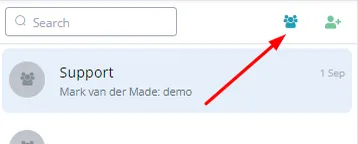
Click the pencil icon to edit the group.